Life in a moving hotel.
Mike and I ended a week-long Alaska cruise this past Friday. We “sailed” on Royal Caribbean’s Radiance of the Seas from Seward, AK to Vancouver, BC, with stops at Hubbard Glacier, Juneau, Skagway, Icy Straight Point (Hoonah), and Ketchikan. The final day was spent cruising down the inside passage east of Vancouver Island.
This was our second cruise. The first was in the Caribbean about five years ago on — strangely enough — the same ship. We really enjoyed that trip, which we went on with another couple around our age. This trip, while enjoyable, was different.
What’s Good about Cruising
Let me start off by explaining why I like to cruise.
 A cruise is the ultimate lazy person’s vacation. You get on board on day one, unpack in your own private room, and go to any number of onboard restaurants for free meals just about any time of the day. In the evening, your moving hotel departs the port and moves gently through the sea, arriving at the next port on the next morning. Once there, you can get off the ship and do all kinds of excursions, ranging in trolley tours of the local town, big production shows (the Great American Lumberjack Show comes to mind), active activities (such as biking or hiking), or “adventure” activities (such as helicopter landings on glaciers or sled dog trips or float plane flights). At the end of the day, you’re back on board in your comfy, maid-serviced room, eating free food, seeing free shows, and/or throwing money away in the casino as the ship moves on to the next port.
Cruise cost is determined, in part, by the type of accommodations you choose. The cheapest accommodations are a windowless cabin on a lower deck that gets really dark with the door closed and has barely enough room for you and your cabin mate(s) to move around. The most expensive accommodations are usually given names like “The Royal Suite,” and include several rooms, large windows, and one or more balconies on an upper deck.
On both of our cruises, we had the same accommodations: a “junior suite,” which is one largish room with a king size bed, sofa, easy chair, desk, coffee table, floor-to-ceiling windows, and small balcony. It was on the top cabin deck, 10 stories above the sea. At some ports, float planes landed right past our window (see above).


A lot of folks say that getting a cabin with a balcony or even a window is a waste of money since you spend so little time in your cabin. I look at it the other way around. If you had a nice room, you’d spend more time in it. I’m a big fan of privacy and like the idea of having a private, outdoor space to relax in.
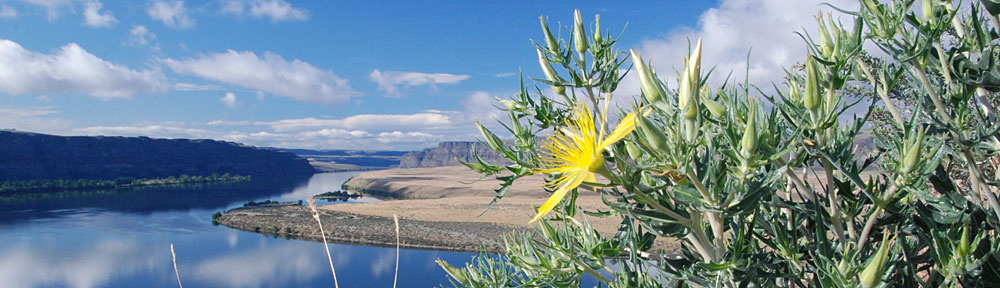
 We spent much of our two “at sea” days in our cabin on the balcony, reading, talking, and taking photos of the things we passed. In fact, as the ship turned away from the Hubbard Glacier to continue on its way, we came back to the room to relax on the balcony with a bottle of wine and our cameras.
If you don’t care about private space and think you’ll be spending 95% of your waking hours outside your cabin, you should definitely go with one of the less expensive rooms. You see, that’s the only difference in onboard treatment. Once you’re out of your cabin, you’re the same as everyone else. You get the same food, see the same shows, and have access to the same services at the same price. So you can cruise quite affordably — sometimes as little as $600 per person for the week! — if you don’t mind sleeping in a closet-like room.
Cruise Limitations
Every cruise has a major limitation: you only visit the port cities on the cruise itinerary and you only stay in that city as long as the ship is at port. If you pick a cruise with the “wrong” cities, you can’t change your plans. You’re stuck with them.
Of course, since many people plan vacations out to the extreme — reservations every step of the way — this probably isn’t much of a limitation. I, however, like to wing it while on vacation. While this may mean that I don’t get to stay in a place I wanted to (because everyone else had reservations), it does give me the flexibility to stay an extra day at a place I really like or explore a place I learn about while on the road.
The best way to make sure the itinerary limitation doesn’t bite you is to choose your cruise carefully. We didn’t do this on our cruise. We just told the travel agent we wanted a one-way cruise in Alaska that began or ended in Vancouver. We didn’t know what we wanted to see. I have no real complaints about our itinerary, but now I know more about Alaska and where I want to go on my next visit.
“Hidden” Costs
 Although you can eat on board for free in most restaurants, there are a few costs that aren’t covered on a cruise. Alcohol is one of them. You pay for all of your drinks — unless you’re gambling in the casino. Drink prices are a bit higher than average, but made with top-shelf liquor. We were paying $8 a piece for our evening martinis (and downing two of them each night), but they were made with Grey Goose and other premium brands. Wine is typical restaurant pricing, but they offer a discount if you buy a 5-, 7-, or 10-bottle plan at the beginning of the cruise. The plan limits you to a shorter wine list, but we chose the 5-bottle plan and had perfectly good wine at most meals, with any leftovers to drink on our balcony later that evening or the next day.
The ship also has premium restaurants that cost $20 per person for a meal. There were two of these: Portofino, serving Italian food, and Chops, serving steaks and chops. We signed up for the Wednesday evening Mystery Dinner Theater at Portofino, which cost $49 per person and included champagne before dinner and wine with dinner, along with entertainment. The meal at Portofino was far better than any other I ate on the ship. (More about food in a moment.)
On our ship, we also had to pay for anything that came in a can or bottle, including Coke and bottled water. It really irked me to pay $2.01 (including a 15% gratuity automatically tacked on) for a can of Coke. The cruise cost us thousands of dollars and I felt that I was being nickeled and dimed. This kind of stuff could have been included for free in the fridge in our room — perhaps as a special perk for those who invested in a nicer cabin — but the fridge doubled as a for-pay servi-bar and it cost the same there.
 And speaking of gratuities, you’re expected, at the end of your cruise, to tip your lead and assistant waiters in the main dining room, the head waiter in the main dining room, and your cabin attendant. Our dining room service was very good — both waiter and assistant waiter were extremely professional without being stiffs. We joked about things, they gave us advice on wine for when we got home, and they didn’t have any trouble giving Mike and Syd (one of our two table mates) seconds and thirds of lobster tails on Tuesday night, when lobster was the popular choice on the menu. But the head waiter obviously only came around to be friendly and secure his tip, so we didn’t tip him. Many people didn’t show up for dinner on Thursday night, the last night of the cruise, to avoid tipping the dining staff. (More on cheapskates in a moment.) We tipped our cabin attendant the suggested amount, even though we didn’t like her. She did her job, but drew the line there. No special service, as we’d had with our last cabin attendant.
The excursions, however, can be the biggest cost of the cruise. They ranged in price from $12 per person for a trolley ride to more than $500 per person for some of the aviation excursions. Our costliest excursion was a helicopter trip with a landing on two glaciers; it cost $398 each. Anyone interested in saving money would probably not do a lot of excursions.
Our final bill for the extras on board (mostly alcohol and excursions) came to more than $1,800. And that doesn’t include the cost of the cruise itself, gratiuties for onboard staff, or the money we spent onshore for meals and other things. This isn’t a complaint; it’s just a note to those who think a cruise includes everything. A cruise only includes everything if you don’t drink or buy any extras on board and you don’t do more than wander around on foot when at port.
Food
If you’re on a diet and succumb easily to temptation, a cruise is not for you. You are guaranteed to eat too much of the wrong food.
Why the wrong food? Well, most of the food is the wrong food. The buffets and dining room menus are filled with fried foods and heavy starches and sweets. And since it’s all you can eat — even in the main dining room with table service! — if you like to eat a lot, there’s nothing to stop you. I gained 10 pounds on my first cruise and (fortunately) only 4 pounds on this one.
And there was certain scarcity to fresh fruits and vegetables. Why? Well, the cruise ship starts its journey in Vancouver, where it stocks up on all supplies for the next 14 days. It takes on passengers for the first 7-day cruise. Those are the lucky ones — they get lots of fresh food to eat. Then those passengers depart in Seward and the ship takes on its passengers for the return trip to Vancouver. Those passengers (which included us) are facing food that’s already been onboard 7 days.
On our Caribbean cruise, we watched them load fresh produce on board almost every single day. The food was good and fresh. But on this cruise, the food was very disappointing. I think that more than half of what we ate was prepared in advance and frozen, then defrosted or heated before serving. (Kind of like eating at some of Wickenburg’s fancy restaurants.)
The skinny (no pun intended) is this: the best food was in the for-pay restaurants, next came the main dining room, and finally, the buffet. But the only difference was the preparation: all of the food came out of Vancouver and was at least a week old.
Other Passengers
The vast majority of this cruise’s passengers were seniors in the 55+ age group. Of them, more than half were likely 65+. With more than 2,000 passengers aboard this full ships, that’s a lot of retirement money being spent.
Those of you who read this blog regularly probably know that the town I live in, Wickenburg, AZ, is a retirement town. I am surrounded by seniors every day at home. To be surrounded by them while on vacation was a bit of a disappointment. Our last cruise to the Caribbean had a better mix of guests, with age groups more evenly spread. I find younger people in the 25 to 50 year old age group more energizing and fun than the 55+ midwesterners we had on board this cruise.
How do I know they were midwesterners? I asked. Each time they sat us down with other people at meals, we’d talk. I’d ask where they came from. I got Michigan, Iowa, and Kansas more than any other state. Our dinner table-mates were from Little Rock, Arkansas. We didn’t meet a single other couple from New York or New Jersey or Arizona (our past and current home states), although we did meet a couple from Pennsylvania and another from San Diego, CA.
The interesting thing about most of these people is that they didn’t do much in the way of high-price excursions or for-pay activities on board. We never saw them in the Champagne Bar, which we visited for our evening martinis before dinner each night. It was easy to get reservations for massage, facial, etc. at the spa. There were lots of empty seats in the main dining room — two of the six seats at our table remained empty for the entire trip. My conclusion: many of these folks were trying to minimize the cost of extras by simply taking advantage of the free or inexpensive options on board and at port. And, by not utilizing the main dining room in the evening, they could avoid tipping the dining room staff. Cheapskates? Well, avoiding the dining room on the last night of the cruise to stiff the waiters is certainly the mark of a cheapskate. But I like to think that some of them were simply afraid of getting a $1,800 extras bill at the end of the trip.
Coupon Crazy!
I should mention here that these people were coupon crazy. Each evening, the cabin attendant put a daily publication for the next day in our cabin. The publication outlined hours for dining and activities and shore excursions. It also included one or more sheets of coupons. Many of the guests clipped these coupons and made it a point to take advantage of them.
For example, a coupon might say that if you went to Joe’s Tourist Junk Shop in Ketchikan (an imaginary shop) between 10 AM and 11 AM, you could redeem the coupon for a free gift worth $15 — while supplies last. I overheard people planning their day around this visit to Joe’s. And if we happened to walk by Joe’s at 9:45, they’d already be lining up. And the free gift? Perhaps a link in one of those bracelets they push at ports or a paperweight that said “Joe’s at Ketchikan” or something similarly junky. Joe’s hopes that these people will come in and buy stuff while they’re there. Some of them obviously do. T-Shirts seemed to be a hot item.
What’s B/Sad about Cruising
What’s bad or sad about cruising is what the cruise ship lines have done to the port cities. Sure, they’ve brought the ports lots of tourists and revenue. But what they’ve also done is created port shopping areas with the same stores over and over in every port. What local charm existed in these areas is completely blown away by cruise ship sponsored stores like Diamonds International, Tanzanite International, Del Sol, and too many others to remember. Every port has the same collection of shops and they’re conveniently located close to where the ships dock so all those seniors from the midwest don’t have to walk far to redeem their coupons.
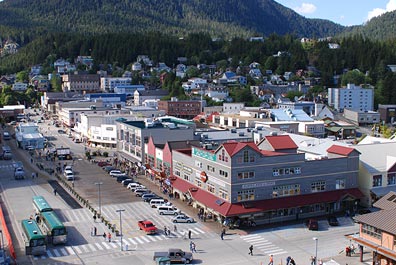 Ketchikan was a good example. The day we were there, three cruise ships were lined up at the dock facing the port shopping area. This was roughly 6 to 9 blocks of solid shopping — mostly for jewelry and t-shirts — with the vast majority of shops owned by cruise ship companies or their affiliates. The Great American Lumberjack Show was on the outskirts of this — this tourist attraction does four or five or more shows a day with people lined up to see them. (We saw highlights of this on television, on a show purportedly about Alaska, so we didn’t need or want to see it in person.) This area was very crowded.
 Yet less than 1/2 mile away was historic Creek Street, the former red light district of the town, which had been converted into small, mostly locally owned shops. It was nearly deserted. And on the town’s walking tour was an interesting totem pole museum and fish hatchery, both of which were empty.
The excursion transportation — mostly buses and vans — comes right up to the port, making it completely unnecessary to step foot into town. So people who just want the bus tour don’t need to walk past tempting jewelry and t-shirt shops. They get door to door service and, on many excursions, don’t even need to get off the bus to “do” the port town.
 Of course, the beauty of Alaska still lies beyond all this. Sure, we did excursions, but we did the ones that took us away from the cruise ships and shopping cities they’d built. One excursion took us by helicopter to land and hike on two different glaciers. Another was supposed to take us by helicopter to a mountaintop, where we’d do a 4-mile hike with a guide and return to the ship by train. (That one was cancelled when low ceilings prevented us from getting to the mountain top; we later rented a car to see what we’d missed: on that day, fog.) Another excursion took us by float plane up the Misty Fjords, passing mountain lakes, waterfalls, and glacial snow before landing in a mountain-enclosed bay. (You can see now how we managed to spend $1,800 in extras.) And at the end of each excursion, we walked the town, going beyond the shiny gift shops to walk among the historic buildings and, in more than one instance, panhandlers and locals who weren’t fortunate enough to get jobs selling jewelry to tourists at the docks.
As usual, my cynicism is creeping in. I can’t really help it. We came to Alaska to see its beauty and learn more about its history. But at most port cities, we faced the same old tourist crap. I guess that’s because that’s what most other people on the cruise ships want to see. We had to dig to see what lay under all that junk. It was worth the effort.
Not All Ports are Equal
 An exception to all this: Icy Straits Point and the indian village of Hoonah. This port had no dock, so our ship anchored offshore and used three tenders (specially configured lifeboats) to ferry passengers back and forth.
There were a few excursions there: fishing, whale watching, bicycling. The main attraction was the old cannery, which had been converted into a fascinating museum with a sprinkling of locally owned gift shops. (Not a single Diamonds International sign in sight.) Hoonah also boasts the world’s longest zip line, which is over a mile long with a drop of more than 1000 feet. (I guess they felt they had to do something to get the tourists in.)
 Mike and I did the 1-1/2 mile walk (each way) into town where bald eagles waited in treetops for the local fishermen to clean their fish. We stopped at a local bar, where a man had covered the pool table with old photos of the town and more recent photos of a 25-foot snowfall. Then we went to the Landing Zone restaurant at the bottom of the zip line and had a great lunch of chowder and fried halibut and salmon, prepared fresh and served by locals.
Back on the ship, I overheard one woman boast that she hadn’t even bothered to get off the ship that day.
Would I Do It Again?
With two cruises under my belt now, I have a good idea of what to expect on a cruise. (After reading this, you might, too.) With all the pros and cons, would I do it again?
I’m really not sure. The moving hotel aspect is very attractive. But the cost and limitations are a drawback. And the cruise ship line development of port cities is a real turn-off.
I’d consider it. But I’ll certainly do my homework before signing up next time.
 Antelope Canyon is an incredible slot canyon cut through Navajo sandstone. At certain times of the day at certain times of the year, the sunlight enters the top of the canyon, illuminating it with a golden light. The canyon has been featured in many magazines, sometimes with shafts of light capturing particles of dust set in motion by the cool breeze. Everyone who sees these photos dreams of taking photos just like them.

 Then they got their safety briefing and were loaded aboard. I took a photo of them taking off. Then I hiked over to Maverick to meet the Chief Pilot there. I had 45 minutes to kill and planned to make the most of it.