If spring won’t come to the bees, the bees will go to spring.
I was very surprised, about a month ago, when a fellow helicopter operator offered me a 6-week (minimum) frost control contract in the Sacramento area. I’ll explain what frost control is in another post; for now, just understand that it required me to relocate with my helicopter to California for at least the 6 weeks of the contract.
Winter in Washington had been mild, with seasonal daytime temperatures around freezing but very little snow. All that changed about two weeks ago when the temperature dropped and then the snow started falling. Not a lot of snow, but enough to make it actually feel like winter for the first time. It was my first real winter since leaving New Jersey in 1996 or 1997 and although I didn’t exactly mind the cold weather, I was ready for spring. So I was very pleased to be offered an early escape from winter that would bring me back home in time for the local spring.
My bees, of course, were all set up for winter. I’d lost one of the three hives and wasn’t sure how the other two were doing. The cold weather was keeping them inside their hives where they’d cluster together around the queen to keep her and themselves warm. It wasn’t a good idea to open up the hives for a good look when it was cold out. I’d already had a peek in late January and had a good enough idea of the situation.
The Crazy Idea
Sometime in the last week before moving my RV out of Washington, I got this crazy idea: it was warm in California and the entire area would be full of blooming almond trees and then walnut trees. If I brought my bees with me, they could skip the last two months of winter and get an early start on spring. I might even be able to get a good start on honey production and do a hive split. And of course, with so many bees in the area for almond pollination, there was even a chance I’d be able to capture a swarm or two.
But could I bring my bees? While it’s true I was driving a full bed pickup truck, I was also pulling a fifth wheel RV. But that fifth wheel had a gooseneck hitch on it, greatly reducing the amount of space the hitch needed in the bed. Could I fit the hives in the pickup bed and still tow the trailer?
The two hives were set up differently. One, the weaker of the two hives, was a single deep hive body with a frame feeder in it to supplement the frames of honey. The other was a deep hive body with a medium body on top; that contained a top feeder. But I didn’t need that top box or feeder for the trip south. I could make that a single deep box high, too. That would fit in the truck bed beneath the fifth wheel.
In all honesty, it wasn’t until the day before I pulled out that I made the decision to give it a try. Even then, I decided that if I couldn’t get it to work out, I’d leave them behind. But late Wednesday morning, I was up at my property with the pickup parked in eight inches of relatively fresh snow near the hive shelter I’d built the previous autumn. And as the temperatures climbed into the high 30s, I was unwrapping the winter insulation from the hives, reconfiguring the taller hive, strapping the hive boxes between their covers and bases, and stuffing rags into the hive entrances. Then I lifted them into the back of the truck. I put the dead hive in there, too; I’d need its components for a hive split or swarm capture and may as well bring it along.
The Drive South
By 12:30 PM — a half hour after my planned departure time, I was at the airport where I’d parked my RV before the snow had come. (Good think I did!) It was all packed and ready to go. I just needed to hook it up to the truck.
When I backed into position, however, I realized that there were bees flying around the back of the truck. On closer inspection, I discovered that they were escaping through the bottom of the hive. You see, I’d replaced the solid hive bottoms with screened bottoms for mite control. While the weaker of the two hives had a Mann Lake screened hive bottom, the other one had a hive bottom made by a friend of mine. He’d used 1/4 inch mesh. As I pointed out to him, he really needed to use 1/8 inch mesh — the bees could squeeze through the larger openings. And indeed, that’s what they were doing. Some of them were coming out for cleansing flights. This would be a problem.
I went into my hangar and found some cardboard. I stuffed it under the hives. Then, for good measure, I stuffed an old saddle blanket I keep in the truck under the hive the bees were coming out of. That would have to do.
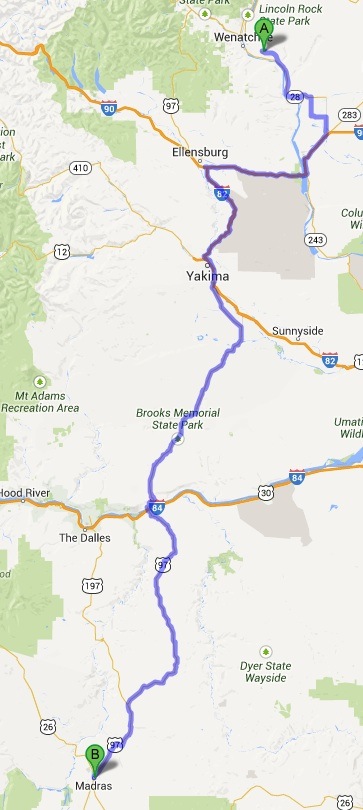
I covered 287 miles the first day of driving.
I hooked up the RV, did my walk around, climbed into the truck, and started off. It was 1 PM and I was hoping to cover about 450 miles that day all the way to a casino near Klamath Falls, OR.
The drive was long but pleasant, with lots of sun and scenery. I drove through Quincy and got on I-90 at George. Then onto Route 97 near Ellensburg. South through Yakima. Cross the Columbia River at Maryhill State Park. Diesel on the Oregon side. Then mile after miles of rolling Oregon farm and ranch land.
It got dark along the way. I don’t like driving in the dark. Weird shit happens.
I changed my destination from Klamath Falls to Bend and then to whatever outpost of civilization I could spend the night in.
I wound up in Madras, parked overnight at a Les Schwab tire dealer parking lot, with a coffee stand on one side of me and a Subway restaurant across the street. I’d driven 287 miles.
I checked the bees before going in for the night. The hives had shifted around a bit, but there were no bees outside the hive. That didn’t surprise me. It was too cold for them to want to come out.
Icy rain fell during the night. In the morning, on my way to the coffee stand at 6:15 AM, I nearly slipped on the ice that had formed in the parking lot.
No sign of life among the bees. But I honestly didn’t expect them to be out and about with temperatures around freezing.
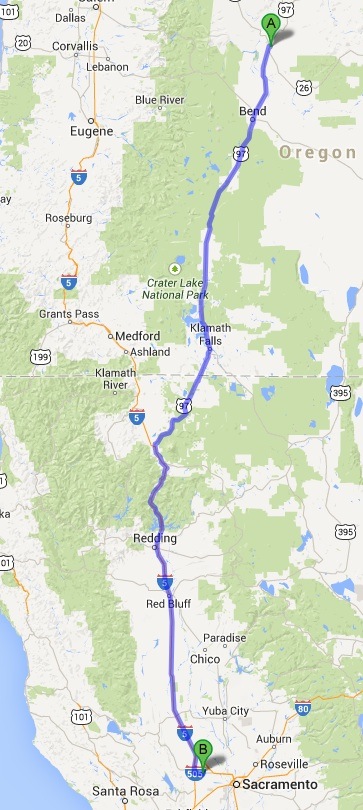
I covered 461 miles on the second day of my trip.
I waited until 7:30 before continuing on my way. (Related: Subway, which opens at 7 AM, sells breakfast sandwiches.)
I continued along Route 97, passing through Bend and Klamath Falls. I was lucky to find a truck stop just before the border of Oregon and California where I fueled up for the second time on the trip. The truck was getting about 300 miles per tank of fuel. (It gets way better mileage than the Chevy I used to drive.) I realized that I might make it all the way to my destination without refueling again.
I followed a remarkably straight piece of road that had to be at least 50 miles long before climbing and descending in the foothills again.
At one point, I had an amazing view of Mount Shasta. Or at least the bottom half of Mount Shasta — the top was in a cloud.
Eventually, I reached Weed and joined up with I-5. The next 100 or so miles were mountainous, which wasn’t much fun in the rain. At least I didn’t have to worry about the bees wanting out.
Lake Shasta looked nearly empty. The water was at least 80 feet below the high water mark.
Finally, past Redding, the home stretch. It was great to see flowers on the almond trees I passed.
I got off the freeway at my exit and waited at the stop sign to make a left turn. That’s when I glanced up in the rearview mirror and saw about 200 bees flying around the back of my truck. As I’d driven, the weather had cleared and it had gotten warmer. The hives had shifted; the bees had begun to find their way out. With the truck stopped, they wanted out.
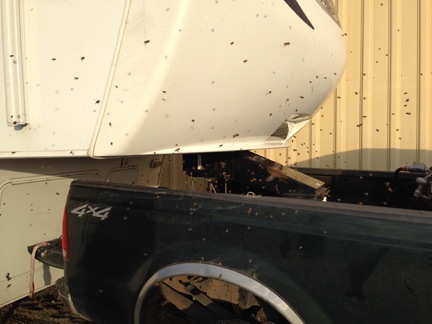
Hundreds of very unhappy bees buzzed around the back of my truck as I parked the RV.
I made my left turn and hurried the last 6 miles to my destination. By the time I was ready to back the RV into its space beside a hangar at the airport, it looked as if there was a swarm of bees in the back of my truck.
It was just after 4 PM and I’d covered 461 miles.
I had to put on my bee suit to unhook the RV. (Thank heaven no one was around to see that.)
I carried the two hives over to the side of the hangar about 25 feet in front of my RV and took the rags out. The bees from the strong hive immediately began flying out. The other hive remained quiet. I was beginning to think it was dead.
I went into town for a richly deserved dinner of chicken chow fun and Chinese ribs from my favorite Chinese restaurant West of the Mississippi. When I arrived at the restaurant, the bees that had been flying around the back of my truck were gone.
Parking the Bees
The next day, the airport manager told me to move the bees to the other end of the airport, in a rough grassy area where they tended to dump junk like old wood, tires, and fencing. We picked a place near the base of a tree. I dropped her off, donned my bee suit, and loaded the bees into the back of the truck. I had to move fast; it was getting warm quickly and the bees were eager to get outside.
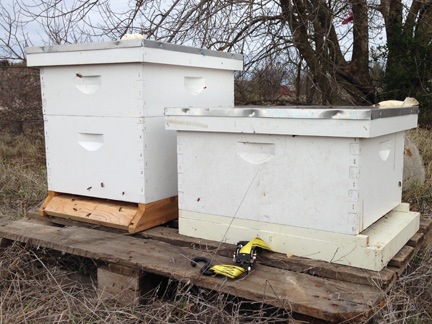
I found an old palette in the temporary bee yard and set it up as a base. Then I put the hives on it, one facing northeast and the other facing northwest.
The bees on arrival in their temporary home. (Can you see the hot air balloon in the corner of the photo?)
Later on, I returned with the dead hive and my beekeeping toolkit. I unstrapped the two hives and opened them up one at a time. I was shocked to see the number of bees in the healthier of the two hives. The population looked nearly as high as it did when I last looked inside that summer.
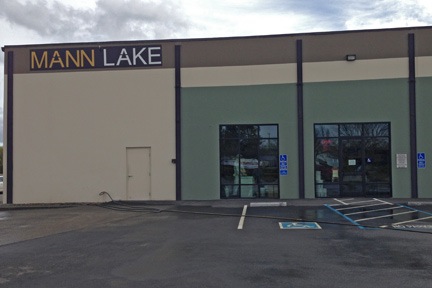
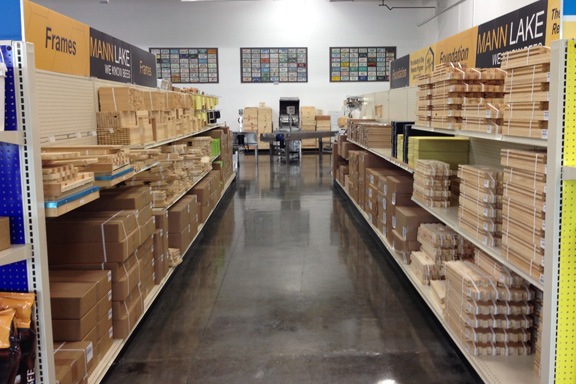
I pulled out and examined a few frames. I replaced empty honey frames with partially filled honey frames from the dead hive. I shuffled the frame around and put some brood frames from the dead hive near the center of the live one. The brood cells were empty, but there was plenty of honey in the cells around them. With luck, the queen would get right to work filling these cells with eggs. I also added a drone frame. (What the heck; why not?) Then I put a medium hive body on top of the deep and filled it with 10 medium frames. I kicked myself for leaving queen excluders at home; later, I’d buy one at the local Mann Lake store.
I closed up that hive — which was a good thing, because the bees were pretty pissed off by then — and moved on to the other one. I really didn’t expect to see anyone alive inside. But there was a clump of bees on two frames on one side of the box. They’d apparently eaten their way through the honey stores in the middle of the box. The clump wasn’t big — maybe 1,000-1,500 bees? I could only hope the queen was in the middle of the clump.
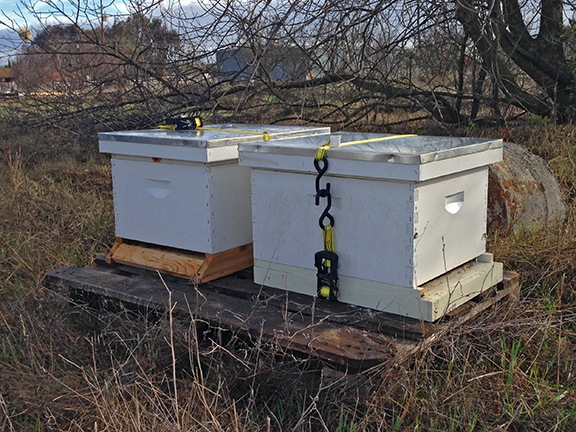
The two beehives after being configured for the next few weeks.
I did some major reorganizing. I removed some very old brood frames and replaced them with newer and cleaner brood frames from the dead hive. Then I added a honey frame filled with honey. I shuffled things around. I had to move the bees, of course — I used my bee brush to brush them into the frames in the center of the hive. Then I closed up the hive. I figure there’s a 50-50 chance of the bees surviving. If they make it through the next week and the queen is still alive, they’ll survive. I’ll examine the hive closely when I return from a trip to Santa Barbara this coming week. If I see the queen or eggs, I’ll know it’s all good. If I see neither, I’ll take action.
Either way, you can bet I’ll report on my progress here.
One more thing: it feels great to be working with my bees again.


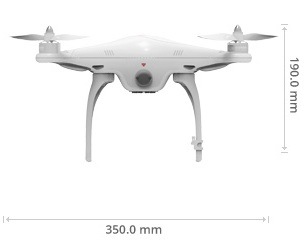
 The Phantom 2 Quadcopter with a GoPro Hero attached. This aircraft can weigh nearly 3 pounds. How’d you like to get hit on the head with that dropping from 400 feet?