Gyro Flight

A friend takes me for a ride in his open cockpit gyroplane.
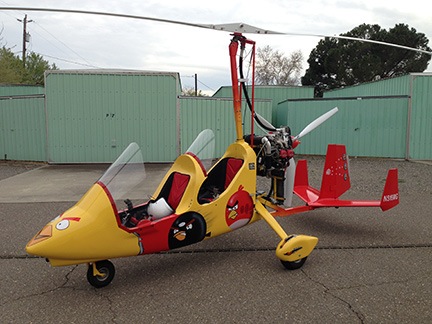
An Angry Bird
Now this is an angry bird!

One of the great thing about living at an airport is that you’re exposed to neat aviation things on a daily basis. And what isn’t neat about an open cockpit gyroplane sporting a custom Angry Birds paint scheme?

My friend George owns this one. He was at the airport most of this week, teaching a friend how to fly it. Well, he was trying to. The wind howled pretty fiercely on Tuesday and much of Wednesday morning.

George and his Gyro
George posing with his gyro.

(This is a gyroplane or autogyro, by the way. Gyrocopter refers to the Bensen Gyrocopter manufactured by Bensen Aircraft.)

On Wednesday afternoon, George took me for a ride — despite winds 14 gusting to 20. It was an interesting experience for me.
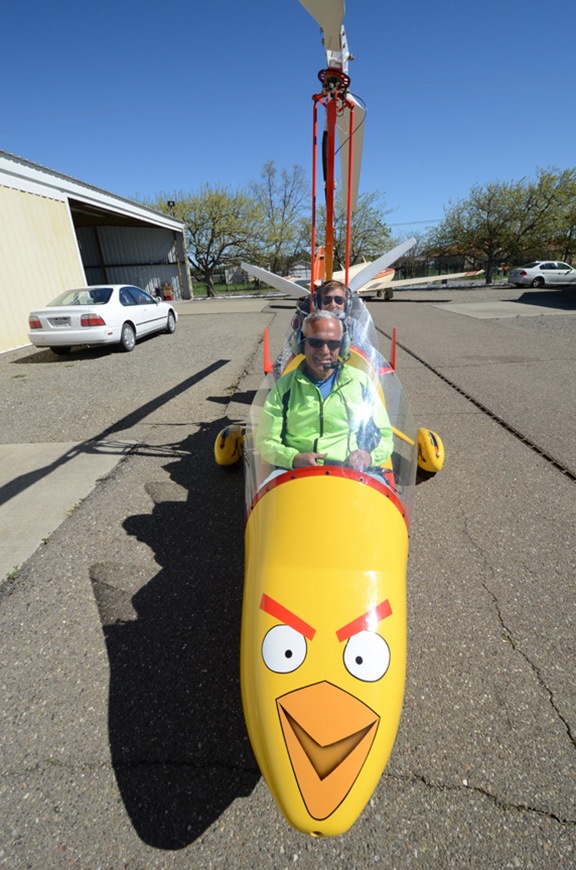
With George
Strapped in and ready to go.

Like helicopters, gyroplanes have a mast and main rotor blades. But unlike a helicopter, a gyro has a means of propulsion — normally a pusher engine/prop. To fly a gyro, you use a pre-rotator to get the blades spinning. You then use the engine/prop to move forward on a runway or other suitable surface. At the right speed, the pilot pulls back on the stick like he would in an airplane to take off. Lift is generated by the rotor blades, which remain spinning in a mode very similar to an autorotation in a helicopter. The engine does not directly drive the rotor blades; the pre-rotator is disconnected before takeoff roll.
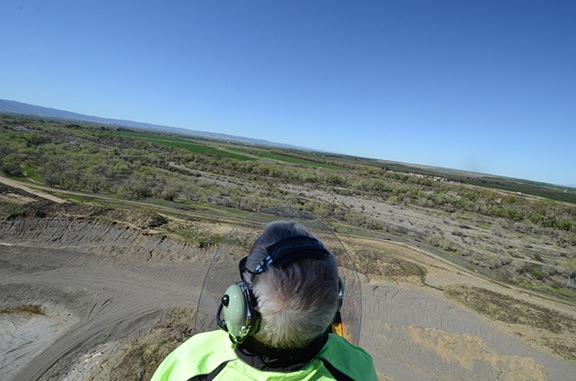
Low and Slow
Low and slow in an open cockpit plane? What could be better?

We were airborne for about 20-30 minutes. George demonstrated low flight along a creek bed, high flight, and a power-off landing that had us descending backwards in the stiff wind. (He had to dive to make the runway.) He demonstrated several very short landings and takeoffs. We flew low much of the time and waved at people on the ground waving up at us.
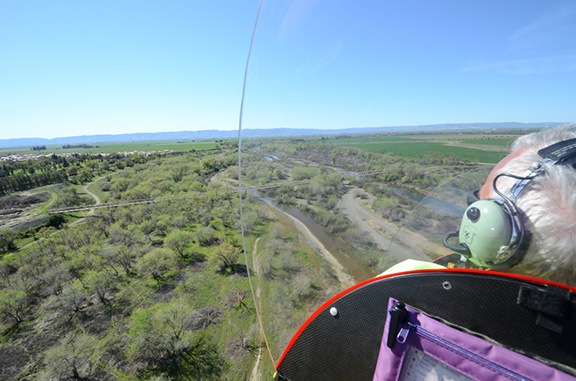
Side View
It’s a great feeling to have nothing between you and the ground you’re flying over.

I thoroughly enjoyed the flight. It reminded me a bit of the powered parachute ride I had a few years ago back in Washington — the closest thing to flying like a bird.

George is a CFI and I’m tempted to take a few lessons. It would be fun to better get to know this kind of aircraft. But there’s no gyroplane in my future — at least I don’t think there is — so getting a gyro rating would probably not be worthwhile.

Still, you never know…

The Peacocks of Lake Solano Campground

A campground drive through turns into an amazing photo opportunity.

There are a few weird little things I like to do. (Actually, there are probably enough weird little things to fill a book, but we won’t go there now.) One of them is driving through public campgrounds to check out the facilities.

I don’t remember when I started doing this. It might have been way back when I first started doing road trips with my wasband in the 1980s. Or it might have been in 1995, when I began doing road trips on my own. In any case, when I’m on the road just wandering around and don’t have anyplace special to go and I see a state or county park campground that looks interesting, I detour to drive through it.

I’ve seen a lot of really neat places to go car camping this way. A lot.

Lake Solano, west of Winters, CA, was just a point on the map when I went out for a drive to Lake Berryessa midday yesterday. The satellite view on Google Maps didn’t show it to be anything special. But when I drove by it on my way up route 128 into the mountains, I noticed its calm, clear water stretching alongside the road. And after a 9-mile kayak paddle the day before that had left me very sore indeed, the calm water of the little lake looked extremely inviting for a paddle one day in the future. So on the way back, I drove slowly past the lake. And that’s when I noticed the sign for the campground.

A campground near a lake. Of course, I had to check it out.

It’s a nice campground with plenty of wooded site. I didn’t really notice whether water and electricity were available. The reason for that was the initial distraction of seeing what looked like a small person carrying some sort of netted frame along the road ahead of me. My brain asked, “What the hell is that?” I looked harder and soon realized I was seeing the side of a peacock with his fan of feathers fully extended. It was the fan that looked like a frame with a net.

I pulled over on the side of the road and grabbed my camera. I’d brought my Nikon D7000 with me, hoping to see something photographic at Lake Berryessa. (I’d been disappointed.) The bird was standing in the middle of the road, rotating slowly so all the females in the area could see him. When he faced me, I snapped a photo with the 24-70mm “everyday” lens that I keep on the camera.

Peacock

Surrounded by PeacocksAnd that’s when I realized that we were pretty much surrounded by peacocks and peahens. They were strutting through the empty campsites, along the road, and into the brush. Occasionally, one would let out a shrill call. Penny stared at them through her window. I used my phone to grab a photo of that.

I spent the next twenty minutes driving around the campground, snapping photos out the truck window of the peacocks and peahens. When I realized after a few minutes that I wasn’t scaring them off, I took a moment to put my 70-300mm stabilized lens on the camera. Then I kept shooting. Yes, every single one of the shots on this page was taken from inside a running diesel pickup truck.

Peacock

Peacock

Peacock

Peahens

Peacock

Peacock

I did get a chance to check out the boat launch, which was perfect for canoes, kayaks, and other non-motorized boats. And I looked at a bunch of campsites, trying to judge whether my mobile mansion would fit into any of them.

But mostly I looked at the peacocks. I never realized just how beautiful these birds are.

Bees: Rebuilding a Screened Bottom Board

A minor adjustment that required a bit of effort.

I started my beekeeping hobby in June 2013 and have been blogging about it periodically. If you’re interested in reading the other posts in this series, follow the Adventures in Beekeeping tag. Keep in mind that the most recent posts always appear first on this blog.

I use screened bottom boards for my beehives. It’s a mite control measure; when the mites fall off the bees, they fall through the screen and can’t climb back into the hive.

My surviving hive had very few mites when I bundled it up for the winter. My other two hives — both now dead — had more than average mites. Coincidence? I don’t think so. It’s in my best interest to minimize the mite population in my hives and I’d like to do that as much as possible without resorting to chemical solutions.

I bought one screened bottom board — also called a varroa trap — from Mann Lake. I like it a lot, but it wasn’t exactly cheap: $28.95. Buying one of these for each of my hives would get costly quickly.

Fortunately, my friend Jim builds his own hive equipment. He built a screened bottom board. It was simpler — it didn’t have the fancy drawer that I really didn’t need — and I couldn’t beat the price: $15. I bought two.

Bees
It’s important to keep the bees inside the hive while transporting them.

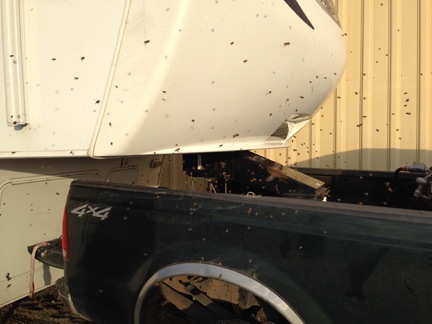
Trouble is, Jim built his bottom boards using 1/4 inch screen. That means the wires of the screen are 1/4 inch apart. While this will keep mice out of the hive — as it kept mice out of my RV when I used the same stuff there — it doesn’t prevent the bees from getting out of the bottom of the hive. This turned out to be very important on my trip south when the bees, feeling the warmth of California’s spring, decided to go flying while I was driving. I don’t know how many bees I lost in transit, but I do know that there were hundreds of them flying around my truck when I parked.

I put the hive in its temporary apiary. I soon discovered that the bees were regularly using the bottom screen to enter and exit the hive. This would not do. I wanted my bees to use the doors I provided — namely the front door. This would be easier for the bees to protect from robbers, too. Clearly, I had to make a change.

Fortunately (or, in reality, unfortunately), the hive that the Mann Lake bottom board had been sitting on was dead. Yesterday, while inspecting the hive, I swapped out the bottoms.

But I still had two bottoms with 1/4 inch screen when they should have 1/8 inch screen.

The solution was simple. I’d disassemble the two bottoms and replace the existing screen with more screen.

I needed a few things:

  • 1/8 inch screen. I bought 6 square feet of the stuff.
  • A small pry bar to pry off the wood strips holding the screen in place.
  • A cutting tool that would cut through the screen. I already had one, but I’d left it home when I traveled south.
  • 1-1/2 inch wire nails. I’d need to reattach the wood strips.

Fortunately, I already had a hammer in the RV toolkit.

The job went surprisingly quickly. The small pry bar I’d bought easily fit in the crack between the wood strips and the main piece of the hive bottom. Jim had used thin wire nails, probably from a nail gun. On one bottom, the nails stayed in the strips and I could reuse most of them; on the other, the nails stayed in the bottoms and I had to remove them with the claw end of my hammer.

Bottom stripped
Here’s the second of the two bottoms I disassembled. I’d painted this one before use.

Once the wood strips were out, I had to use the pry bar to separate the screen from the main part of the bottom. Jim had used U-shaped tacks for this. As I pried, the screen broke, leaving most of the tacks behind. But I was able to salvage about 10 of them — this turned out to be a good thing because I hadn’t bought any.

I cut pieces of screen and laid it into place. Then I replaced the wood strips, nailing them down firmly. There was enough screen overhang that I know the nails caught the screen. But because there was nothing holding the front of the screen in place at the entrance, I used the salvaged tacks.

Completed Bottom
Here’s the completed screened bottom with the new screen in place. The holes are half as wide so I’m sure they’ll keep the bees from getting through while allowing the mites to fall through to the ground.

It took me about an hour, working out in the sunshine of a very nice day with just a bit of wind. My truck tailgate made a good work surface, although I did use the pavement nearby as a base when it came time to use the hammer.

I now have all the parts I need to build another two hives. All I need are the bees.

Where I Live Now and Why

A video that tells part of the story.

I’m extremely proud to be a small part of the team that created this Wenatchee Valley Chamber of Commerce video. Created by the talented folks at Voortex Productions, this promotional movie combines ground and aerial footage, narrative, and original music to show and tell what Wenatchee is all about. Watch it and you’ll see why I made the move here from the dying Arizona town I lived in.

We are Wenatchee from Voortex Productions on Vimeo.

All of the aerial footage was shot from my helicopter. It required quite a bit of tricky flying. Because the videographer sat in the seat behind me shooting out the door, certain shots — such as the downtown flight — required me to fly sideways at about 30 knots. The final reveal from behind Saddle Rock required a smooth vertical climb with gentle but noticeable wind currents in the canyon behind the peak.

The air-to-air footage of Miss Veedol was challenging but fun. It required me to keep up with the plane as it flew around Wenatchee, putting the videographer in the position he wanted: above, below, in front of, behind. I’m amazed by how well the shots that day came out and tickled that my property in Malaga can be seen behind the plane in one long sequence.

Many thanks to the folks at Voortex Productions for giving me the opportunity to prove how great aerial video can make a production even better than it might otherwise be. I especially appreciate their understanding of the safety and performance aspects of the helicopter, enabling us to keep the ship light so these shots were possible.

Bees: Post-Winter Results

One out of three isn’t bad.

I started my beekeeping hobby in June 2013 and have been blogging about it periodically. If you’re interested in reading the other posts in this series, follow the Adventures in Beekeeping tag. Keep in mind that the most recent posts always appear first on this blog.

If you’ve been following my blog, you may know that I brought my bees to California with me. After all, I’ll be here for about two months and it’s a heck of a lot warmer here than back home. Knowing that one of my three hives was already dead, I hoped to save the other two and get them an early start on the season.

When I set them up here in California, I discovered that although one hive — last year’s swarm capture — was very strong, the other hive was very weak. So weak, in fact, that when I opened it up a week later to check on it, the bees were gone. Bees from the healthy hive were robbing honey from the dead one.

So I was one for three. With an expected survival rate of 50%, I was batting below average. Disappointing.

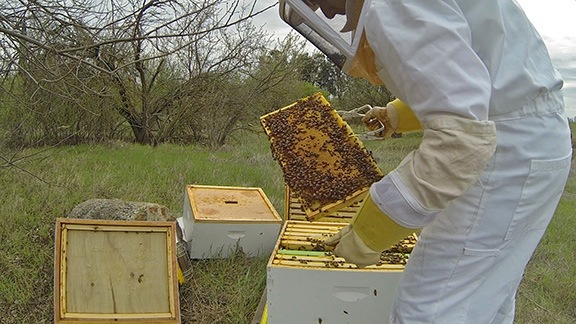
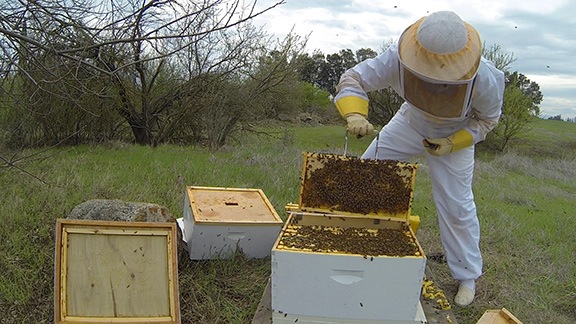
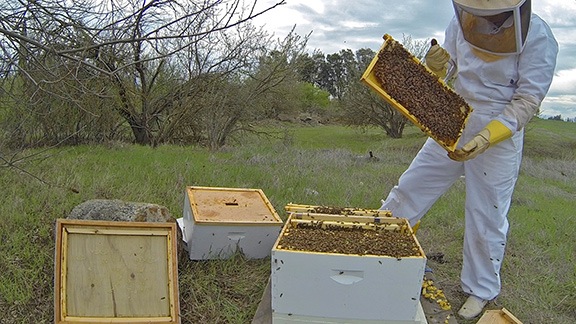
The surviving hive, however, was doing amazingly well. I saw that today when I opened the hive and inspected all of the frames. Although I couldn’t spot the queen, there’s plenty of brood in all stages of development in the middle of the hive. As I searched for the queen, I even saw several baby bees emerging from cells. One side of the drone frame is also almost full of capped drone cells. And the rest of the hive’s nine frames are completely built out with lots of stored honey.

Bees

Bees

Bees

I looked for signs that the bees might be planning to swarm, but there were none. I considered doing a hive split, but since I was unable to find the queen and I couldn’t actually see eggs in cells — I really need to either start using black foundation or wearing glasses during inspections — I decided not to risk it. At the rate at which the hive is growing, I expect the bees to start feeling crowded soon. I’ll check it next Friday — when I’ll pull the drone frame and pop it in the freezer — and if there are any swarm cells at all, I’ll split the hive.

One of the problems I had with the hive was its bottom. A friend of mine had made me some screened bottoms for about half the price I’d pay at Mann Lake, my favorite supplier. Unfortunately, he’d used 1/4 inch mesh rather than 1/8 inch mesh. Since the bees could get through 1/4 inch mesh, they’d basically begun using the bottom back of the hive as another exit. I didn’t think this was a good idea. The dead hive had 1/8 inch mesh. So I disassembled that hive, and put the live hive on top of that bottom. I then repositioned it so it was in the same place. I didn’t want to confuse the bees.

Beehive
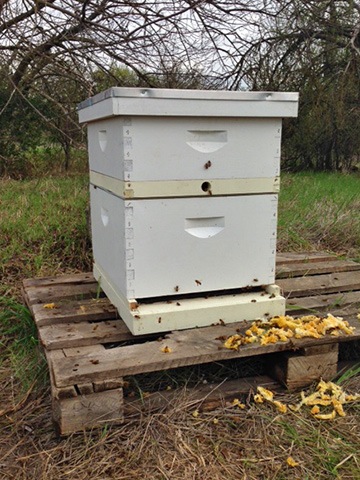
My surviving hive with queen excluder and spacer beneath honey super. The yellow-orange stuff in front of it is the burr comb I scraped off the honey frames. The bees will clean off the honey and then I’ll collect the wax and melt it down.

With the inspection done and the bottom changed, I put a queen excluder on top of the bottom hive box. That’ll keep the queen in the bottom but allow the workers to come upstairs. I then added a spacer with an entrance. I put the medium hive box on top of that. The box had been full of medium frames but, for some reason, the bees didn’t want to build out comb on the frames. Instead, they were building burr comb on the bottom of the frames.

When I brought the helicopter down to California last week, I brought down some other medium beehive frames I had, including a bunch that already had comb built out. I figured I’d swap in those frames. Maybe the bees would get the hint.

I topped off the box with the screen inner cover that’s always been on that hive and the outer telescoping cover.

I wanted to stop the bees from robbing the other hive, so I packed the other hive into the back of my truck. Later, I’d pack up the spare hive bottoms with their frames in black plastic garbage bags. It was the only way I could think of to keep the bees and ants out.

At this point, I have one very healthy hive that I’ll likely be able to split next week. I also have enough hive parts to build a total of three hives, two of which would have two boxes. And of course, Mann Lake is right in town if I need more parts.

I’m still hoping to find a swarm.

In the meantime, a local beekeeper has 176 hives for sale at a very good price. I’m hoping to buy a few before I head home in April.