For years, I had an online shop on Etsy to sell my jewelry. Not anymore.
I’ve made some changes in my online shop and I thought I’d take a moment to explain why and what I changed. But let me start with an explanation of how I sell my handmade jewelry.
How I Sell My Work
Most of my sales are either directly to buyers at art shows, via consignment sales at two Washington State galleries, or wholesale to a variety of gift shop owners. Each method has its own pros and cons:
- Art shows take a lot of time and effort. I’ve got to get to the show, set up my booth, and then sit in it for the duration of the show. At the end, I have to pack it all up and get it home. Those are the cons. On the plus side, however, is that I have complete control over my inventory and sell at retail price. So I have the potential to make more money per item sold.
- Consignment is a different ball game. I drop off inventory that the consignment place may or may not put on display immediately. When I drop it off, I lose control of it and can’t sell it. But I also have to keep track of it. If and when it sells, I get a check for 60% to 65% of the retail price. Ouch. If it doesn’t sell, I get it back, usually in serious need of cleaning before it can go back into my inventory. Those are the cons. On the plus side, it doesn’t take much effort to sell and my work eventually appears in a shop with other gallery quality items. I generally get checks every single month, year-round. Still, I’d rather not do any more consignment selling, especially for high ticket items.
- Wholesale is pretty much the same as retail with the main benefit being that I get paid up front, don’t have to keep track of what’s sitting out there, and I never see it again. It’s the same as selling to a retail buyer, but at a deep discount. Once it’s gone, it’s gone for good.
I’d like to do a lot more wholesale selling and a lot less art show selling. Part of that is that art show success is so dependent on the venue and the weather. I usually turn a decent profit at each art show I attend, but I did lose money at a Christmas Show in Spokane last year and that hurt.
When I sell wholesale, I know my cost of sales right up front: the amount of the discount I have to offer and the cost of getting the merchandise to the buyer. When I sell at art shows, I have a lot of costs to cover before I can start seeing profits: jury fees, entrance fees, transportation costs, lodging costs, etc. — and that doesn’t even include the cost of my booth tent, tables, table coverings, displays, etc. It’s possible to pay $400 for a booth at an outdoor show 50 miles away and have weather so miserable that no one comes out to the show. Or pay $500 for an indoor show 150 miles away and be stuck in a back room none of the shoppers walk back to. This has happened to me and it sucks.
Selling Online
Of course, selling online is probably the best of all worlds. I keep control of my inventory and sell it at retail price (or maybe a slight discount with a coupon or sale). The online shop calculates and collects the money and sends my share — more on that in a moment — right to my bank account. I package the merchandise — which is easy because I’m selling small items — and ship it out. I don’t have to set up, sit in, or tear down a show booth. I don’t have to sell at deep discounts or wait until an item out of my control is sold. When an item is sold online, it’s gone and I never have to think about it again.
Lots of folks think this is the only way to sell. They think it’s as easy as setting up an online shop and ringing in the sales. But what they don’t understand is that people not only have to want what you sell, but they have to be able to find it.
And that’s where Etsy comes in.
Etsy — Then and Now
Etsy started as a marketplace for handmade goods — items created by crafters and artists. It built a reputation as a place where you could buy unique things while supporting makers. And, for some people who don’t know any better, it probably still has that reputation.

A response to my toot this morning about my switch from Etsy to Square for online selling. I giggle at the word “tat,” which is apparently UK English for “junk.”
But it’s a farce. Etsy is now full of manufactured junk, much of it made overseas and passed off as “handmade” by people trying to cash in on Etsy’s reputation. As a web designer on Mastodon commented to me today, “I was looking at selling on Etsy lately and was dismayed to see it now sells all the same tat as eBay/Amazon, and appears that the only way to actually sell anything is to pay them to boost listings.”
And that brings up another one of Etsy’s ploys. If you search Etsy for an item — say “silver jewelry” — it will bring up search results with Etsy sellers who paid to have their posts boosted before any other sellers. Sometimes, the search results don’t even match the search phrase. In so many cases, the results that come up are cheap crap that you know isn’t handmade.

My search for “Silver Jewelry” brought up this collection of garbage. Are we expected to believe that someone will make you a personalized name necklace for only $16? And how much of this stuff looks like silver to you? The whole second row is paid advertising. Scrolling down (beyond this screenshot) displays more of the same. As a seller, do you think anyone will find what you make in this mess?

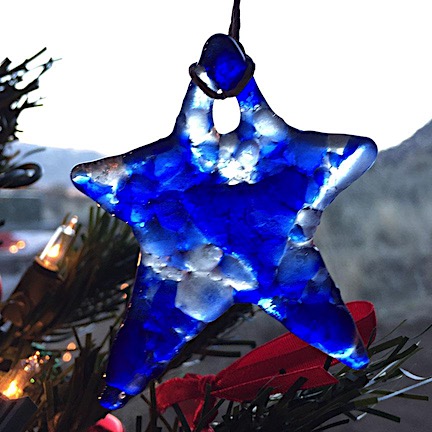
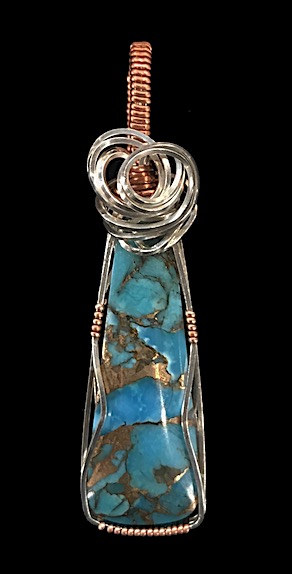
While this might not be your taste in jewelry, it’s solid sterling silver, hand formed from sheet, strip, and wire with a genuine White Buffalo Turquoise cabochon in it that was hand polished by a lapidary friend just for me. Even the beaded necklace has sterling silver beads, although the white beads are howlite.
So I’m making quality sterling and fine silver jewelry with gemstones using a wide variety of silversmithing tools and techniques and I’m competing on Etsy with this crap?
But wait, there’s more!
Recently, Etsy decided, out of the blue, that it was going to hold back 70% of my payment as a “reserve.” No real explanation of why. It just had to wait an extra week or two to get my money.
Add that to Etsy’s fees:
- 20¢ for each listing, including automatic re-listing of an item that didn’t sell in 60 days and automatic listing of multiple quantity items when one sells. So, in other words, you’re going to pay 20¢ per item just to be able to show it on Etsy.
- 6.5% of the order total, including shipping and gift wrapping fees, if charged.
- 3% + 25¢ for payment processing fees.
- 15% of the order total for sales made through the use of Etsy’s offsite advertising. Yes, if Etsy puts an ad on Google and someone clicks that ad and it takes them to your shop and they buy something, you pay Etsy an extra 15%. This is an opt-in feature and I’m pretty sure the fee used to be 20%. I opted out when I realized what it was costing me; somehow all of my sales were being hit with this fee.
And this doesn’t even begin to cover the optional monthly fees you can pay for shop customization options or the optional marketing fees you can pay to boost listings and get them at the top of search results.
So, in all, we’re looking at roughly 10% to 25% of the listing price to sell it. And that’s if it sells the first time it lists. You’ll pay an extra 20¢ every time it’s relisted.
Yes, I know this is less than the cost of selling by consignment or wholesale and even less than the cost of selling directly to buyers at art shows given the cost of doing art shows. But I think it’s a bit outrageous when you consider that I’m not getting my money immediately and my work is pooled in with so much other crap.
Sellers Revolt
Etsy sellers are not taking this sitting down. Or at least some of them aren’t. The withholding of money has gotten Etsy sellers up in arms enough that they’re threatening to strike. And that has resulted in Etsy backpedaling to reduce the amount it withholds. I got an email telling me that they were only going to withhold 30% of my sales.
Too little, too late. For the reasons listed above, I’m outta there.
I set up my shop to be “on vacation” with a vacation notice that says my shop is permanently closed and they can find my new shop on Square. Of course I included a link. I also turned off all automatic listing renewals for everything still listed in my shop. One by one they’ll disappear. When they’re all gone, I’ll delete the shop. Unless Etsy deletes it first.
The Square Solution
I use Square for credit card processing. I have been using it since it first appeared as a credit card acceptance option, back when its target market was garage sale runners and babysitters.
Back then, I set it up for my flying business. I was tired of using a credit card acceptance system that charged me a minimum monthly fee, statement fees, and a relatively high credit card processing fee. It was costing me more than $50 a month, even when I didn’t accept any credit cards.
Square was different. It used a smartphone app, charged a reasonable processing fee, and that was it. No monthly fees, no minimum fees. The only catch (back then) was that they wouldn’t pay out more than $1,000 per week. They weren’t expecting folks like me who sold service that often started at $1,000. But I was able to get around that with them by providing documentation that proved I was legit and had other credit card processing service in the past. The upped my weekly limit to $5,000, which was fine. (There isn’t any limit anymore.)
So when I started doing art shows, it made sense to set up a Square account for my jewelry business. While people might whine and complain that the rate is too high — seriously? — or they have some other imagined gripe about it, I have no complaints about Square, at least not yet.
One of the things Square now offers is the ability to sell online. While they didn’t implement this in a user friendly way, I have enough tech knowledge that I was able to figure it out. I started building my online store more than a month ago and now have most of my inventory in it. You can find it at MLJewelryDesigns.square.site.
It’s simple, but that’s okay. I think it looks professional — certainly a lot better than Etsy ever looked. It works.
Best of all, it’s free. No listing fees, no selling fees. All I pay is the cost of credit card processing, which I would if I were selling at an art show. It even has a built in shipping calculator that lets me buy discounted postage to ship items out. Just like Etsy.
Yes, there are upgrades available for a monthly fee. One of them would let me use a custom domain name, which I’m considering. Others offer better marketing options or shop analytics — most of which I don’t need and certainly don’t want to pay for. I’m not fooling myself here: I don’t sell much online and don’t think I ever will. But I want the option. I want to be able to send folks to a place where they can buy what I make 24/7.
And that brings me to marketing.
Promoting My Online Shop
I remember the early days of the worldwide web — you do know that’s what the WWW stands for, right? Back in the day, everyone wanted an online shop. They thought that all you had to do was set up a website and people would just buy, buy, buy whatever you were selling. No one seemed to realize that people had to want what you sell and find your shop before you could maybe sell to them.
And that’s where marketing comes in.
Yes, I have an online shop. Yes, there are features built into Square’s online shops to be found by Google in searches. But I’m not dumb enough to think that I can just sit back and let those two things bring me sales.
Serious business owners have real websites for their businesses, not Facebook pages.
You might think it’s enough to just put your business on Facebook and steer folks to your page, but it isn’t. First of all, it’s alienating people like me who wouldn’t open a Facebook page to follow a friend, let alone get more information about a business. Second, as discussed in this blog post by UK web designer Nick (who also authored the Mastodon toot above), you’re at the mercy of Facebook’s algorithms to determine whether what you post on Facebook will even appear for the folks who follow you.
You can do better than that without breaking the bank. Heck, even my WordPress-based sites have the ability to forward all of my posts to the folks who want to see them. No algorithm will block that.
No. I have to send people to my shop. And I do that several ways:
- Maintain a website. I use the ML Jewelry Designs website as way to share news with visitors, including folks who actually subscribe to get that news. And yes, I get a bump in website hits and even a few online sales after every art show I attend. Also note that I used the word “maintain.” That means adding fresh content regularly. No one wants to visit an out-of-date website more than once.
- Distribute business cards at art shows. My cards have a photo of one of my pieces of jewelry and a link to the ML Jewelry Designs website. The website is not my shop, but it does have links to my shop and links to specific pieces of jewelry. Those cards are not only available in multiple places in my booth, but I also slip them into the packaging for every single item I sell.
- Post about new work on social media. The website does this for me. I use WordPress which posts to Mastodon for me. I’m not on Facebook or Twitter (or X, the dead bird site) anymore. I do have an Instagram account and I try (but mostly fail) to post there. Any social media post I make has a link to either my website or the actual listing in my online shop for the jewelry I’m showing off.
- Link where appropriate. I link to the ML Jewelry Designs website wherever appropriate, including this blog and from the organizations that sponsor the shows I do.
No More Etsy for Me
While I know that several of my artist friends have had some success with Etsy and haven’t seemed too bothered with the reserve or fees, I can’t say the same. If you’re like them and Etsy is working for you, stick with it. But if, like me, you’re tired of your work being hidden away among so much manufactured crap, maybe it’s time to find another solution.
I’m done.