I attend a week-long lapidary class at the William Holland School of Lapidary Arts in Young Harris, GA.
It all started when I watched a YouTube video about lapidary intarsia. I thought the resulting cabochons were very cool and had the potential to help my take my jewelry work to the next level.
Some definitions might be in order before I go on:
- Lapidary is the process of shaping and polishing stones into decorative items such as cabochons, engraved gems (such as cameos), and faceted designs. Read more on Wikipedia.
- Intarsia is a method of seamlessly combining stones, normally to make cabochons, but possibly as part of an inlaying process. (The Wikipedia entry discusses wood intarsia; stone intarsia is similar but with stone.)
- Inlay is similar to intarsia but the stones are cut to fit precisely into a pre-made metal frame. (I’m also interested in learning how to do inlays.)
Why Build Lapidary Skills?
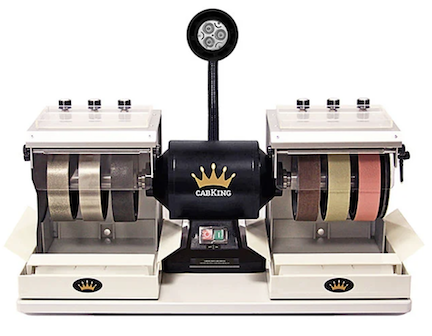
I bought a CabKing like this one about 8 years ago when I first began working with stones and making jewelry.
When I first got started making jewelry, I had a real interest in lapidary work, too. So much of an interest, in fact, that I bought a CabKing cabochon making machine and quite a bit of stone rough and slabs. I quickly realized, however, that I’d rather make jewelry than cut and polish stones. And when I discovered a very affordable source of cabochons for my work, I simply stopped using the CabKing and put all those unpolished stones in storage.
The trouble with using off-the-shelf (so to speak) cabochons in my work is that I was forced to design around the stones I had instead of designing what I wanted to make and then making the custom stones I needed. But I didn’t feel confident about my cabochon-making skills. And I was doing okay designing around what I could get.
Over time, my work improved to the point where I had the skills I needed to make interesting jewelry. My work was better than average at most of the art shows I attended. I had no trouble selling work priced at up to $250. But my work wasn’t good enough to make it at the fine art shows where finished pieces could fetch $500 or more. My “statement pieces” were stuttered phrases, not real statements. (So to speak.) And I was unable to get into the shows where true statement pieces were sought by people who had the money to spend on them. I was caught in a sort of netherworld between low-end high-quality jewelry and high-end fine art jewelry. I wanted to step up, not down.
I had seen jewelry by lapidaries who were able to achieve what I wanted to. John Heusler, who I was introduced to back in 2018 (?) in Quartzsite, AZ, by a mutual friend, made cabochons for the jewelry he designed and made. Jeff Fulkerson was another artist who made stunning jewelry with his own intarsia and inlay work. Both of them had numerous articles in the now defunct Lapidary Journal magazine that stuffed my reference shelves. They made work similar to what I wanted to make. Something better than I was already making.
Watching the video about intarsia and thinking about inlays got me thinking about how custom stones could help me raise my work to the next level with true originality. I could start with a vision of a final piece and construct it from scratch with raw metal and stone.
At least that’s what I think is possible.
The William Holland School of Lapidary Arts
The video I saw about intarsia showed a facility called the William Holland School of Lapidary Arts in Georgia. I think there was a plug for it at the end. I tracked down its website. I was interested in taking a class over the winter months — my brain said Georgia is south so it should be a good winter destination — but soon discovered that they don’t offer winter classes. (The mountains in Georgia get snow — who knew?) But I did find a class during a narrow window of availability in my calendar between some time training people on my boat in September and my boat’s haul out date in October. It was called Forbidden Lapidary and it was being taught by a familiar name: Jeff Fulkerson.
Here’s the description:
FORBIDDEN LAPIDARY: WHAT YOUR MOTHER NEVER TOLD YOU
INSTRUCTOR: JEFF FULKERSONThis is the class you always wanted but didn’t know it! In this class I’ll reveal several shortcuts, new techniques, giving old tools new uses, and totally unrelated tricks that will shoot your lapidary skills to the next level. In this class you will learn to back stones, we’ll explore different dopping techniques, and how to make cabettes (small cabochons for stone on stonework).
You will learn alternative methods to polish soft stones, how to line up & make small dots or round cabochons, cutting earring pairs, how to polish flat cabochons on a lapidary arbor and we will make some odd shaped and sharp cornered cabs including concaved shapes. Finally, we’ll look at making an intarsia cab, the mystery of superglue & silver dust, as well as Un-dopping different dopping techniques.
Students must provide rough stones for the intarsia. I recommend lapis, jaspers, as well as some rough turquoise. Think about what colors you’d like when selecting your rough. Bring more than you think you’ll need. The instructor will have a very limited supply of
rough.Class Fee: $295
Kit Fee: $35 to cover consumables
Prerequisite: Students must have taken a lapidary class & have a basic knowledge of cab making
Yes, it included intarsia, which is what I wanted most to learn. The prerequisite was a lapidary class and basic knowledge of cab making. I had experience making cabs but had never taken a formal class. But I had confidence I could keep up without a lot of special attention.
I did some research about the school. It was well-reviewed. The campus was in a wooded area in the mountains of northern Georgia. There was lodging and all meals were included in the lodging fee. There was also a campground. The classrooms were well equipped and class size was limited to six students.
In late August, I felt like I needed to treat myself to a self-improvement trip. Maybe something that would motivate me to get back to jewelry making was just the ticket. The insane price increase of silver — which has come back down, but not to pre-increase levels — had pretty much put a stop to my silversmithing activities. And the sickly economy was making it difficult to sell the inventory I already had (other than earrings and bracelets, which always sell well). I was going to try (again) to spend the entire winter at home and was willing to dedicate a part of that time to my jewelry making work. Learning new skills would fire me up.
So I worked my logistics skills, signed up for the class with lodging, booked plane tickets, found a somewhat affordable rental car, and arranged for a dog sitter. Later when my dog sitter backed out (for good reason), I found another dog sitter. Then I booked two hotel rooms. The trip was not going to be cheap — and I can blame that on my hatred of cross-country tube flying prompting me to get a first class ticket to Atlanta — but I felt I deserved it.
Forbidden Lapidary
Last week was the week. It was an extremely informative, confidence-building event that had me feeling relaxed and full of both questions and answers. And a real desire to take more classes.
First Jeff was a great instructor. His demonstrations clearly showed how to perform a task and were followed up with time to try it on our own with him standing by to help if needed.
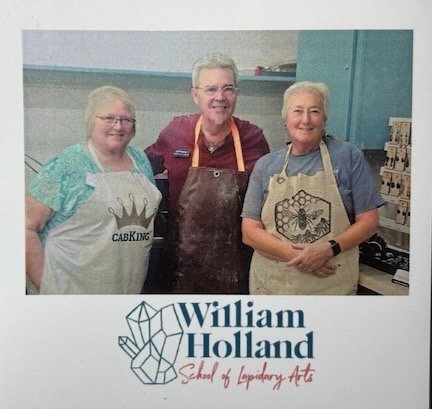
We each got a copy of our class photo. Do I look like someone who has had her hands in cold water all week? (That or worse!)
Second, there were only two students: me and a woman about my age named Cathy. With fewer students and skill levels to deal with, Jeff was able to give us all the attention we needed during the 4 1/2 days of class time.
Jeff could have called his class “Real Life Lapidary” because he covered the kinds of things real lapidaries need to know. This included turning scrap pieces into usable cabochons and “repairing” stones that need a little work before they can be used in jewelry. Of these techniques, I think that filling crevices in stones like turquoise with silver filings and backing uneven or unstable stones before cutting and polishing them are at the top of my list. Anyone who has made a cab has experienced a stone breaking during the cutting process; Jeff gave us some good, working suggestions for salvaging that stone. It may not sound like a big deal, but with turquoise rough selling for $3 or more per gram, anything you can do to maximize the amount of usable stone saves money and keeps costs down.
I will also benefit from his discussion on different dapping techniques. Dapping is the process of affixing a handle to the bottom of a stone to better grip it when cutting and polishing on the cab machine. When I first made cabs, I didn’t use dapping sticks. But I got some practice in class and definitely think it’s helpful. I’m looking forward to making my own dapping sticks out of nails and trimmed hex keys.
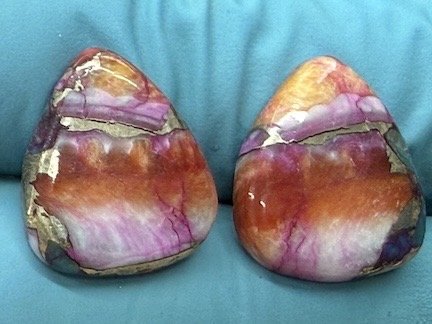
One of the three earring pairs I made in class.
We learned how to create matched pairs of stones for earrings by slicing a rough cab in half and then polishing the two halves. I made three of these but Cathy went nuts and made at least a half-dozen pairs. I think that was her favorite part of the class; she’s already taken a bunch of lapidary classes there.
And then there was the intarsia, which I got to try three times. Two projects were stones attached to other stones and one was the inlaying of a circle inside a hole drilled into a stone. My work wasn’t bad for first efforts; I look forward to seeing what kinds of designs I can come up with for future jewelry pieces.
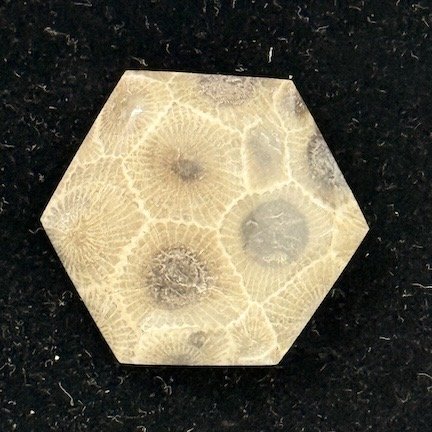
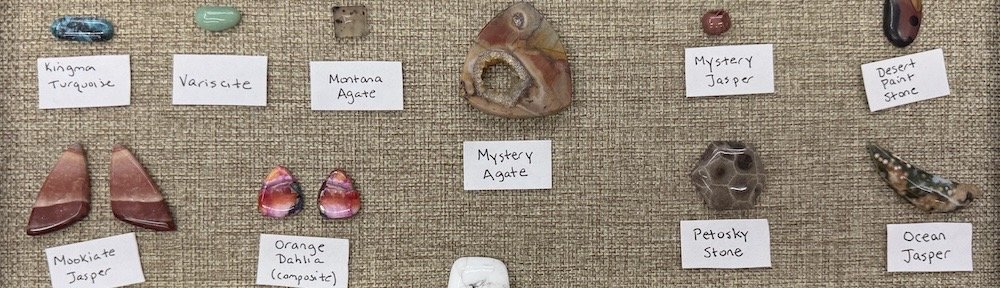
Here’s a perfect example of the kind of work I can do with the right equipment. I bought a Petosky Stone about the size and shape of a medium potato at the auction on Tuesday night. The next day, I cut it into slabs and then cut and polished one of the slabs to make this hexagon shaped cabochon that drew a lot of complements. I even sold one of the slabs at the tailgate that night.
Another benefit of the class was having every kind of equipment needed right there at our fingertips. In addition to enough cab machines that we could all use them at the same time, there were also a pair of flat laps, trim saws in two sizes, a slab saw, and even an intarsia machine. (Imagine a flat lap laid on its side with a 90° angle shelf to support stones being trimmed.) My equipment is limited to my CabKing with a flat lap on the side, a tile saw I sometimes use for trimming rocks, and another flat lap I’ve never used for stone work. After taking the class, I’ve realized that I could probably benefit with a real trim saw and could possibly convert that tile saw for intarsia grinding. I don’t want to invest in any more equipment than I have to.
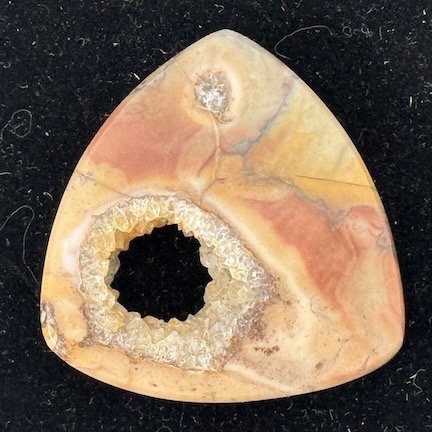
On Sunday, the day before class started, I visited two local rock shops. I bought an agate cab with this bit of druzy (crystals) in it. I made good use of the trim saw to cut a shape out of the stone. Lots of pieces broke off but the main shape survived through the cutting and polishing process.
Jeff also shared information about supplies he uses in his work, including specific brands of super glue (used for intarsias) and epoxy (used for backing stones) and types of drill bits (for drilling stones).
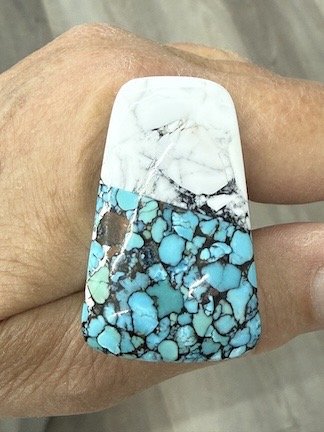
I brought two composite bricks from home: white buffalo and Kingman turquoise. I cut two slabs from each and used pieces to make my first basic intarsia. I’m not terribly keen on it, but Jeff said it was a big hit at Show and Tell.
A plus for me was getting some of my Kingman Turquoise Mine composite bricks cut on the slab saw. I didn’t cut much because I was cutting them too thick, but I have a good feel for how they cut and think I can cut the rest at home.
I’ll be honest: the topics covered in class could have been covered in less time. Maybe 3 days instead of 4 1/2? But then we would have missed out on the extra practice we were able to get with all that time in class. And it was great to have an experienced jeweler and lapidary artist on hand to grill with questions. We asked him lots of things; he even commented how much he liked being asked things that weren’t included in the curriculum.
Outside of class time, I made a few friends and got to poke my head into other classes to see what they were up to. Not all of the classes focused on lapidary work. There were several silversmithing and beading classes. Another class did knife handle inlays and yet another glass was dedicated to inlays. A Master Class focused on the creation of dies that could be used to punch custom shapes out of metal sheet for production work — I could really benefit from that, too.
My Lapidary Retreat
My room at the campus was in Otto’s Lodge, which happened to be a long uphill walk from the main building. I walked it three times, one of which was in the dark. (It was very dark there at night.) The rest of the time I drove up in my rental car, taking everything I needed for the day. The accommodations were simple but comfortable. I paid extra for single lodging; at my age, I really can’t deal with unknown roommates and would not like to subject strangers to my potentially loud snoring.
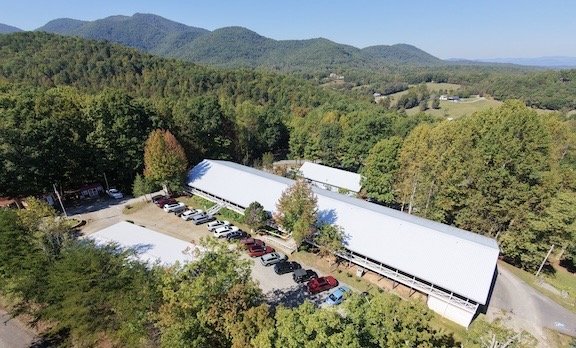
Here’s the main building and one of the other lodges from the air. (Of course I brought a drone with me.) The classrooms and cafeteria are on the lower level, which is ground level at the back of the building. There’s lodging on the upper level. Otto’s Lodge was down the hill, beyond the trees, and is not visible in this image.
There was lots of social time at meals — breakfast, lunch, and dinner every day. The food was good enough. Nothing special, but every meal was balanced and there was a nicely stocked salad bar available. I totally pigged out on chicken pot pie night, although the “pot pie” was a sort of chicken stew with pastry pieces baked on top. What got me was the noodles they served with it. Breakfast was tough for me; I usually eat homemade granola and fiber cereal with fresh berries and all they had was sugar cereal like Honey Cheerios. I ate eggs and grits or oatmeal instead.
There were special events after dinner. There was a fundraising auction on Tuesday for a wide range of lapidary related (and other) stuff; I bought some stones and back issues of Lapidary Journal, and stone backing material. There was a tailgate event on Wednesday where many of us laid out stones and jewelry for sale; I sold two slabs I’d brought along and one of the silver crosses I’d made and bought one really nice cabochon. There was show and tell on Thursday, where each class put their finished and in-progress projects on display.
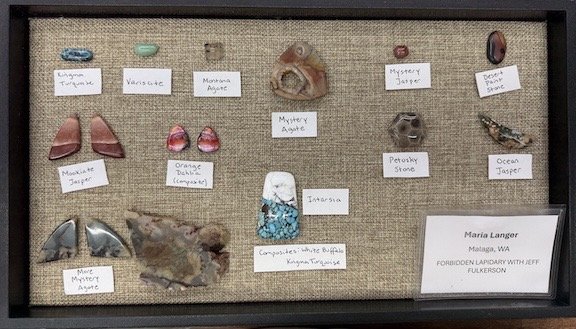
Here’s my Show and Tell tray. I labeled everything (as if the people there couldn’t identify the stones).
In all, the experience could easily be described as an immersive retreat. Not only did I learn a lot, but I felt relaxed, slept reasonably well, ate well, and made friends.
Would I Do It Again?
Hell, yes!
But I won’t do it the same way. Instead, I’ll plan to be there three to four consecutive weeks, staying in the campground, which was nestled in the woods near the main building. Lodging is cheaper there, so I can save some money. I just need to make the cross-country drive to Georgia. I’m thinking of next summer, possibly after my big boating trip. I’d like to take at least one inlay class and possibly a class on creating and using dies.
Honestly, I’d love to be an instructor there. My silversmithing skills are totally up-to-speed and I’d like to teach some project-based classes where we create specific pieces using a wide variety of skills. I’m already making big plans to teach in my home-based studio this winter. Teaching in the summer in such a well-equipped environment would be a blast.
Discover more from An Eclectic Mind
Subscribe to get the latest posts sent to your email.