Great Loop 2021: Doing My Homework

I research my part of the route.

The Girl Scout motto is “be prepared,” and it’s something I’ve taken to heart ever since I was a scout. The best way to ensure a smooth endeavor is to be prepared for what may come up along the way. While I wanted my two-month boat trip to be smooth, I also wanted to make sure I didn’t miss anything.

Of course, I am limited in what I can see and do on the trip. After all, I am not the captain of the boat and the captain — like an aircraft pilot in command — makes all the decisions. I assumed I’d have some kind of input, but I couldn’t be sure. Still, I wanted to know all of the options — or as many as I could discover through research — so I could share an educated opinion when one was requested.

That meant hitting the books.

What I’d Already Done

If you haven’t read the previous posts in this series, let me recap my early research.

AGLCA
I had discovered and explored the American Great Loop Cruisers’ Association (AGLCA) website where there is lots of basic information for non-members. I wound up joining the association and ponying up even more money to attend a web-based Rendezvous which was very informative. (I blogged my thoughts about the AGLCA and Rendezvous here.) I’ve been back to the website, which has since been revised, to see if I could learn more, but stopped short at paying to watch narrated slide shows, wading through forum questions and answers, and participating in the new social networking features. I have a budget and limited time; I need to spend both time and money wisely. While I believe that the forums can be a valuable resource to get specific questions answered, I don’t see them being very helpful until I have a specific question. As for social networking — well, until I actually start my cruise, I really don’t have anything to network about.
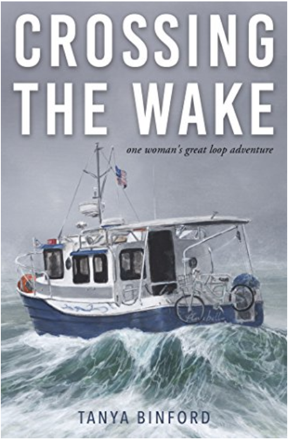
Crossing The Wake
Here’s the book I read first about motoring the Great Loop. I keep looking at that photo and imagining all the salt water corrosion on that poor bicycle.

Crossing the Wake
I read Crossing the Wake: One Woman’s Great Loop Adventure by Tanya Binford, which I reviewed briefly in the first blog post of this series. The only thing I learned from the book was that a barely prepared middle-aged woman could do the trip “solo” in a 25-foot boat. (I put “solo” in quotes because apparently there are so many people doing this trip that it’s common to join up with one or more boats and do lengths of it together.) The book was more of a personal memoir than a useful travelogue because it lacked most of the details a cruiser would need to plan and execute this trip.

Needing — or maybe just wanting? — more detailed information about the trip from Jersey City, where Captain Paul, first mate Dianne, and the Motor Vessel Nano would pick me up, to Chicago, where I’d leave them, I started digging deeper

Waterway Guide

I learned about Waterway Guide at one of the “Lunch and Learn” sessions at AGLCA’s Rendezvous. Lunch and Learn sessions basically give an AGLCA sponsor time in front of members to sell their product. They are informative and can be helpful, especially if they’re selling something you’re interested in. Waterway Guide was definitely something that interested me. It’s an online service that provides a wealth of navigation, marina, anchorage, service center, and points of interest information for east coast waterways, including the entire length of the Great Loop. (They do have a database of west coast marinas and some other services, but it is not maintained anywhere to the level of the east coast information; they apparently focus on the east coast, leaving me to wonder if another organization fills the void out west.) Of course, membership is required to get access to all of the information they have online and, of course, I joined to get that information. (My AGLCA membership got me a discount, which was nice.)
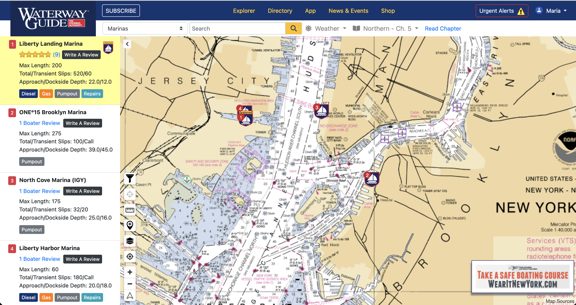
Waterway Guide Online
Waterway Guide’s website showing New York Harbor. I love the fact that it displays charts and plots various features on it. Zooming in provides more detail. If I turned on location tracking in my browser, it would put an icon near my position.
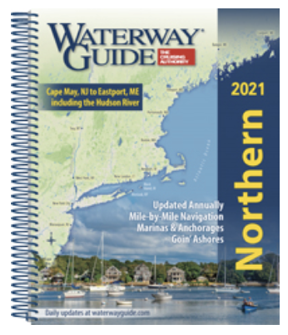
Waterway Guide Cover
The printed Waterway Guides offer detailed information about various east coast waterways.

The membership level I chose also came with two of their printed guides. I chose Northern, which would take me up the Hudson River, and Great Lakes Volume 1, which would take me through the Erie Canal and into Lake Erie. These books, which are revised annually, include all of the information that’s on the website in a handy spiral bound format that’s easy to leave open and consult while traveling. (Sadly, they are not small so I won’t be bringing them with me on the trip; there’s limited space on the Nano. I hope Captain Paul will have his copies with him.)

I have a love-hate relationship with these books. First, I love the amount of detail that’s included. Reading through them makes me want to go ashore and explore every place they talk about. But what drives me nuts is the way the book is organized. Each section is broken down into segments that can be 5 to 25 miles in length. Within each segment are subsections:

  • An overview or notes section discusses the segment of waterway in terms of geography, geology, and points of interest.
  • Navigation tells you more about navigating each part of the segment, including which chart(s) to use. This has some more points of interest information.
  • Dockage/Moorings tells you where you can find marinas or other places to tie up. This information is repeated in chart format for the section.
  • Anchorage suggests places to drop anchor and provides useful information about each place such as how it is protected and whether there is noise.

Sounds great, right? Well, it is and isn’t. The information is great but the presentation isn’t presented logically. For example, in the “Tappan Zee Bridge to Bear Mountain — Mile 27 to Mile 46.7” segment of the Northern guide, the overview takes you through that roughly 20 miles of Hudson River with a separate heading at the end for the Bear Mountain Bridge. Then Dockage/Moorings takes you back from the beginning of that stretch to the end. Then Anchorage takes you back again from the beginning to the end. So there’s a lot of back and forth in a 20-mile stretch of river. What I found, especially in the segments covering the Erie Canal, is that I couldn’t keep track of where a marina or anchorage was without trying to follow along on the online guide, which included charts and icons for many of the things they were talking about.

I think the guide would be a lot easier to follow if the Dockage/Moorings and Anchorage sections were combined and that information was presented together. Or, better yet, combine all information with a much shorter overview. Just take me up the river and tell me what I’ll find along the way without forcing me to go back and forth on a map to see where points of interest, navigation details, marinas/moorings, and anchorages are when moving forward.

I guess what I’m trying to say is that the books could probably use a deep edit to remove repetition and better organize the data. Having more charts/maps and possibly fewer photos would be helpful. As for the photos, I can’t tell you how frustrating it is to see a photo of an interesting or beautiful place that has neither caption nor label to identify where it is.

(Please keep in mind that I spent 20+ years in publishing where I wrote and laid out dozens of books. One of the series I wrote for — Peachpit Press’s Visual QuickStart Guide series — made extensive use of “spreads” where everything you needed to see for a task was either on one page or two facing pages (a spread). I laid out these books, so I know it’s possible to present information in a format that doesn’t require a lot of paging back and forth. It drives me nuts when information could be presented more logically for the reader and isn’t.)

But overall, the books are worth the money — about $50 each — if you need printed detailed information for a trip.

But wait! There’s more! Waterway Guide also has an app, which I downloaded for my iPad.
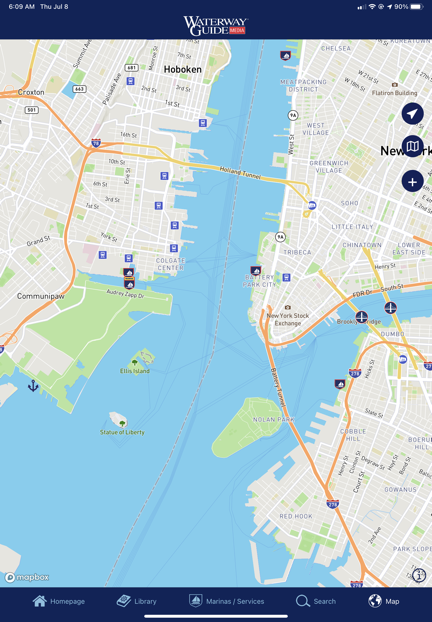
Waterway Guide App
The Waterway Guide app doesn’t even use nautical charts as the base map layer.

So far, I’m not impressed. In order to get the kind of detailed information the printed guide has, you have to subscribe to each chapter — even if you’re a member, logged in, and have already obtained the printed version of the book containing that chapter. I subscribed to the New York Harbor & the East River chapter for $2.99/year to give it a try. The content is the same as what you’d find in the book, including the organizational shortcomings I mentioned above. It’s basically an ebook that you pay for each chapter you want to read using a subscription format that hits you up for another fee every year. (I can only assume the old information becomes inaccessible if you cancel the subscription.) And yes, it does include ads — although I admit I didn’t see many (yet). I’m bummed out because I was hoping it would be an offline version of the website and it falls far short of that. It doesn’t even have real charts. I’d much rather use the web browser in my iPad to access the website, where I have all the information without having to pay more subscription fees.

Skipper Bob’s Guide
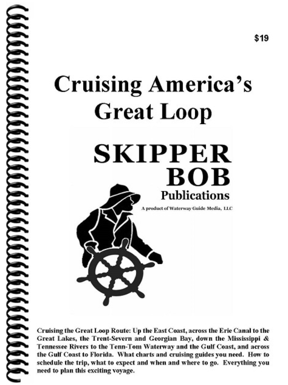
Skipper Bob's Guide
Skipper Bob’s guide, Cruising America’s Great Loop, is an excellent overview of the entire trip.

If you want the “Cliff’s Notes” version of Waterway Guide specifically for the Great Loop, try Cruising America’s Great Loop, a Skipper Bob publication. This $19 book provides 108 pages of information about cruising the Great Loop. It’s a good overview that tells you which charts to use, what you’ll see along the way, and things to watch out for.

My opinion: If you’re considering the Great Loop and want to learn more, start with this book. It really is a good overview to help you decide whether cruising the Great Loop is something you really want to do. It’s also a great visual aide when you’re trying to explain to friends and family members what the Great Loop is all about.

New York State Canal System Cruising Guide
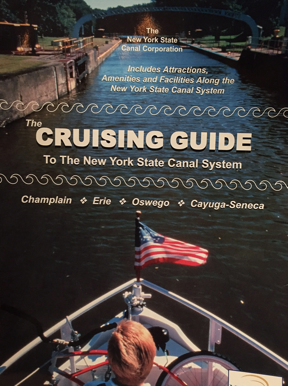
Cruising Guide
I got my copy of the Cruising Guide for free from the New York State Canal Corporation, but I’m not sure how.

I think it was the Skipper Bob book that recommended getting a copy of The Cruising Guide to The New York State Canal System from the New York State Canal Corporation. I tracked it down online where I found a printable (!) order form. I filled it in, sent a check for $29.95, and waited. About two weeks later, I got a thick envelope with a spiral bound book, a bunch of other informative pamphlets and maps, a letter, and my check. The letter informed me that they were no longer accepting payment for the guide; it was free. For the life of me, now I can’t find a link on their website to order the book, but there’s some good navigation info here. I did find the same book on a website that is charging $29.95 for it.

The book breaks down the canal from west to east — the opposite direction I’ll be traveling in August — with charts, photos, and descriptions on full-page sections along the way. (This is the format I wished Waterway Guides would use.) It’s got a LOT of information specific to the canal, inlcuding the amount of time between points and the expected time to lock through each specific lock. It’s easy to see why the book is now free: there are ads throughout. But the ads don’t distract from the content and are strategically placed near where they apply. For example, an ad for a marina will be on the same or facing page as the map where it can be found.

This is a great book that I would definitely bring with me if Captain Paul hadn’t already assured me that he also had a copy and it would be on board.

Quimby’s Guides

The one book I bought that I really regret buying is Quimby’s Cruising Guide. This well-known resource for eastern U.S. boaters is nothing more than a listing of commercial establishments and locks on various inland waterways. While it might have a lot of value for folks doing the entire Great Loop, it didn’t provide any coverage for the area I’d be cruising: the Hudson River, the Erie Canal, and three of the five Great Lakes. I don’t know what made me think it would provide coverage; it’s my own damn fault that I didn’t read the description thoroughly. At $42, it was a costly lesson.

I should mention here that although the information it provides is extremely limited and the book has quite a few ads, I do like the way the information is presented: in order of river mile. There’s no bouncing back and forth in the text to get the big picture. Instead, it’s just a list, by river mile, of the facilities and related contact information.

Summing Up

I think one of the things that has me so excited about my trip is that there’s so much that I can learn along the way. I’m familiar with just a tiny stretch of this trip — from Jersey City to just beyond West Point, where my family took our small motorboat on outings when I was a kid. The rest is new and full of challenges and history. How can that not be exciting?

Preparing for the trip by researching it as much as possible can help me make the most of the journey. I’ll keep reading right up to the day I head east.

Great Loop 2021: Plotting the Course

I put the planned overnight stops into a navigation app to get a general idea of the route.

When Capt Paul was interviewing crew members for his trip from Maine to Chicago by way of the Hudson River, Erie Canal, and Great Lakes, he sent each of us a PDF of a spreadsheet that he had created that listed the days of the journey, the expected stopping point each night, the distance between points, and expected dates of arrival and departure. I had taken a look at the list and had even tried once or twice to plot the route, but it wasn’t until today that I sat down and entered each planned stop as a waypoint in a navigation app.

What changed? Well, I tried a different, more user-friendly marine navigation app, Aqua Map.

A Tale of Two Marine Navigation Apps

TZ iBoat
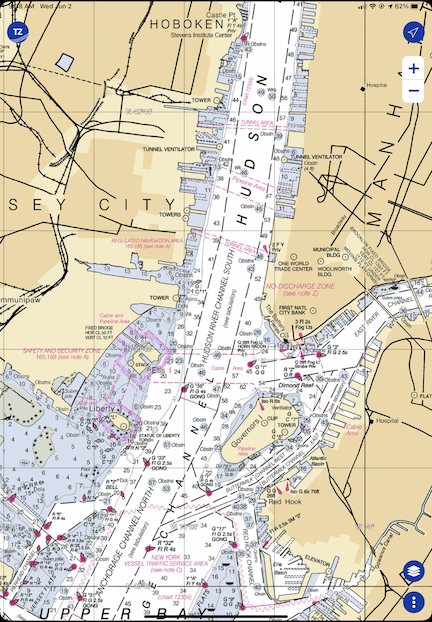
Here’s New York Harbor as it appears in TZ iBoat. This is a raster (“r” = “real” is my way to remember it) chart. TZ iBoat will automatically switch to the view magnification that’s appropriate for the scale I’ve zoomed to.

Years ago, when I did the Learn to Navigate the Inside Passage cruise with Northwest Navigation, I looked for (and found) an app that would run on my iPad and display our position on real nautical charts. That app was TZ iBoat. I chose it because it (1) enabled me to download charts so I didn’t need an active Internet connection and (2) it supported raster charts, which are basically scanned and location encoded versions of traditional printed NOAA (or, in the case of that trip, Canadian) charts. I wanted raster charts because I wanted something that looked like the paper I’d need to consult when actually cruising. Call me old fashioned, but I’m the same way with aeronatuical navigation apps like Foreflight — I always consult the sectional chart version because that’s what I’m used to.

TZ iBoat wasn’t terribly expensive. The app was free but I’d need an annual subscription to get the charts. That’s showing as $19.99 today on the App store but I’m pretty sure I paid more. I’m thinking $35. Still a lot cheaper and easier than buying printed charts.

When this Great Loop trip came up, I renewed my subscription for USA coverage. I already knew the software pretty well, so it would be easy enough to use it on this trip.

Aqua Map
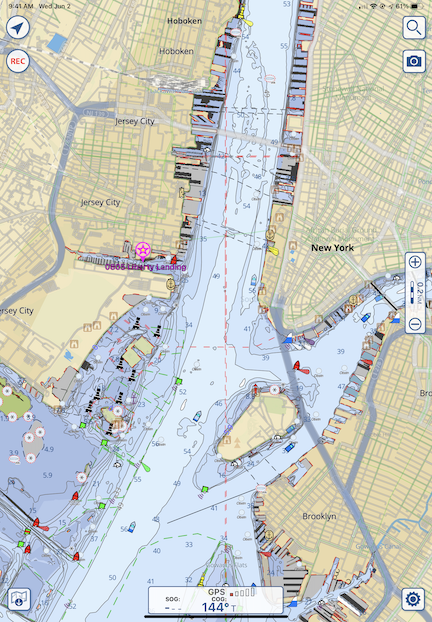
Aqua Map’s view of New York Harbor at roughly the same magnification. Because this is a vector chart, the more I zoom in, the more details are displayed.

But then Capt Paul told me about Aqua Map. I downloaded it to give it a try. I immediately realized that it had some major benefits over TZ Boat: it could display data overlays from other sources, including Waterway Guide. So in addition to charts, it would give me data about marinas, anchorages, locks, and other facilities that either aren’t included on charts or have limited information on charts. The app was free; a subscription for the US and Canada, including charted lakes, rivers, and canals, was $14.99. I subscribed and linked it with my Waterway Guide subscription. (This, I’m pretty sure, makes it unnecessary for me to subscribe to the digital version of Waterway Guide in that app.)

The only drawback to Aqua Map: it uses vector charts instead of the raster charts I prefer.

But is that really a drawback? Maybe I just need to face it: vector charts, with their customizable display layers, are probably the future of navigation, whether it’s marine or aviation. Maybe it’s time for me to move into the 21st century after all.

Of course, I’ll have both with me on the trip. My new iPad has plenty of room for both of them and the downloaded charts I’ll need along the way.

Plotting the Route

There were two ways I could plot out the planned route:

  • Create waypoints for each stop along the way.
  • Create a route with connected waypoints for each stop along the way.

I decided to just create the waypoints. I wasn’t going to steer the boat and, even if I did need a route laid out between obstacles, I could always create it on the day of the trip. All this data could easily be stored in the app. For now, all I really wanted to know was the general planned route and I figured that would show up well enough once the waypoints had been entered.

I did that this morning while I had my coffee and breakfast. It took quite a while. There were 51 overnight stops on the plan — some planned for more than one night — and they had to be located and created individually. I quickly learned to use Aqua Map’s search feature to find one point after another and create the waypoint. I named them with the 4-digit planned date (which I already knew was no longer accurate because we planned a later departure from New York) and the stop name. So the first waypoint I created was 0805 Liberty Landing for August 5 Liberty Landing Marina.

I only had one problem and that was when putting in the waypoints for Liverpool and Onodaga (in New York on the Canal). It seemed to me that they were the same place; I’m still waiting for Capt Paul to get back to me on my query.

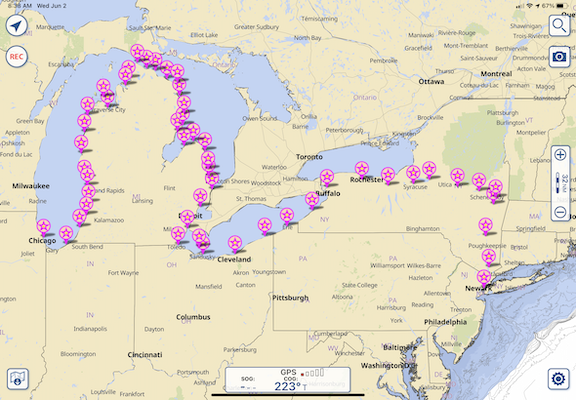
Once I zoomed out, the route became clear. While it looks like we’re boating across dry land as we cross New York, it also clearly shows which side of each of the Great Lakes we’ll be cruising along and the fact that points seem closer together on the Lakes than in the Canal.

IMG 0081
Here’s the big picture look at our original planned route.

Of course, Capt Paul and his crew will be doing more than this. He’s starting in Portland, ME and finishing up in Stuart, FL. What I did here represents a fraction of his cruise. But since I’m not going to be on board for anything beyond this, I didn’t bother plotting it.

Keep in mind that this is the general plan — a starting point for knowing where we’re going and how long it will take. I seriously doubt we’ll follow this to the letter. Capt Paul is already making changes to overnight stops along the way so we can enjoy a dinner at the Culinary Institute of America in Hyde Park after leaving New York City. I’ll be making an updated version of the route as we travel.

I’m also starting to consider turning the breadcrumbs subscription back on for my ancient Spot Messenger — if I can find it — so friends and family members can track me in real time. It might be worth it if I can get a pay-as-you-go monthly subscription and buy those lithium batteries it sucks down in bulk.

Snowbirding 2017: About the Campsites

And how I find them.

Adventure Truck
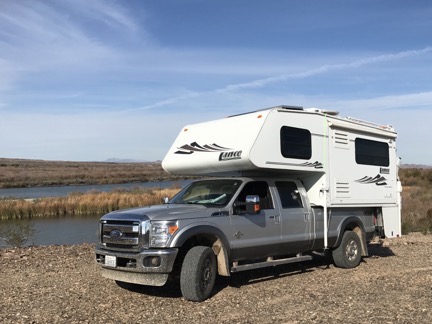
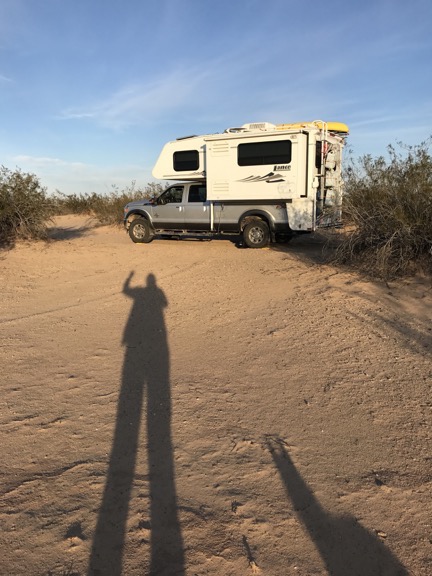
Adventure Truck and the Turtleback off road near Cibola Lake on the Colorado River.

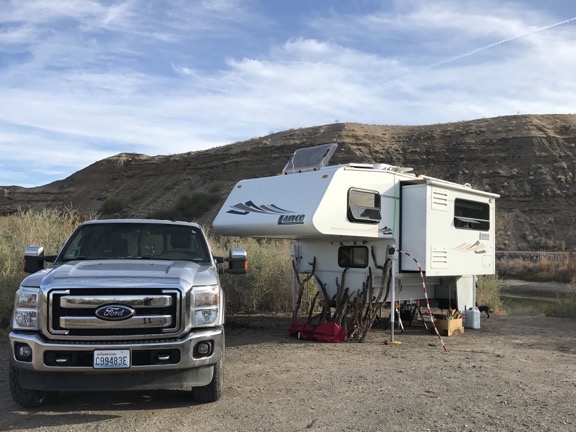
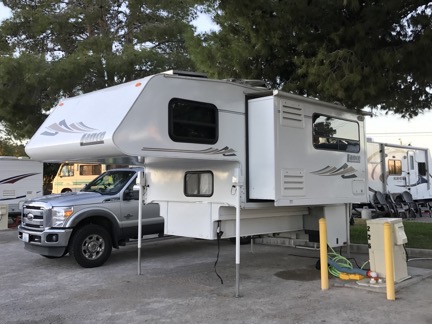
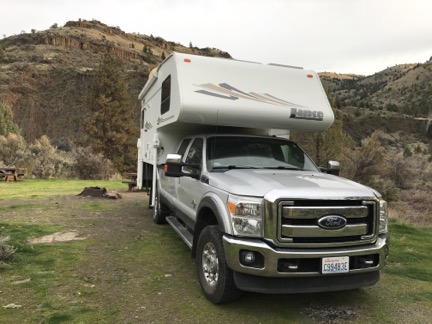
I’ve been on the road since the day before Thanksgiving — an early start to my annual snowbird migration to points south. Other than a little over a month spent at a friend’s guest house in Wickenburg, AZ and three days spent in another friend’s guest house in Phoenix, I’m been camping out in my truck camper, the Turtleback. It’s a fully-contained RV with a queen size bed, refrigerator, stove, convection microwave, sink, and bathroom. It can carry 14 gallons of propane, 40 gallons of fresh water, and a total of 60 gallons of wastewater (in two tanks, black and gray). There’s a propane furnace for cold nights and an AC air conditioner for hot days. The two batteries have plenty of juice for overnight stays, are charged by a solar panel during the day, and can be supplemented by an onboard propane generator with the flick of a switch. With its dinette and refrigerator on a slide out, it has plenty of room for one (or two who like each other a whole lot). Best of all, it can go just about anywhere my truck can go and since my truck is a 1-ton 4WD diesel with high clearance, it can go pretty much anywhere it wants to go.

This ain’t no KOA parking lot rig.

Now that I’m back on the road again after my Wickenburg stay, I’ve been sharing photos of my campsites with friends on Twitter and Facebook. The other day one of them asked how I find my campsites. I thought that might make a good blog post.

What I look for

First let me start by explaining what I look for in a campsite.

I want something quiet, private, and safe. I don’t like to listen to generators and I don’t like to close my blinds.

I like a view, but don’t need one. I love camping near moving water or a body of water that’s smooth and reflects the sky.

I must have relatively level ground, although I do have leveling blocks to make minor adjustments if a site has a slope to it. (The camper does not need to be perfectly level.)

I also want something free or cheap or at least worth what I’m paying for it. So far, of the 23 days I’ve spent camping, I’ve only paid for 5 nights. Prices for those campsites — one state park campground, two BLM campgrounds, and two nights at a Las Vegas campground (yes, they have them) — ranged from $5 to $23 per night.

Colorado River
I spent about 10 nights at this free BLM campsite along the Colorado River south of Ehrenberg with some friends. We were on a peninsula and surrounded by water, so I got some fishing and paddling in while I was there.

Because I’m self-contained, I don’t need any hookups or even access to water or a dump station. (This, by the way, is often called “dry camping.”) Picnic tables are nice to have, but I don’t need a fire pit because I don’t usually have a campfire when I’m traveling alone and I have a portable BBQ grill if I want to grill something up. Although these things are nice for long-term stays, they usually come with neighbors so I lose any possibility of quiet or privacy. Those are actually more important to me than the convenience of being hooked up to utilities.

Las Vegas Camping
I spent two nights at a Las Vegas campground so I could take in two shows. At $23/night, it was the most expensive overnight stay, but it had clean, hot, private showers.

I’m not opposed to staying in a regular campground with a full hookup once in a while. It’s a good opportunity to dump my tanks, take a long hot shower, top off the charge on my batteries (if needed), and refill my fresh water tank. But as I recently learned after 10 days of dry camping south of Ehrenberg, my black water tank can hold at least 10 days of waste and I don’t use much fresh water. (It probably would have been a perfect stay if it weren’t for battery issues that were resolved when I left by simply replacing two bad batteries.) But the parking lot atmosphere of most RV parks is a real turn off to me and it irks the hell out of me to pay $30, $40, or even $50 to spend a night there.

Where I look

First, I’ve learned over time where the kind of campsites I want can be found.

When Free isn’t Free
Keep in mind that some areas — including the Icicle Creek area I discuss here — require an access pass for parking. I buy my passes annually and keep them in my truck for hiking and camping, which I do three seasons out of the year. It’s worth it to me and I like supporting the park system.

Public land, including National Forest (NF) and Bureau of Land Management (BLM) and sometimes even State Forest (SF) land almost always has some free “distributed” camping. Distributed camping is camping allowed off forest or desert roads in established campsites that are not necessarily in campgrounds. For example, a drive up Icicle Creek in the Leavenworth, WA, area will take you into National Forest with several established campgrounds. Those campgrounds have level parking space, picnic tables, fire rings, and access to toilets and sometimes even water and you’ll pay a fee to use them. But off the main road are side roads with campsites scattered here and there. Those campsites are usually free.

Did you know that you can camp in the NF just outside Grand Canyon National Park for free? And if you know where to look, you can even find back roads into the park that can help you avoid entrance lines? It’s like camping near your own private entrance to the park.

Near John Day
My Thanksgiving dinner campsite on a tributary creek to the John Day River in Oregon.

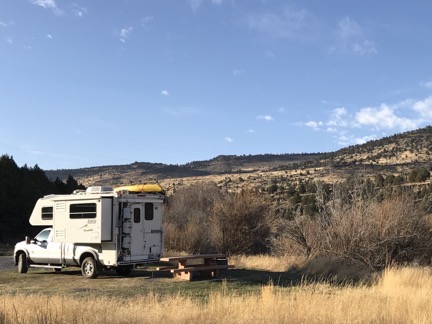
Even the campgrounds in NF, BLM, and SF areas can be quite a bargain. On Thanksgiving night, for example, I had an entire campground on a creek in Oregon to myself. My back door looked out over the creek, it was dead quiet and completely private, and I had a picnic table and fire ring if I wanted to use them. There was even a very clean pit toilet a 250 feet from my site. All for $5. I can’t complain, can I?

State and county park campgrounds can also be nice, although they can be spendy and are usually crowded on weekends. Washington state campgrounds can be outrageously priced so I generally avoid them unless they have features I can’t get elsewhere.

How I find them

This is where experience is a good teacher. The more I look for and find sites, the better I become at doing it. And getting a feel for an area is also extremely helpful.

I use a few online tools to get started. I start with Google Maps to get a general feel for the area I want to spend the night. What’s there? Towns? Parks? Points of interest? NFs appear on Google Maps; when I get the name of a NF, I can Google it and get details, including detailed maps that show parking areas and forest roads.

I can also go to the BLM website and search its maps for nearby BLM land. Then I can get details about possible camping areas or campgrounds.

At Walker Lake
I needed a place to stay near Hawthorne, NV, where I planned to meet up with a friend of a friend. No problem: free camping on the lake on BLM land. Too bad the weather was so stormy!

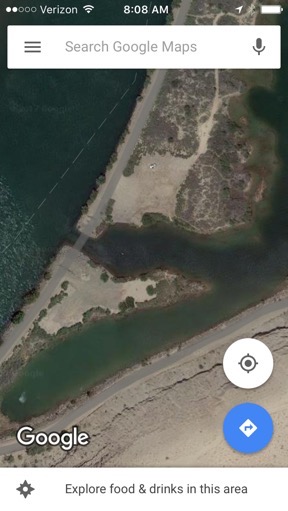
Once I know for sure that camping is allowed in an area, I can use Google’s satellite view to get a look at potential sites. Keep in mind that map view isn’t always accurate — for example, Google maps shows a through road along the levee where we camped in early January; in reality, there’s an inlet cut through the road that clearly shows in satellite view. Satellite view will also show clearings in forested areas, side roads, and even fire pits that indicate an established campsite.

Map View Satellite View
In map view, it looks like the road crosses right over inlet (left) but satellite view tells the real story (right). We camped in the clearing just to the east of where the north side road ends.

Oregon Camping
I had a streamside campsite in central Oregon. There were about two dozen deer roaming the campground when I arrived late in the afternoon. Only five of the 30 or so sites were occupied.

Another somewhat obvious trick is to simply ask around. For example, when I was near Burns in Oregon looking for a place to stay on my way south, I saw some BLM land that showed a campground. It was pretty remote and it was late in the day; I worried that it might not be suitable for me and then I’d be stuck driving at night, which I hate to do. I Googled BLM and found a BLM field office. (The same one that was in the news a lot last year.) I was close enough to drop by and chat with a ranger. He assured me that the campground was open and would accommodate my rig. I made the hour-long drive south and found what might have been the nicest campground so far. I picked a site along the creek and paid only $8/night.

Cibola
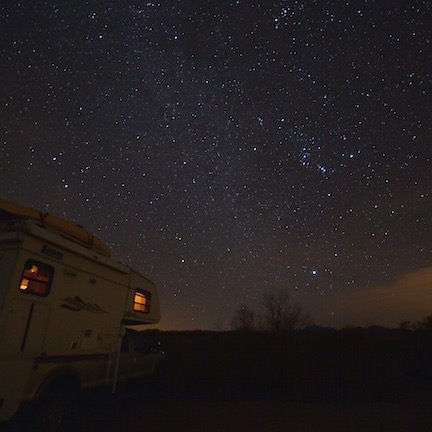
A bonus to this campsite along the Colorado River just outside of the Cibola Wildlife Refuge was the incredibly dark night sky. I got to practice my astrophotography skills not long after sunset.

I also ask friends. The campsites I stayed in last year and this year south of Ehrenberg on the Colorado River were sites my friends knew well, having camped there for many years. My friend Janet showed me other sites. I found still more just wandering around on my own, like a campsite father down the river near a wildlife refuge.

Near the Hot Spring
Greetings from somewhere south of Holtville, CA!

I found the site I was in the last night before my side trip to San Diego (where I am now) by a combination of methods. A friend told me about the hot springs along I-8, although he was pretty sketchy about the name and location. Google maps found the place and directed me to it. A review on Google told me it was BLM with camping available and the reviews were pretty good. The campground host at the long-term (i.e., fee) camping area directed me to free 14-day limit camping about 2 miles south of the hot spring. I drove in, found a level spot, and parked for the night. Only two cars drove past during the 16 or so hours I was there so it was plenty quiet. I got a great night’s sleep — with the bonus of a good hot tub soak in the morning before I hit the road.

I’ll leave San Diego later today and head back east toward Arizona. I’ll spend a night or two in Borrego Springs, following up leads for free campsites with good hiking on BLM and NF land. Then the plan is a side trip to the Salton Sea where I should be able to find a site in the state park there. Then back to Quartzsite for a few days; there’s plenty of free camping out in the desert. After that, who knows? I’m making it up as I go along and only tentatively plan things out a week or so in advance.

I love the flexibility I have on this trip with my smaller rig. I also really love the freedom to make things up as I go along, without having to get approval from (or listen to complaints from) a travel companion. So far, most of my sites have been better than I expected and, as you can imagine, I’m very pleased about that.

I do admit that things can get a bit stressful late in the day when I still don’t know where I’m going to park for the night. But there’s aways plan B: a truck stop or Walmart parking lot. (Fortunately, I haven’t had to resort to either one so far on this trip.) Or a KOA.

Do you have any campsite tips you’d like to share with readers? Please do use the comments link or form to let us know. I’d certainly love to get some new ideas. You can never know too much.