A quick summary of where the current images were taken and who I was with.
You may not realize it, but I shot all of the photos that appear in the header on this site. There are currently more than 90 of them and they’re set up to appear randomly. Each time you visit this site or click a link to another page here, the image up top should change.
I noticed just the other day that although all images were shot within the past 10 years, the vast majority were shot when I was alone. That made me realize how much I traveled by myself, even when I was married, and how the places and things I saw were beautiful or interesting enough to capture an image of.
Anyway, here are the images, with summaries.
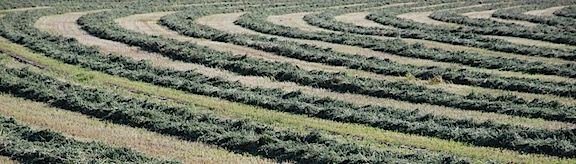
Alfalfa

This was an alfalfa field near where I spent my summer in Quincy, WA. I think I shot this in 2008. Alone.
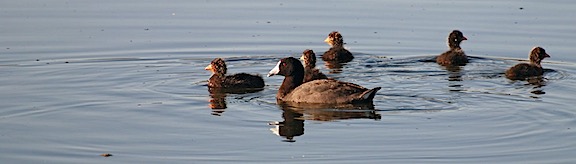
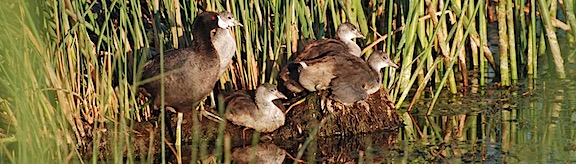
American Coot Family 1 & 2
I shot these two images at Quincy Lakes in Quincy, WA in 2008. Alone.
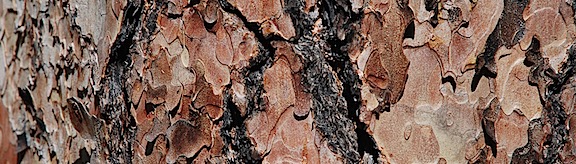
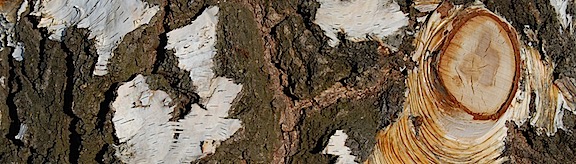
Bark
I like photos that show texture. These close up photos of bark were shot at Quincy, WA in 2008. Alone.
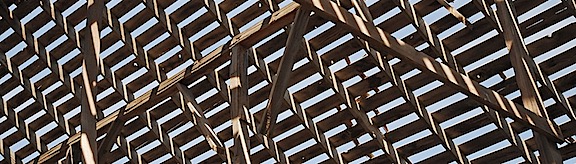
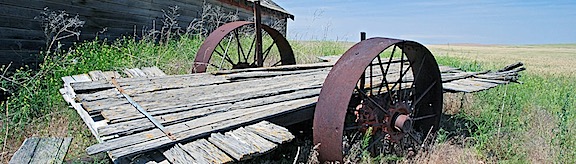
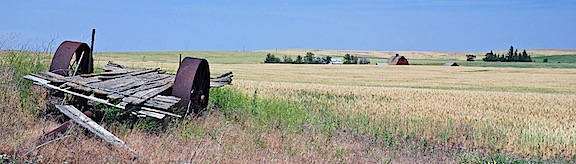
Barn Roof, Wagon, and Waterville Farmland
These three images were shot on the Waterville Plateau near Douglas, WA, probably in 2009. I was with my wasband.
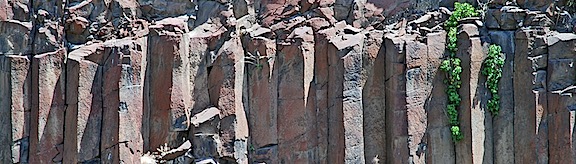
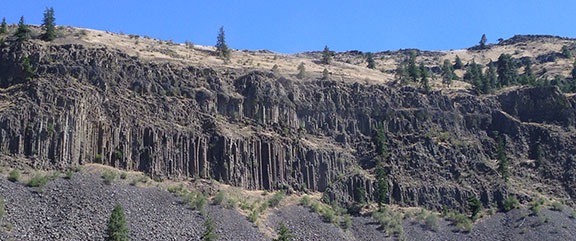
Basalt Cliffs
I’m pretty sure this photo was shot while repositioning my RV from Washington to Arizona by way of Glacier National Park with my wasband — one of the last “vacations” we had together — in 2009. I think it’s at Palouse Falls.
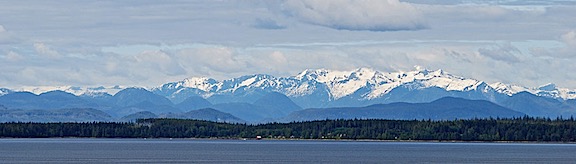
BC Mountains Pano
This was shot from a cruise ship on an Alaska Cruise with my wasband in 2007. Our last day on board took us between Vancouver Island and the mainland.
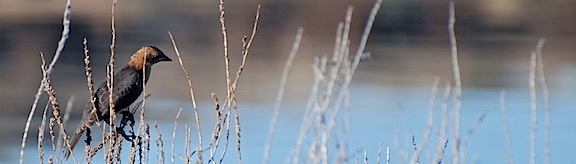
BHCB
This was shot at Quincy Lakes in 2008 or 2009. I assume BHCB is an abbreviation for the type of bird. Alone.
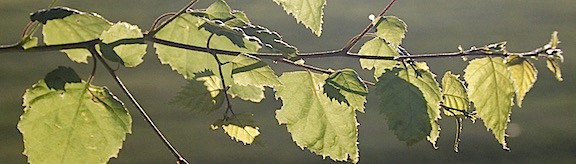
Birch Leaves
I liked the way the sun shined through these leaves in the late afternoon. Shot at Quincy near the golf course in 2008. Alone.
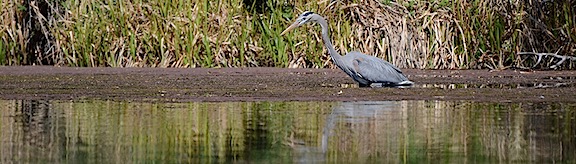
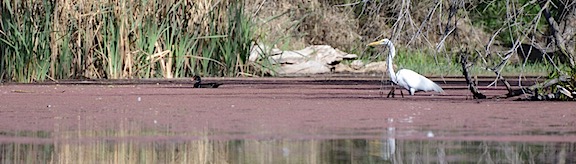
Blue Heron & White Heron
I was kayaking with my dog at Lake Solano in Central California in 2014 when I shot these photos of herons.
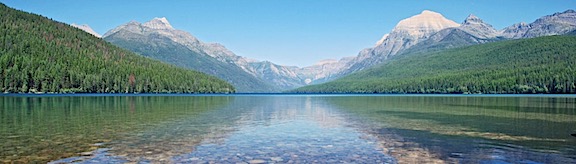
Bowman Lake
This was shot at Glacier National Park in 2009 while traveling from Washington to Arizona with my wasband.
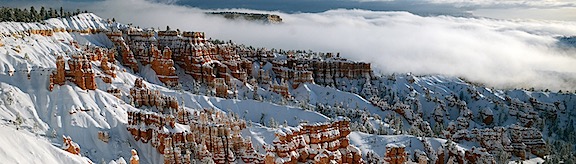
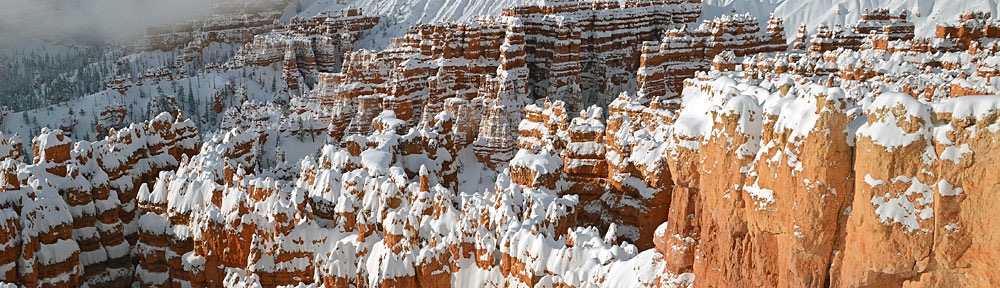
Bryce and Bryce Dawn
These two photos were shot at Bryce Canyon in 2011. I’d gone there with a client in January on a photo flight for this 360 interactive panorama: Bryce Canyon in Winter, Utah, USA.
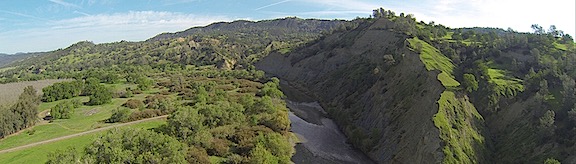
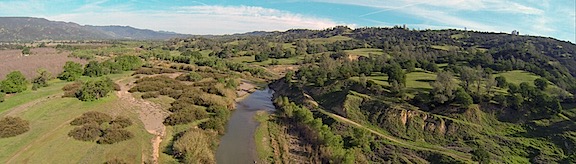
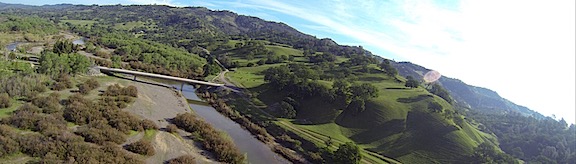
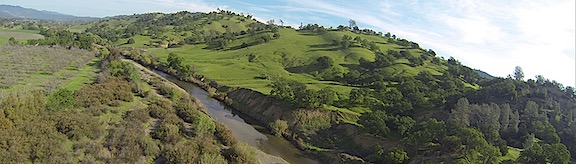
Cache Creek
These four images of Cache Creek were taken from my helicopter’s nosecam on an early morning flight up Cache Creek in Central California in 2014. I was alone.
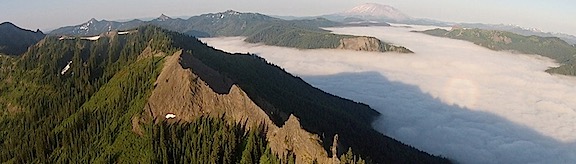
Cascades
This image of a ridge and cloud-filled valleys was taken from my helicopter’s nosecam on a flight between Wenatchee, WA and Hillsboro, OR in 2012. I blogged about the flight here and shared video from the flight here. It’s notable not only for the perfect weather and amazing scenery, but because it was my dog Penny’s first helicopter flight — 90 minutes long! And yes, that is Mt. St. Helens in the background.
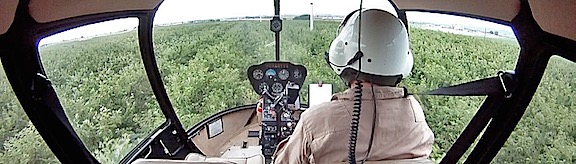
Cherry Drying Cockpit
This is a shot from a GoPro camera mounted in the back of my helicopter during a cherry drying flight. It was probably taken in 2011.
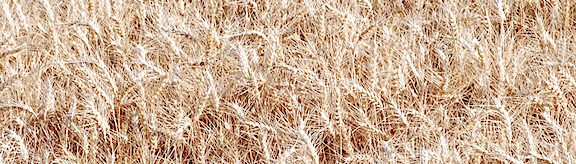
Close Up Wheat
This closeup of wheat growing in a field in Quincy, WA was shot in 2009. I was alone.
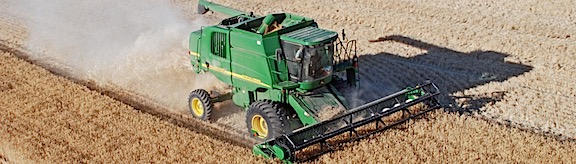
Combine
This aerial shot of a wheat combine at harvest on the Waterville Plateau in North Central Washington was shot in 2011 during a flight between Wenatchee and Coeur d’Alene, ID. My friend Jim was flying his helicopter; I was on board with a camera.
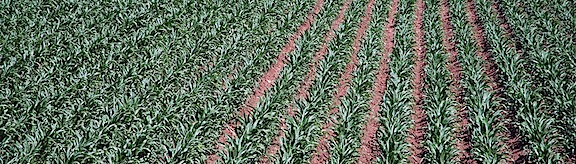
Corn
I like patterns. This field of young corn plants in Quincy, WA was capture in 2009. I was alone.
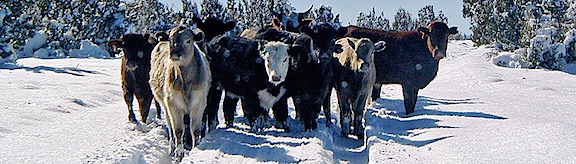
Cows in the Road
I was on my way up to my old Howard Mesa, AZ place one bright winter day when I came upon these cows following tire tracks in the road. When I approached, they just stopped and stared. I took a photo before continuing, herding them along with my Jeep. I can’t be sure of the date, but I expect it was around 2003 or 2004. I was probably with my friend Jeremy.
Cracked Mud
I shot this alongside the road to Alstrom Point on the northwest end of Lake Powell in Utah. It was probably shot in 2008. I was alone.
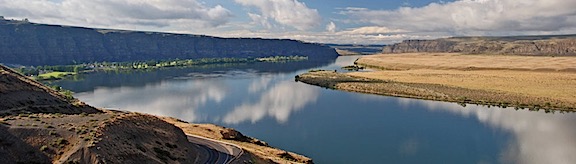
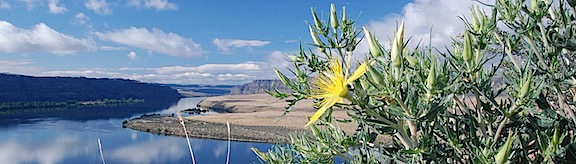
Crescent Bar View, Yellow Flowers
I shot these photo of Crescent Bar in Quincy, WA in 2009 not long after drying a cherry orchard down by the river there. I was alone.
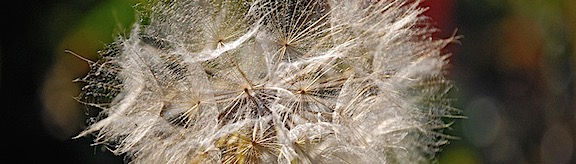
Dandelion
I shot this photo of a dandelion seed puff in Quincy, WA in 2008. I was alone.
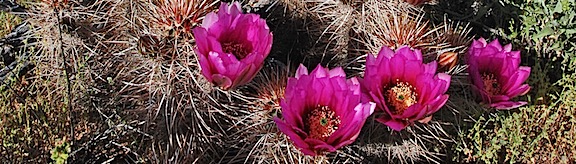
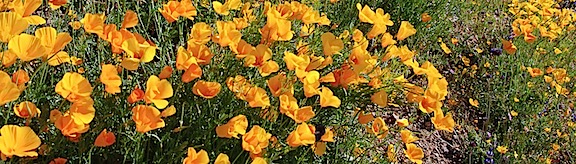
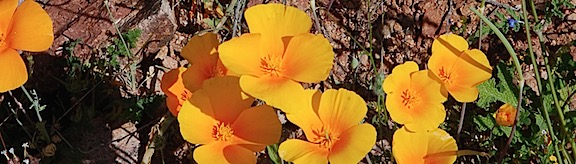
Desert Still Life & Desert Wildflowers
I shot these photo of hedgehog cacti blooms and California poppies near Wickenburg, AZ between 2009 and 2011. It was probably on one or two Jeep outings and I was probably with either my wasband or my friend Janet.
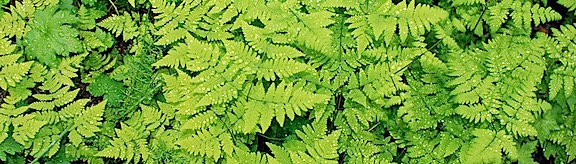
Fern
Patterns and textures again. This was shot in Alaska sometime during a cruise with my wasband in 2007.
Float Plane
I shot this image of a float plane taking off at an Alaska port while on a cruise with my wasband in 2007. It was shot from the balcony of our stateroom.
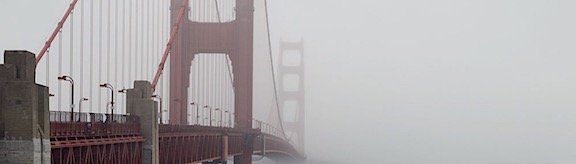
Golden Gate Bridge
This image of the Golden Gate Bridge was shot during a trip to San Francisco in 2011. Not sure if I was alone — isn’t that odd? — but I was probably there for a Macworld Expo speaking gig.
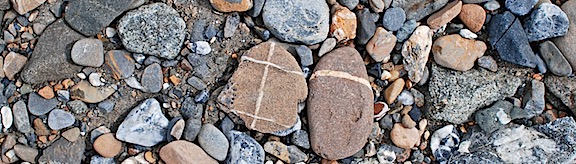
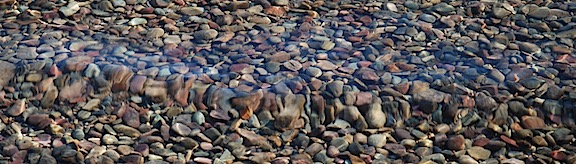
Glacial River Rocks
I shot this closeup of rocks in a river bed while on a trip to Denali National Park in 2007 with my wasband.
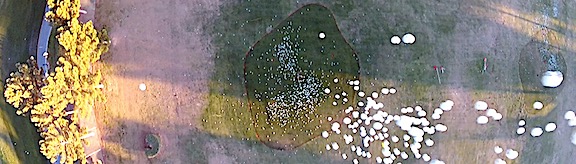
Golf Balls
Attach a GoPro to the bottom of a helicopter with the lens pointing down. Then hover over a golf course green and drop hundreds of golf balls. This is what it might look like. Shot in late 2011 or early 2012. My client was dropping the balls.
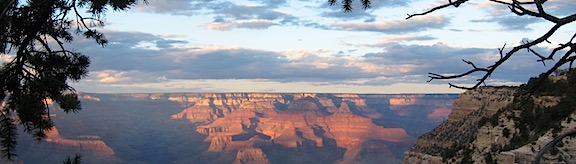
Grand Canyon Sunset
I’ve been to the Grand Canyon countless times so I don’t know exactly when this was taken or whether I was alone. I know it was shot before the summer of 2011.
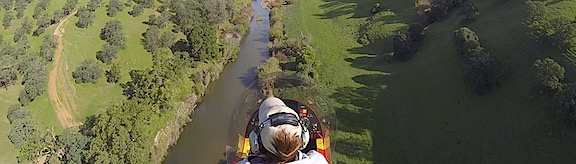
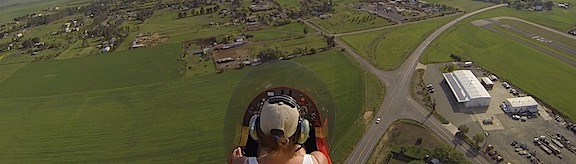
Gyro Cache Creek & Gyro Pattern
I learned how to fly a gyroplane in the spring of 2014. These two shots were made with a GoPro mounted on the mast. In the first shot, I’m flying up Cache Creek; in the second, I’m doing a traffic pattern at Woodland Airport. Both were shot in Central California.
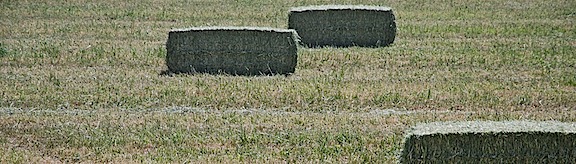
Hay Bales
I’m pretty sure this was shot on the road between Upper Moses Coulee and Waterville in North Central Washington in 2009. I was alone.
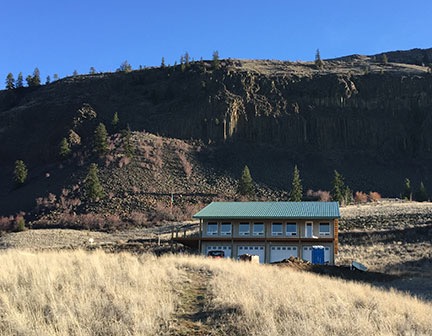
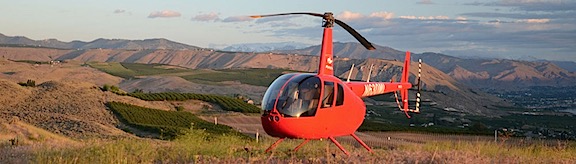
Helicopter
This is a photo of my helicopter right after sunrise parked out near my new home in Malaga, WA. I shot this in 2014; I was alone.
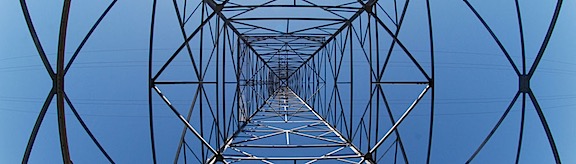
High Tension
This was shot in 2008 near the Chief Joseph Dam near Bridgeport, WA. I was on a daytrip with my wasband.
Hopi House
Another trip to the Grand Canyon. I suspect I was alone when I shot this one, possibly on a day trip by helicopter with clients from Phoenix. Sometime between 2009 and 2011.
Houses
Here’s another straight down image shot with a GoPro from my helicopter. This was Peoria, AZ in 2011 or 2012. I was alone.
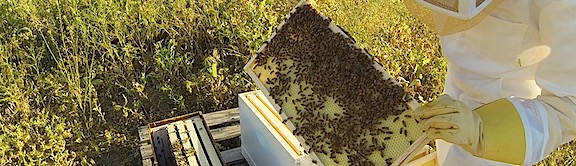
Inspecting Bees

I set up a GoPro on a tripod to record a beehive inspection in 2013. That’s me in the picture; I was alone.
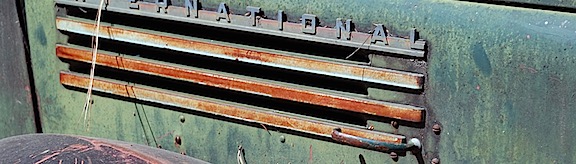
International
This is a closeup of an old International truck parked outside the bakery at Stehekin, WA. I was there with my wasband and another couple on a helicopter trip in 2011.
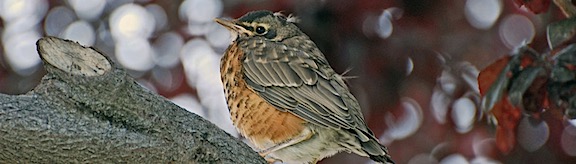
Juvenile Robin
Shot in 2008 at Quincy, WA. I was alone.
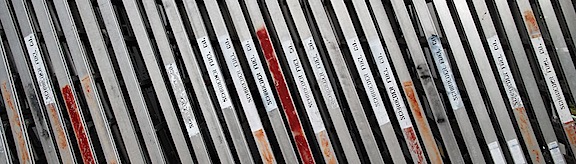
Ladders, Side
Patterns again. These are orchard ladders neatly stacked at an Orchard in Quincy, WA. Shot in 2008.
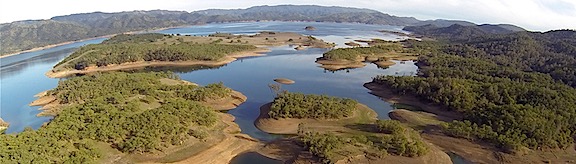
Lake Berryessa
An aerial view of Lake Berryessa in Central California, shot with my helicopter’s nosecam in 2014. I was alone.
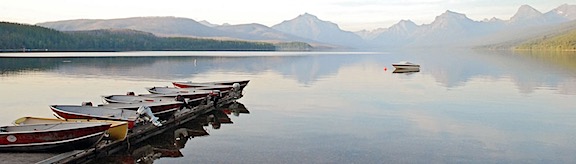
Lake McDonald Sunset
This was shot on a trip to Glacier National Park with my wasband in 2009.
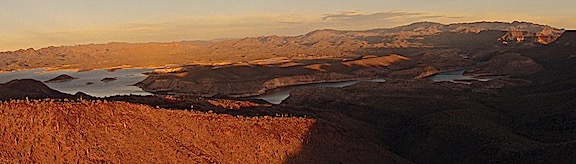
Lake Pleasant
Another nosecam image from my helicopter. This is a dawn flight over Lake Pleasant near Phoenix, AZ. I was alone.
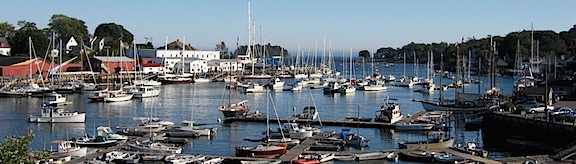
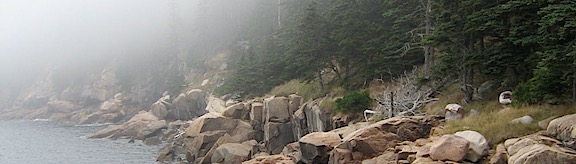
Maine Coastal Town & Main Fog
I shot these during a trip to Maine to visit some former friends with my wasband back in 2008 or 2009.
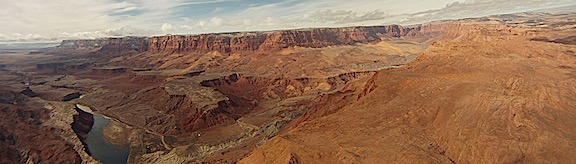
Marble Canyon
Another nosecam image from my helicopter. I’m pretty sure I shot this one on my way back from a Bryce Canyon photo shoot with a client in 2011.
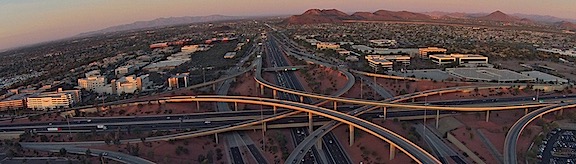
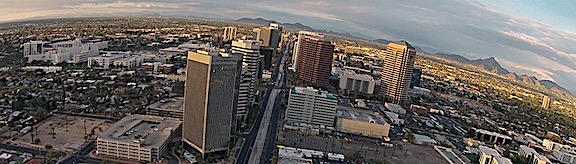
Mini-Stack
An aerial view of the so-called “mini-stack” of at I-17 and Route 101 in north Phoenix, AZ. Probably shot in 2011 or 2012.
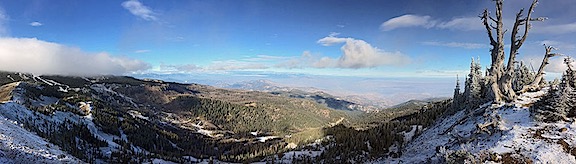
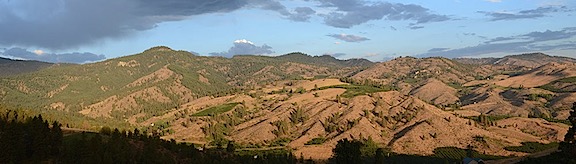
Mission Ridge Pano
I shot this photo from Wenatchee Mountain near Wenatchee, WA during a jeep ride to Mission Ridge with my friend Don in 2014. What an amazing day!
Monument Valley
I’ve flown over Monument Valley dozens of times. Once in a while, there’s a camera on the helicopter’s nose. This was probably shot in 2011. I was either alone or with aerial photo clients.
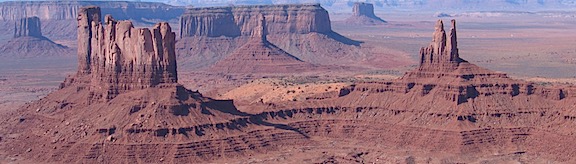
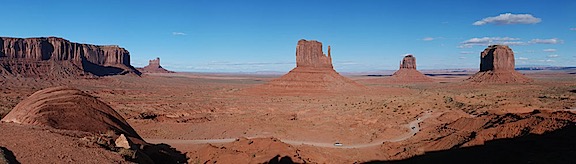
Monument Valley Wide
I used to do multi-day excursions by helicopter to Arizona destinations that included Monument Valley. While my clients took tours, I’d explore on my own. This is Monument Valley from the overlook, shot in 2010 or 2011.
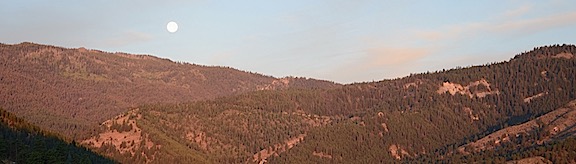
Moonset Sunrise
I used to camp out at a friend’s place overlooking Squilchuck Valley near Wenatchee, WA. This was one of the early morning views from my doorstep. I was alone.
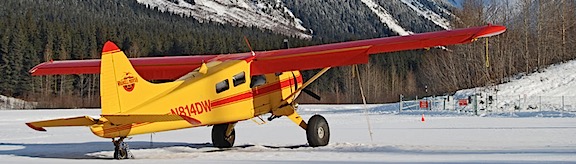
North to the Future
I shot this in Girdwood, AK in 2008. I’d gone up there alone for a job interview. I got an offer but turned it down. Beautiful place.
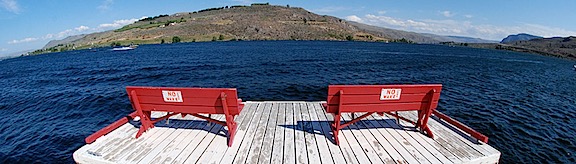
No Wake
I shot this with my 10.5mm fisheye lens at Lake Pateros, WA in 2008. I was with my wasband.
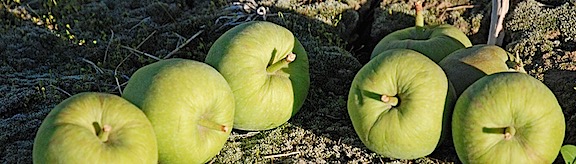
Orchard Still Life
These are apples culled from the trees in Quincy, WA. Shot in 2008; I was alone.
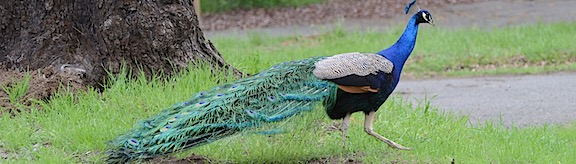
Peacock
This is one of the dozens of peacocks strolling around at the Lake Solano campground in central California. I shot this in 2014; I was alone.
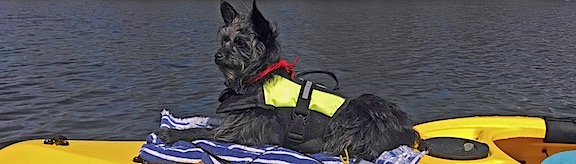
Penny Kayak
This is one of the few images I didn’t shoot. I was on a kayak trip in the American River near Sacramento with a Meetup group and one of the other members shot this and sent it to me.
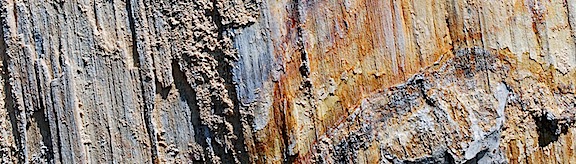
Petrified Wood
I’m not sure, but I think this was shot in Vantage, WA in 2008 or 2009. I was probably alone.
Phoenix
Another nosecam image, this time of downtown Phoenix. Shot in 2011 or early 2012; I was likely on a tour with passengers.
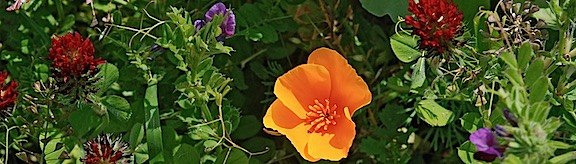
Poppies and Chicory
Another desert jeep trip near Wickenburg, AZ. I could have been alone, with my wasband, or with my friend Janet.
Poppies Plus
This wildflower closeup was shot on a trip to the Seattle area, possibly in 2007 with my wasband and his cousin.
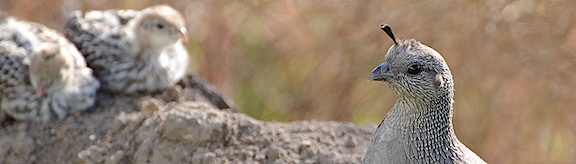
Quail Mom
A Gambols quail hen and her chicks, shot from my doorstep in Wenatchee Heights, WA in 2012. I was alone.
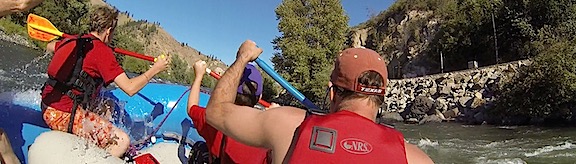
Rafting
Put a GoPro in a head mount, get in a raft, and head down the Wenatchee River and this is the result. I was rafting with a bunch of friends in 2013.
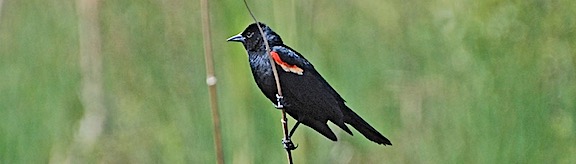
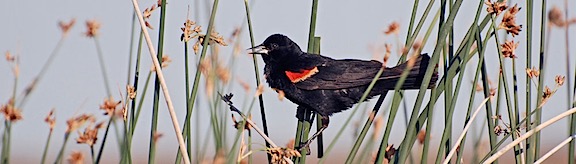
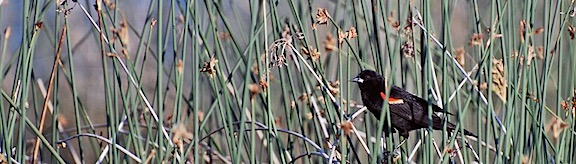
Red Wing Blackbird
I shot these at Quincy Lakes in Quincy, WA in 2008. I was alone.
Rocks Under Water
I’m pretty sure I shot this in 2009 at Glacier National Park on a trip with my wasband.
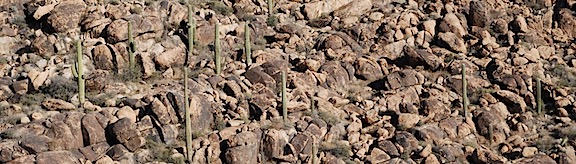
Saguaro Boulders
I shot this photo of saguaro cacti among sandstone boulders near Congress, AZ on a Jeep trip in 2009 or 2010. I was probably with my wasband.
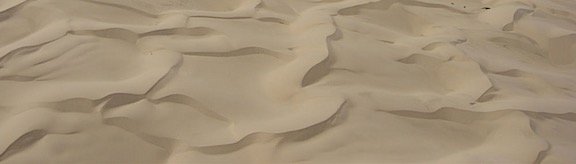
Sand Dunes
This is an aerial shot of the sand dunes west of Yuma, AZ. This was probably shot in 2008 on a flight to the San Diego area with my wasband.
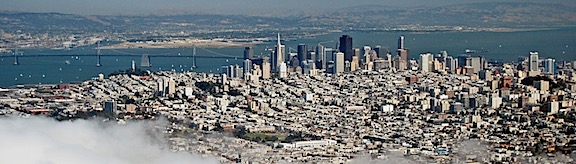
San Francisco
What a memorable flight! This was on a ferry flight from the Phoenix area to Seattle in 2008. Another pilot was flying my helicopter so I got to take photos. Low clouds over the coast forced us high over San Fransisco. Amazing views!
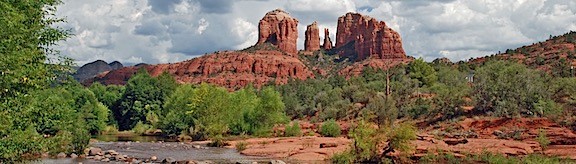
Sedona
The red rocks of Sedona at Oak Creek. Shot in 2010 or 2011 while on a multi-day excursion with passengers.
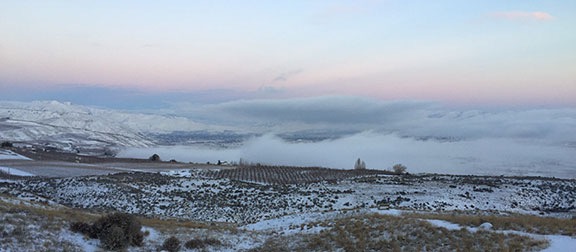
Squilchuck View
The view from where I spent several late summers at Wenatchee Heights. This was probably shot in 2012.
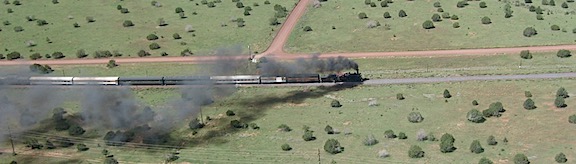
Steam Train
This is an aerial shot of the old Grand Canyon Railroad steam train. I used to buzz that train with my helicopter any time I saw it from the air. This was probably shot in 2007. I was alone.
Stucco Scroll
I shot this on a photo walk at the San Xavier Mission in Arizona with my wasband and a group of photographers.
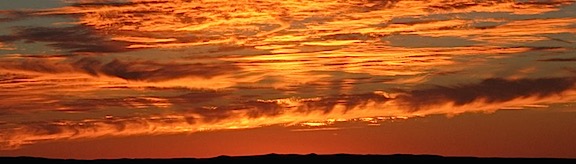
Sunset
I can’t be sure, but I think I shot this from Howard Mesa in 2006 or 2007.
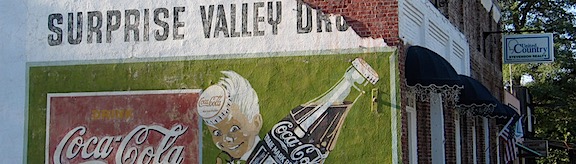
Surprise Valley Drugs
I shot this in California during my 2005 “midlife crisis road trip.” I was alone. It was one of the best vacations in my life.
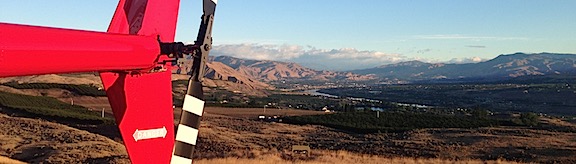
Helicopter Tail
An early morning shot of my helicopter parked out near my new home in Malaga, WA. Shot in 2014; I was alone.
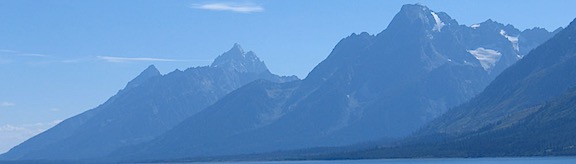
Tetons
Another shot from my 2005 “midlife crisis road trip.” This was at the Grand Tetons.
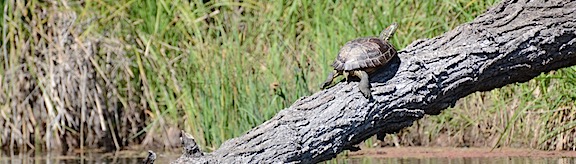
Turtle
Shot while I was kayaking with my dog at Lake Solano in 2014.
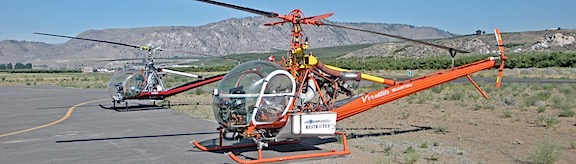
Two Hillers
I shot this at Brewster Airport in Brewster, WA on a day trip with my wasband in 2008.
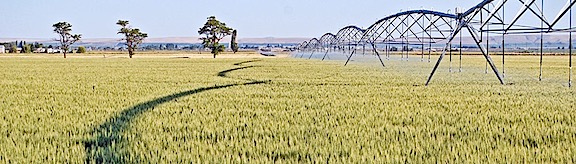
Wheat Irrigation
Textures and patterns. What’s not to love about them? Shot in Quincy, WA in 2008. I was alone.
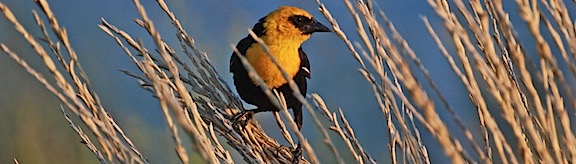
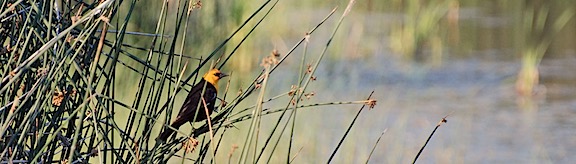
Yellow Headed Blackbird
I shot both of these photos at Quincy Lakes in Quincy, WA in 2008. I was alone.
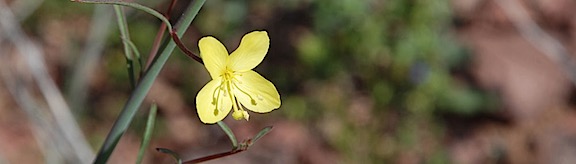
Yellow Flower
A yellow flower. Probably shot somewhere in Washington state in 2011 or 2012. I’m sure I was alone.
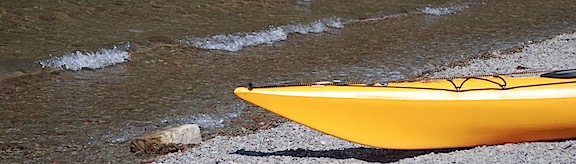
Yellow Kayak
Although my kayaks are yellow, this isn’t one of them. This was shot at Glacier National Park on a trip there with my wasband in 2009.