I’ve Got the Power!

Literally.*

Last week, I blogged about cleaning my hand-me-down temporary power box in preparation for rewiring it and installing it on my 10-acre lot in Malaga, WA. At the end of that post, I mentioned that I hoped my friend and I could have it in place later that day.

Well, I got what I hoped for. When my friend rolled up just minutes after publishing that post to this blog, he was eager to get started on the job. By the end of the day, the pole was in place.

Rewiring

Power Box After
Here’s what we started with.

The first job was clearing out the old wires to replace them with new ones. Not everything had to go. We had to remove the wires on the left side of the box and replace them with a new set that I’d bought the previous week. On the right side, we had to connect wires to the 30 amp breaker and run those wires down to an RV outlet that had to be positioned farther down the pole.

I backed my pickup down to where the pole was and we lifted it into the back of my truck with the business end on the tailgate. Then I moved the truck forward into the shade of the house under construction — now nearly finished — where I’m currently living. I fetched all the pieces I’d bought at Home Depot and the electrical supply shop the week before and got out some tools.

I think my friend was pretty surprised when he realized that I knew how to use tools. Apparently, a lot of women don’t. When he pointed out which wires needed to be removed, I grabbed the right screwdriver and got to work on it. After all, I was supposed to do all the wiring myself — that was a requirement of my permit. (In Chelan County, either the homeowner hires a licensed electrician to do all the work or does it all herself. The rule didn’t say anything about coaching from a knowledgable friend.)

I had most of the tools needed to get the job done. There were only two I didn’t have — and got the next time I was out: a good wire stripper and a hacksaw. The wire stripper was needed for obvious reasons — each new wire’s end had to be stripped before it could be fastened into place. The hacksaw was to cut the plastic conduit that also needed to be replaced.

Step-by-step we worked our way through the box. I learned about how the box was organized and what each wire did. It was surprisingly simple. And safe — it wasn’t hooked up to any power yet.

Then we were finished. It had taken less than an hour.

Planting the Pole

We closed up the tailgate, climbed into the truck, and headed out. I think my friend was more excited about getting the pole set up than I was. Don’t get me wrong — I was eager to get it set up. But when you consider that he had plenty of other things to do that day, it was really nice — and so refreshing! — to be with someone who was so focused on helping me get a job done. (That’s part of what real friends are all about.)

At my property, my friend was pleasantly surprised at the trench and hole I’d dug. After seeing me limp around on a bad foot for three weeks, I don’t think he had very high expectations. I think he’d come with the idea that he’d have to do some digging, despite the fact that I’d assured him that I’d dug the trench to specs. He later told me that out of everything I’d done so far on this project, digging that trench was the most impressive. (I have to agree. I surprised myself.)

Because he’s a man, though, he had to pick up a shovel and extend the trench a little in front of the transformer box. I’m not sure if he did it because he thought we needed the extra length or if he was trying to see for himself how difficult it was to dig. If the later, he discovered that it was quite easy to dig. After all, a middle-aged woman with a gimpy foot had done it.

I backed the truck up as close to the post hole as I could and we wrestled the pole out of the truck and into the hole. It was a bit of a struggle, mostly because of the conduit hanging loose with a 90° angle at the bottom and 10 feet of wire hanging out. But we finally got it into place. We threw some rocks into the hole and followed that up with some dirt. We realized that the fastener we’d brought to connect the grounding wire to the grounding rod wasn’t big enough. I’d have to come back and make that connection another time.

Power Pole Installed
My friend took this silly photo of me with the power pole and box installed.

The last step was putting in the two required supporting poles each in a different direction. We used the same poles my friend had used for his setup. The heads on the screws he’d used stripped immediately, but I had some long nails in my toolbox to get the job done.

My friend voiced some concern about the grounding rod being inside the hole. He seemed to think it needed to be driven in from the surrounding grade to make it more sturdy. But it was sturdy. If I could have pulled it out, I would have — just to drive it in elsewhere. It would have to wait. I could aways get another rod if I needed to.

Finished, my friend took a picture of me by the pole. Then we put away the shovel and other tools and celebrated by going out for a late Thai lunch in town.

I called the Chelan County PUD and told them the power pole was ready for inspection. I knew it would be at least 24 hours before the inspector came out.

Fastening the Grounding Wire

Later that day, while doing laundry at a local laundromat, I stopped at a hardware store to pick up the piece I’d need to connect the grounding wire to the rod. But rather than take care of it that day, I went out to dinner with another friend. We spent the evening back at the Mobile Mansion where we chatted and drank wine and I helped him fix a problem he was having with his GPS. (Once a techie, always a techie.)

The next day, I had a charter flight down to Othello and Pasco. I had to pick up my passengers at 8 AM sharp. Before leaving, however, I put the grounding rod connector piece and a screwdriver in my bag.
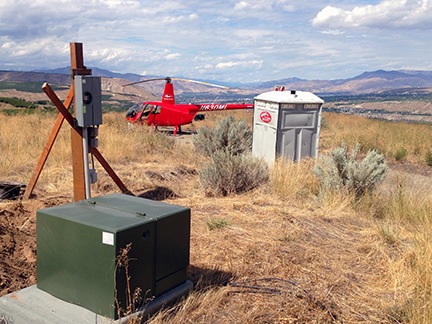
Helicopter Parking
Heck, why make the drive when I was only a few minutes away by air?

At about 1 PM, when the flight was done and I’d dropped off my passengers, I flew over to the property and landed at the end of the driveway. I shut down and took the connector and screwdriver over to the power pole.
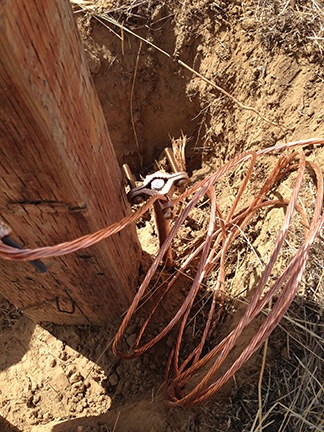
ConnectionI sure did drive that rod in close to the pole.

I ran the connector through the very long piece of copper wire and made the connection to the rod. My friend had told me I could bury the extra wire. Seemed like a shame to me, but I really didn’t care. All I wanted was to pass the inspection.

The Inspection

I was home for less than an hour when the phone rang. It was the inspector. He said he’d be out on the property by 3 PM.

Thinking that showing up in a helicopter would be a wee bit too cocky, I jumped into my Jeep and made the 30-minute drive from Wenatchee Heights to Malaga. I had to stop for gas, of course — why is it that my vehicles always need fuel when I’m in a hurry? But even though I arrived early, the inspector was already there, looking at my pole and the trench and the hole.

Penny and I hopped out of the Jeep and I extended my hand as I walked up to the inspector. “What do you think of my trench?” I asked proudly. “I dug it myself.”

We both laughed.

He did the inspection, pointing out the few minor things that were wrong with the setup. Because they were minor, however, he let the pole pass inspection. He put the official sticker on the box.

Another hurdle jumped.

I’ve Got the Power

That was on Tuesday. Part of the inspector’s job is to call the Chelan County PUD and arrange for them to hook up the power. I had no idea if I needed to be present, but I figured that they had my phone number and would call if they needed me.

The rest of the week rolled by. I got busy. (I always get busy.) I didn’t hear anything about the power pole.

On Saturday, I had a charter flight. I was taking a couple up to Tsillan Cellars in Chelan for dinner. I had to meet them at the airport at 4 PM. But it was a nice day and I felt like flying. So I fired up the helicopter and took it out for a spin in the Leavenworth area where some friends of mine were hiking in the mountains. One of them had texted me his general location with some landmarks. I thought it would be fun to try to spot them from the air. And I hooked up the GoPro to get some video while I was out. (More of that in another post.)

By 3 PM I was ready to head back to Wenatchee. I needed fuel and wanted to relax for a while before meeting my passengers. I figured I’d fly by my property to see whether I could tell if the power had been installed.
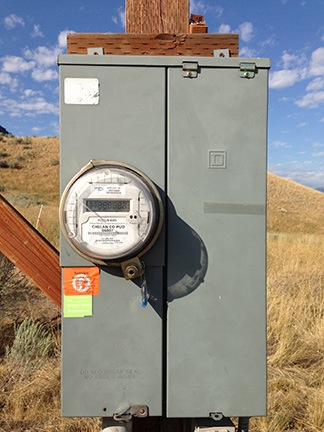
Meter on my Box
The meter on my power box confirmed that power was available at my lot.

I didn’t want to land there and shut down, but I did have to get close. I hovered near the transformer box. The wires I’d left loose were buried. As I flew away leaving a nasty cloud of dust (from the digging) behind me, I realized that I now had both water and power on the property.

I confirmed that the power worked just yesterday when I drove out to take a look. There was a meter on the box and it was running. I took a shovel and finished filling in the hole and ditch.

I was another step closer to my new home.

[*Note: Thanks to my old friend Steve for inspiring the title of this blog post.]
Closure

Unfinished business stirs my subconscious mind.

This morning I was awakened by my mother-in-law’s voice calling for help. I hurried to her. She was lying in the bed I occasionally shared with my ex-husband, her son, in our Wickenburg home, propped up on some pillows. She was talking on a speaker phone to her daughter, Suzie. She wanted me to tell Suzie something.

I never found out what. The whole thing was a dream. When I woke, I woke from that dream to find myself in my own bed in my current home 1200 miles away.

My mother-in-law, Julia, is dead. She died earlier this summer. No one in my ex-husband’s family had the common decency to tell me that the woman I’d known for 30 years had passed away. I found out through a mutual friend.

I know my husband lied to his mother about the end of our relationship. I know he painted me as an evil monster who ruined his life and abandoned him in Arizona. I know he told her that because that’s what he believes. It’s part of the delusions that drove him into the arms of the desperate old woman — his new mommy — who he now lives with. It’s part of the delusions that drove him to subject me to mental abuse, unreasonable demands, and harassment during our year-long divorce process. He believes this to be true so he tells his friends and family members.

Anyone with knowledge of the facts, however, knows better.

I wanted to say goodbye to Julia but wasn’t allowed to. When I sent her a birthday gift for her 90th birthday last September — a framed photograph of me and her son taken many years ago that I know she admired — I was accused by my ex-husband of “harassing his family members.” So I never contacted her again.

And then she died.

I tried to get some closure with a blog post written to her. But she’s dead. I don’t believe in heaven and hell so I don’t believe she knows what really happened or can read, from beyond the grave, what I wrote. She never knew the truth.

Why does it matter to me? I’m trying to understand that. It could be because of how I value the truth.

I know how he lied to her and “bent the truth” for the last five or more years of her life. To protect her, he’d say. I know that he did the same to me — although I didn’t realize the extent of his lies until much later. I don’t understand how a person could lie to someone he claims to love. I don’t understand how a relationship can be expected to survive when its fabric is punched with holes created by untruths.

But then again, our relationship didn’t survive. He saw to that by signing up for an online dating service only a week after I left for my summer job last year and moving in with the first woman who would sleep with him. Asking for a divorce came later.

I wonder if he remembers that chain of events as well as I do? Whether he was honest with any of his friends and family members about how he betrayed his life partner of 29 years?

I wonder how much he still lies and who he lies to.

But most of all, I wonder how many of those lies he believes. How far his delusions have taken him. Whether he wakes in the morning feeling the overwhelming hate he must have for me — nothing else could explain his actions over the past year or so — and how much that drives him.

But I’ll never know because I’ll never get a chance to ask. His mommy won’t let him talk to me.

And that’s a good thing. Clearly, the man I loved is dead and buried — killed as a result of a mental illness that drove him to madness and an odd form of suicide. The man who looks like him is a foul impostor I have no desire to hear from.

That’s my closure: knowing that that the man I loved is gone for good.

Kayaking the Columbia

Not quite as exciting as the title might make you think, but very pleasant.

I spent a few hours yesterday kayaking in the Columbia River near my home in the Wenatchee area of Washington.

I bought the kayak a few months ago and, in all honesty, have only taken it out a few times. It’s nothing special — a yellow Costco special nicely outfitted for one person on calm water. My first outing was in one of the Quincy lakes with a friend way back in May. Other brief outings followed. But then I got my little jet boat running and started taking that out instead.

A few weeks ago, while out on the jet boat salmon fishing with a friend in the mouth of the Wenatchee River, I noticed a number of people taking kayaks and paddle boards up the Wenatchee River. The spring flow was long over and it hadn’t rained hard enough lately for floodwaters to raise the flow. Indeed, we couldn’t get much farther upstream with the jet boat than the second bridge because of low water. Low water meant slower flowing water. Slow enough for people to take a leisurely paddle upstream.

That’s what gave me the idea to do the same.

Yesterday I headed out with that in mind. I had a five hour window before I had to be back at the helicopter for an afternoon charter flight. Just enough time for a paddle and a shower.

Washing the Kayak
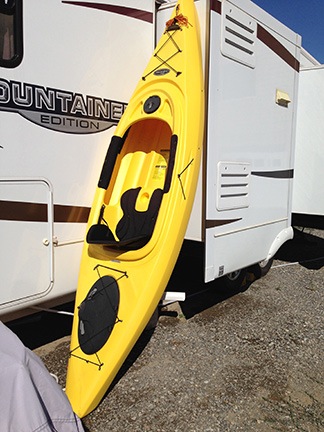
Washing the kayak is as easy as standing it up in the corner and hosing it out.

I started off by washing the kayak. It had been stored under my RV for over a month and I didn’t want to think of the creepy crawlies that might be in there. Better to just hose it out. So I propped it up against a corner of my RV, connected a spray nozzle to the outside shower, and gave it a good rinsing, letting the water drain through a normally plugged hole on one end. I let it dry while I packed a tote bag with a few things.

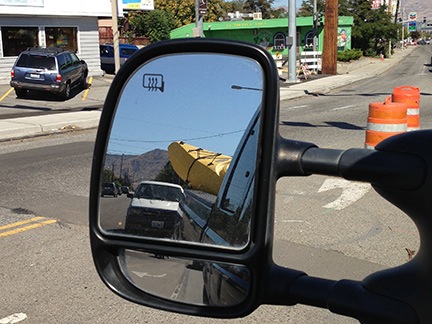
Mirror View
I can keep an eye on the kayak in my truck’s mirrors.

Loading the kayak into the back of my pickup isn’t difficult. I lift one end into the bed over the closed tailgate and push it as far forward in the truck as I can. Then I angle the body of the kayak diagonally across the bed. I secure it in place with a bungee cord attached to a corner tie-off hoop built into the truck. It doesn’t move more than an inch in either direction during the drive; I can watch it in the truck’s mirrors.

One of the things I absolutely love about this area of Washington is the sheer variety of outdoor activities available. The Columbia River is a source of many of these activities: boating, fishing, swimming. There’s even an 11-mile bike/hike/skate trail that goes down one side of the river, crosses a bridge, comes back along the other side, and crosses a second bridge to return to a starting point. Parking is free in the loop trail parking lots or any of the parks along the river in Wenatchee or East Wenatchee. There are three boat ramps within a 20-minute drive of my home — all free with plenty of trailer parking.

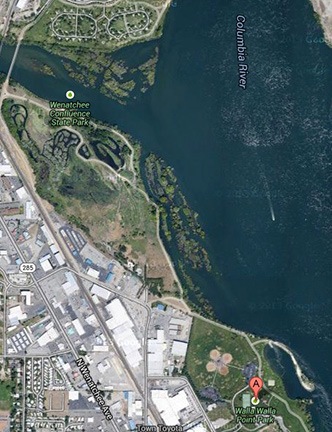
Where I Kayaked
The area where I kayaked on Sunday.

I decided to put in near the swimming beach at Walla Walla Point Park, which is about 15-20 minutes away from my home. The beach is protected from the river’s main flow by a sort of jetty with a path on it. You can see it in the lower-right corner of this satellite image. I chose this area because I could back the truck pretty close to the water and the little lagoon was a good, calm spot to launch.

I dragged the boat across the grass and down the beach to the water. I put Penny’s life jacket on her and stowed my life jacket and tote bag in the boat. Then I put Penny in the boat, pushed off a bit, and climbed in after her. A moment later, we were gliding across the lagoon. It was about 11 AM.

I could feel my arm muscles working hard right from the start — but not nearly as hard as they had to work when I exited the lagoon and got into the Columbia River’s main flow. There was some shallow water then and the river rushed over it. I had to paddle hard to get through it. I started to think that I’d never reach the mouth of the Wenatchee River about a mile or so to the north.

But then I got through it and into calmer water. I still had to paddle hard to stay ahead of the current, but it wasn’t a frantic paddling. I stayed close to shore and the water got calm. I might make it after all.

The satellite image above shows the river with the water at a higher level. Northwest of where I put in is an area that reminds me of the marshes in Newark, NJ. You know — where the NJ Turnpike goes past the Meadowlands? The difference here is that the water isn’t tidal. The little side inlets exist only as long as the river’s water level is deep enough. Although the image shows lots of watery passages between trees, on Sunday there was only one channel that went through to the mouth of the Wenatchee.

I know this because I found it. I didn’t have a map or satellite image. Instead, I just paddled close to shore, saw an opening in the trees, and decided to explore. What I found was a calm water passage surrounded by trees and water weeds and inhabited by ducks and herons. The water was glassy smooth and shallow — in some places barely deep enough to paddle over. There was the tiniest bit of current to convince me to keep moving forward, that water had to be coming in from somewhere.

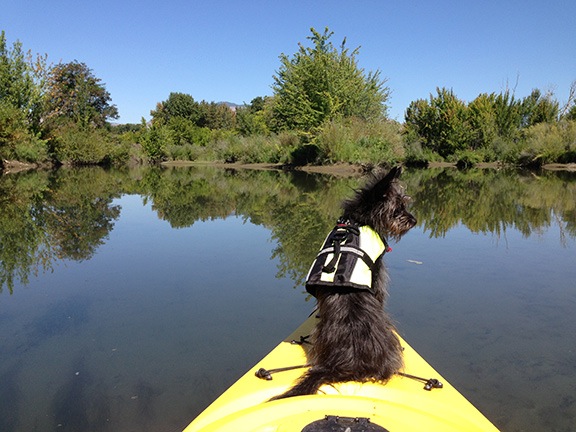
Penny on the Kayak
Penny rode on the forward deck as I paddled us through glassy smooth water.

It was sort of magical in there. Quiet and private, with the occasional sound of a motorboat out in the main channel of the river to remind you that you weren’t paddling the remote Amazon. Trees hanging over the narrow parts of the waterway gave us cooling shade every now and then. Bubbles and bits of debris on the water surface cast shadows on the sandy bottom, assuring me that the water was indeed moving in the opposite direction I was.

Near the end of the waterway, we met up with a man on an inflatable boat with oars. He was alone but talking to someone. At first, I thought it was me. But then when we got near him he laughed, held up his smartphone, and said that he was sharing a virtual float trip with friends in Georgia.

The world is getting smaller.

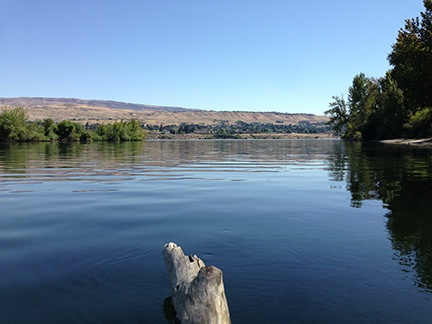
Parked on a Log
Parked up against a log, looked down the Wenatchee River and across the Columbia River to the far shore in East Wenatchee.

The waterway dumped us out at the mouth of the Wenatchee River. I turned left and started paddling up that river. There wasn’t much current, but there was more than there had been for the past 30 minutes. I paddled upstream on the south side, pausing when I reached a log jutting out of the water. I pulled in upstream from it and let the current take me downstream until the kayak was lodged against it. I rested there and tweeted a photo (as I so often do) and took in the calmness of the rivers around me.

How can anyone not like this area? It’s got the dry air of the desert but is full of water. It rains, but not too often. It gets hot, but not too hot. It gets cold but not too cold. And all around are beautiful mountains and forests and orchards and farms and rivers and lakes. Boating, fishing, hiking, motorcycling, biking, wine tasting. Beautiful sunrises and sunsets, magnificent thunderstorms, star-filled skies. Quiet, private places to live and work. A major city less than an hour away by air or three hours away by car. And people who are friendly and happy and youthful — even if they’re not exactly young anymore.

How did I live in Arizona for so long when I had this to tempt me for five consecutive summers?

(Well, I know the answer to that question but we won’t go there.)

Finished with my rest, I paddled across the Wenatchee River into one of the water channels on the opposite shore. I paddled around on that side down one channel and up another before finding a third to take me back out to the Wenatchee River again. Along the way we saw Canada geese, seagulls, and killdeer. Penny barked at the geese.

I crossed the Wenatchee River again and headed back into my quiet waterway for the return trip to the park. This time some kids were walking along one of the sandbars, catching fish in a cutoff milk jug while a man paddled a canoe. As I paddled past him, he said, “I see your dog is getting you come exercise.” I laughed and told him she was guiding me.

Back out in the main flow of the Columbia River, I let the current do some of the work for me. I had to paddle hard to get around the tip of the jetty and back into the swimming lagoon. There were lots of people there now, kids swimming in the designated area, dogs fetching balls in the water nearby. I paddled up to shore and we got out. I ran into a friend of mine and chatted for a while before dragging the kayak back to the truck.

By 2 PM, I was back home prepping for that afternoon’s flight. It had been another great day out.

Adventures in Cheese-Making

There’s a whole world to explore.

I started making homemade cheese in September 2013 and have been blogging about it periodically. If you’re interested in reading the other posts in this series, follow the Adventures in Cheese-Making tag. Keep in mind that the most recent posts always appear first on this blog.

I love cheese. I mean, who doesn’t?

I love just about any kind of cheese, but I especially love the soft mellow kind like bries. I like cheese that has a secret flavor you can taste only when you let it rise to room temperature before eating and eat it either alone or with a plain cracker. The hint of nuts or earthiness that lingers on your tongue after the cheese has been swallowed.

CheesemongerThere’s an excellent cheese shop not far from where I live: The Cheesemonger in Leavenworth. It — and the smoked meat house called Cured — is the only reason I go to that tourist town. I go early in the day, before the crowds arrive. I prefer taking my motorcycle, since there’s always motorcycle parking right outside Cured. I descend into the basement shop, make my way past the milling tourists nibbling on samples of cheddar and swiss, and find one of the many helpful counter people. Then I place my order, rattling off the names of the cheeses I like best: triple cream brie, morbier, butter cheese, and whatever blue-veined cheese behind the glass catches my eye. I whisper the secret password to get my local discount on checkout, leave a tip, and climb back out into the sunlight while the same milling tourists stand uncertain on how to proceed. In and out in a flash.
If you’re in the area and like cheese — again, who doesn’t? — I highly recommend a visit to this shop.

Anyway, my love of cheese got me interested in making cheese. This interest was fed by my attendance at a cheese-making class I took in early August. Yes, special ingredients and equipment was needed, but it wasn’t difficult to do. And it might be interesting. And heck — the end product was cheese.

It’s not as if this was brand new to me, either. Last autumn, I made yogurt. I’d had a great deal of success with that — so much, in fact, that I made all my own yogurt while I was living in my Arizona house. cheese-making was similar and certainly should be within my capabilities.

Yesterday, I made my first batch of “basic cheese.” Although I won’t be able to taste it for about a month, I also made ricotta cheese from the whey and got to taste that right away.

I realized that my cheese-making adventures were blog-worthy — certainly enough to document for future reference. So if you’re interested at all in making cheese, follow along with me as I take you though my learning process. I’ll write posts in this series as I find time and would certainly love to get comments from other folks exploring home cheese-making.

Bees: More about Mites

My own observations prove another beekeeper’s theory true.

I started my beekeeping hobby in June 2013 and have been blogging about it periodically. If you’re interested in reading the other posts in this series, follow the Adventures in Beekeeping tag. Keep in mind that the most recent posts always appear first on this blog.

As I mentioned in a previous post, I’m concerned about varroa mites in my beehives. Mites can weaken a colony to the point that winter survival is impossible. Since I’d like all my hives to survive the winter, I’m starting a war on mites now, before it’s too late.

My Setup, as it Relates to Mites

There’s a few points I want to make here without spending a lot of time on a long narrative.

  • My three hives come from two sources:
    • My original hive was a nuc I purchased from a beekeeper in Peshastin. That hive grew and thrived very quickly, producing 2-1/2 gallons of honey in about a month. When a hive inspection showed signs of swarm cells, I split it off to form my third hive.
    • My second hive was a swarm capture. The swarm came from a colony living in the wall of a friend’s shop building. These are as close to “wild bees” as you can get.
  • My hives aren’t all set up exactly the same way. As I experiment with different hive components, I use them on different hives. For example, my first and second hives have standard wood bottoms while my third hive has a bottom with a varroa trap screen drawer. When setting up this third hive, I placed a sticky board in the drawer and left it there for about a month (which is really too long.)
  • My first and second hive have drone frames installed. As I discovered earlier this month, the drone frames work — once they’re adopted by the bees — and my first hive was confirmed to have mites.

Mite Count

On Wednesday, after a normal hive inspection, I placed sticky boards (with screens) in my first and second hives. Remember, I’d already learned that my first hive had mites; the idea behind the sticky board was to see how bad the mite problem was in each hive. Because I’d left the sticky board in the third hive so long, I couldn’t really gauge the mite problem. So I got serious for this test and left the boards in for just two days. If I had a third board, I would have tested that third hive again, too.

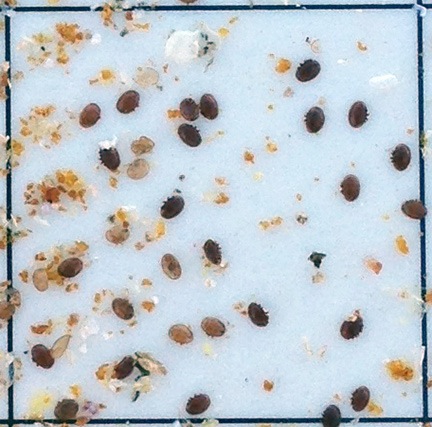
Mites on a Sticky Board
I’d say this hive has a mite problem, no?

When I pulled them out yesterday morning, I was surprised to find that the sticky board from Hive #1 was full of mites. Here’s a magnified image of just one square inch of the board. The dark ovals are dead mites — you can even see the legs on a few of them. The light ovals are also mites, but I don’t know if they’re some sort of shedded skin or exoskeleton or the actual mite itself after being dead for a day. The other dots on the image are mostly litter from the hive as well as some propolis that the bees laid down between the holes on the screen. Keep in mind that this sticky board has 176 square inches and although not all of them are as full of mites as this one, some are a bit worse.

All this was gathered in less than 48 hours.

But what was even more surprising to me — at first, anyway — was that the sticky board for Hive #2 had very few mites on it. In fact, because I pulled it out first, I thought that I’d pulled it out too soon. It wasn’t until I pulled out the other sticky board that I realized that the boards had done their job; I just had far more mites in one hive than the other.

Why the Difference?

Last night, I was at a BBQ gathering of helicopter pilots and mechanics who are based in the area for fire season. One crew — pilot, mechanic, and fuel truck driver — are based in a really nice house in a farm just down the road from where I’m currently living. They had a fire going in the fire pit and grilled up some steaks and brats and corn. It was a really nice night out.

I got to talking to one of the pilots, a guy who flies the Cessna Skymaster “push-pull” used for observation and direction to fire crews. He lives in the Snohomish area of Washington and keeps bees at home. We got to talking about mites and he asked me where I’d gotten my bees. When I explained their source, he told me that commercial bees always had mites.

I thought about what he said. It completely jived with what I had observed. The hive from the nuc had a bad mite problem. The hive from the swarm had very few mites at all.

He said that because so many hives were moved around for pollination, the mite problem spreads. He keeps mites out of his hives by keeping them away from commercially available bees.

Certainly something to think about.

Three Means of Attacking Mites

Because I’m serious about eliminating — or at least greatly reducing — the mite population in my hives, I’m currently using a two-prong attack:

  • The drone frames, as I discussed in another post, can help concentrate most of the mite reproduction on one frame, where they can be easily removed. Unfortunately, the queen is far less likely to lay drone eggs as the summer season comes to a close. In addition, only one hive (so far) has adopted the use of the drone frame.
  • I’ve purchased a miticide and dosed each of my hives with it. Although it can’t be used when the bees are producing honey for human consumption, using it now, before winter, should help reduce the number of mites and make a stronger hive.

The third method, which I hope to be able to institute soon, is to have sticky boards beneath screens on the bottom board of each of my hives. While it would be great to do this via a varroa trap with drawer for each hive, the $27 price tag makes that a bit more than I want to spend. So I’ll likely cook up my own solution using some “hardware fabric” I already have on hand to make the screen. I’ll talk to a beekeeper friend to see what we can rig up.

In this area, bee colonies have a 50% overwinter survival rate. I have three hives. I want to have all three colonies survive the winter. That’s going to take some work — and I’m willing to do it.