Boating with Friends

Another nice day out on the river.

On Thursday, I took my boat out for the first time this season. It was a girls day out: me, Stephanie, Megan, and Penny the Tiny Dog.
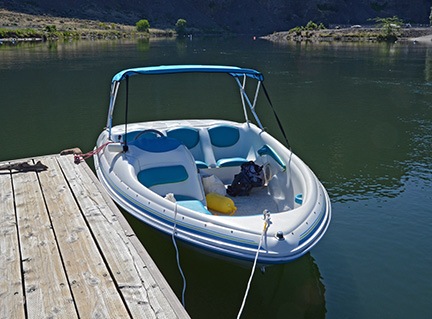
My BoatMy little boat in a photo from 2012. It’s a 1995 SeaRay Sea Rayder F-16. It’s a fun little boat, but it definitely looks faster than it is.

I admit I wasn’t very responsible about winterizing the boat. I was supposed to disconnect the battery and I didn’t. I did, however, remember to put fuel stabilizer in the half-empty fuel tank. Then I parked it in my hangar and pretty much forgot about it.

About a week ago, I pulled the battery and brought it to Les Schwab. The previous owner, Ron, had bought the battery there years ago. One of the benefits of having a Les Schwab battery is that they’ll test and charge it for you for free. A friend of mine dropped it off there for me and I picked it up a few days later. It took a charge and tested good. On Thursday morning, I reinstalled it, closed the engine lid, and crossed my fingers.

The Boat’s Role in my Divorce Saga

Oddly, my little boat played a role in my divorce trial drama last year.

My wasband apparently believed it was worth more than I’d paid for it. He, or more likely, his mommy, decided to try to trick me into admitting it was worth more by offering me $1,000 for it in court. Because I’d only paid $1,500 for it and had since had a mishap that reduced its value, I accepted the offer.

But when he learned that he’d have to get it from Washington to Arizona and pay for storage until he could do so, he took back the offer and I got to keep it.

The exchange between his lawyer, my lawyer, and me must have made a nice show for the judge. My friends and family certainly laughed about it afterwards

His loss. But then again, I suspect his mommy isn’t the kind of person who likes to have fun outdoors. She’d rather spend her time living life vicariously by reading my tweets and blog posts. Are you enjoying this one?

I towed the boat behind my Jeep to the gas station where I topped off the tank with premium fuel. I always do that for vehicles that have been left sitting too long. Then I crossed the bridge to Wenatchee, drove to the boat ramp behind Pybus Market, and launched it. I got there 30 minutes early so it would be in the water when my friends arrived and, with luck, I’d be able to get it running. I didn’t want my friends to have to wait while I launched it and cranked it and possibly couldn’t start it. I figured that if it wouldn’t start, they wouldn’t have to waste too much of their time.

Stephanie showed up just after I parked the Jeep and was climbing on board. She admitted to a certain fear of water and I handed over my old jet ski vest, which I’d brought along. She climbed aboard and took a seat while I crossed my fingers again and began cranking the engine.

It caught on the second try. I don’t know why I was so worried about it.

I left the engine idle while securely tied to the dock. Being a weekday morning, there weren’t any other boats coming or going. That’s one of the things that amazes me about the Columbia River. It’s a huge river — really a chain of dam-formed lakes — and the water is usually calm and blue and very inviting. Yet there are relatively few boats on it. Even on weekends, the boat ramp parking lot is seldom full.

I let the engine run for 10 minutes, then shut it down. No sense wasting fuel or talking over its sound. I opened the Bimini top and Stephanie and I sat in the shade. The temperature was perfect — in the high 70s, I think — and there was a gentle breeze. Beyond the boat ramp, the river, which was running high with spring thaw in the mountains, rushed by at what I’d later clock at 5-1/2 miles per hour.
In the Boat
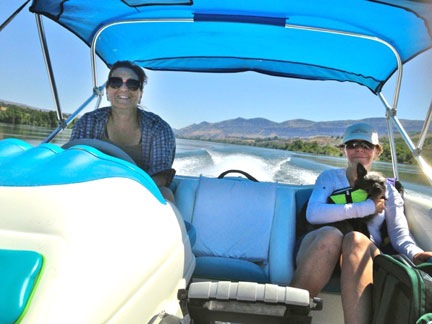
Megan took this photo of me and Stephanie with Penny as we headed upriver.

Megan showed up with a big cooler full of food a while later. We loaded it on board. Megan grabbed the bow rope while I started the engine. We cast off. I backed up gingerly, then shifted into forward and steered us out of the little lagoon.

We headed upriver, as I always do, at about 25 miles per hour. It was very cool out on the water and I was glad I’d brought along a long-sleeved shirt. I pointed out a few points of interest along the way, including the swimming lagoon at Walla Walla Point Park, where they also rent kayaks and paddle boards, and the estuary where I’ll be paddling with other friends later today.
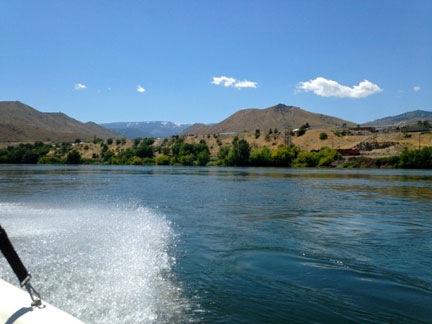
Along the RiverAnother one of Megan’s photos. It was a really beautiful day with light wind and few clouds in a clear blue sky.

We headed up the Wenatchee River a bit. The water was high and moving quickly — quite a difference from when I’d been there with my friend Janet the previous summer. I went as far as the second bridge before turning around and heading back out to the Columbia. We continued upriver, past the north end bridge. After a while, the water began to get turbulent from the water release at the Rocky Reach Dam. Because I didn’t want to spook Stephanie — and I know how crazy the water gets closer to the dam — I decided to stop there. I pulled the power back to idle and cut the engine.

Wonderful silence.

That’s the trouble with motor boats. When you’re moving they make a lot of noise. So what I typically do on a boat outing is drive the boat upriver to a certain point, then cut the engine and drift back.
Megan Selflie
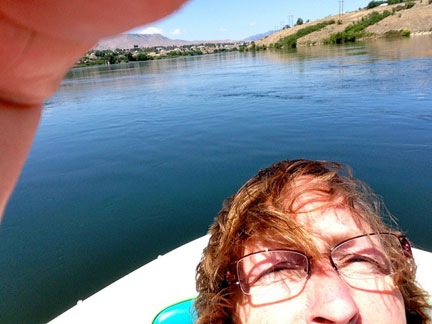
Megan captured this selfie as we drifted downriver. The water was glassy smooth in many places.

Stephanie opened her picnic cooler and produced a bottle of pinot gris and glasses. She pours wine at Kestrel Vintners‘ tasting room in Leavenworth. I couldn’t drink — I’m on call during daylight hours for cherry season — but both Stephanie and Megan had some. Then Megan started pulling food out of her cooler. Soon we were sitting in the drifting boat as it gentle spun its way down the river, eating and talking and enjoying the scenery.

The river was moving pretty quickly — 5-1/2 miles per hour according to a GPS app on my phone — and it took about an hour for us to drift back past the boat launch. Since we weren’t ready to go in and there was still a lot of river between us and the next dam, we kept drifting. Megan and Stephanie took pictures. I lounged in my seat in the shade or on the engine compartment lid out in the sun. I’d worn short shorts with the hope of getting some sun on my legs. I’ve got a great tan on my arms and upper chest — hell, I live in tank tops this time of year — but my legs are terribly white.
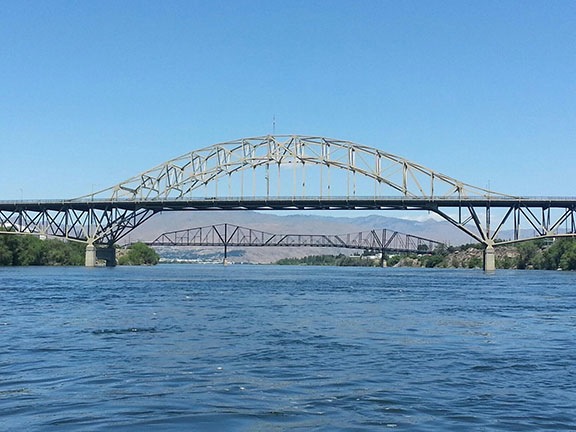
South End Bridges
Stephanie’s shot looking back at the south end bridges.

Soon we passed under the south end bridges. Megan wanted to know if we could see my home from the River. I knew that I could see that part of the river from my home so I figured I should be able to see my home from the river. I looked up and spotted it — the building under construction is visible from literally miles away — and gave them landmarks on the top of the cliff and then below it. I’m not sure if they saw it, but they said they did. I know my friend Judy has been monitoring construction from her home right across the river from me.

We got as far as the Billingsley Hydro Park, which is another local boat launch facility on the East Wenatchee side of the river, and I figured we’d gone far enough. It was nearly 1 PM and I had to put the boat away, buy a concrete box (long story), and meet with an HVAC contractor at 3. We stowed the dishes and glasses and napkins and I started the engine. Five minutes later, we were pulling up to the boat launch lagoon and I was easing the boat alongside the dock. Fifteen minutes later, the boat was out of the water and we were snapping on the cover and bungeeing it to the trailer.

It had been a great day out. We all agreed that we needed to do it again soon.
Construction Day 12: Framing Windows, Adding a Floor

Prepping for the home stretch.

On May 20, 2014, I began blogging about the construction of my new home in Malaga, WA. You can read all of these posts — and see the time-lapse movies that go with them — by clicking the new home construction tag.

I was out most of the work day yesterday. I took my little boat out with Penny and some friends. We put in at the boat ramp by Pybus Market, drove up to the Rocky Reach Dam, and drifted back downriver at 5-1/2 miles per hour, chatting, eating, and, in the case of my friends, drinking a nice Pino Gris. (I’m on call so drinking before sunset is a no-no.) Afterwards, I met with the owner of Pybus Market about setting up a helipad there for trips from Cave B Inn. Then I stowed the boat back in my hangar at the airport and bought a small concrete box with a lid before finally getting home at 3 PM. Another busy day!

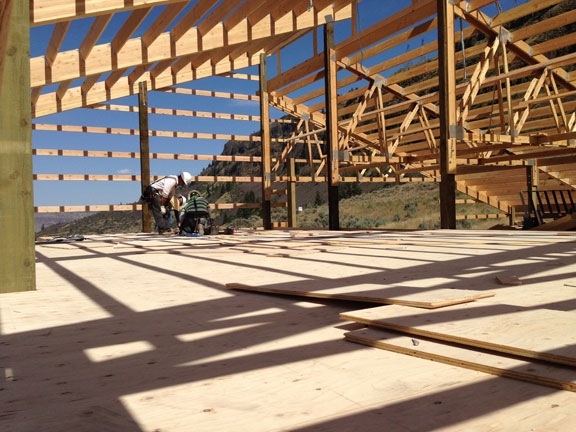
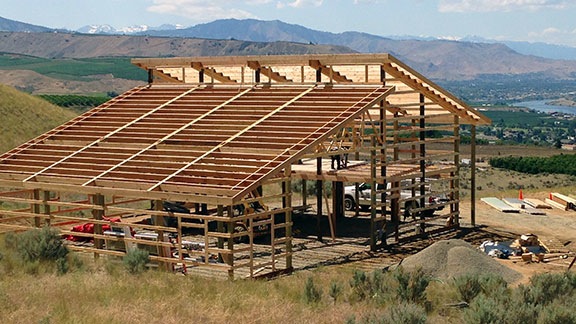
When I got back, I saw that the crew had made a ton of progress. They’d fully framed out nine of the building’s 20 windows: the five shop windows and the four peak windows. Then they’d spent the rest of the day putting in 3/4 inch plywood sheets for the base floor of my living space. This is a huge step forward in the project, not only because I can finally “go upstairs” to get the feel of my future home but I also have a huge shady space over my future garages to get my woodworking projects done. With sun temperatures roughly 20-30°F warmer than shade temperatures, it’ll really extend the amount of time I can spend working outdoors.

Day 12
If you’ve got sharp eyes, you can see where they framed out some of the windows in the shop and on the vertical wall of the high roof. You can also see them putting in the floor of my living space. (And yes, there is still snow on the mountains west of my home.)

Floor Going In
I climbed a ladder to take a peek at their progress on the floor when they were almost done.

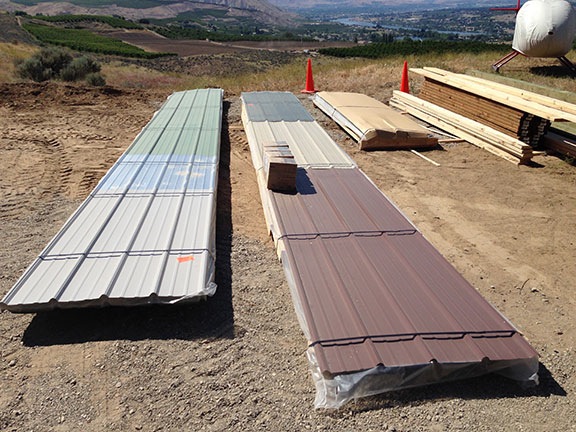
While I was out, the metal for the roof and side walls was also delivered. According to Angel, they’ll likely finish the roof on Monday. He asked me if it was okay for them to come as early as 6 AM. No problem for me; I’m up before dawn every day. It’ll be better for them to work earlier when it’s still cool anyway. I suspect a different crew will handle the roof while Angel’s crew continues working inside.

Metal for my Building
Hard to believe that this is all the metal that will cover my building. The top sheets are scrap for protection, not my color choices. I’ll save them and use pieces for my chicken coop roof and other small projects I might have.

On Monday, they’ll also frame out the rest of the windows and doors and build the stairs.

I hung out until they were finished with the floor. I needed help getting the darn concrete box out of the back of my truck. They used a forklift. The box will become an oil/water separator that I need to satisfy the county for my RV Garage/Shop floor drain. I’ve got a DIY solution that I’ll likely be blogging about when I get it finished.

Want to see a time-lapse for the day? Here you go!

New Home Questions Answered

Your questions, answered in one place.

Since I began blogging day-by-day construction progress of my new home on May 20, 2014, I’ve gotten a lot of questions and comments from blog readers, Twitter followers, and Facebook friends and followers. I thought I’d respond to a few of the most common ones here.

“Not much in the way of foundations. Small wonder whole towns disappear when tornadoes hit.”

Hoisting with a Crane
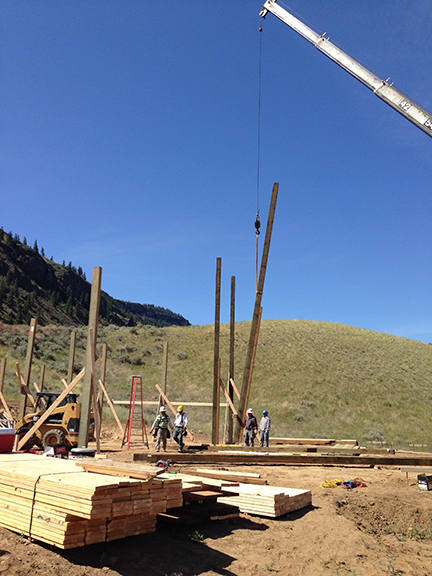
The long posts were hoisted with a crane.

This comment appeared on the blog post for Day 2, which showed the posts supporting the building in place. News flash: there is no traditional “foundation” and there won’t be.

I’ve repeatedly linked to a Wikipedia article about pole buildings in an attempt to educate readers about this type of construction. Unfortunately, the ability to consume web content beyond looking at pictures and video remains above the skill level of many blog visitors.

The posts supporting my building are 6×8 or 8×8 (depending on length and position). Each pole is sunk 3 feet into a hole 4 feet deep and 3 feet across. The holes and post placement were inspected by the county literally minutes before the concrete trucks arrived to fill each hole with concrete.

As far as tornadoes go, the chances of a tornado barreling down a path along the base of the cliffs in Malaga, WA are pretty slim. So slim, in fact, that you stand a better chance of winning a lottery jackpot, being struck by lightning, and being attacked by a shark — all in the same day.

But just in case it does get windy, the building is designed to withstand gale force winds. I don’t recall the exact number, but I do remember it being over 100 miles per hour.

And if you’re worried about seismic activity when Mount Rainier turns Seattle into an ash-covered scene from a futuristic disaster film, it’s also built to withstand earthquakes — not that we’ve had any serious ones here in a very, very long time.

Where’s the foundation?

See above.

When are they going to pour the foundation?

See above.

Please tell me they’re going to pour a concrete slab.

They’re going to pour a concrete slab.

Really. They are.

For some reason, they do this after the building has been constructed. I don’t know why. Maybe it’s so they can drive equipment around inside without worries about damaging new concrete. Does it really matter? The building is not attached to a foundation or a slab so it doesn’t really matter when they pour it. For some pole buildings, they don’t pour a concrete slab at all. In fact, I could save a bunch of money now by putting off the pouring of my slab until I’ve got some more cash. And believe me, I’ve been thinking about that for the garage side, which really doesn’t need concrete right away.

My building will also have a floor drain in the RV garage. That’ll make it possible to do something silly — like wash my car or helicopter inside. (Imagine that!) Or for the building to someday be used as a wine-making facility. (That’s thinking ahead.) The concrete in the RV garage/shop side will be gently sloped to that drain; the concrete in the car garage side will be gently sloped toward the garage doors.

I’ve got it covered, folks.

Who designed the building? Did you work with an architect?

I designed the building. I did not work with an architect.

This probably saved me about $10K in design fees.

It’s also one of the reasons I went with a pole building. Not only is it simple construction, but the folks who specialize in pole buildings can make whatever you dream up a reality without getting costly third parties involved. I brought my sketches to Western Ranch Buildings and Tanya patiently worked with me to fine-tune them for cost effectiveness without sacrificing my must-have features — such as the windows and huge RV garage door. Tanya, working with an in-house engineer for some components, drew up plans that would satisfy the county and give the workers something to work with. If you saw how simple my building plans are, you’d be shocked.

As for the design itself, I thought about what I needed in the building — space for all of my possessions and a modest living area. Then I thought about what I wanted in the building — a shop area, windows to let in light and air and show off the views from inside, decks to take in the views from outside. I knew I wanted that living space on the second floor and I knew it had to face the views. Since the RV garage side needed to be tall to accommodate my RV and helicopter, the living space had to be over the regular garage. I went with a four-car garage because that’s what fit in the 24 x 48 foot space I limited the living space above to.

(County ordinances allow me to have two homes on my 10 acres, as long as one of them is under 1,200 square feet. Since I can’t afford to build a garage and a home, I’m building the 1,200 square foot living space first and leaving the prime building location available for the construction of a real home, likely by the property’s next owner. When I had the septic system installed, I ran lines for both building sites, so the next owner will be all set to build that dream house.)

In a way, the design emerged on its own. Sketches evolved. The original design was a huge square building with a standard peaked roof. But when my neighbor put in a split roof, I realized that it would not only look better but also give me another interior wall for windows into my living space. I changed my sketches accordingly and the final design took shape.

Everything I did was well thought out — hell, I had enough time to think about it — with plenty of consideration for future needs — even a future beyond my ownership.

Why aren’t the builders doing the interior of your living space, too?

Two reasons.

One is that these folks specialize in pole buildings. Although they can do interiors, it’s not what they usually do. Not only that, but they’re very busy and I really can’t delay this project any more than it has been delayed. (I’m sick of living in a trailer and want a solid roof over my head, preferably one that doesn’t sway when the wind blows.)

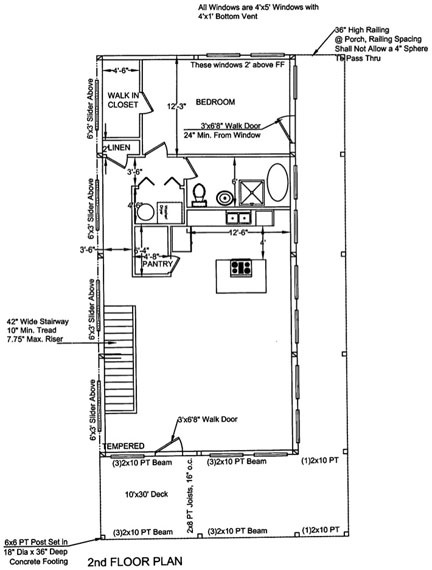
Floorplan
Here’s the living space floor plan as submitted to the county. It’s not 100% right, but it’s close enough for permitting purposes and to get bids on HVAC, framing, insulation, and drywall.

The other more important reason is money. I’m not quite sure what I can afford to get done. I know I can pay for the shell of the building; I’ve been saving for well over a year, living on the cheap in my RV to put aside every penny I can. The income I get from this season’s cherry drying work and the promise of a loan from a family member if I need it assures the shell will be done.

I’m not sure, however, how far I can stretch my money beyond that. I know I can save money by doing things myself; I have every intention of doing all the plumbing and electrical work, for example, and will likely do the floors and all the painting. But I also know that I need to hire professionals to do difficult things such as HVAC ductwork, framing, and drywall. By breaking down the living space project into sub-projects, I can do them one at a time, knocking them off as time and money allows.

With luck, heavy rain over the next few months, and a lot of hard work, I’ll be cooking up Thanksgiving dinner for friends in my new kitchen.

Can you share a conceptual drawing of what it will look like when done?

This question from a Facebook friend made me giggle. You see, they’re working so very quickly.

My response: If you wait two weeks, I’ll have a photograph.

Construction Day 11: Framing Second Story Floor, Garage Doors

A huge amount of work done.

On May 20, 2014, I began blogging about the construction of my new home in Malaga, WA. You can read all of these posts — and see the time-lapse movies that go with them — by clicking the new home construction tag.

I was out for a good portion of the work day, with a hair appointment in the morning and a meeting with the concierge at Cave B Estate Winery at lunchtime. While I was gone, the three-man work crew buzzed through piles of lumber, fitting them like puzzle pieces into the frame of my future home.

In looking at the time-lapse (below), I could clearly see the order in which the work was accomplished. First, they laid in the remaining beams for the second story floor. Then two men added girts to the front and back of the building while the third finished framing out the floor. They took a break for lunch and then the two continued adding girts, this time to the garage side of the building while the third man framed out the garage doors.

Day 11 Work
The “well-oiled machine” was working in peak form on Wednesday, framing floors, garage doors, and exterior walls.

They were almost done for the day when Tanya drove up. She wanted to review the window placement with me and Angel, the lead worker. We talked about it first, then walked around the building with Angel, who made notes in pencil right on the girts. It wasn’t until then that I realized my building would have 20 windows — not including the ones in the garage doors.

The next step will be framing the windows and getting the plywood on the second story floor. Once the windows are framed, they can be installed. Once the floor is finished, the stairs can be built. After the windows comes the metal roof and skin of the building — the metal was scheduled to be delivered the next day. The additional windows for the shop area would arrive Friday. Somewhere along the way, they’d add the poles for my front deck and put in the concrete pad. The garage doors would be last.

That’s my understanding of how the job would finish up. At this point, I’d say they’re more than halfway finished.

In 11 days.

Here’s the time-lapse for the day. I think this is one of the most interesting ones in a while. So much going on that its difficult to keep track of it all!

Construction Day 10: Deck Roof Framing

The roof is now fully framed.

On May 20, 2014, I began blogging about the construction of my new home in Malaga, WA. You can read all of these posts — and see the time-lapse movies that go with them — by clicking the new home construction tag.

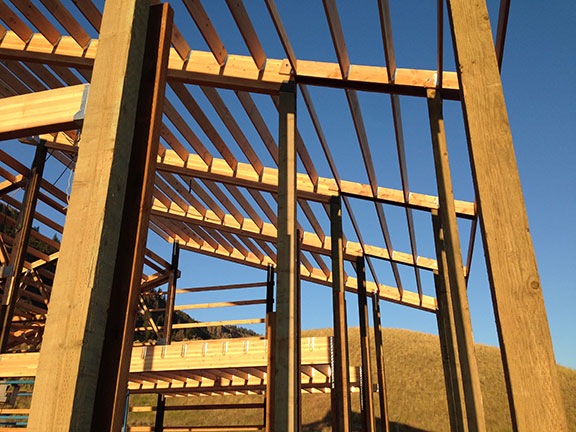
On this tenth day of construction the crew of three guys mostly worked on the framing for the roof over the north-facing deck which will be just six feet wide but run the entire depth of the building — 48 feet. The final building will have decks on two sides, but the east-facing deck, which will be 10 x 24, won’t have a roof over it.

Deck Roof Framing
They framed out the roof over the north-facing deck. At this point, their roof framing work should be done.

The day started out nice enough, but soon got windy as thunderstorms rolled by on a northwest to southeast path, never quite going over us. I did hear loud thunder once, but never really saw the storm that it was advertising — it was south of me, beyond the cliffs.

I was out for a while, running errands in town, and when I got back a big truck was partially backed into my driveway. He’d just dropped off a load of roof insulation for the RV garage/shop side of the building. (The living space will have more substantial insulation.) Since he blocked my way in, I parked on the road. I chatted with him for a while about how great it is to live in the country — he lives in Cle Elum — before he got a phone call and then headed out for his next delivery an hour away.

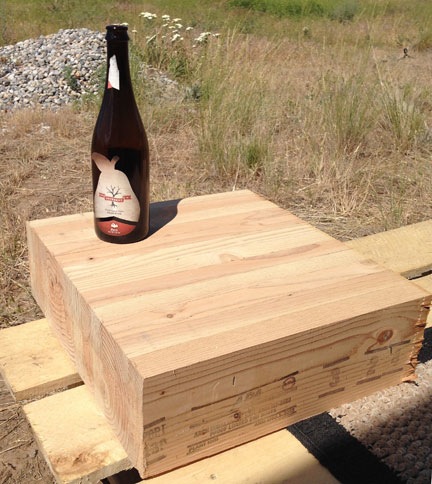
Glulam Beam
Here’s one of the two glulam sections left in the scrap pile. The bottle is for scale. While pine can’t be true butcher block because it simply isn’t hard enough, I should get several years use out of it as a food prep surface beside my BBQ grill.

One of the bonuses of this construction project is the scrap wood being left behind. The beams supporting the second floor, for example, are glulams (glued laminated timber), created by gluing together standard pieces of lumber. A few of them are made from 12 2x6s. The builder ordered them slightly longer than necessary and the workers trim them as they use them. When they trimmed for the second floor support, they left me with two nearly perfectly square blocks of wood suitable for making small “butcher block” tables. I’ve already researched ways to seal the wood to make it safe for use with food; I’ve got a woodworking friend who’ll put legs on them for me. This creative use of scrap wood has been a lot of fun for me; I’m really looking forward to setting up my tools in my shop to hone my skills and do projects like this on my own.

The builders made progress on the building, but it seems to be going more slowly now. I think it’s because the novelty of this construction project out my back window has worn off. Seeing the second story floor start to go in yesterday really energized me, but they did very little work on that today. I think it’s interesting to note that they moved their lunch area into the building’s footprint; I think it’s because they’re looking forward to the shade they’ll get when they put the floor in.

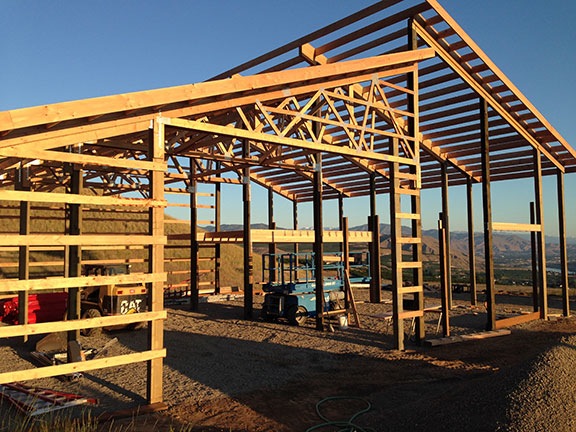
Building Front
The front of the building, shot from the southeast corner.

There’s a good possibility that metal for the roof and sides will be delivered this Wednesday or Friday. With the insulation handy, once the roof metal comes there’s no reason why they can’t put on the roof. Got my fingers crossed!

Here’s the time-lapse for Day 10: