Construction, Day 14: One Roof Finished

Despite moderate to heavy winds, the workers manage to finish one of the building’s two roofs.

On May 20, 2014, I began blogging about the construction of my new home in Malaga, WA. You can read all of these posts — and see the time-lapse movies that go with them — by clicking the new home construction tag.

Monday’s high wind postponed roof work. The wind was also supposed to be a factor on Tuesday, but when the workers arrived around 7 AM, the wind wasn’t much more than a breeze. They decided to go for it.

Starting on the Roof
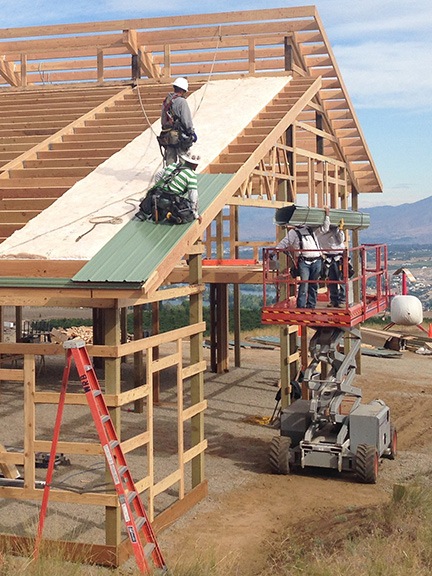
In this shot, you can see the first roll of insulation and first roof metal panel placed. Two workers are delivering a rolled up sheet of roof metal to the guys waiting on the roof.

There were four workers in the crew that day and you could tell that they’d obviously done this many times before. They started by using the man-lift to get two of the workers and a roll of insulation up on the roof beams. The workers unrolled and placed the insulation. Then the two men on the ground rolled up one of the many long sheets of roofing metal and tied it securely. They used the man lift to get it up to the workers on the roof. They unrolled it and fastened it into place.

The very edge of the roof, where it overhangs the outside of the building by about two feet, did not get any insulation. As Angel and I discussed later on, there’s no reason for it and it’s basically all taken away by birds, over time, for nesting material. (Note to self: keep garage doors closed during bird nesting season.)

I busied myself with work around the yard for most of the morning. I needed to construct a latticework for my peas and beans to climb as they grow. I needed to haul off some sage I thought I’d burn but realized was an eyesore. I needed to retrieve a 20-in by 14-ft culvert pipe someone had left on my property years ago and put it on Craig’s List to earn a quick buck. My 1999 Yamaha Grizzly ATV, which I bought new in 1999 for “yard work” in Arizona, was a huge help. I’m so glad I brought it with me, along with the “farm trailer,” I’d bought in Arizona all those years ago to use with it.

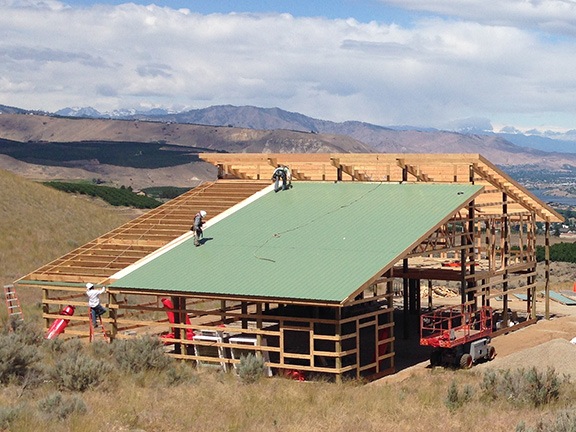
At one point, I drove the Grizzly up the road for a look at their progress from above. In only a few hours, they’d done more than half the roof.

Roof progress
I can’t believe how quickly the roof metal went up.

Meanwhile, the wind was picking up. I really expected them to call it quits, but if there’s one thing I noticed about this crew, it’s that they like to finish a whole job in a day. You can clearly see this if you go back through the day-by-day posts I’ve written about the project. So even after breaking for lunch at about noon, they went back to the roof to finish up.

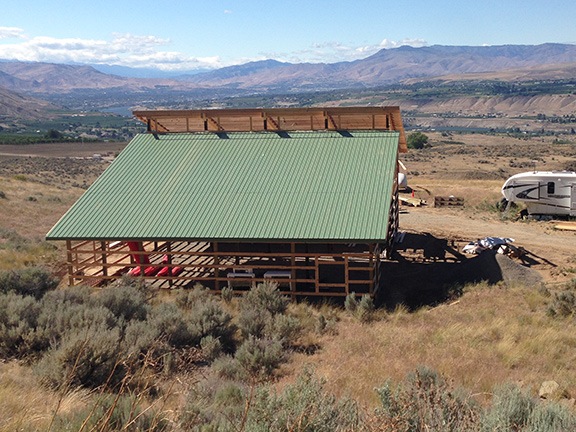
I had a meeting at the airport to attend at 2 PM. Although I toyed with the idea of flying over, I had some errands to run in town so I drove. I passed the workers on their way home when I drove back around 4:15. When I reached the overlook for my building, I saw that the roof was done.

Finished Roof
The larger of my two roofs is done.

I have a time-lapse for the day (of course). It doesn’t clearly show what they did because of the camera angle. Although I toyed with the idea of moving the camera, I didn’t want to deal with the problem of getting power out to it. So I left it where it was. The other roof work, which should be done today, will be more visible.

Construction, Day 13: Framing the Living Space Windows

Ten of the last 11 windows get framed.

On May 20, 2014, I began blogging about the construction of my new home in Malaga, WA. You can read all of these posts — and see the time-lapse movies that go with them — by clicking the new home construction tag.

The builders were supposed to put on the metal roof today. In fact, on Thursday they even warned me that they might come as early as 6 AM to get started.

But the weather didn’t cooperate. The usual work crew arrived without the roofing guys. It was just too damn windy. No one wants to be standing 30 feet above the ground holding a sheet metal sail.

So Angel and his crew went to work on framing the windows and doors to the deck for the second floor living area. With the floor in place, it was easy.

I was out most of the day. With the construction of the building shell nearing completion, it was time for me to get to work on the interior. The first step was the HVAC. I met with four contractors to talk about options and got promises for bids by Wednesday. I made some other stops, too, including a very nice lunch at a farm stand up the road from East Wenatchee.

When I got back, most of the windows had been framed. I watched them work on a few while doing some odd jobs around my property. They would have finished them all, but they ran out of lumber.

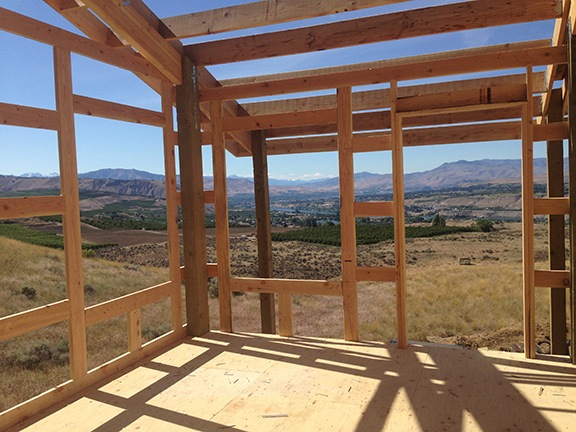
Later, after the builders had gone, I used the man-lift to go upstairs. (My friend Bob, who had come for dinner the night before, had shown me how to get the darn thing started and that was all I needed to make it my personal elevator.) I wandered around my future home, checking out the views from my future windows. I liked what I saw.

Bedroom View
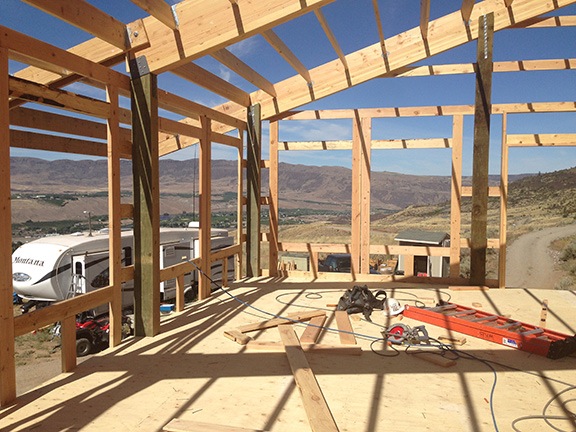
Here’s the view from the doorway of my future bedroom. There will be two 4×5 windows and a glass door leading out to a long deck.

Great Room View
In this shot, I’m standing right about where my stove/breakfast bar island will be in my future kitchen looking out across my future great room. This room will have eight 4×5 windows and a glass door leading out to the front deck.

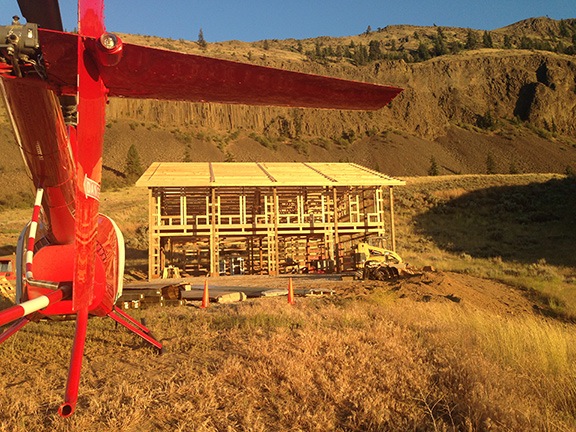
Still later, as the sun was getting ready to set, I wandered out by where my helicopter was parked to take a photo from a different point of view. I realized that my home was really starting to look like a home.

Sunset Helicopter
Home is where the helicopter is.

Here’s the time-lapse video for the day:

Paddling with Friends

The river is high, the estuary is flooded, and the irises are blooming.

My friend Brian bought a kayak from a friend’s estate a few weeks ago. Knowing that I had some experience paddling in the Wenatchee River and — possibly more importantly — I had a truck to haul the kayaks, he suggested that we go for a paddle. When I heard his daughter was in town for the weekend, I offered her my second kayak (yes, I have two; long story) so she could come with us.

Estuary
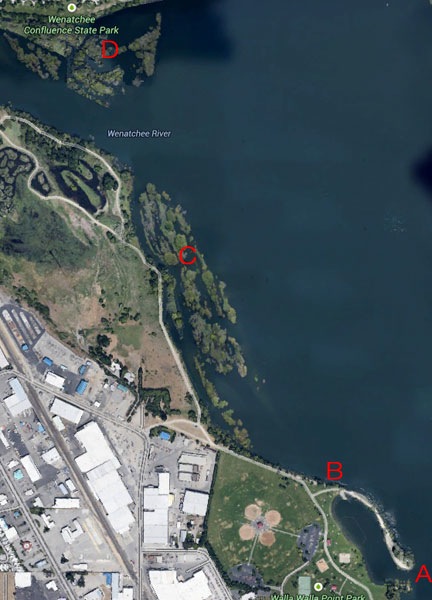
My favorite paddling destination on the Columbia River, labeled.

We put in at Walla Walla Point Park, near the swimming lagoon. I knew from experience that the river’s swift current — it’s currently at a low flood stage — would make it nearly impossible to paddle out the lagoon entrance (A on the satellite image) and upriver past the sheltering arm of land. So I recommended that we launch from just upriver from the park’s little bridge (B). It was a bit of hike from the parking lot, but we each handled our own kayaks and did fine.

I let them launch first. They stayed near the launch point, holding onto tree branches until I was in the water with Penny. Then we began paddling up the shoreline toward the estuary (C) at the mouth of the Wenatchee River.

It was difficult at first. I clocked the river’s current at about 5-1/2 miles per hour the other day. But once we got moving, it became easier. And some place near the shoreline had less current, making it an easy paddle.

Bryan's Kayak
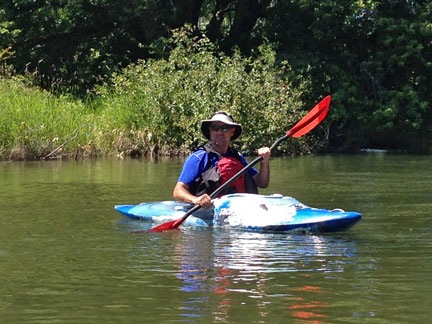
Brian bought his kayak from the estate of a friend. It’s really designed for white water.

Brian had trouble, though. His kayak is designed for white water. It’s short and has a completely smooth bottom. Each paddling stroke pushed the kayak’s nose hard in one direction. As a result, he wiggled his way along, having a heck of a time moving in anything resembling a straight line.

Brian’s daughter, Kathleen, did much better. In fact, she kind of surprised me — she’s a quiet girl and I wasn’t sure how outdoorsy she was. Maybe it’s the kayak, though. My two Costco specials are pretty easy to use.

We entered the mouth of the estuary at the southmost point. The satellite image is a pretty good representation of the area, although it might show the water level even higher than what we experienced on Saturday. The last time I’d been in there for a paddle, late last summer, the water level had been much lower and there were fewer channels that I could paddle through. This time there were multiple channels and a pretty decent current.

Penny in the Kayak
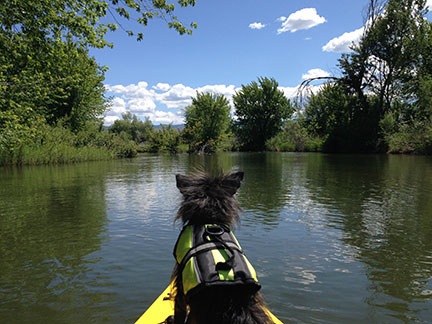
After Penny took an unexpected swim, I put her life jacket on and she returned to her favorite position on the boat’s bow.

At one point, Brian’s kayak rammed into mine and poor Penny, who’d been sitting on the bow, fell into the water. She wasn’t wearing her life jacket yet, but she was secured with her leash and I reeled her in. I put her life jacket on more to warm her up than to keep her safe.

More than once, we found side channels to get us out of the main current. Once, the channel met back up with the one we’d been in after a nice, leisurely paddle through a shady area. Another time, the channel dead-ended in tall grasses that were difficult to turn around in. No worries, though. It was a beautiful day — perfect for exploring.

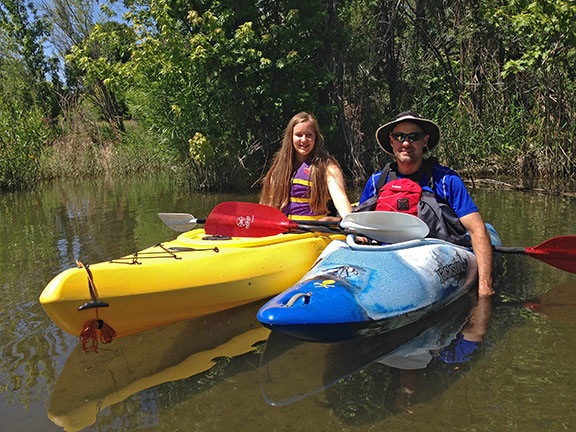
Brian and his Daughter
Brian and his daughter posed for a photo in one of the calmer side channels.

We eventually reached the Wenatchee River confluence. The Wenatchee was running hard. I wanted to cross it to continue padding in the estuary on the other side (D on the satellite image above) and even got a start, but the current was sweeping me out into the Columbia and it looked like it would be a tough crossing. So before the others started off behind me, I returned. We took a different one of the estuary’s channels back downriver, exploring more side channels on the way.

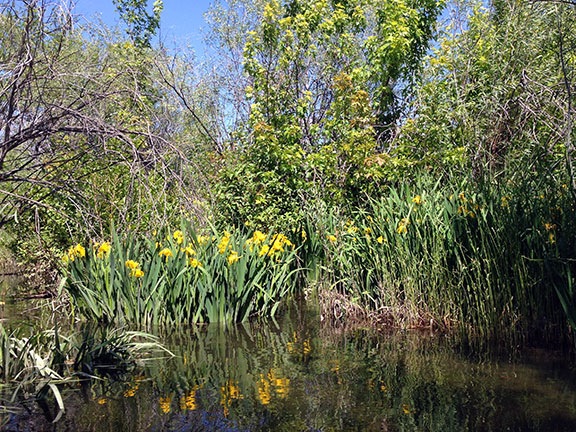
We were nearly back to the south end of the estuary when I began to see irises — thousands of them — coming up through the floodwaters and blooming along the shoreline. The calm water reflected the bright yellow blooms. For a while, everywhere we turned were irises among the trees. I must have taken a dozen photos, trying hard to capture that reflection in the water. I want to return a little later in the year and see if I can snag a few of the bulbs for my garden. I just hope they don’t need to be flooded to grow.

Irises in the Columbia River
There were irises blooming all over the place in the south end of the estuary.

We left the estuary and began paddling back. It was easy, moving along with the current. Instead of pulling out where we’d started, we went around to the mouth of the lagoon (A on the satellite image above). There was some fast water along the way. We passed a man in a beautiful, long sea kayak headed upriver. He told me he was surprised that Penny didn’t jump out to chase the geese.

Once in the lagoon, we paddled to shore, close to the swimming area. I climbed out onto land, feeling pleasantly tired.

It had been a nice day out. I’m hoping to paddle on Friday with another friend; maybe there will be something new to report.

Facebook Crosses the Line. Again.

Facebook is now posting advertisements from my account.

Yesterday, a friend sent me an email message that included the following shared Facebook update:

An Ad I didn't Write

Yes, it’s a Facebook update apparently written by me that is promoting a magazine I don’t read or care about. This appeared in one of the groups on Facebook that I’m a member of.

When I clicked the link to see the ad for myself, Facebook prompted me to log in with my friend’s account information. It actually filled in the user ID field with his account name.

I was appalled.

Let’s look at what’s going on here: this is a Facebook update that looks like it was written by me to promote a product I don’t care about.

Is it unreasonable for me to be outraged?

And yes, I checked the Facebook Ad settings. This is the only one that seems as if it should apply and I’ve got it set to No One, meaning no one can see my name attached to any advertisement:

Ad Settings

Why has this happened? How many other times has it happened? Is it happening to your Facebook account, too?

How many more liberties will Facebook take with our privacy in an effort to maximize their bottom line and bombard us with advertising?

Making Greek Yogurt

It’s easy and it just makes sense.

I eat a lot of yogurt. I like yogurt for breakfast — especially with granola — and yogurt for snacks. I eat salad dressing with yogurt in it, enjoy frozen yogurt, and sometimes even eat flavored yogurt for dessert.

I buy plain, non-fat, Greek yogurt. Greek yogurt is basically the same as regular yogurt but with a lot of the excess whey removed. You know what whey is if you’ve bought yogurt or cottage cheese or ricotta in a large container and used only some of it: it’s the liquid that accumulates at the top after you’ve scooped some out.

Greek yogurt is more properly known as strained yogurt and is also called yogurt cheese or labneh. You can read more about it on Wikipedia.

Not All Greek Yogurt is Created Equally

Creamy, delicious Greek yogurt has become wildly popular. Unfortunately, that’s causing a serious environmental problem: an overabundance of whey, the by-product that must be discarded. As this excellent article about the problem in Salon mentions, there’s 2-3 ounces of whey for every ounce of Greek yogurt produced. This video explains the problem and potential solutions:


A quick video explains the problems with mass-produced Greek yogurt and some possible solutions.

The article also suggests that you can help the environment by making your own Greek yogurt (instead of buying it) and using the whey that’s produced in your own kitchen and garden.

What some Greek yogurt makers are doing to circumvent the problem is “faking” Greek yogurt by adding artificial thickeners. The article, “Greek Yogurt: What’s Real & What’s Not,” lists the actual ingredients of many popular plain Greek yogurts. You might be surprised to learn that your favorite creamy yogurt is made that way by the addition of thickeners like corn starch and gelatin. This is covered in articles like “Greek Yogurt Wars: The High-Tech Shortcuts vs. The Purists” on The Kitchn and “High-Tech Shortcut To Greek Yogurt Leaves Purists Fuming” on NPR’s The Salt.

Real yogurt should have just two ingredients: milk and active yogurt cultures such as S. Thermophilus, L. Bulgaricus, L. Acidophilus, Bifidus and L. Casei.

I don’t know about you, but when I buy yogurt, I’m not interested in buying corn starch and gelatin. Take-away lesson: Read the ingredients list and make sure you’re paying for what you really want.

Or make your own.

The Recipe

My wasband wasn’t a big yogurt eater, but he told me, time and time again (as we often do in long-term relationships) that his Armenian grandfather used to make his own yogurt. I was kind of impressed, mostly because I thought it was difficult to do. That’s until I stumbled onto a recipe posted by my friend Tammy on her blog. I tried it and had immediate success. Since then, I make about half the yogurt I eat.

Tammy’s recipe can be found here. It’s got lots of photos with the step-by-step instructions. I find myself searching for the recipe time and time again; for some reason I can’t remember the important temperatures. So I’ve decided to put the short version here, mostly for my own reference. I recommend you stop by Tammy’s site and read it there before you try it. And then leave her a comment telling her about your results. I think she’d like that. (Most bloggers do like comments.)

Tools:

I don’t usually include a Tools section in my recipes, but there are four that you must have (beyond what you might expect in a recipe):

  • Thermometer. I use an instant read meat thermometer. It needs to go up to at least 200°F. Temperature is extremely important in this recipe, so don’t try it if you can’t take an accurate temperature reading.
  • Whisk. I have a plastic whisk, but that’s because I use non-stick cookware. A regular metal wire whisk should be fine.
  • 2 1-quart mason jars with tight-fitting lids. Even if you don’t can your own foods, you really should have a few of these around your kitchen.
  • A small cooler taller than the jars. Make sure it has a tight-fitting lid.

Ingredients:

  • 1/2 gallon non-fat milk. I used to make this by the quart, but when I started “Greeking” it (see below), the yield was lower so I started making 2 quarts at a time.
  • 1/4 cup real plain yogurt with active yogurt cultures. Did you know that not all yogurt is just yogurt? I discuss that above, in case you skipped it to get to the recipe. I recommend the following Greek yogurts: Chobani, Dannon Oikos, Trader Joe’s, Athenos, and Stonyfield. If not using Greek yogurt as a starter, check the ingredients list to make sure the only ingredients are milk and yogurt cultures. This quantity, by the way, is more than Tammy uses. Let it get to room temperature.

Instructions:

  1. Heat the milk to 190°F, stirring occasionally. I do this in a microwave. I have a huge glass measuring cup that holds 1/2 gallon. I put it in the microwave and heat it on high. In my current microwave, it takes 20 minutes to get to 190°F. I know this by repeated temperature readings as I heated it. (My old microwave in Arizona had a temperature probe, which was probably its best feature — and definitely the reason I packed it when I moved. I’d put the probe in the milk, tell the microwave I wanted the milk at 190°F, and it would simply stop zapping when the temperature reached 190°. I’m looking forward to installing it in my new kitchen — despite the fact that it’ll be nearly 30 years old by then.) Of course, you can always do this in a pot on the stove.
  2. Remove the milk from the heat source and allow to cool to about 120°F. I do this by letting it just sit on the stovetop.
  3. In a small bowl, mix about 1/4 cup milk with the 1/4 cup yogurt. This smooths out any lumps and makes it easier to blend with the rest of the milk in the next step.
  4. Whisk in yogurt/milk mixture in to the rest of the milk. Mike sure it’s blended well, but try to minimize bubbles.
  5. Pour the milk mixture into the mason jars. Fill them to the very top. Then close them up tight.
  6. Place the mason jars into the cooler and fill the cooler with the hottest tap water you can get out of your sink. My water heater delivers 130°F water in my kitchen, which is just a tiny bit too hot for my hands — but otherwise perfect, in my opinion. Fill to the very top of the jars, almost so they’re floating in it.
  7. Cover the cooler tightly and set aside for 6-8 hours. When I made this in Arizona in the spring and autumn, I used to set it outside on the patio in the shade. In the winter, it stayed inside. The idea is for the water (and milk) to cool slowly.
  8. Remove the jars from the cooler and discard the water.

At this point, the jars should contain yogurt. You can pop them in the fridge to enjoy at your leisure or “Greek” it.

“Greeking” the Yogurt

My only gripe with Tammy’s recipe — or at least the way it usually came out for me — was that the yogurt tended to be very runny. I don’t like runny yogurt.

I started making yogurt right around the time I discovered Greek yogurt. I actually stopped making yogurt because I preferred Greek yogurt and didn’t know how it was made.

Then I did some research and discovered that all I needed was one more step: strain out the extra whey.

Greek Yogurt Maker
You can get this nice Greek yogurt maker for about $22 on Amazon.com.

While you could do this with cheesecloth in a strainer and make a big mess on your countertop or in your fridge, I went online to Amazon.com and bought a gadget: a Euro Cuisine Greek Yogurt Maker.

To “Greek” your homemade yogurt, add these steps to the recipe above.

  1. Refrigerate the yogurt. I suggest overnight to really chill it down and give it as much substance as it can get on its own. Just put the jars in the fridge.
  2. Empty the yogurt into a strainer lined with cheesecloth or a nifty Greek yogurt maker like the one I bought. If using a strainer, you’ll want a bowl beneath it to catch the whey.
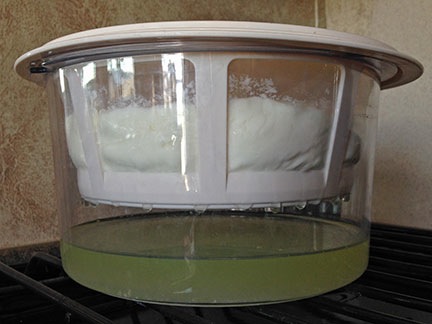
  3. Straining Yogurt
    This yogurt has been straining in my refrigerator for about 90 minutes. The yellow liquid is whey.

    Let strain for 2-4 hours, preferably in the refrigerator. The amount of time you allow it to strain will determine how thick the yogurt is. I have, in the past, forgotten about it and let it go overnight. The resulting yogurt was too thick, almost like cheese.

  4. Remove the yogurt from the strainer and place it into a container you can seal. I use (ironically) old yogurt containers.
  5. Give the yogurt a good stirring. This will smooth out any lumps and make it creamier.
  6. Store in the refrigerator. Obviously.

The removal of the whey should cut the total quantity of yogurt in half.

If you’re wondering what to do with the whey, this page has some excellent suggestions. I give it to my chickens and blend it with water for my tomato plants. I also, on occasion, make it into ricotta. As you might imagine, its very high in calcium but supposedly tastes very bad on its own. I’ve been too cowardly to try it.

Cost Considerations

One of the most mind-blowing things about making my own Greek yogurt is the cost savings. Yesterday, I spent $1.69 on half a gallon of skim milk. I already had yogurt for the starter and can use the yogurt I made for the next starter, so there’s no additional cost. This half gallon of milk will yield about a quart of Greek yogurt.

The last time I bought Greek yogurt, it cost $5.89 for a quart. So I’m saving more than $4 every time I make it instead of buy it. With two quarts a week — my average consumption — that’s $416/year saved.

And you know what Ben Franklin said about saving pennies…

Flavoring Yogurt

I have two things to add here.

First, a while back when I posted on Facebook about making yogurt and included a photo, one of my friends commented to ask, “When do you add the flavor?” Well, there’s no reason to add flavor because yogurt already has flavor. It’s yogurt flavor.

However, if you like to add flavor, you can always mix in some honey or a spoonful of your favorite jam or preserve. I like apricot, which I keep around mostly for a condiment on grilled pork.

And that brings up my second point, also from Facebook. A friend posted an image of a bowl of yogurt with fresh strawberries on top of it. Her caption: “This is how you flavor yogurt.”

Yes, fresh fruit is the best way to do it. Don’t add sugar; add more natural ingredients. It’s more healthy for you and it really is quite tasty.

What do you think?

Do you make your own yogurt? Do you think it’s worth the time?

Share your tips, thoughts, and recipes (or links to recipes) in the comments for this post.