It just doesn’t make sense for me or the pilots I work with.
I’m in the process of hiring pilots to work with me during cherry drying season here in Washington State. Finding and hiring good, qualified, responsible pilots is a real chore every year made even more difficult by the preponderance of middlemen — guys who want to act as brokers between pilots and people trying to hire them.
I Am Not a Middleman

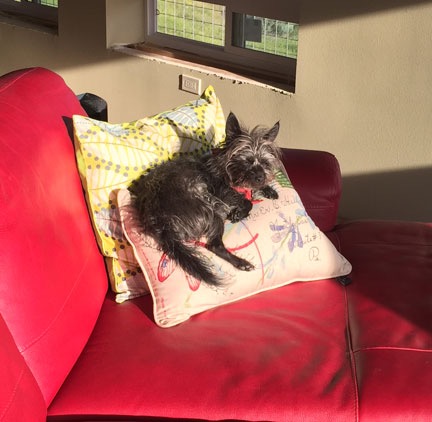
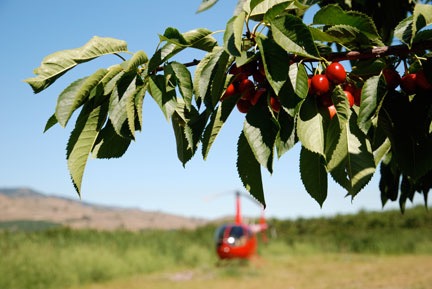
My helicopter, parked in a cherry orchard in 2009. I’ve been doing this work for years.
Let me set things straight from the start: I have cherry drying contracts with orchard owners. I work directly with them or their orchard managers to learn the orchards and fly them. I fly as a pilot over the orchards I’m contracted to cover.
During the busiest time of the season — usually mid June to mid July — I have overlapping contracts that make it impossible for me to cover all the acreage alone if rain is widespread. So I hire other pilots with helicopters to work with me, as part of my team, to get the job done. We work together — all of us know all of the orchards in our area. I don’t assign specific orchards to specific pilots. When it rains, I dispatch pilots, including myself, to service the orchards we get calls for.
My goal is to get a helicopter over an orchard as quickly as possible, so I dispatch based on pilot location and availability. All of my pilots are based within ten minutes flight time of all of the orchards in their area so they can get to orchards quickly and get from one orchard to the next quickly. If a pilot has flown over a specific orchard once, I’m more likely to assign that orchard to him again — but that’s mostly because the more often you work an orchard, the better you know it and the quicker you can service it.
Because I hire and pay pilots, I’ve been accused of being a middleman or broker. But although I am in the middle of the transaction, the pilots I hire are working for and with me. I give them their orders, I pay them. And what the pilots seem to like most about the arrangement is that I pay them in advance for standby and I don’t wait until my clients pay me to pay pilots what I owe them. In other words, they are my contract labor and I pay them based on my contract with them — not my contract with someone else.
There are at least two other helicopter operators in my area who do pretty much what I do: contract with growers to provide coverage, then hire pilots to help them provide that coverage. I worked for an earlier incarnation of one of them. What they do is a bit different from what I do, but I think it’s because of the sheer number of orchards they have and area they cover: Instead of getting all pilots in an area familiar with all orchards and dispatching based on location and availability, they assign specific orchards to specific pilots. As a result, one guy could be flying all day while another guy sits around waiting for a call. My belief is that if good customer service is your primary objective — and it certainly is mine — this is not the best way to utilize your assets (the pilots). Get all the pilots in an area to work as a team and get the acreage covered as quickly as possible.
On Working Directly for Growers
The best situation is to work directly for a grower, but not all pilots want to do that. There are a few reasons for this.
First of all, most orchards aren’t big enough to pay enough standby money to make it worthwhile for a pilot. Aggregation is the key. Get multiple orchards and add up that standby money. If you do it right, you should bring in enough money to make it worthwhile without contracting more acreage than you can handle. This is how I started.
It isn’t easy to aggregate when the contracts are in widespread locations or have overlapping dates. It’s taken me years to fine-tune my operation and, after seven years, it still isn’t perfect. (I don’t think it ever will be.) There are days when I have — and am paying for — more pilots than I need and actually taking a loss on the standby money I have to pay them. But when I average everything out, I do okay.
And although my clients usually pay within a reasonable time, the more clients I have, the more accounting there is to deal with. Invoicing, following up, collecting money, making deposits, paying pilots, filing tax-related documents, paying taxes. If I didn’t have an accounting degree, I’d probably have to hire (and pay) someone to do this, too.
And when you consider how short the season is — one to three months, depending on the contracts you can get and the area you can cover — it’s difficult for an operator outside the area, doing other work for the rest of the year, to build a solid client base.
The pilots who work for me are glad that I do all the setup and pay them what they’re owed, per the contract, on time. The ones who come back every year know a good deal when they have one.
Enter the Brokers
Unfortunately, there are a number of helicopter operators — either current or past — who have decided that there is money to be made by acting as a middleman between the people looking for pilots — like me — and the actual pilots.
I blogged about one of them back in 2013. He contacted me, claiming he had five helicopters with experienced pilots — he said 1000+ hours PIC time — available for cherry drying contracts. The real situation — which I pieced together from our subsequent communication and discussion with another pilot — was that he had zero helicopters and zero pilots; as soon as I told him what I wanted, he’d find pilots to fill the position. Then I’d pay him and he’d pay the pilots a piece of what I paid him. The red flag went up when he told me he wanted more money than we originally agreed upon. The reason: he couldn’t find a pilot willing to take what he was willing to pay after taking his cut from what I paid him. I figure his cut was probably $25 to $50 a day on a four-week contract and maybe $100 or more per hour on flight time.
What does he do for his cut? The way I see it, two things:
- Work as a sort of matchmaker to match a pilot with someone who needs a pilot.
- Sit on all the money he receives from the person doing the hiring as long as he can before paying the person doing the work.
Why would a pilot take a cut in pay to work with someone like this?
And that’s just part of the problem. Another part is the qualifications of pilots the middleman finds. You see, he doesn’t really care how qualified or responsible the pilots he brokers out are. They’re not flying his helicopters. They’re not servicing his clients. If they screw up, it’s not going to cost him anything. So he’ll send any pilot and helicopter that seems to satisfy the person hiring.
And then there’s the issue of communication — possibly giving the pilot the wrong information about the job. Suggesting that there might be more flight time than what’s really possible. Or that the contract could be extended. Or that it’s okay to do training while on actual cherry drying missions.
All this results in a mismatch of expectations — and that’s never a good thing.
Isn’t that enough reason for me to avoid working with middlemen?
This Year
This year, I’m hiring four pilots for about four weeks each. I’ve filled three of the slots. The fourth slot is being difficult, with two pilots saying yes and then backing out because they were unable or unwilling to fulfill contract requirements. I’m negotiating with three pilots to fill that slot, but haven’t come to an agreement with any of them yet.
The reason it’s difficult? I’m picky. I want someone experienced and responsible, someone I know will show up over an orchard promptly and do the work as my clients expect it to be done. I want someone who takes the work seriously and understands that it requires good flying skills in any conditions and is not an opportunity to give a friend rides or do training. Safety and service are my two biggest priorities. Unfortunately, its not easy to find someone willing to come to Washington for a month who understands and respects that.
But I know things will come together in time. They always do. And I’m looking forward to working with my team to give my clients the best service possible.
No middleman required.