An activity-packed road trip with a foodie bonus.
My helicopter was due for an annual inspection before the end of August. The Robinson mechanic with the local fix-it guys, Alpine Aviation, had moved on to another job elsewhere, so there wasn’t a qualified mechanic on staff to do the job. That meant taking it out of town to my backup “local” Robinson shop in Hillsboro, OR. I’d brought the helicopter there a few years before when I was in the same situation. They treated me fairly, recognizing that I needed the helicopter safe and legal but not necessarily factory-perfect. And because they worked on Robinson helicopters all the time, they had a lot of experience with the various things that needed special attention.

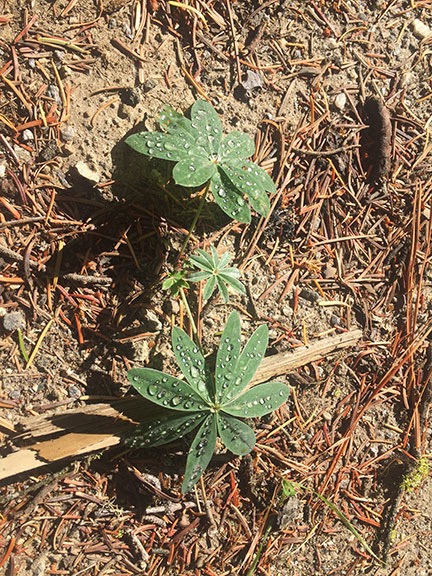
After too much time flying in low-visibility, smoke-filled skies, it was a real pleasure to drop down into the Klickitat River Valley.
So on August 24, I left Wenatchee’s smoky skies and headed south with an old Macworld Expo friend of mine, Raines Cohen. Although the trip should have taken us about 90 minutes on a direct route, heavy wildfire smoke and a TFR near Mt. Adams forced us to go past Yakima and down the Klickitat River Valley, then down the Columbia River to Troutdale before cutting southwest to Hillsboro (HIO). Total time in the air was just over two hours. We caught a train to downtown Portland where Raines bought me lunch at a block full of food trucks. I had no time to dawdle; I hopped on another train to Portland International Airport (PDX) to catch a flight back to Wenatchee.
I’d originally planned to catch another flight back to Portland with a cab to Hillsboro to pick up the helicopter. When I asked Kirk if he wanted to join me and spend a few days in Portland, he suggested that we drive. I admit I wasn’t too happy with the idea. It’s more than five hours from Wenatchee to Portland and he’d have to drive back alone. But he said there were things we could see along the way. I’m always up for a road trip, so I cancelled my flight arrangements and made plans for the trip. That included getting a house-sitter — my friend Alix with her dog Remi — to watch the kittens I’m fostering in the garage and Penny the Tiny Dog, who I’d decided to leave behind to keep things simple.
Day 1: Wenatchee to Hood River
We left in the morning on Tuesday, September 1. We would have gotten an earlier start, but I had to drop my motorcycle off for servicing and the shop didn’t open until 9. So it wasn’t until after 10 AM that we rolled out of town.

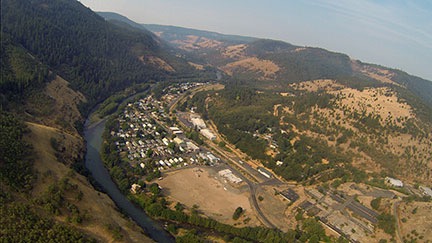
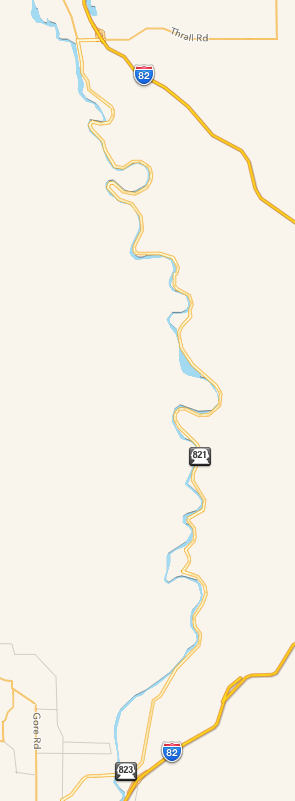
Yes, the freeway would have been quicker, but just look at the twists and turns of Route 821 in the Yakima River Canyon!
We took Route 2 to Route 97 over Blewett Pass. After a quick pit stop at a truck stop in Ellensburg, we continued south on a road I’d been dying to drive: Route 821. This road twists and turns inside the Yakima River Canyon, following the course of the river the whole way. It was a great drive, even in Kirk’s Equinox, but one of these days I’m going to get back down there on my motorcycle.
We got on the freeway near Yakima and took that to Route 97, which goes through Washington and Oregon into California. It’s the fastest route between Central Washington and northern California — the route I take when I drive between Wenatchee and the Sacramento area for frost work each spring. In this part of Washington, it cuts across the Yakama Nation, with wild horses sometimes visible grazing near the road.
One interesting stop along the way: St. John’s Monastery & Bakery. This is a Greek Orthodox monastery with a bakery operated by nuns. The bakery sells all kinds of Greek foods, including pastries, breads, ready-made meals, and honey. We bought and shared a baklava which may have been the best I’ve ever eaten. I highly recommend a stop here if you’re driving through the area. It’s the only thing in the Goldendale area worth visiting (in my opinion).

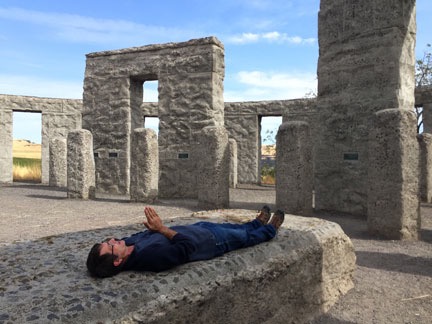
At my request, Kirk hammed it up on the Stonehenge “altar.”
One of the reasons we took Route 97 south was because Kirk wanted to show me the Maryhill Stonehenge. This is a replica of the famous Stonehenge in England, built the way the original was originally built — in other words, not in ruins. It’s situated on a hillside overlooking the Columbia River. It’s a weird spot, mostly deserted but kept clean. We walked around the rocks and then hiked down to the gravesite of Samuel Hill, the man who’d built it. Hill was also one of the driving forces behind the construction of the amazing Columbia River Highway, which we’d drive over the next day or so.
We drove down the hill from Stonehenge and made a stop at a farm stand surrounded by orchards. Kirk bought a 20-lb box of peaches. I introduced Kirk to paletas (Mexican ice pops), one of my favorite local treats.
By this time, it was nearly 4 PM. We’d taken a lot longer to drive south than we expected. But that didn’t matter. We weren’t in a hurry. I had reservations for a place in Portland, but not until the next day. We could stay anywhere that night. I like that — being able to travel at my own pace, visiting places of interest that I stumble onto.
Kirk had always wanted to visit the Maryhill Museum of Art, so that’s where we went next. The museum is housed in a mansion built by Samuel Hill in the early 1900s. Although it wasn’t quite finished, it was dedicated in 1926 by Queen Marie of Romania; there are many paintings of her and furniture items she designed in the museum’s lobby. The museum also has a huge collection of Rodin sketches and sculptures, as well as a variety of other interesting collections. Although it had turned into a gray day, after walking through the museum, we took a nice walk on the grounds overlooking the river. If you like art and you’re in the area, it’s worth a stop.

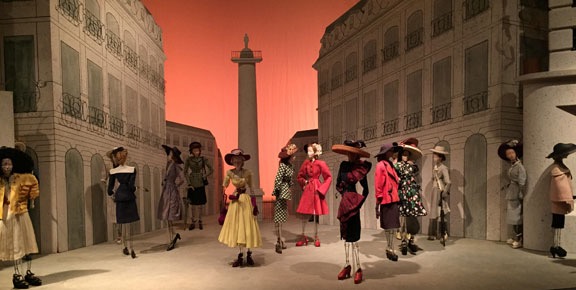
Théâtre de la Mode is an exhibit that shows fashions of post World War II France on 1/3 size mannequins.

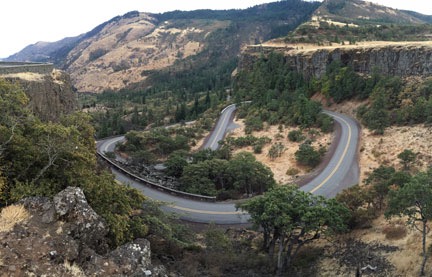
I had the pleasure of riding east on these switchbacks on my motorcycle back in 2011.
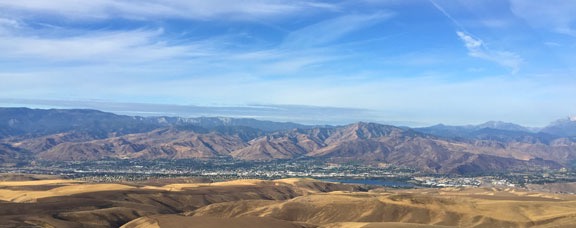
We headed west on Route 14, which winds along the Washington side of the Columbia River. By this time, it was well after 5 PM and time to start thinking about a place to spend the night. We crossed the river at The Dalles, got on Route 30, the Historic Columbia River Highway, and headed west on the Oregon side of the river. That brought us up a steep, switchbacked road to the Rowena Crest Viewpoint. This is a must-stop along the drive, with sweeping views up and down the Columbia River. For folks with time who arrive earlier in the day, there’s also a number of hikes that’ll take you higher onto the plateau to the south.

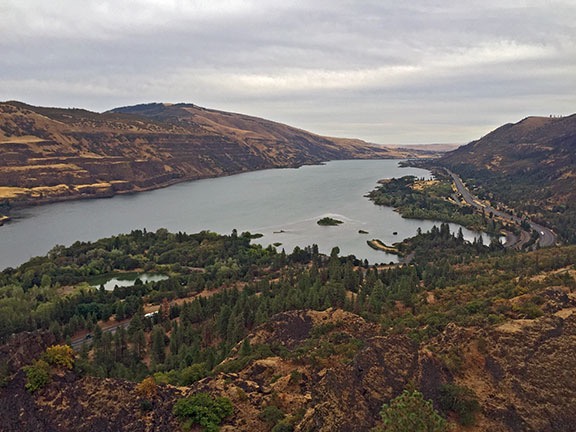
The view from Rowena Crest on that gray afternoon. This shot is looking up the Columbia River toward Rowena and The Dalles.
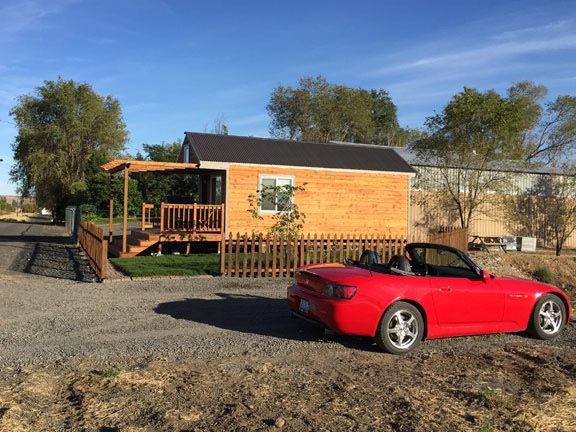
We got back on Route 30, which dumped us onto I-84 after a while. We exited at Hood River. We then followed a series of signs for the “Historic Hood River Hotel,” winding up in town in front of a three-story brick building. Since I’ll take a night in a historic hotel over a night in a Quality Inn (etc.) any day — as long as it’s not crazy expensive — I voted to check it out. The room we got on the top floor was clean and comfortable for only $100. Best of all, the place was walking distance from numerous restaurants. The desk clerk suggested Kin Eatery, which was new, and that’s where we wound up. We had a great dinner with even better wine. (I’d link to their website, but it’s so completely useless that I don’t want to waste my time or yours.)
It had been a great, busy day. We both slept well.
Day 2: Hood River to Portland
The hotel had a very nice buffet breakfast that was included in our room rate. Fresh baked scones, yogurt, cereal, fruit, juices, and other healthy choices. And I got a latte. What else could I want?
We continued on our way, following I-84/SR-30 to the Bonneville Dam Fish Hatchery. I wanted to show Kirk the huge sturgeon I’d seen there way back in 2005, the year of my “midlife crisis road trip.” I don’t think he believed that the fish was as big as I claimed. But he is. His name is Herman the Sturgeon and he’s 10 feet long and 500 pounds. He’s still swimming around in the sturgeon pond, accompanied by several large friends, all of which are visible in a fish window or from walkways around the pond.
It poured like hell while we were at the fish hatchery, but we dodged raindrops and eventually made our way back to the car. From there, we went into the Bradford Island Visitor Center at the Bonneville Dam. There are quite a few displays there covering the salmon runs, dam construction, and native people. There’s also a fish ladder with a viewing window — quite a few salmon were running upstream. We left just as a tour was beginning.

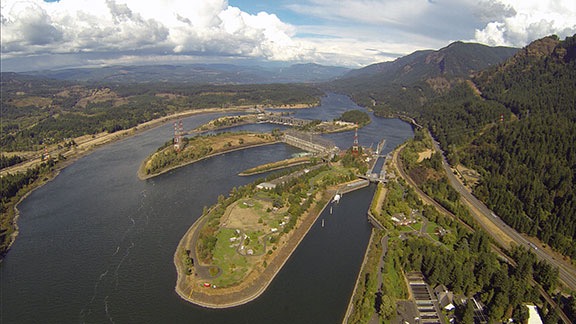
Here’s a view of the Bonneville Dam complex shot with my helicopter’s nosecam on my way home that Friday. The fish hatchery is in the lower right and Bradford Island is about dead center.
It was while we were at the visitor center that I listened to my voicemail messages and got some bad news. During the final part of the inspection the day before, the mechanics had found a screw and washer in the oil pan screen. They didn’t know where it had come from but they obviously had to find out. I called the maintenance boss to talk to him about it. He said he’d gotten some info from Lycoming, the engine manufacturer, and the guys were working on it. But it would definitely delay my pickup. Instead of coming for it on Thursday morning, as planned, it might not even be ready by Friday afternoon. This was very bad news for me since I had a rides gig on Saturday and three charters on Sunday. I told him to do the best he could and hung up. It looked as if at least one of us would be spending an extra day or two in Portland.
When we left the visitor center, we were dumped back on the freeway until we could finally exit back where Route 30 continued on its own. This is probably the most well-known stretch of the Columbia River Highway, where one waterfall after another tumbles off the cliffs alongside the road. There are countless hiking trails with ample parking and no shortage of scenery. I could easily spend a week just exploring this part of Washington on foot.

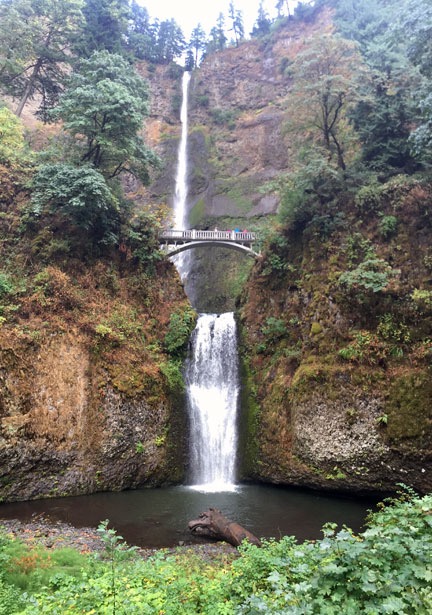
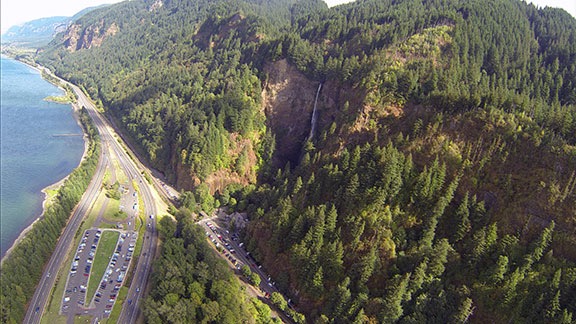
The iconic Multnomah Falls.
We passed one waterfall after another, but didn’t stop. Our destination, which I hoped to make in time for lunch, was Multnomah Falls. This is the iconic waterfall of the Columbia River Highway — the one with the bridge across it. You know. That one.
We arrived at 11:30 and, by some miracle, got a parking space close to the front door. That was a good thing because it was raining again. I dashed inside the lodge while Kirk went in search of a restroom. I got us one of the last tables in the restaurant. I had a nice sautéed trout with vegetables for lunch.

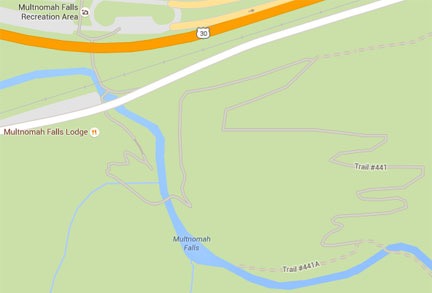
The Multnomah Falls area includes a trail with 11 switchbacks that climbs to the top of the falls.
After lunch, we headed out for a closer look at the falls. It had stopped raining by then and the sun was poking out. We did the quarter-mile hike up to the bridge, where we stopped and looked at the water falling from far above us. The trail continued and so did we.

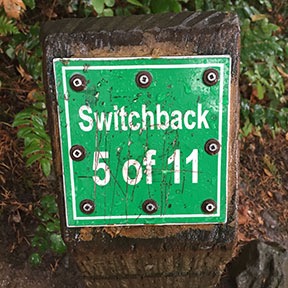
Yep. 11 switchbacks.
It was a long hike to the top of the falls. Not distance — it’s only about a mile from the bridge — but in time. There are 11 switchbacks, each of which was marked so you could track your progress. The switchbacks were needed because we were basically climbing up the side of a cliff. I don’t do well on uphill climbs and I needed a lot of rest stops. Kirk was very patient. It rained on us, of course — hard at times — and we found shelter up against the large trees alongside the trail. There were plenty of people on the trail, but I wouldn’t call it crowded.

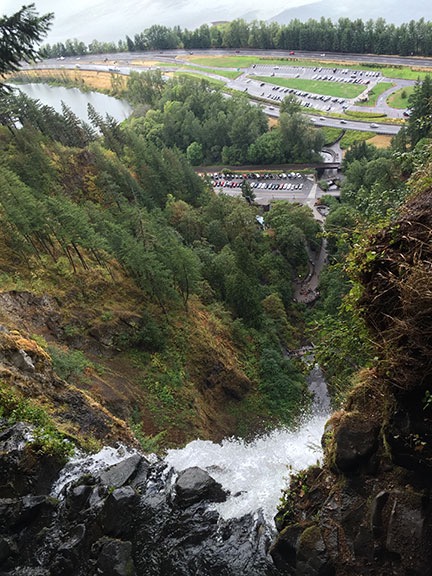
I reached far out with my camera and shot this view looking down the falls. If you look closely, you can see the bridge.
Eventually, we reached the highest point of the trail and started a descent to Multnomah Creek. A few steps down to a circular platform and we were there, at the top of the falls. I’ll be the first to admit that if I hadn’t been encouraged all the way by Kirk, I probably wouldn’t have finished the hike. But I was so glad I did! The view looking back down was amazing. We stayed for about 20 minutes. During that time, the rain stopped and the sun came out. It was a beautiful afternoon, with wispy clouds floating up the Columbia River valley.
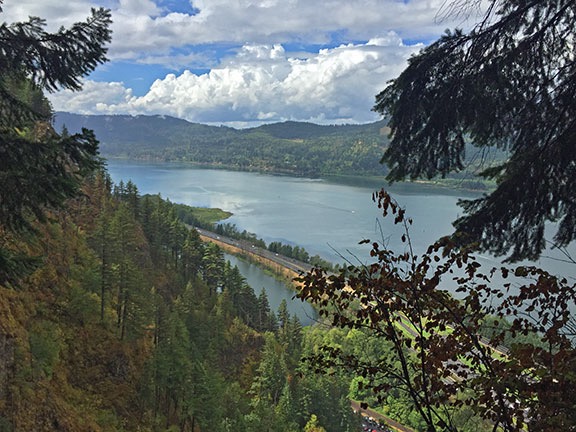
Here’s a view of the Columbia River from the top of Multnomah Falls.
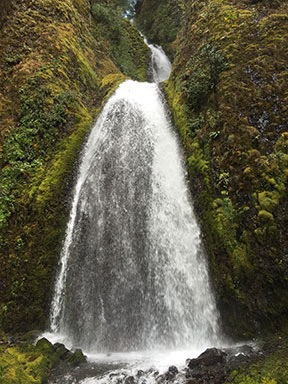
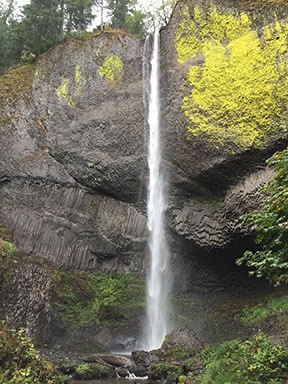
We hiked back down and continued down Route 30. From that point, we made several waterfall stops: Wahkeena, Bridal Veil, and Latourell. We stopped and did short hikes at some of them. I tried Periscoping once or twice but didn’t have a good, strong signal. The weather pretty much held, although it did drizzle a bit while we were at Latourell Falls.

Wahkeena (left) and Latourell (right) Falls are stops right along Route 30.
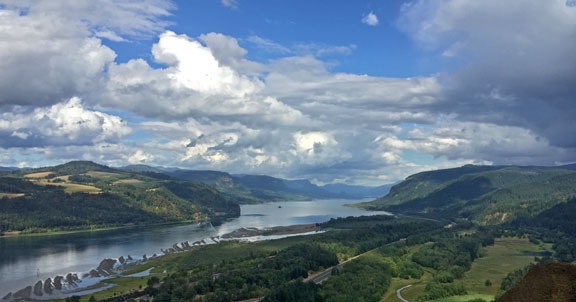
After some more twisting road that led away from the river briefly, we wound up at Vista House, yet another historic overlook along the road. The view was so spectacular — especially with the post-storm clouds and blue sky — that I took several pictures of that and none of the building itself. It’s a small domed building with a second floor, walk-around viewing area. I managed to capture a good image as I flew over it a few days later in my helicopter.

The view from Vista House that Wednesday afternoon.
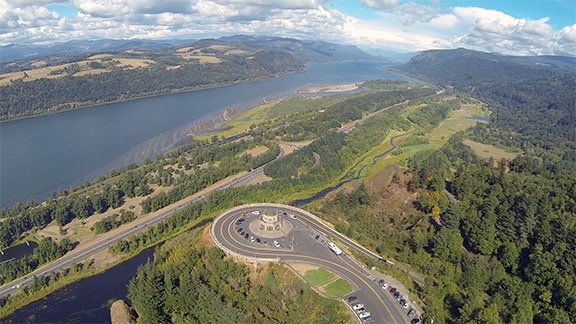
A view of Vista House from the air shot from my helicopter two days later.
Although the Columbia River Highway continued on toward Springdale and Troutdale, the scenic parts pretty much ended at Vista House. We continued down the road to I-84 and pointed the car toward Portland. I worked my phone’s navigation features to guide us to the AirBnB property I’d reserved for our overnight stay. We arrived at about 5:15 in a quiet Portland neighborhood, let ourselves in with the hide-a-key, and relaxed for a while.
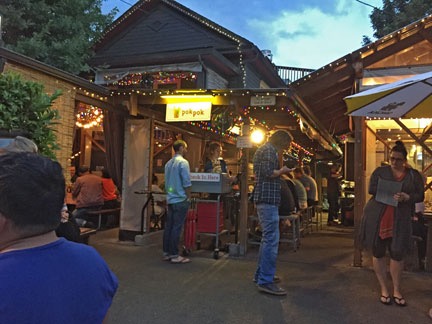
Pok Pok features indoor/outdoor seating.
Our hosts arrived a while later and after having a nice chat with them and marveling at the huge size of one of their cats, we headed out on foot for dinner. My Twitter friend Terry had recommended a Thai place called Pok Pok, whicih was about five blocks away. (I didn’t realize it when I made the reservation, but the AirBnB property I’d booked was within walking distance of one of Portland’s many foodie areas.) There was a wait to get in, but they had openings at the bar so we took two seats there. We ordered the Fish Sauce Wings that Terry had told me about, as well as Kai Tuun (a chicken dish) and Kaeng hang Leh (a pork dish). Kirk had a Thai beer and I had one of their weird drinks, a Lord Bergamot (Smith Teas bergamot tea infused vodka with Som honey drinking vinegar, orange liqueur, and soda on the rocks), which was so tasty I had two. Although the food was great, I didn’t think it was worth waiting for the amount of time we would have had to wait for a regular table. And when the two people who sat near us admitted to also being out-of-towners, I began to suspect that Pok Pok is a tourist joint. Still, no regrets. It was a great meal.
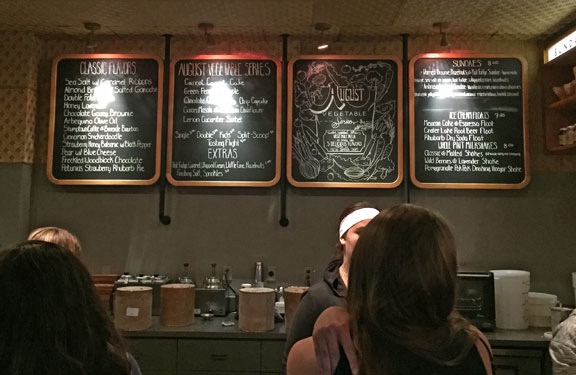
Afterwards, we walked down the block to Salt & Straw, a “small, hip ice cream parlor featuring unique, housemade flavors like blue cheese & olive oil,” according to Google. It had been recommended by our AirBnB hosts. The line stretched out the door about a half block and didn’t move very fast. I couldn’t imagine any ice cream being good enough to wait an hour for and neither could Kirk. So we had a pastry at the French bakery next door, sitting outside and watching the folks on line as we ate.
A nice evening walk back to our lodging finished the day.
Day 3: Portland
The only thing disappointing about the AirBnB place we stayed was breakfast: they put a French press and hot pot in our room and left cold cereal in the kitchen for us. While weak coffee and cold cereal is apparently enough of a meal for Kirk, I needed some decent coffee. So after getting dressed for the day, we drove about halfway to the K&F Clinton Street Coffeehouse and walked the rest of the way. I got a latte and a breakfast pastry; Kirk passed on a second cup of coffee. Afterwards, we took the long way around back to the car, walking on Division Street. We discussed whether Kirk would stay an extra day with me and he told me he would. Later, I booked the same place for that night.
We headed into Portland. Kirk wanted to visit the Lan Su Chinese Garden. We found the place, parked, and then discovered it wasn’t open yet.
So we walked to the destination I wanted to visit: the famous Powell’s City of Books. All I can say is wow. I’ve never been in a bookstore with so many books. With limited time — the meter was running at our parking spot 10 blocks away — I had to choose one topic to explore. I went to the Writing books area and found hundreds of books about writing. What’s neat about Powell’s is that they have both new and used books and don’t seem too worried about how much shelf space they use. It was an amazing selection. I bought two books, both of which were used and much cheaper than if they’d been new. I could easily spend an entire day in this bookstore, but I worry about how many books I’d carry out with me.
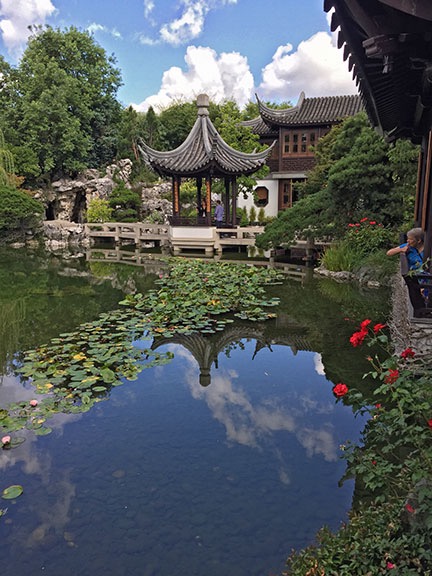
Lan Su Chinese Garden is a beautiful oasis of nature in downtown Portland.
Back at the garden, Kirk fed the meter and bought tickets for the garden. It was a beautiful place, with a carp-stocked pond, Chinese style buildings, and lush vegetation, all surrounded by a tall wall that blocked out most views (but not sounds, unfortunately) of the city beyond. We spent about an hour wandering around while a tai chi class moved silently on a platform overlooking the pond.
From Chinatown, we went in search of lunch. I wanted to show Kirk the block of food trucks I’d seen with Raines two weeks before. I don’t think he understood that there was an entire block of them. I had a rough idea of where it was so we moved the car and parked near there. After walking around for a while, trying to find something that looked remotely familiar, I finally asked for directions. The place we wanted was the block bordered by SW Alder, SW 10th, SW Washington, and SW 9th. It’s a full block lined with at least 50 food trucks selling all kinds of food. We walked the entire block, looking for something that struck our fancy. (I’d had a gyro two weeks before but wanted something more exotic.) Finally, we split up. I had a Tangine meal from a Moroccan food truck and Kirk had something Asian.
We ate on a bench in nearby O’Bryant Square, a park with a weird collection of people. I’m not sure if Kirk realized that the woman sitting at the far end of our bench, tapping away at her smartphone with long, manicured fingernails, was actually a man. The two of us did spend some time wondering why an extremely clean and well-dressed Hispanic man, who had a smart phone, was eating food from the garbage. And we disagreed entirely about the musical talents of the homeless-looking man who strummed away on a guitar in the middle of the crowd — I said he had no talent but Kirk was more inclined to think he did. Whatever. The highlight of the park — if that isn’t enough — was the bicycle pedal driven blender some guys were using to make and sell iced smoothies. They gave me a sample as we walked by for a closer look and it was awful.
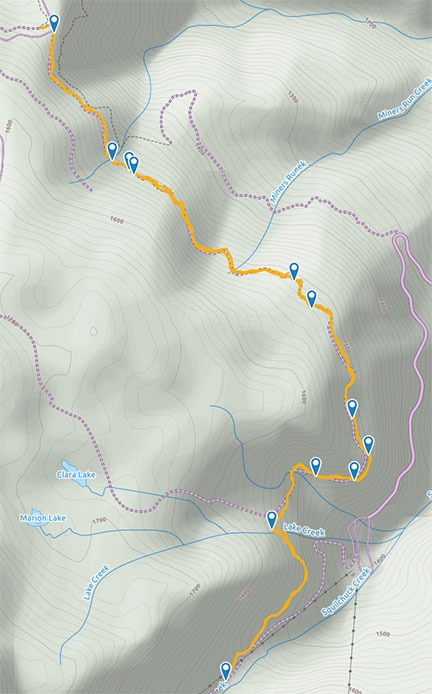
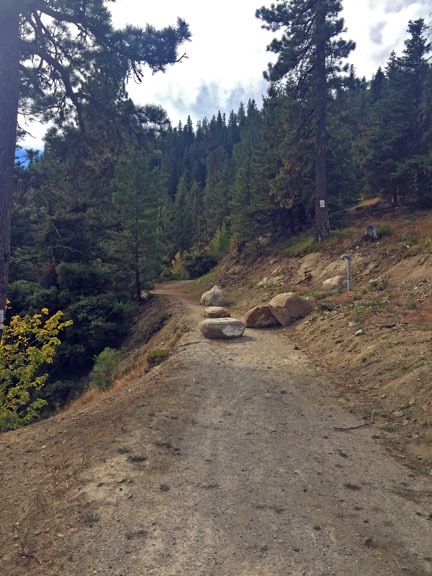
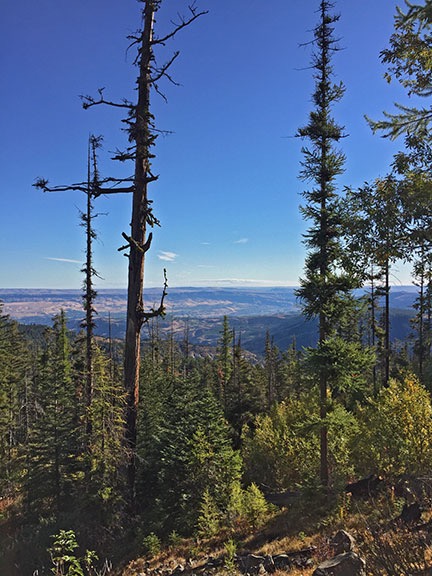
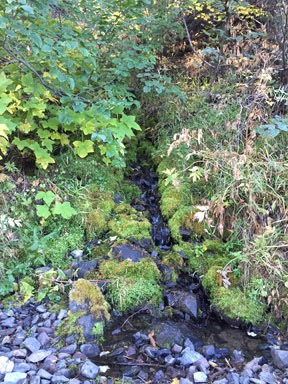
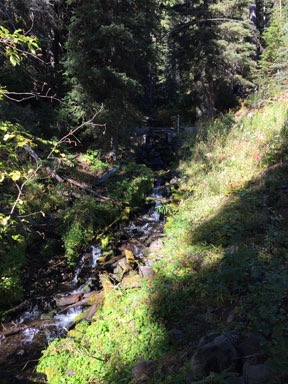
After a walk in Pioneer Courthouse Square, we got back in the car and headed out to Washington Park in search of a hike. We’d been directed to the Hoyt Arboretum visitor center. That’s where we got a nice trail map and picked a combination of several trails that wound through tall pine forests. Kirk knows a lot about trees and shared some of his knowledge of what we saw. There’s a stand of giant redwoods and even a few sequoias in there and our path took us past all of them. Of course, it rained when we started the hike, but I kept dry in a $3 poncho I bought at the visitor center. I was seriously tired of being wet. But it was a pleasant walk all the same and, for most of the walk, the sound of the city and highway faded away.
I should mention here that I’d been to Washington Park’s International Rose Test Garden a few years before and although we didn’t visit it on this trip, I do highly recommend it.
Afterward, we headed back into town. I wanted to visit the Pendleton Home Store with the thought of buying a king-size blanket for my bed. I’d gotten a bedspread months ago, but thought I could do better. We found the store and parked nearby, then spent some time browsing the store. I worked with a salesperson to go through the catalog for options. Unfortunately Pendleton doesn’t carry all of its styles in king size and, if I’m going to spend $400 for a blanket, I have to really love it. So I walked away empty-handed.
It was nearly 5 PM when we headed back to our lodging. We relaxed for a while before heading out to dinner. We walked again — the weather had cleared out and it was very pleasant — this time going to Bollywood Theater, an Indian restaurant recommended by our hosts. I snagged us a seat inside and we waited on line to order. I can’t really remember what we ordered, but we shared it and it was delicious. Afterwards, I checked out the attached Indian market, where I could buy all the grains and spices I needed to make authentic Indian food. Unfortunately, I hadn’t come with any lists of ingredients I’d need in the future. Next time, I’ll be better prepared. I really love Indian food.
We got lucky on the way back to our room. Salt & Straw’s line was much shorter and, not willing to leave the area without a taste, we got on line. Ten minutes later, we were inside, tasting some of the unusual flavors they offered. I tasted Pear and Blue Cheese. It was interesting, but I ended up with a half scoop of Freckled Woodblock Chocolate and a half scoop of Honey Lavender. They were both good, but next time I’ll go for the Stumptown Coffee & Burnside Bourbon. (Don’t know how I missed that.)

The flavor board at Salt & Straw.
We took a different route back to our room and settled in for the night, exhausted from a full day.
Day 4: Portland to Hillsboro to Home
Kirk had his weak coffee and cold cereal breakfast again. I tried the coffee again, but really couldn’t drink it. Then we packed up and said goodbye to our host. I navigated us to Hillsboro, which is southwest of Portland. Along the way, I suggested a few return routes to Kirk. The weather looked good and I know he wanted to make a few stops, possibly for some hiking, along the way.
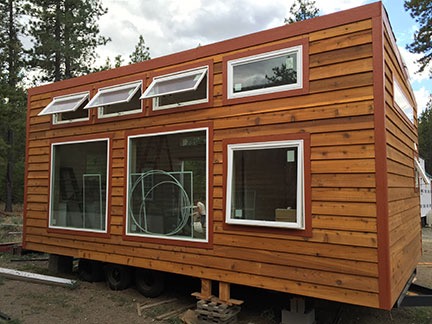
Despite being partially undressed, my helicopter was almost ready to go.
My helicopter was out on the ramp, running with a few panels still off when we arrived. That was a good sign. It meant it was mostly assembled. Kirk came inside the shop with me were I chatted with the mechanics. They needed a few more hours. That was no problem; I’d rented a car from Avis for the day and would keep busy while Kirk started the long drive home. So Kirk dropped me and my luggage off at the Avis desk nearby and we said our goodbyes. I got the keys to a small car that would cost a whopping $30 for the day, loaded up my stuff, and headed out on my own.
I got coffee and a breakfast sandwich at a local coffee shop. Hell, I have my priorities straight!
Then I went shopping. I found a Trader Joe’s and stocked up on the various things they sell that I really love. I also snagged a 2-lb box of fresh figs, which I love. Then I stopped at a number of other places: Pier 1, Michael’s, Sportsman’s Outfitters, others. I bought a few small things along the way — after all, they needed to fit inside the helicopter. I went into REI and bought Kirk a map and book about the Pacific Crest Trail, which he kept telling me he wanted to hike. Around then is when my phone rang. My helicopter was ready.
I headed back, returned the car, and managed to carry all my luggage and purchases down the ramp to my helicopter. I stowed it on board and went inside to settle my bill and order some fuel. The bill was a lot higher than I expected, mostly because of that damn screw, which required 14 hours of labor to replace in the oil pan baffle. Sheesh.
I was airborne by about 3 PM. It didn’t take much research to realize that a direct route home would not be possible. There were storms with low clouds to the north, heading east. I figured I’d follow the same route I’d taken down two weeks before, but was over Klickitat when I realized even that would be difficult. So instead, I headed east to the Columbia at Mattawa and followed the river up from there. I wrote about part of the flight elsewhere in this blog and have shown some of the photos my helicopter’s nosecam captured in this post.
Here’s one more photo: Multnomah Falls from the air, shot on my way home.
I was home by 5 PM and put the helicopter away. Penny was very happy to see me. Kirk got home an hour or two later. He’d taken his time on the way home, making a few stops along the way.
Postscript
That trip to Portland was likely my last trip with Kirk. A few days after our return from Portland, I ended our relationship.
Things had started off very well, but soon settled into the kind of frustrating rut you’d expect when two smart people, set in their ways after 50+ years of life experiences, end the good-behavior courtship phase of the relationship and reveal what they’re really all about. I realized that we were not as compatible as I’d hoped and pulled the plug before either of us could get too emotionally involved.
If there’s one thing my disastrous marriage taught me, it’s this: I’d rather be alone than with the wrong man. Life is too short to let someone else make you unhappy.
So I’m single again, without any new emotional scars, enjoying life on my terms. But I’m still keeping an eye out for a guy who might be the right companion for future adventures.
I’m thinking of the Florida Keys in November. Any takers?