About one of my photos and the plane featured in it.
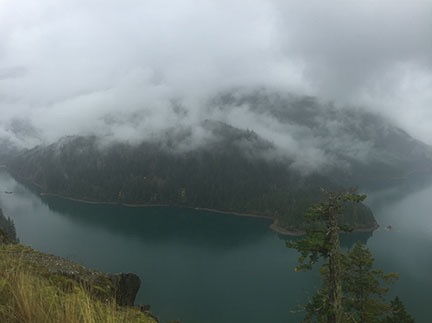
I was in Alaska this past week. My friend George has a house up there and he’d told me I was welcome to come any time. Last month, when I was feeling kind of stuck in a rut — long story there — I decided that a trip to visit a friend might be a good idea. I texted George to see if he was going to be around, then bought plane tickets to go see him.
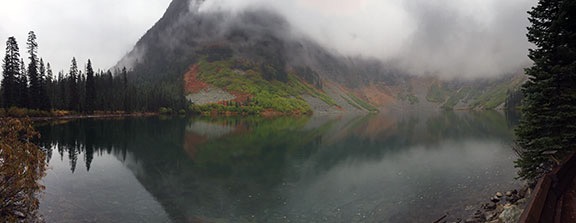
This was my third trip to Alaska.
The Alaska Cruise
The first trip, back in 2007, was with my wasband. We were married at the time and we went on a cruise out of Seward. He had friends living in Anchorage and we spent two nights at their home before heading north on the tourist train to Denali. After Denali, we got on another tourist train to Seward where we picked up the cruise ship.
The trip was memorable, but mostly because both Alaska Air and the cruise line had managed to lose various pieces of luggage in Alaska. It was a huge relief that the one remaining missing bag found its way into our stateroom on the ship.
Although I didn’t hate the trip, I was extremely disappointed. I detest being treated like a tourist and because my wasband had booked everything through a travel agent, that’s exactly how we were treated. I particularly hated the Princess-affiliated hotel we were stuck in near Denali with the boardwalk outside our room that people thundered by on at all hours. Even the cruise was a disappointment. Shuffled here and there, every port full of the same tourist crap shops and cooked-up attractions, and hundreds of midwesterners on the ship who bragged about how they kept their costs low with an inside cabin and no port excursions. Clearly most folks were on the cruise so they could say they’d been on an Alaska cruise. I was hoping for a more unique and positive experience.
Anyway, I blogged about the trip when it was over, so you can read a lot more detail and see some of the photos. Personally, I’d rather forget it in favor of some new Alaska memories.
The Job Interview
My second trip was in March 2008. I flew up to Anchorage for a job interview.

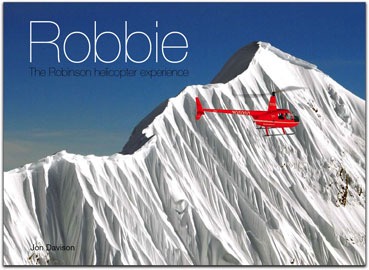
Alpine Air Alaska was featured on the cover of the 2009 book, “Robbie: The Robinson Helicopter Experience.”
The interview was at Alpine Air Alaska. I’d met the owner of Alpine Air, Keith, via email when we were both featured in Jon Davison’s coffee table book about Robinson Helicopters. (Can’t believe I didn’t blog about that, but I can’t seem to find an entry.) Keith’s operation was on the cover. I was looking for a summer job that would keep me out of Arizona’s brutal heat and Alaska seemed like a good idea.
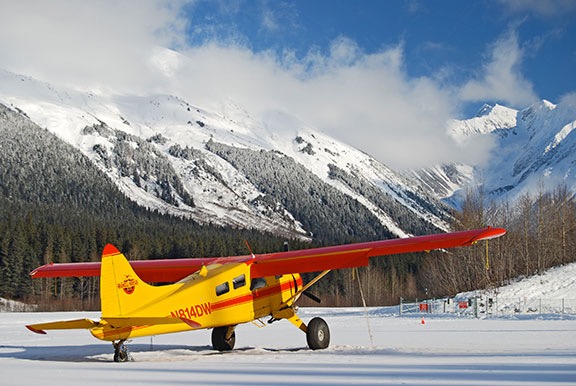
I did a few flights with Keith — including one where we landed an R44 on a glacier and got out for a walk with the passengers — and got a chance to see how incredibly beautiful Alaska is in the spring. There was snow on the ground, but not much, and when the low clouds moved out, there were tantalizing glimpses of the snow-covered peaks around Alpine Air’s base in Girdwood. I had my camera with me — it was a Nikon D80 in those days — and I shot a photo right outside the hangar of a bright red and yellow airplane with the mountains beyond it. Later, I entered it into a state-themed photo contest. That’s where it got its name, “North to the Future,” which is the state motto of Alaska. (It didn’t win.)

Shot in March 2008, I call this photo “North to the Future.”
And that’s really what this blog post is about: the photo. You see, although it looks like a photo of a plane, it’s really a photo of a scene. The snow covered runway, the fresh snow in the trees, the clouds clinging to the mountains, the blue sky beyond, and this brightly painted plane looking as if it’s waiting for an excuse to take off. I just thought it was a great image, and the aviation theme didn’t hurt. It’s actually one of my very favorite photos. The colors and clarity still blow me away.
But the photo has a history beyond the day it was shot.

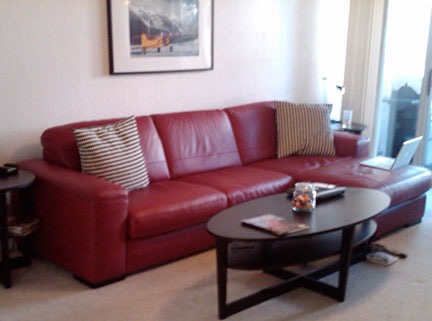
I happened to find this 2009 photo of the condo living room in iPhoto while looking for something else. You can see the photo hanging over the red leather sofa. (Seeing this photo reminded me how much I hated that place.)
It was among the first photos I had enlarged and framed in 2009 to hang in the condo my wasband lived in part-time in the Phoenix area. Back when he bought the condo in late 2008, I thought I’d be spending a lot of time there with him. Instead, he got a roommate, a friend who made me feel very unwelcome every time I came around. With my wasband living in the condo four nights a week, our marriage was suffering. In the summer of 2011, I asked him to get rid of the roommate so I could move in. By the time I moved in that autumn, it was pretty clear that my wasband didn’t really want me there; he was likely already planning his exit strategy for our marriage. By the summer of 2012, the marriage was over.
Still, the photo hung over the red sofa in the condo. Several of my other photos, enlarged, matted, and framed, hung in the condo with it. I wanted them back — I couldn’t understand why my wasband and the desperate old whore he was living with would want my artwork in their home. When the court allowed me to retrieve my things from the condo in November 2012, the photos were near the top of my list. My wasband made me ask permission to take each and every item, including the photos. Later, back home, I packed them up with plenty of bubble wrap in big, flat boxes, and moved them first to my Wickenburg hangar, next to my Wenatchee hangar, and finally to my new home in Malaga. (Oddly, I later got the red leather sofa the Alaska photo had hung over, too.)
Back to Alaska. The job interview that March went well and Keith made me an offer. After some thought and a discussion with my wasband, I turned it down. Ironically, I was worried that being so far away from my wasband for five or more months that summer would hurt our marriage. (It wasn’t the first or last time I turned down work because of him.)
It turned out for the best. I started cherry drying that summer — with a mere seven weeks away from home — and it was far more lucrative and better for my business than a tour job would have been. It also gave me a firm basis for my Wenatchee-based business when the divorce finally freed me up to follow my own path in life.
Trip Number Three
I went to Alaska for the third time this past week. I was feeling in need of a trip and had a free week on my calendar when George would be there, too. I invited myself and he welcomed me.
I’ll blog about the trip in some detail later this week — if I can find time. For now, I just want to talk again about that photo.
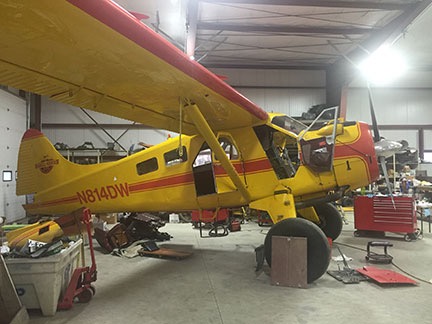
You see, when I showed the photo to George — I keep a copy in my phone — he said, “Oh, that’s Wrangell Air‘s plane. I use the same mechanic.” (Although George doesn’t fly for a living, he is a pilot with two planes and a gyro.)
A few days later, we took a drive down the Turnagain Arm. On the way back, we went through Girdwood. I wanted to see the Alaska Air hangar and try to better remember those few days in March seven years before. The hangar looked much the way I remembered it. But there was no fresh snow, no blue sky, and no red and yellow plane.
George wanted to talk to his mechanic, so we went to another hangar down the runway. Inside were a bunch of planes in various stages of undress as they were being worked on by two mechanics. Although the guy George wanted to talk to wasn’t there, he talked to another guy while I wandered around.

The red and yellow plane was in for maintenance.
And there was the red and yellow plane, in the back corner of the hangar, in for its annual inspection.
It would have been great if it had been parked outside in the same place and I could get a cloudy autumn version of the same shot. I doubt it would have come out nearly as nice, though.
But maybe I’ll get it the next time I’m in the area. Alaska isn’t that far away and George didn’t seem to mind me being around.
The Photo Today
Back home, I hadn’t unpacked any of my photos. My new home has limited wall space and I’m not quite sure where I’ll fit the large framed photos.
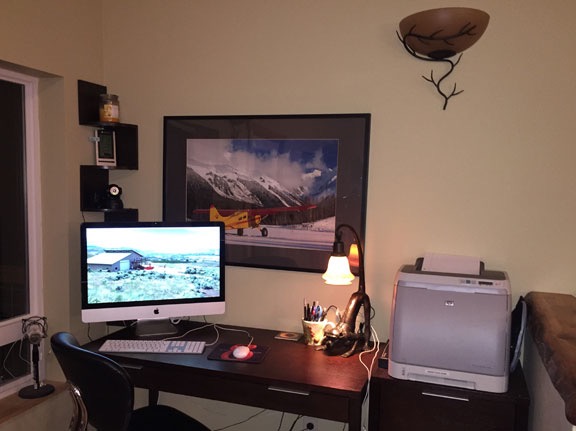
But today I went down into the garage where the big, flat boxes marked “Framed Photos” are leaning up against a wall. One by one, I opened the boxes and pulled out the bubble-wrapped frames. I stacked the boxes on the floor, ready for my next trip to the recycling center, and repositioned the wrapped frames where my other packed boxes remain. There’s room there now — I’m about half unpacked. When I found “North to the Future,” I set it aside.
Later, I brought it upstairs. I’d been thinking about how nice it might look on the wall over my desk. I unwrapped it and held it up to the wall. It was a lot bigger than I remembered it. It would be a bit of a squeeze.
I found a picture hanger and tapped it into place. Then I used a damp rag to wipe the Phoenix dust off the frame and plexiglas over the photo and mat. The wire at the back of the photo found its way into the hook without any trouble. I straightened it and stepped back to look at it. It’ll do.

I think my office is now officially finished.
Now that I’ve been thinking a bit about this photo and Alaska, I realize that the second two trips are far more meaningful to me than my first visit. Those trips were for a purpose other than trying to cram as many tourist destinations and photo opportunities into the shortest amount of time. They remind me how much I hate being a tourist and how much I love being a traveler. (If you don’t know the difference, you haven’t traveled.)
This photo is the perfect reminder of those trips to Alaska — and great trips yet to come.