Flying with Miss Veedol

My first photo flight of the year.

Early Tuesday morning, I lifted off from the ramp at Wenatchee Pangborn Memorial Airport in East Wenatchee, WA on an air-to-air photo flight with Miss Veedol for Voortex Productions and the Wenatchee Chamber of Commerce.

The Miss Veedol was the first airplane to fly non-stop across the Pacific ocean. A 1931 Bellanca J-300 Long Distance Special piloted by Clyde Pangborn and Hugh Herndon Jr., it took off in Japan with 915 gallons of fuel, jettisoned the landing gear to improve aerodynamics, and crash landed 41 hours later at Fancher Field in East Wenatchee, making history. You can learn more about it and its eventual demise on Wikipedia and the Spirit of Wenatchee website.

I recommend you watch this in full-screen mode.

The Miss Veedol I flew with on Tuesday is a replica of the original aircraft that is based at Wenatchee Airport. This isn’t the first time I flew with it — we did a video flight way back in January 2014. Footage from that flight (and a few others) was incorporated into the amazing We Are Wenatchee Part I video. (This video still brings tears to my eyes; I’m so glad I live here and so proud to be part of the team that made the video. I hope you’ll check out Part II and Part III, too.) It was a difficult flight, mostly because it was bitter cold and I was having trouble keeping up with the plane.

But Tuesday was a completely different story. It was a gorgeous morning when we gathered just before dawn. I parked near Miss Veedol’s hangar and discussed the flight plan with my clients from Voortex Productions and Miss Veedol’s pilots. Then we split up. I got the helicopter going while they started up Miss Veedol’s big radial engine. The two photographers climbed on board — I had already taken their doors off — I backed the helicopter away from where Miss Veedol would be taxiing, and then I followed her down the taxiway while the photographers shot photos. By that time the sun was up, illuminating the plane’s orange wings and fuselage and casting long shadows. We circled the plane in the run up area, then moved beside it as it taxied to the runway. We took off in formation, with the helicopter slightly above and behind the plane.

The conditions were nearly perfect for the flight. Light wind, blue sky, gorgeous early morning light. It was just after 6 AM when we reached the river and headed up on the East Wenatchee side. The plane would go up one side of the river and down the other while a photographer and videographer captured images and footage.

Miss Veedol Over Columbia River
Miss Veedol with the city of Wenatchee in the background. The snow-covered mountains are the Enchantments, west of Wenatchee in the foothills of the Cascades. Most of the snow will be gone by late June. (I can see the tops of these mountains from my home.) Photo by Charley Voohris.

One of the most frustrating things to me when I do photo flights is that I can’t take photos. I see the shot but I don’t have a camera handy and, even if I did, it would be impossible to work it properly with just one hand. I have to wonder if the photographers see the same shots I do. I like flying with Charley because he usually does see the same thing I do — or something even better — and gets the shot.

Miss Veedol Over Shadows
I distinctly recall when we were in position for this shot because the shadows beneath the plane made its orange color really pop in the early morning light. Photo by Charley Voorhis.

One of our target areas was a rock formation called Saddle Rock at the top of a hill overlooking Wenatchee. Every time we do an aerial photo flight, we spend time up and around Saddle Rock. (You can see it in the closing shot of We Are Wenatchee Part I above — seriously, you must watch that video.) Part of our mission was to get photos of Miss Veedol around Saddle Rock. Charley succeeded in getting several really good shots as we circled Saddle Rock twice.

Miss Veedol Flies up a Canyon
Spring time is always green here, but this year it’s especially green with all the rain we’ve had. I followed Miss Veedol up this canyon on our second pass for Saddle Rock. I love the textures and contrasts in this shot. Photo by Charley Voorhis.

Another target area was the Senator George Sellar Bridge — which I usually refer to as the South End Bridge. We circled twice at the end of the shoot.

Miss Veedol at the Columbia River Bridge
Charley managed to perfectly frame Miss Veedol between the Senator George Sellar Bridge and the historic Columbia River Bridge. Photo by Charley Voorhis.

Our Flight Path
Our flight path, captured by Foreflight.

After circling the bridges, Miss Veedol headed back to the airport for a few touch and goes before taxiing back to her hangar. We went back for a few more shots at Saddle Rock. By that time there was just enough tailwind to make hovering flight a tad difficult pointing in the direction we needed to point but I think they got the shots they needed. We did a quick run to the north end of Wenatchee and then back to the south, circling Pybus Public Market once. Then it was back to the airport.

Total flight time was 1.3 hours.

I want to thank Charley Voorhis at Voortex Productions and the Wenatchee Chamber of Commerce for allowing me to show these photos on social media and in my blog. It was a great flight and I look forward to our next one!

I Have No Patience for Lazy Writers

A brief rant.

This morning, I got this email from someone who is apparently farming out parts of his books to people with better description skills than he has:

You are the perfect person to help me. I’m writing a book about birding adventures that I had in 2011. One tense incident happened along the Rio Grande when armed cartel waded across the Rio Grande. To make a long story short, for the next forty-five minutes or so two helicopters (border patrol) circled overhead. Here is my question:

How would you accurately describe the sound these helicopters make?

Border Patrol at Rio Grande
Photo of Border Patrol helicopter over Rio Grande from gallery on U.S. Customs and Border Protection website.

For the record, I’ve never been birding along the Rio Grande while Border Patrol helicopters circled overhead for 45 minutes. How would I know what it sounds like?

Yet this guy was apparently there and can’t describe it. He figures that since I’m a helicopter pilot and a writer, I can describe it for him. So he sends me this email message.

Here’s a tip: if you can’t accurately describe something with words, you shouldn’t be a writer.

And yes, I addressed this in my blog back in 2009: “Writing Tips: Writing Accurate Descriptions.” If you do read that post, pay close attention to the first paragraph under the heading “Do Your Homework,” since it pretty much covers my thoughts on getting email messages like this one.

Lake Berryessa and the Glory Hole

Not something you see every day.

I spent a few weeks in the Sacramento area of California — as I have been since 2013 when I brought my helicopter there for its first frost control contract — in late February and early March. I’ve gotten to know the area pretty well over the past five years and as I continue to explore new places, I also return to the old ones. Lake Berryessa, the largest lake in Napa County, is one of these places.

I first discovered it during a drive up Putah Creek, starting in Winters, CA. From there, I made a stop at the Lake Solano Campground (which I eventually stayed at for the first time this year) and noted its crazy collection of peacocks. Farther up the road, I passed numerous parking areas for fishing and hiking and picnicking. Still farther, the road crossed the creek, wound up a hill, and passed the Monticello Dam, which holds in the waters of Lake Berryessa. Penny and I have hiked in various places along the shore, driven much of the west side’s shoreline, and even flown over it numerous times in my helicopter.

Aerial View of Lake Berryesssa
An aerial view of Lake Berryessa, shot with a GoPro on my helicopter back in March 2014. The water was very low.

For the first four years I’ve been in the area, the lake level was low — very low. This isn’t surprising given the serious drought that affected nearly all of California. All of the lakes I flew over were low. But this year things were different. This year, all the lakes are full, nearly full, or even — in some cases — overflowing. Lake Berryessa is one of the lakes with too much water.

Man-made lakes — basically, any lake that holds water in with a dam — usually have flood control features built in that guide excess water safely out of the lake and into a receiving stream or river. This is normally done with the use of a spillway that can be opened or is automatically utilized before the water level reaches the top of the dam.

Spillways come in different styles. The most common is a sort of water chute that excess water flows down, away from the dam. Most dams have this kind of spillway. The Oroville Dam, which has been in the news a lot lately, has spillways like this, one of which was severely damaged by floodwaters.

Another less common type is an open bell mouth spillway. That’s the type at Lake Berryessa. It’s a round concrete hole not far from the road and the dam. From Wikipedia:

Near the dam on the southeast side of the reservoir is an open bell-mouth spillway, 72 feet (22 m) in diameter, which is known as the Glory Hole. The pipe has a straight drop of 200 feet (61 m), and the diameter shrinks down to about 28 feet (8.5 m). The spillway has a maximum capacity of 48,000 cfs (1360 cms). The spillway operates when there is excess water in the reservoir; in 2017 after heavy rains it started flowing, for the first time since 2006.

Monticello Dam w/Glory Hole
In looking through my archive of photos from 2014, I found a GoPro photo of the dam from the air that clearly shows the Glory Hole when it isn’t in use.

It was in the news in February because the lake had finally filled, after 11 years, and water was flowing into the Glory Hole. Of course, I had to go see it. So when I got the helicopter into California and needed to a “maintenance flight” to check a few things, I headed over there. Sure enough, water was flowing into the hole and a small gathering of people along the road were looking in. I flew by a week later and the water was still flowing in.

I wanted to see it again from the ground, so I returned on Saturday. By that time, Penny and I were on our way home from nearly four months on the road so I had the Turtleback on my truck. Once again, I’m so glad I downgraded from my big fifth wheel; parking in the very crowded parking area was remarkably easy.

There were a lot of people there. It was, after all, Saturday and the Glory Hole had been on the news quite a bit. It made a good, easy, and free point of interest for sightseers.

Glory Hole from the Road
The Glory Hole, photographed from the road. That’s the dam to the right. The water is pretty close to the top.

Penny and I joined the crowd and walked along the road for a good look. The chain link fence made it difficult to get a good photo. The hole is right next to the road and pretty much fills the camera lens. But I did my best.

A guy was out there with a Phantom 4 drone so I decided to give my drone (AKA flying camera) a shot when he was done. I went pack to the truck, put Penny inside, and pulled out my drone. Within about 5 minutes, I had it all set up in a clear area between parked cars and the fence downstream from the dam. When I was sure the other drone had landed, I launched mine.

Understand that I’m still learning how to use my Mavic Pro. I’m also very careful. Immediately after launching, I took it up over the lake, away from people. Then I captured some still and video shots of the Glory Hole from the air, including a short pass where I flew directly over the hole with the camera pointing straight down.

Glory Hole from the Air
I really don’t know why the water looks so green in this shot. I don’t think it’s the camera. It must be something to do with the light.

I tweeted the video clip and got a lot of positive feedback about it. I also got a request to contact the folks at a video licensing company who want to represent me on the resale of the clip to news other media organizations. I’ll all for that, provided my FAA Commercial UAS Pilot certificate has come through; it’s not legal to sell drone photography without it. Need to get home and check my mail to see if the paperwork is there; I applied back in January so I should be good.

I need more practice using my Mavic and I intend to get some on my way home. I had it out again this morning from my campsite at Bodega Bay. I’m hoping to put together a little montage when I get home and share it here on the blog. Stay tuned.

Congratulations! You’ve made it to the end of yet another lengthy blog post here on An Eclectic Mind. If you got this far, you must have gotten something out of what you read. And isn’t it nice to read Web content that isn’t full of annoying ads?

How about doing something to show your appreciation? I’d love it if you’d add a comment at the end of this post to share your feedback with me and others. But I’d really love it if you’d visit my Support page and chip in a few dollars to help cover the cost of hosting this blog and motivate me to keep writing new, interesting content. It’ll only take a moment and I really would appreciate it!


My R44 Helicopter’s Overhaul

Easier than I expected, but I’m still glad it’s all behind me now.

I picked up my 2005 Robinson R44 Raven II helicopter, Zero-Mike-Lima, from its first 12-year/2200-hour overhaul on Monday, February 20, 2017. I’m very happy with the way it turned out. I thought I’d take a moment to share some information about the process and the way I dealt with it.

About the Overhaul

While most helicopters — most aircraft, actually — have a wide variety of life-limited parts and complex maintenance schedules, Robinson handles maintenance for major components a bit differently. It requires that the entire helicopter be overhauled every 12 years or 2200 hours of flight time, whichever comes first. It does this by syncing the life on certain components so they all need to be inspected, rebuilt, or replaced at the same time.

For example, another helicopter might have blades with a life of 3000 hours and an engine with a life of 2000 hours and a transmission with a life of 1500 hours. The owner/operator/maintenance manager is required to keep track of when each component is due for maintenance or replacement and make sure the helicopter doesn’t overfly the next due item. Then the helicopter needs to be taken offline so that the work that is due can be done. Once it’s finished, that item’s clock is reset (so to speak) and the helicopter continues to operate until the next item needs attention. The benefit to this is that major maintenance costs are spread throughout a helicopter’s life and each maintenance task can be knocked off relatively quickly. The drawback is that there’s a lot of components to track and the helicopter could be down for maintenance quite frequently if it’s flown a lot.

On a Robinson helicopter, the engine, rotor blades, transmission, and other major components are all built to last 12 years or 2200 hours. That’s also when the whole helicopter needs to be thoroughly inspected for frame cracks or other structural problems. So Robinson owners usually get it all done at once as an overhaul.

I say usually because it doesn’t always work out that way. For example, some components — for example, the engine — are limited by hours flown only. So if a helicopter is only a few years old but is flown often, only those components that have a flight time related life limits need to be replaced or inspected. But since you often have to take the helicopter apart to get to those components, it usually makes sense to do the whole overhaul. And there’s always a chance that a helicopter’s component will simply go bad — a blade strike can destroy a set of blades, an engine overspeed can damage an engine, etc. — and that component will be replaced on its own, thus throwing the whole 12-year/2200 hour synced schedule out of whack.

It Ain’t Cheap

An R44 overhaul isn’t cheap. These days it usually runs about $220,000 to $240,000. And no, that isn’t a typo.

But remember this: instead of spending $50K one year for a set of blades and $40K another year for a rebuilt engine and $15K another year for a tail rotor assembly and $15K another year to borescope the frame tubes, you’re paying for everything at once. When it’s done, the helicopter is in like-new condition. (Heck, mine is now worth more than I paid for it 12 years ago.)

I didn’t think much about the overhaul cost during the first few years I owned Zero-Mike-Lima. Ideally, I should have been saving up about $100 for every hour I flew, but I didn’t. I was already paying about $2,100/month on its eight-year loan, about $1,000/month to keep it insured, and anywhere from $3,000 to $8,000 a year on regular maintenance. (Don’t let anyone tell you that owning a helicopter is cheap.) Back in those days, my flying business struggled. I still had this silly idea that I could operate a tour business in (of all places) Wickenburg, AZ, and even when I moved it down to the Deer Valley area for part of the year I couldn’t make a tour business work. So my writing work was funding my flying business and I wasn’t very interested in using my royalties to save up for the helicopter’s overhaul.

But around 2007, things started to change. I discovered the world of aerial survey work and began to understand the value of regular, repeat clients rather than one-time tour passengers. My business began paying its own expenses. Then, in 2008, I got involved in cherry drying work in Washington state and, through careful management of my expenses and the acquisition of new contracts, began making some decent money. (My tenth season is coming up in May and I expect to hire at least five pilots with helicopters to work with me.) It was around 2010 that I was able to start putting aside some of Flying M Air’s revenue for the overhaul. By 2012, I’d saved up $132K, which was pretty darn close to the $150K I should have had saved by then. Not bad, huh?

Of course, it was that $132K and the helicopter that my future wasband and the desperate old whore he moved in with had their eye on in divorce court. But my legal team was smart. We brought in a helicopter flight school owner who operates a fleet of R22 and R44 helicopters as an expert witness. He testified that the money I’d saved was to cover a deferred maintenance expense — which, of course, is what the overhaul is. Fortunately, the judge understood this and I was able to keep the money.

Sadly, a portion of it went to pay for divorce legal fees. But I consider that money well spent since I got to keep the helicopter and a variety of other assets I owned, too. I still don’t understand what made my wasband think he was entitled to any of it. (Expensive delusions?)

Once I’d gotten through the divorce, downsized a bit, and built my new home, I was able to start saving again. Last year’s very rainy cherry season couldn’t have been more timely for me — although I admit I felt bad for my clients. By the time I was ready for the overhaul, I had a bunch of money saved up again.

Timing is Everything

In the first eight years I owned my R44, I flew it almost exactly 200 hours a year. At that rate, it would have needed to go in for overhaul within 11 years.

I thought about overhaul timing starting around 2010 or so. My busy season in Arizona was winter and spring and I wanted the helicopter around for that. And, of course, I needed to take it to Washington for the summer for cherry season, which was starting to really pay off. That meant an autumn overhaul. I’d bring it in around September to get it back by Christmas. That was the plan.

But despite picking up new work doing frost control in California in the late winter/early spring of 2013, I began flying a lot less. My frost and cherry contracts paid to have the helicopter standing by, ready to fly. It didn’t necessarily fly. (This amazes me: that I can fly less and earn more.) When I permanently moved to Washington in May 2013, I no longer had that long ferry flight — at least 10 hours each way — between Arizona and Washington for cherry season. And as I worked to build my new home, I didn’t have as much time for joy flights. So it soon became apparent that the helicopter would go the full 12 years before overhaul.

My season changed, too. Now it was vital to have the helicopter available from late February through September for frost season, cherry season, and local area tours. Winter was absolutely dead — in fact, I’d begun going south for the winter, leaving the helicopter idle in the garage until I needed it in California for frost. Clearly, that would be the best time to get the overhaul done.

I started speaking to overhaul shops about what needed to be done as early as August 2015. They all estimated anywhere from two to four months. That meant dropping it off in October or November 2016 to get it back in time for this year’s frost season.

Researching Overhaul Shops

As you might imagine, you can’t get an overhaul done in just any repair shop. It needs to be an Robinson authorized repair shop. The helicopter is literally stripped down to its frame and rebuilt. I wanted to make sure it was rebuilt by people who knew what they were doing.

I started my search in August 2015, when I brought Zero-Mike-Lima to Hillsboro, OR for an annual inspection. Hillsboro Aviation is the outfit who had sold me the helicopter at Heli Expo in 2004. (I got it priced up there, ordered it two months later, and took delivery six months after that.) They had a good shop full of experienced mechanics that maintained the R22s and R44s for their flight school. But I didn’t get many details then; I wasn’t really thinking about yet.

In November 2015, while I was in Florida visiting my sister, I stopped off to visit a shop in St. Augustine that I knew of. (I had actually rented an R22 from them way back in 2000 or 2001 so I could give my stepdad a ride.) I had no problem with the distance; I figured I could spend some time visiting my sister while they worked on it. They were very receptive and gave me a tour of their hangar, where their mechanics were working on two Robinsons. I was introduced to the guy who would be doing most of the work. “He’s great with Robinsons,” I was told. “He’s been working on them for nine months now.”

Nine months! I thought to myself. I want someone who has been working on them for nine years.

A few months later, in March 2016, I checked out a shop in Salinas, CA. They had a very impressive operation where they did a lot of work on airplanes, including some classics. They could even make their own metal parts using computer-driven fabricators. But they didn’t seem overly eager to do it. It was almost as if they’d take it on as a sort of challenge. And I couldn’t pin them down on timing. Maybe four months, maybe more.

I tried to contact Hillsboro again and, for a while, got no response. Later, I discovered that they’d undergone a personnel change and the guy I’d spoken to was gone. They seemed eager to get the job, though, and I was confident that they’d do it right.

And then I contacted Quantum Helicopters in Chandler, AZ. I had a history with Quantum and it wasn’t all good. I’d gotten my private pilot license with them, finally finishing it up after a year and a half of part-time lessons, taking the summer off to avoid the heat. I liked my instructor a lot and thought the school treated me well. The owner had even been instrumental in helping me buy my first helicopter, a 1999 R22 Beta II. I leased that helicopter back to the school and began my commercial training in it. All was going well until my commercial flight instructor took a job at the Grand Canyon and I just couldn’t seem to do anything to please my new instructor. I was ready to take my check ride but no one would sign me off. I got frustrated and wound up leaving the school. (It took me only 10 days a few months later to finish my training and pass my check ride at a different flight school in Long Beach.) I made the mistake of voicing my concerns and frustration to the owner in a letter and he told me not to bring my helicopter in for maintenance anymore. He later backed down a bit from that position, but it would be ten years before I came back. I was pissed.

Why come back at all? Simply said, Quantum has one of the best Robinson maintenance shops in the country. The Director of Maintenance, Paul, is the same guy who was there in the same job when I started my training back in 1998. That’s 20 years working on Quantum’s Robinsons and before that, he worked at the Robinson factory. He’s got a staff of at least a dozen mechanics and apprentices and they work on Robinson helicopters all day long every day. They know Robinsons. And their maintenance hangar is huge, with enough space to work on at least six helicopters at a time and all the tools they need to fix Robinsons.

When I first came back to them, it was because I had a leak in my hydraulic servos. Another mechanic had told me they’d need to be replaced but hadn’t been able to do it. In a bind, I called Paul and he agreed to take a look. He said that the problem wasn’t uncommon and that there was a good chance the servos would last until overhaul. He told me to keep an eye on it and how much hydraulic fluid needed to be periodically added. He saved me about $2,000 and a week of down time that day. (And he was right; the leak never got worse and the servos lasted until overhaul.)

Before moving to Washington in 2013, I had Quantum do a few of my annual inspections, replace the original fuel tanks with the new bladder tanks, and even install some specialized lighting on the front skid legs. The work was always done right. Best of all, they understood that I wasn’t a sucker with deep pockets. They did what needed to be done to keep the aircraft safe and airworthy and advised me of any potential problems that might need future attention. But they never replaced anything that didn’t need replacing. That saved me a lot of money, too.

So when it came to start getting estimates of overhaul cost, I included Quantum in my list of possible shops to get the job done. Again, it was quite a distance from where I lived in Washington, but I was spending much of my winters in Arizona, anyway.

I also contacted the Robinson factory. They do overhauls, too. In fact, they have a separate assembly line just for overhauls. The benefit of a factory overhaul is that it really does come out just like new. They do everything that could possibly be done to restore it to like-new condition. But I was warned in advance of a few things. First was timing: it could take up to six months. Second was expense: factory overhauls usually cost a lot more than their estimates because any part that is even slightly damaged is replaced — and if it isn’t part of the kit, it’s added to the bill.

The Estimates

The estimates fell into three categories:

  • Cheap. The Florida outfit thought that I was mostly concerned with meeting airworthiness requirements as cheaply as possible. They would do the minimum amount of work so I could pay the minimum amount of money. While that may be attractive to some, I’m always skeptical of the lowest bidder. What costs are hidden? Besides, was the nine-month mechanic still there — now with 18 months of experience? Or had he been replaced with a four-month mechanic? I decided I didn’t want to take the chance.
  • Reasonable. Quantum’s estimate was reasonable. It was based on the cost of the “overhaul kit” sold by Robinson and just the parts I needed. They’d have my engine rebuilt locally — rather than replace my engine with someone else’s rebuilt engine. (I’m not sure if that matters but I kind of liked the idea.) They had the tools and knowhow to do all the inspections in-house. The factory overhaul estimate, which arrived after I made my decision, was also reasonable, but I already knew that the estimate was misleading; it would cost me 20% to 25% more by the time they finished replacing every single dinged panel with a new one and running it all through the paint shop.
  • Expensive or Crazy Expensive. The other estimates were either expensive or crazy expensive. I can’t remember which was which. I’m thinking Salinas was crazy expensive — maybe 20% more than Quantum. The other was close to Quantum’s but I didn’t have the same level of confidence in them as I had with Paul and his team.

So I went with Quantum. And I managed to save about $10K to $12K by not having the helicopter repainted and not replacing the leather seats and headliner, neither of which needed replacement. (I did have the carpet replaced; the pilot side was completely trashed.) After all, I’d taken pretty good care of the helicopter for the past 11+ years and it had spent most of its life in a hangar or garage when not flying. A good detailing and it would look fine.

Paul told me the fastest they’d done an R44 overhaul was about 8 weeks for a very anxious owner. I told him I’d give them 3 and a half months. I’d drop it off in November and pick it up in mid-February. He said that would work for him.

The Last Days before Overhaul

I flew a lot last summer. It was a rainy cherry season and more than a few times I flew all day long, sometimes several days in a row. But I was still at just over 2030 hours at the end of the summer.

With a calendar date set for the overhaul, I began flying as often as possible, hoping to put as many hours on it as I could to get my money’s worth from the overhaul. I took it to an AOPA fly-in near Seattle, then flew it around the Olympic Peninsula and down to visit a friend in Salem, OR. I took almost all of my friends and neighbors for rides, often to my favorite eating spots: Tsillan Cellars winery, Cave B winery, Blustery’s Burger. (Will fly for food.) I went joy flying before or after charter flights.

Then, in early October I took it in for a 50-hour inspection, which includes an oil change. My mechanic found metal in the oil filter. He told me that he’d been seeing some metal for a while, but the amount he now saw was significant. My engine was sending me a message: I’m tired, rebuild me.

Into the HangarOn October 18, 2016, Paul wheeled the helicopter into the hangar where the overhaul work would be done.

Although it was running smoothly, I decided to move up the calendar a little, mostly to get the helicopter out of my sight so I wouldn’t be tempted to fly it any more. I made arrangements to fly down to Arizona with a friend. Then I did a few last rides that I’d promised to friends and had the oil changed again. I’d decided that if there was a lot of metal in the filter, I’d have it trailered to Arizona. There wasn’t. So I flew, but chose a route that took us near major roads so we could land and get help if the engine started acting up. It didn’t. The flight, which we did over a two-day period in mid-October, went smoothly and, in the evening of October 18, 2016, Paul rolled it into Quantum’s hangar. I would be helicopterless until February.

Down to the Wire

Of course, Paul wasn’t going to start work on my helicopter until I sent money: roughly $171,000. I had money saved up, but not that much. So I needed to get a loan.

I talked to three lenders, including my local bank. In the end, I went with a lender I’d learned about at the AOPA fly-in the previous summer. I filled in all the paperwork online and was approved in 24 hours. It pays to have good credit.

I arranged for two wire transfers: one from the lender and the other from me. They converged at Quantum in the beginning of November, just in time for Paul to order the overhaul kit from Robinson and get it before Robinson closed down for the Christmas holiday. In the meantime, his team began stripping down my helicopter.

Visitation

I made a total of four visits to the helicopter over the next few months.

I arrived in Arizona in early December after a leisurely drive down from Washington with my camper that began the day before Thanksgiving. I was scheduled to dog sit for 10 days for a friend in Wickenburg, but I thought I’d visit the helicopter before I started that gig. So I drove down to Chandler on December 2 for my first look. At this point, they’d been working on it for about a month and it was almost completely disassembled. I blogged about that visit here.

Fuselage
The helicopter’s fuselage was sitting on a rolling wooden cart. You can see more photos here.

Tail Rotor
Here I am back in December with my brand new tail rotor, still wrapped in foamy paper. That’s my helicopter’s fuselage on the right behind me.

My only regret is that I didn’t bring goodies for the crew that day. I’d gone after a midday trip to the eye doctor and was running late; all I could think about was getting back to Wickenburg before the traffic jams started.

I returned on December 16. I remembered to stop for pizza for the crew that day. The overhaul kit had arrived and I posed for a picture holding the new tail rotor, still in its foam wrapping.

Main Rotor Blades
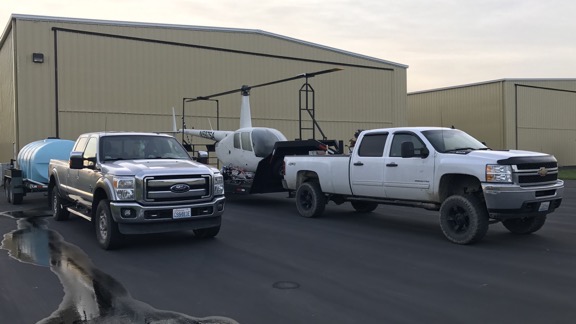
The main rotor blades are a lot longer than the 8-foot bed of my pickup truck.

I returned a few days later, after spending the weekend with some friends in Phoenix. I wasn’t there for the helicopter; I was there to fetch the rotor blades. Robinson doesn’t want old rotor blades out there in the wild, so they require any shop replacing blades to send back the blade roots as proof the blades are not being used elsewhere. (It would be too costly to ship back the whole blades.) Quantum throws away what’s left. But I got this crazy idea that they might look cool hanging in my house. So I went back and fetched them off the recycling pile. I brought them back to Wickenburg in the back of my truck and then later got them hoisted to and tied down on the top of my camper. That’s where they are right now — under my kayak. It’ll be fun getting them down when I get home.

I was busy for the rest of December and most of January and didn’t visit again for a while. I didn’t want to be a nuisance, either. But I did return for one more visit on February 3, 2017. By that time, it was starting to look like my helicopter again, with the tailcone back on and the blades and engine installed. (I think it was the engine that had been holding up progress.)

Nearly Done
By February 3, Zero-Mike-Lima was starting to look like my helicopter again.

Nearly Done
The main rotor blades, transmission, engine, tail cone, and tail rotor were installed and it would be ready for test flight and blade balancing in a week.

By that point, I’d been communicating with my frost client in California and had an idea of when I needed to be there: February 25. Would the helicopter be done in time? I wanted to pick it up sooner so I could fly it a bit and work out any bugs before I left the state. Paul assured me that he’d begin flying it within a week and that it should be ready soon after that. We agreed on February 20 as a pickup date.

The Pickup

I continued my travels, now with the goal of getting to the Sacramento area with my truck and camper by February 19 so I could hop on a flight to Phoenix on February 20. I spent a few more days in Wickenburg with friends and then hit the road, spending a few days in Death Valley along the way. I had an interesting — read that never again — experience driving through snow storms in mountain passes on the east side of the Sierra Nevada before reaching Lake Tahoe and crossing the mountains on Route 50 at Echo Pass. By the afternoon of February 16, I was at my destination, visiting with friends and making arrangements to park the helicopter and camper for a while.

I also had to make arrangements for one more wire transfer of $48K — the final payoff amount. As I blogged here, I was able to handle that over the phone with the money delivered on Friday since Monday was a holiday.

(If you’re doing the math, the total amount I spent comes out to $219,000 for the overhaul. But that doesn’t count the amount I’ll get back from Robinson for cores sent in for evaluation. Paul seems to think I’ll get about $8K back.)

I arrived at Sky Harbor airport just after noon on February 20. Quantum sent a van to get me. A while later, I was back in the hangar. My helicopter had been moved to where the other R44s and a handful of R66s were parked. It was done.

Finished
Zero-Mike-Lima, ready for pickup.

It looked great: clean and almost pristine. But not so pristine that it didn’t look like my helicopter.

I spent about an hour going through the plastic toolbox I’d left behind to store the helicopter’s contents and setting it back up the way I liked it with headsets, iPhone and iPad mounts, extra oil (Paul swapped out the W100 Plus I’d had with some mineral oil I’d need to use for the engine’s first 50 hours), and cleaning supplies. While I worked, I chatted with Paul and the other mechanics as they took care of some last-minute items for me: replacing the cap for the cyclic dual controls, making me a new plastic cover for the pedal area at the front passenger seat, and replacing one of the Danger stickers on the tailcone.

Paul from Overhaul
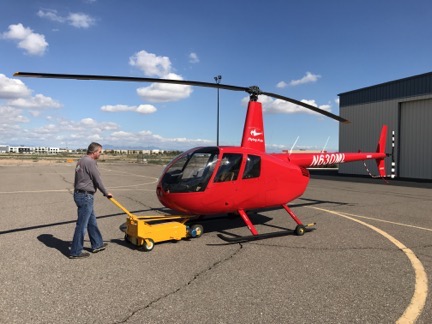
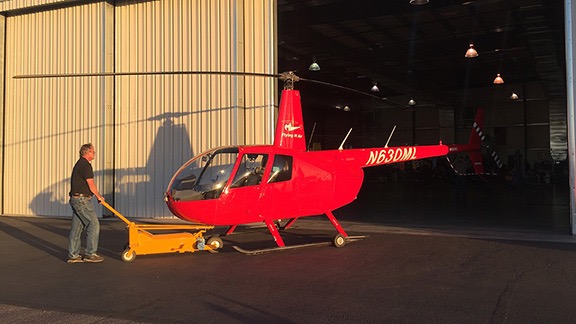
Paul pulls my R44 out of the Quantum hangar after its overhaul on February 20, 2017.

When it was finally set up and Penny, the toolbox, and my luggage was stowed inside, Paul towed it outside onto the ramp. I did a preflight and added a quart of oil. And then I got in and started it up.

It might sound weird but when you’ve flown the same aircraft — and only that aircraft — for 12 years and over 2,000 hours, you really get to know the way it sounds and feels. The fuel pump sounded different. The startup process felt different. The engine sounded different. And when the blades started spinning, I heard a definite whistle that hadn’t been there before.

I called Paul from the cockpit, using my Bluetooth-enabled Bose headset. “The blades make a whistling noise now,” I said. He was standing on the ramp just outside the hangar watching me. He told me they will sound different because the new blades are stiffer than the old ones. I wasn’t too happy about that but I was very happy to have the new blades, which I knew were a lot better than the originals. The old ones were barely within specs for airworthiness and I was thrilled that they’d made it to overhaul.

When I took off, it just about jumped into the sky. I’d later discover that it cruised about 10 knots faster than it used to. Nothing like a rebuilt engine.

I flew it to visit friends at Falcon Field in Mesa and then took two of them for a flight up the Salt River as far as Roosevelt Lake. The next day, I went to Wickenburg and then took two friends for an overnight trip to Bisbee (their choice). I noticed that the cylinder head temperature was running higher than it used to and it was burning a lot of oil. I texted Paul about it. He said it was the mineral oil and that it should cool down once the rings set. I sent more pizza.

I took three other friends to Sedona for breakfast and it performed magnificently at altitude on a relatively warm day. Then I flew back down to Chandler to have a few minor things tended to: clutch belt adjustment, strobe light fix, and oil change. The next day, I flew it to California with a friend.

Postscript

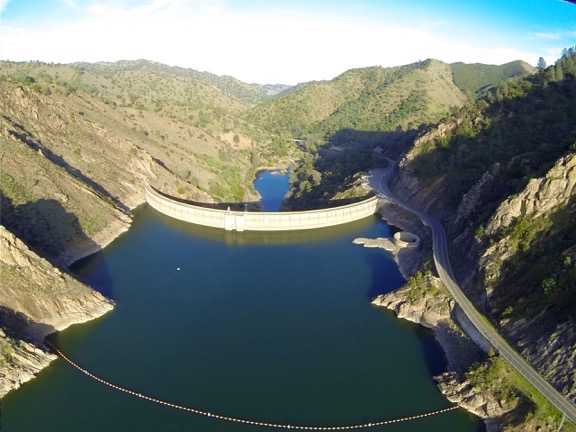
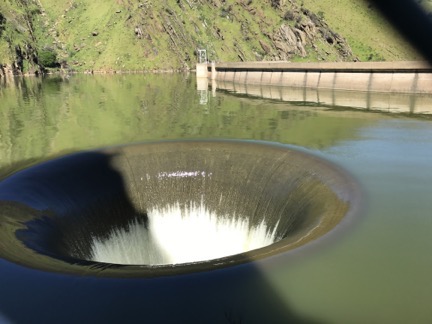
Zero-Mike-Lima was parked on the ramp at Woodland for a few days. I took it for a little joy flight out over Lake Berryessa (which is full) to see the “Glory Hole” and came back to the airport via Cache Creek. Then I decided that I wanted it in a secure, sheltered place so I made arrangements to hangar it with a friend’s helicopter at another airport nearby. Yesterday I took it to Sacramento Mather airport to have the battery in the Garmin 420 panel mounted GPS changed. And I took it for another flight to make sure the traffic feature of the Mode S transponder still works with the GPS.

On Sunday or Monday, I’ll start my drive home with my truck and camper. Today’s weather is kind of dreary, but I’ll be sure to take Zero-Mike-Lima out at least one more time before I head home. Unless I get called out for frost protection, it’ll be a long time before I get a chance to fly it again.

Meanwhile, I’m glad to have the overhaul behind me. Finding the right shop, arranging for payment, and then waiting for it to be finished were somewhat stressful tasks that had to be done. Now I’ve got a helicopter with a clean bill of health and few maintenance items ahead of me for the next few years. I suspect my cost of operations will drop, helping my business stay more profitable in the years to come.

And yes, this is likely my last overhaul. I figure I’ll retire from flying in about ten years, which should be before the next overhaul is due. The next owner is likely to get quite a deal on a well-kept machine — and possibly my business at the same time. Stay tuned.

Congratulations! You’ve made it to the end of yet another lengthy blog post here on An Eclectic Mind. If you got this far, you must have gotten something out of what you read. And isn’t it nice to read Web content that isn’t full of annoying ads?

How about doing something to show your appreciation? I’d love it if you’d add a comment at the end of this post to share your feedback with me and others. But I’d really love it if you’d visit my Support page and chip in a few dollars to help cover the cost of hosting this blog and motivate me to keep writing new, interesting content. It’ll only take a moment and I really would appreciate it!


An Insider’s Look at Helicopter Spray Operations

Fascinating work with a lot of very specialized equipment.

My friend Sean runs a helicopter spraying operation. (You might know about this kind of work by another name: crop dusting.) The business is highly regulated not only by the FAA to ensure that operators and pilots have the skills and knowledge to do the work safely from an aviation perspective, but also by state and local agencies concerned with the safety of the chemicals being sprayed. It also requires a ton of very costly specialized equipment, from spray rigs that are semi-permanently installed on the helicopter to navigation equipment that helps the pilot ensure chemicals are spread evenly over crops to mixing and loading equipment to get the chemicals into the helicopter’s spray tanks.

Sean's Helicopter with Spray Gear
Sean’s helicopter with spray gear. He was running rinse water through the system on the ground here.

A lot of people have asked me why I don’t go into this business. Although I’d love to fly spray jobs, I have absolutely no desire to invest in the required equipment, start selling spray services to potential clients, or deal with the government agencies that need to get involved for each job. Or have employees again.

Sean is just getting his business off the ground (no pun intended) after over a year of spending money on equipment and jumping through hoops with the FAA. While I wouldn’t say he’s struggling, he’s certainly motivated to complete contracts and collect revenue. Unfortunately, it’s not the kind of work a pilot can do cost effectively without help. He needs at least one person on the ground to mix and load chemicals, refuel the helicopter, and keep the landing zone secure.

Sean was having trouble finding someone to do the job. It’s not because he isn’t paying — I think he’s paying pretty good. Trouble is, a lot of folks either (1) don’t want a job that doesn’t guarantee a certain number of hours a week or (2) don’t like physical labor. Because the job depends on when there’s a contract to fulfill and what the weather is like when the job needs doing, hours are irregular. And it is tough physical work.

Spray Gal
Here I am in my coveralls, hamming it up for a selfie between loads.

I know because I stepped up to the plate to help him with his first two big jobs. I thought I’d spend a bit of time talking about this work from the loader’s point of view.

The Job

The pilot’s responsibilities are to spread the loaded chemicals over the crops to be sprayed using the tools in and on the helicopter. I can’t speak much about that because I haven’t flown a spraying mission. I can tell you that in a light helicopter like the Robinson R44, the pilot is doing a lot of very short runs — sometimes only a few minutes — and is often spending more time getting to and from the spray area than actually applying the spray. For that reason, the landing/loading area needs to be as close to the crops as possible — usually somewhere on the same property. The pilot is taking off near max gross weight for most flights and landing relatively light. And there are a lot of take offs and set downs. As I told Sean the other day, doing spray runs is a lot like doing hop rides at fairs and airport events — you just don’t need to talk to your passengers.

The loader’s responsibilities — well, that’s something I can address since I’ve been wearing that hat for the past two weeks.

When the pilot is warming up the aircraft for the first flight of the day, the loader is mixing the first batch of chemicals. Sean’s current setup includes a mix trailer that holds 1600 gallons of fresh water, a Honda pump, a mix vat, and a dry mix box. With the pump running, I turn valves to add 50 gallons of water to the vat, which is constantly mixing. Then I add about 4-6 capfuls of an anti-foam agent (which is not HazMat) to the vat, followed by a specific amount of chemical provided in 32-ounce bottles.

Mix trailer
Sean’s mix trailer onsite at an orchard near Woodland, CA. This is the “business end.” The mix vat is on the left.

Luna Sensation
This is how the chemical we’re using is shipped: in 32-ounce bottles.

The chemical we’ve been using is a “broad spectrum fungicide for control of plant diseases” made by Bayer (yes, the aspirin people). It is highly regulated and must be kept under lock and key when not in use. It looks a lot like Milk of Magnesia, which was a constipation remedy my grandmother gave us when I was growing up. It doesn’t smell as good, though. (And I’m certainly not going to taste it.) If you’re not familiar with that, think of an off-white Pepto Bismol. We’re spraying this stuff on almond trees and there’s a definite deadline to getting it done.

Here’s where some math comes in. The guy who wrote up the specs for our client’s orchard wants 6.5 ounces of the stuff applied per acre. The helicopter can take 50 gallons of chemical mix at a time. That 50 gallons covers 2.5 acres. So how much do I need to put into the vat for each 50 gallon load? 6.5 x 2.5 = 16.25. Round that down to the nearest whole number for 16. This is an easy mix because the chemical comes in 32 ounce bottles and there are measuring tick marks on the bottle at 8, 16, and 24 ounces. That makes it easy to add half a bottle and get it right. But if it didn’t work out so smoothly, we could use a big measuring cup Sean has to get the right amount.

So I add the chemical and the mixer mixes it up. If I’ve finished the bottle, I need to rinse it, which I do by dipping it in the mixer and then swishing it around a few times before dumping it into the mix. Then I put the empty bottle away in a box; even the empties are accounted for at the end of a job.

As you might imagine, I’m wearing protective gear: rubber gloves and coveralls. This particular chemical isn’t very nasty and I’m not likely to breathe it so I don’t need to wear a respirator or anything like that. (If I did, I probably wouldn’t be helping out.)

All this tank filling and mixing takes me less than 2 minutes.

Stopwatch
I timed one of our cycles. Lap 1 was skids down to skids up: my loading work. Lap 2 was skids up to skids down: Sean’s flight. Less than 4 minutes for a cycle.

When Sean is ready for chemical, I turn the valves on the trailer’s mix system to direct mixed chemical into a thick long hose with a specialized fitting at the end. I bring the fitting over to the helicopter, drop down to my knees (which is why I also wear knee pads), and mate the hose fitting to a fitting on the helicopter’s tank. I then turn a valve on the hose fitting to get the mix flowing into the helicopter. I watch the mix vat the whole time and turn the valve off when it gets near the bottom so I don’t run it dry. Then I get back up and use a pull cord on a pump on the same side of the helicopter to start up his pumping system. When that’s running, I give Sean a thumbs up and head back to the trailer, gently resting the hose fitting on the hose along the way.

I timed this once and it took just over a minute, but that’s because it took two tries to get the helicopter’s pump going.

Sean lifts off immediately — often while I’m still walking away — and I get back to work mixing the next batch. When I’m done with that, I wait until Sean returns. It’s usually less than 4 minutes. Then I’m turning valves on the trailer quickly, sometimes before he even touches down. My goal is to minimize load time so he can take off again quickly.

Landing
Here’s Sean coming in for a landing beside the trailer. And yes, his approach route for a while was under a set of wires. (The rest of the time, he was departing under them.)

I usually leave the pump on the whole time I’m in the loading area, although if Sean’s work area is more than a minute or two from the landing zone, I sometimes shut it off. I wear ear plugs or earbuds so I can listen to music while I work. I keep a radio in my pocket so I can hear Sean if he calls for something or warn him if there’s a problem with the landing zone.

Beyond Mixing/Loading

Every six or seven runs, Sean needs fuel. He often radios ahead, but if he doesn’t or if I don’t hear the radio, I can tell he needs fuel because he throttles down to idle RPM (65%) after landing or makes a hand signal. In that case, I’ll fill the chemical first and return the hose to its resting position, then turn on the fuel pump on his truck, and walk the hose over to the passenger side of the helicopter. Sean said fueling is usually done by walking around the back, but no one can pay me enough money to walk between a helicopter’s exhaust pipe and tail rotor while it’s running. So I walk around the front, dragging the hose under the spray gear to get into position. Then I pump fuel until he gives me a signal to stop. It seems to me that he’s half filling the main tank each time — that’s about 14 gallons less whatever he already has in there.

When I’m done, I cap the tank, carefully walk the hose around the front of the helicopter to the truck, and then go back to start that pesky helicopter pump. Thumbs up and he takes off. I usually remember to turn the fuel pump off. Then I mix another batch of chemical so I’m ready when he returns.

Occasionally his pump or mine needs fuel. He uses helicopter fuel — it’s just 100LL AvGas — for both pumps. He keeps a jug of it at the mix trailer. I do the fueling.

Keeping the landing zone secure is pretty easy. On our last job, we were in a nice concrete loading area for a hay operation. Trucks did come and go, but in most cases, they saw Sean landing or sitting in the landing zone and waited until he was safely on the ground or had departed. Twice I tried to signal trucks to stop when I saw him coming in but they didn’t — both times they didn’t see the signal until it was too late and Sean aborted the landing. In our current landing zone, which is a dirt patch at the edge of the orchard, there’s a truck that comes and goes to haul out dead trees cut into firewood; the driver of that rig seems to pay attention and stops when I signal him.

Getting Physical

The job is extremely physical. All day long I’m walking around the trailer, truck, and helicopter; climbing up and down on the trailer’s mix station and truck bed; and hauling heavy hoses, fuel jugs, and cartons of chemical. And dropping to my knees (and then getting up) when I load the helicopter. And don’t even get me started with the pull cord on the helicopter’s pump, which I apparently pull too hard half the time.

I move at a quick pace, but I don’t run. Running is dangerous. Too easy to trip on a hose or a skid. Too many very hard things to crack your skull on if you fall. Anyone who runs while doing this job is an idiot.

But it can’t be too physical, right? After all, I’m a 55-year-old woman and I’m not in the best of shape. And I’m doing it all — although I’m exhausted at the end of the day.

Hours and Break Time

The job is weather dependent. We can’t work if it’s raining or likely to rain. We can’t work when the wind is more than 7 or 8 knots. We didn’t work Sunday because it was raining on and off all day and very windy.

But when we can work, we start early. We’re typically at the landing zone about an hour before dawn. Usually, Sean gets there first since he has more to do to get ready. He fills his truck’s fuel transfer tank with 100LL from the local airport. That can take 20-30 minutes. Then he comes back to the landing zone and, if the water tank is less than half full, he hooks it up to his truck and drags it to his water source and fills it. That’s another 20-30 minutes. Then he brings it back to the landing zone and positions it based on the wind direction, slipping 4×4 pieces of wood under the trucks rear wheels to bring the front end of the trailer up.

By that time it’s nearly dawn and I’ve arrived. I prep my work station by setting out chemical and anti-foam bottles in the trays on one side of the trailer and boxes for the empty bottles on the other. I suit up in the coveralls and get my knee pads on. While he’s preflighting the helicopter, I’m mixing the first batch of chemicals so I can load as soon as he starts up.

We work pretty much nonstop until we’re out of water. More math: If the trailer’s tank holds 1600 gallons and we’re using 50 gallons per load, we can do roughly 32 loads (1600 ÷ 50) before we’re completely out of water. That’s two 8-bottle cases of chemical. It’s also 80 acres. If you figure an average of 6 minutes per spray run/loading cycle, that’s about 3-1/4 hours.

When we’re out of water, I get my break because Sean has to fetch fuel and water using his truck. There’s nothing too difficult about doing any of it, but since I can really use a break after working that hard for that long, I won’t volunteer to do it. Instead, I strip off my protective gear, wash my hands (if I can), and take Penny for a walk. (She waits in the truck while I’m working.) Or sometimes I run out and get a bite to eat. Or eat a snack I’ve brought with me. That break lasts about an hour. Then it’s back to work all over again for another 3+ hours.

At the end of the day, we run three rinse cycles through all the equipment. I “mix” batches with just water. The first one usually includes some anti-foam stuff because the foam really gets out of hand if I don’t. The second two are straight water. I purposely overfill the mix tank on the third run to make sure the water gets all the way up the sides. Each load gets pumped into the helicopter and sprayed out to clean the spray rig.

Container
The most difficult thing I did on Saturday was to get this container open so I could lock up two cases of chemical.

Then we wind up the hoses, secure the helicopter — or bring it back to base if Sean is near his hangar — lock up any unused chemicals and empty bottles, and call it a night. By that time, it is night; we often do the rinse cycles in the dark. I bring a lantern so I can see.

It’s long day. A very long day. I’ll start at 6 and finish by 7 with two hour-long breaks in the middle of the day. That’s 11 hours of active work.

On Saturday, we worked for most of the day. Yesterday was Sunday and we would have worked all day if the weather was right. There are no “weekends” in this line of work.

So yeah: this job wouldn’t be very attractive to someone who prefers to sit on his ass all day.

But I’m getting a great workout. I know I am because every single muscle in my body was screaming at me this morning when I got out of bed. No pain, no gain, right?

Right?

Why I’m Doing It

Although Sean is paying me for this work and the pay isn’t bad, I’m not doing it for the money. I’m doing it for two reasons:

  • Sean is a friend and he really needs to get this business off the ground. Without a helper, he’d have to mix and load by himself. He’d likely only get a fraction of the acreage done each day. The first orchard I helped him with was 1,000 acres and he did have another part time helper. This one is about 500 acres and there is no other helper. It would take him well over a week to do it by himself. Together, we’ll knock it off in less than 4 days.
  • I have a natural curiosity about how things work. The best way to learn about something is hands on. I know a lot more about the spray business now than I did two weeks ago and that’s a real motivator for me.

We’re down in Turlock, CA for this job. It’s 100 miles from Sean’s base near Woodland, which is also where I’m camped out for the next few weeks. Although I wanted very much to bring my camper down here with me and live in the orchard, Sean needed me to tow the mix trailer while he towed his helicopter.

Spray Gear
Here we are on Friday morning, just before dawn, ready to head down to Turlock with the mix trailer behind my truck and helicopter trailer behind Sean’s.

I’m very glad I let him have his way. We’re staying in very comfortable rooms at what’s probably the nicest Best Western I’ve ever stayed in. After months of mostly living in my camper, I admit that it’s nice to have a good, long, hot shower every day. So that’s a bonus.

And isn’t that what life is all about? Doing different things? Seeing different things? Experiencing different things?

That’s what it’s all about for me.

But I admit that I do hope Sean finds a new helper for his next job. I’m not staying in California much longer and I’m ready to hang up my spray loader cap.