About the BOGO iPhone 8+

How I got conned into getting a second phone and why I don’t mind.

Back in September, when I was on vacation in Washington, DC, I upgraded my old iPhone 7 to an iPhone Xs. It was just under 2 years since my last upgrade, but the iPhone 7 had a tiny scratch on the camera lens. I was facing either $80 to repair a two-year-old phone or $1000+ to buy a new phone with a much better camera. I went with the upgrade.

While I was there at the Verizon store in Union Station, the salesperson excitedly told me that because I was 55 or older, I qualified for a buy one get one free offer on a second phone. “I don’t need a second phone,” I told her. “I’m one person.”

“But it’s free,” she said.

“What kind of phone?” I asked, figuring I could get it and sell it on Craig’s List. “An old flip phone?”

“Any phone we sell that lists for under $1,000,” was the surprising answer.

“And what about using it?” I asked. “Do I have to pay more every month to have it?”

“No, she told me. “Your monthly service cost will be the same. You just have to keep it for two years.”

Red iPhone 8+
It’s pretty and I am partial to red.

This sounded too good to be true, even though I couldn’t sell it right away. The way I saw it, it would be an insurance policy; if I broke my other phone, I could use this one. I was hooked. I picked out a red iPhone 8+, which is known for having a good camera. That’s the big screen iPhone. Too big for everyday use, in my opinion, but what the hell. It was free.

Except it wasn’t. I had to pay sales tax on it. That was nearly $80.

She activated my iPhone Xs and I tossed the boxes for both phones in a shopping bag. I finished my vacation 2 weeks later, packed them in my luggage, and brought them home. I put the boxes on a shelf in my office, never even bothering to take out the red phone.

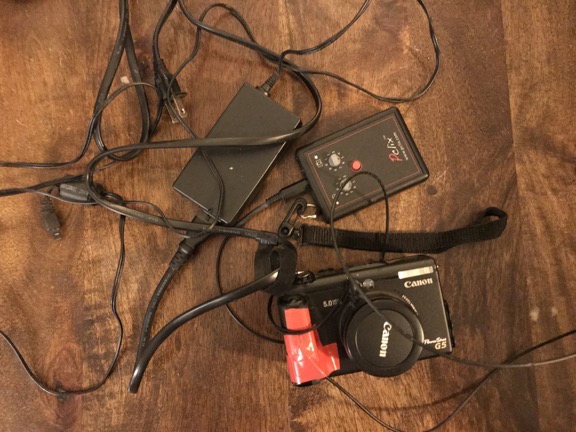
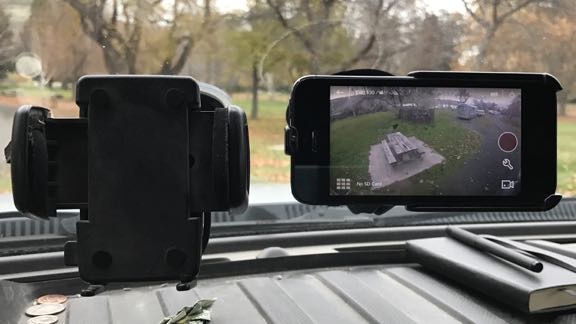
Fast forward to the other day. After getting a phone call while I was recording a video, I decided it might be nice to use a different camera for all these YouTube videos I’ve been making. I thought immediately of the red phone still in its box. The big screen would make it easier for my 55+ eyes to see what I was shooting. I retrieved it, plugged it in to charge its dead battery, and called Verizon to make sure I could activate it and use it without paying additional fees.

I was on the phone for over an hour with the customer service person. Turns out that the Union Station salesperson wasn’t exactly truthful. Although my bill was about what I expected every month — higher than the old bill but just enough to cover the cost of the $1200 iPhone Xs I was paying off over 2 years — I was paying extra for that new phone. I didn’t know it because I never bothered looking at my bill. Service was $40 each per phone and I’d been paying $40/month since September for a phone in a box just draining its battery.

Imagine how pissed off I was. Maybe you can’t. I can get pretty pissed off. I could feel my blood pressure rise.

She did more research and we discovered that my old plan had been $85/month for my one phone. That included unlimited talk, text, and data. The new plan with the BOGO phone was $60/month for one phone or $40/month per phone for more than one phone. So, in reality, I was paying slightly less for my plan every month with two phones than I had been paying for one phone.

But I would be paying $20/month less if I had just one phone. Still, $20/month wasn’t going to break me. Hell, I hadn’t even noticed the difference.

I thought about the situation I’d found myself in. In my mind, I was basically getting two phones for the price of one. At the end of my two year period, I could sell both phones and come out fine. (I keep my phones in pristine condition with cases and screen covers.) In the meantime, I could use this new phone for video stuff; it had exactly the same plan as the one I was using every day.

To sweeten the deal, the Verizon customer service rep put a $100 credit on my account, basically covering 5 months of what I’d paid ($80/month paid – $60/month what I would have paid with one phone = $20/month).

Of course, I wound up keeping the phone. It was a hell of a lot easier than fighting with Verizon about taking it back. And I really do like the phone for the video work I’m doing. The big screen rocks and the camera quality is better than I need.

But I did learn a valuable lesson: The next time I upgrade my phone, I’m taking my bill along with me and will compare the current bill with the new bill. I’m not going to pay for equipment I’m not using again.

Typical Late Autumn Weather Time-Lapse

Lots of fog coming and going all day long.

I knew when I woke up yesterday morning that it was going to be a foggy day. How could I tell? I looked out my window and didn’t see a single light anywhere. The fog was all around me, blocking out the thousands of lights down in Wenatchee that keep my home from getting dark at night as well as closer in lights in at my neighbors’ homes. It was pitch black dark.

But with fog and low clouds moving around, it would be a good day for a time-lapse.

The Equipment

I went down into the garage and rummaged around in a box full of old camera equipment until I found my Canon PowerShot G5. This was my first “serious” digital camera, which I bought back at the end of 2003 for aerial photography. (Back then, I had the crazy idea that my future wasband was capable of taking satisfactory photos from the helicopter to meet the needs of aerial photo clients. That turned out to be a very expensive exercise in futility.) With 5 megapixel resolution, it was a big deal — all my digital cameras up to that point had shot in 2.1 megapixels or less. I even took it with me to Supai, the Havasupai village at the bottom of the Grand Canyon, when I went on an Arizona Highways photo excursion in April 2004.

So yes, the camera is old. At least by today’s standards.

But I don’t throw anything useful away. Even when I got better digital cameras — like the Nikon D80 I bought in 2007 and the Nikon D7000 I use now — I kept the old Canon.

Years ago, I bought a Pclix intervalometer for it and started using it as a dedicated time-lapse camera. An intervalometer, in case you don’t know, is a device or camera feature that tells the camera to shoot an image periodically per your specifications. That and a tripod are the two things you need to make time-lapse movie images. You then use an app on your computer (or smartphone, I suppose) to compile those images into a movie.

G5 and Pclix
Shown here: my Canon G5 with optical cable taped on, Pclix intervalometer, and the power supply for the camera, which is not USB.

The Pclix I have uses an optical trigger mechanism. That means it sends a beam of light down a fiberoptic cable. The light is seen by the old Canon G5 as if I’ve pointed a remote at it and it clicks the shutter. To get this to work, I used electrical tape to attach the business end of the optical cable to the G5’s remote sensor. Of course, the camera needs to be plugged into power — its old battery won’t hold a charge and, even if it did, it wouldn’t last all day. The Pclix runs on a pair of AAA batteries and I was very surprised to see that they still had enough juice to power it. But I guess an electronic timer and tiny beam of light don’t need much power.

When I dug out all this stuff yesterday morning, I was kind of surprised to find it all. (Note to self: putting things away really is a great strategy for making them easy to find in the future.) Although I still do time-lapses once in a while, I’ve been using my GoPro, which is a lot more compact and easy to set up. But my GoPros and my Nikon D7000, which has a built-in intervalometer, are all in Arizona, waiting for me to join them. The G5 was my only option.

Setting Up

I’ve always been interested in time-lapse movies. There’s nothing quite like them to show the movement of slow-moving things. You can see the ones on this blog by checking out the time-lapse tag.

Of course, the challenge is to set up a time-lapse camera before something interesting happens. I can’t tell you how many times I’ve tried to create a time-lapse of clouds on days that clouds never made an appearance. The good thing is, the images are all digital, so if a whole day shooting results in a dull time-lapse, I can just delete it all.

Yesterday’s challenge was pointing the camera in the right direction with the right zoom magnification. (This is one of the benefits of using the G5 instead of a GoPro: optical zoom.) It was barely light out and the fog was thick when I got it all set up. I was also concerned about focus; I let the camera’s autofocus feature take care of that, but when there’s no detail to lock in on, the camera can’t focus. So I suspect there are some focus issues with individual shots.

I let it run all day from the corner of my deck, plugged into one of the outlets there, with 1 shot every 15 seconds. That’s how the Pclix was set up. I’d lost the instructions and didn’t want to mess with reprogramming it.

The Results

I checked on the camera at about 3:30 PM and discovered that its tripod had fallen over. Oops. I brought it in and saw that the last shot taken was after 2 PM, so I did get most of the day.

I brought the camera up to my loft where my office is now. It took a while to find a cable that would connect the old camera to my computer — I knew there was no chance I’d find a card reader for the Compact Flash card (which isn’t compact at all by today’s standards). I worked some magic and got the images into my computer.

Then I ran them through an app that resized them and put the time in the corner.

Then I fired up QuickTime 7 Pro — which I’ve always used for time-lapses — and created a movie with 30 frames per second. So each second of this movie is 7-1/2 minutes of the day. Here it is:

What surprises me most is just how much of the day was foggy. Keep in mind that my home sits on a shelf about 800 feet above the river. In the winter, we often get inversions that fill the valley with fog. Sometimes I’m above it, sometimes I’m in it, and sometimes I’m below it. Yesterday, I was mostly in it and above it. At one point, I looked out my office window, which faces south towards the cliffs, and it was perfectly clear. Yet at the same time, the view through the camera was nearly completely fogged in.

Of course, this has motivated me to do some more time-lapses. Maybe I’ll produce a few in Arizona when I head down there for the winter. But I think I’ll leave my clunky G5 setup home.

DJI Sales Support Experience Update

This is a total fail.

Back in January, I blogged about ordering a Mavic flying camera from DJI, a company with plenty of slick marketing materials that make it look as if they have a significant U.S. presence but apparently operate 100% in China. At about the time I had my lengthy online chat with DJI’s support people, I also sent an email message to them asking about the status of my order.

That was January 9, 2017.

On February 13, 2017 — yes, five full weeks later — I got the following response from them:

DJI Support Email

Of course, by this point, I’d already gotten my Mavic. In fact, I got it less than two weeks after my email message to them. It just took them 5 weeks to send me a canned response that provided no help and certainly proved they hadn’t looked into my support request at all.

I’m not the only one who is amazed at the complete lack of sales support from DJI. My friend Jim, who saw and liked my Mavic, decided to buy one, too. He ordered from DJI and was originally told it would ship out within a few days. Later, they changed that to a few weeks. He cancelled the order and ordered from Amazon instead. He’ll have it by the end of the week.

I can’t knock the product. The Mavic is an amazing tool for aerial photography and videography that’s incredibly easy to fly. I blogged a bit about it here. But the quality of sales support by DJI is dismal.

With so many customers in the U.S., would it kill them to open a call center with access to sales info to help its new customers? They must be absolutely raking in the dough on these things — they’re not cheap.

And are we going to be similarly served if anything goes wrong with our Mavics and we need technical support under our extended warranties? I sure hope not.

My Poor Man’s Backup Camera

If a poor man happens to own a wifi-capable GoPro and spare smart phone.

One of the things I really like about my 2012 Ford pickup is its backup camera. Incorporated into the tailgate, it automatically shows an image on the rear view mirror every time I shift into Reverse. It helps me see what’s behind me in tight spaces or parking lots and, when used in conjunction with the obstacle warning system, makes it impossible for me to hit anything while coming as close as possible to it.

Trouble is, when the truck’s tailgate is off — as it is when I’m traveling with my truck camper (the Turtleback) — I don’t have a backup camera anymore. And when the Turtleback is on board, I can’t see out the back at all.

Clearly I needed a backup camera that would work with the Turtleback.

Commercially Available Solutions

There are some options I could buy to give me the setup I want.

The first is the Lance backup camera, which installs over the back door. The Turtleback was already wired for it, although the camera wasn’t installed. I had to buy the camera and then buy the cable that would connect the camera to my truck or some sort of monitor in the truck. I was spared the ordeal (and cost) of putting this system together by the simple fact that Lance no longer sells the camera. At least that’s what I was told and it works for me.

I could also buy a Ford backup camera just like the one in my tailgate. After spending $800 for that, I’d have to figure out how to mount it on the Turtleback and run the wires to the truck’s existing plug. That would be great because it would work just like my tailgate camera. But $800. And how the hell would I mount something that was designed to fit into a truck tailgate?

There were various wired and wireless options I could buy from various online sources. Prices ranged from $50 to close to $1,000. All of them had one thing in common: they would likely be a bitch to install, the biggest problem being getting power to the camera. This, however, would be the avenue I’d travel if I couldn’t come up with a better idea.

The DIY GoPro/Smart Phone Solution

Camera Mount
The window over the Turtleback’s sink with the GoPro mounted and plugged in. I can close the blinds without disturbing the camera. In this photo, the Turtleback is parked in my friend’s backyard in Arizona.

Reading about all these wireless cameras and receivers reminded me that I already had a wireless camera: my GoPro 3. It also had a suction cup mount that made it possible to mount on the inside of the Turtleback’s back window (so I didn’t have to worry about it falling off or getting stolen when parked). And because I’d had a USB power center installed in the cabinet over the sink (where the stereo is), I could run a power cord to the GoPro to keep it powered all the time, thus enabling me to keep the WiFi feature turned on and ready all the time. That gave me the camera component without spending a dime.

But I still needed a monitor.

Sure, I could use my iPhone and just run the GoPro Capture app every time I wanted to look behind me. But did I really want to deal with pushing buttons every time I shifted into Reverse or just wanted to see what was back there? Not really.

And that’s when I remembered my iPhone 5. I’d sold it to Amazon when I bought my iPhone 6 two years ago. They’d rejected it. There was nothing wrong with it. In fact, it was in remarkably good condition since I’d had a skin on it the entire time I owned it. I tried again. They rejected it again, on different grounds. I called up and complained. They looked at my Amazon purchase history. They saw the thousands of dollars I spend on Amazon every year. And they gave me a credit for the value of the phone. When I offered to send it to them, they told me to keep it.

And it had been sitting in a box inside another box in my garage ever since.

By some miracle, I found it. I charged it back up. And then I set it up to work with the GoPro. Sure enough, the rear view picture was almost exactly what I needed. Certainly close enough.

I poked around in my box of RAM mount parts. I found a suction cup mount and an iPhone 5 cradle and all the other parts I needed to mount the old iPhone over the truck’s dashboard beside the mount I already had for my iPhone 7. Then, because I knew the now 6-year-old iPhone 5 wouldn’t hold a charge as well as a new one, I attached a power cable to it.

The result: a dedicated monitor showing a live image of whatever’s behind the Turtleback.

Backup Camera Monitor
Here’s an example image from my backup camera “monitor.” In this example, I was parked at a campground in Washington. The empty phone cradle to the left of the monitor is the one where my iPhone 7 lives in transit; I was using my phone to take this picture.

All without spending a dime on any equipment I didn’t already have.

Best of all, when the Turtleback is removed from my truck while traveling, I can set up that camera in the truck’s back window to give me some of the same benefits as the backup camera in the tailgate I left home.

Keep in mind that although I’m unlikely to use that old iPhone for anything else, I can grab the GoPro and use it while I’m on my trip any time I don’t need it back there. In fact, I brought an assortment of GoPro mounts and SD cards, as well as my GoPro 3+, to use on my trip.

A Word about Having “Too Much Stuff”

My friends constantly rib me about having too much stuff. After all, they’ve seen my garage and the seemingly countless labeled bins and still unpacked (but labeled) boxes of things I’ve collected throughout my 50+ years of life.

But there’s a lot to be said about having all this stuff and this blog post offers a perfect example. Because I kept that old iPhone, I had an easy monitor for my camera solution. And because I had later model GoPros with wireless built in, I had an easy camera setup. And because I had that old RAM mount stuff, I was able to put together a solid and reliable mount for my monitor.

In other words, this solution cost me nothing because I already had all the components I needed. And I had those components because I don’t throw much of anything out if there’s any possibility I might be able to use it in the future.

So yes, I have a bunch of labeled bins with old electronic equipment in it. So what?

It’s what made my poor man’s backup camera possible.

Found: Camera Equipment

I unpack a few more boxes and find some camera equipment I forgot I had.

Regular blog readers might know that I moved from the Arizona home I lived in for about 15 years to Washington state back in 2013. I packed my belongings over a nine-month period while waiting for my much delayed divorce to make its way through the court system. In the beginning, I packed the things that meant the most to me — heirloom items, mostly — but I also quickly packed my valuable possessions, including electronics and camera equipment. (Eventually, I packed or discarded things I didn’t really need or want, but that’s because I was bored and pissed off and I didn’t have anything else to do while I waited to get on with my life.)

The Migration of My “Stuff”

My new home wasn’t waiting for me when I moved out of my Arizona home. So the boxes went from my Wickenburg home to my Wickenburg hangar (September 2012 through September 2013) to my Wenatchee hangar (September 2013 to June 2014) to my Malaga garage (June 2014 to today). I started unpacking when my living space was nearing completion in April 2015. I’ve been unpacking ever since.

Seriously: I packed way too much stuff. Everyone who comes into my garage tells me I have too much stuff and I have to agree. I’ve given a lot away and I’ve sold a bunch, too. (Craig’s List works much better here than in Wickenburg.) The benefit, of course, is that I didn’t have to buy much when I moved into my new home. I already had almost everything I needed to make a home.

As my modest living space fills with stuff, I struggle to find places to store it all. That’s why I’ve still got about 20 boxes in the garage that need unpacking. One thing I learned is that the first step to keeping your home clutter-free is to have a specific place where everything you own belongs. If something can’t be put away, it should be thrown away.

Finding the Camera Equipment

These days, I’m organizing and arranging my garage’s shop area. Part of the job is to finish unpacking those damn boxes. So while my friend Bob was over, working on his boat, I began tackling boxes again. I had a mission: I wanted to find and unpack my games and camera equipment.

I found the games right away: Boggle, Scrabble, two (?) Monopoly games, Pente travel version, Uno, Skipbo, dominos, Parcheesi, and playing cards — including a few custom decks I’d had made not long after returning home to get divorced. I sorted it all out, with some games going upstairs to live on the bottom shelf of my coffee table and some going into my truck camper (the Turtleback) for my annual trip south. I got a lot of joy out of flattening that empty box and tossing it atop the others waiting for a trip to the recycling center.

The camera equipment was a bit more elusive. Although I had some of it in a plastic bin on a garage shelf, a lot of it was missing. I definitely remembered a light gray camera bag and two identical Nikon 35mm film camera bodies. There was a 10.5mm fisheye lens that I hadn’t seen in a while, too.

The equipment in the bin was what I’d had with me in the big fifth wheel (the Mobile Mansion) where I lived every summer since 2010 and then full-time while waiting for my home to be built. I knew there was more from my old house and I was pretty sure I’d packed it. But none of the boxes were marked “Camera Equipment” — I’d labeled every single box — and I was at a loss.

And then I remembered that I didn’t always label the boxes with the exact contents. The reason: a mild case of paranoia. If someone got into my Wickenburg hangar that last summer and started going through the boxes, I didn’t want him (or her) to find my valuables. The same thing applied to the movers; I didn’t want them knowing exactly which boxes they could find stuff worth stealing.

I looked at the labels on the remaining boxes. One was marked “Old Photos.” But I also had a plastic bin full of old photos. How many old photos did I have? I used my box cutter to open the box. And there was the gray camera bag, along with a bunch of lenses, filters, and other equipment I’d completely forgotten about.

It was like a great birthday or Christmas day: getting presents that you actually wanted.

The 35mm camera bodies — which are pretty much worthless these days — were in the box. But the camera bag was full of lenses. Not only was the missing 10.5mm lens there, but there were three others I’d completely forgotten I had. They’re all Nikon lenses and I suspect, based on their weight, that they’re of different qualities (metal and glass vs plastic). Not only do they fit the D7000 I currently use, but most of them will work with the old film cameras (if I ever start using them again).

Camera Equipment
With the newly found lenses, I now have seven lenses to choose from: 10-24mm ƒ3.5-4.5 zoom, 10.5mm ƒ2.8 fisheye, 16-85mm ƒ3.5-5.6 zoom (on the camera here; my “everyday” lens), 18-55mm ƒ3.5-5.6 zoom, 50mm ƒ1.8, 55-200mm ƒ4.5-5.6 zoom, and 70-300mm ƒ4.5-5.6 zoom.

This is not “professional” camera equipment. Back when I was shopping for my first DSLR in 2007 — right before my first Alaska trip — I bought a Nikon D80 camera, mostly because it would work with lenses I already had. It had a crop sensor, not the full-frame sensor preferred by professionals. (Learn the difference between full-frame and crop sensors here.) By the time I bought my D7000 in 2011(?), I had a lot invested in lenses and didn’t want to have to start over; that’s why I went with another crop sensor model, albeit one that’s slightly more advanced than a general consumer model: the D7000 I still use today.

Of course, it wasn’t just lenses that I found. There were also about a dozen camera filters — the good, glass screw-on type — that included polarizers, skylight filters, and neutral density filters. There are also a few collapsible reflectors that could be used to either shade or reflect light back up to small subjects. I distinctly remember using those for flower photography in the desert near my Arizona home.

And then there’s my HD video camera and all of its accessories. And my old time-lapse setup. And my geotagger. And my lightweight tripod. And lens pouches. And bean bags.

Needless to say, I’m thrilled to have access to all of my camera equipment again. I’ll be bringing quite a bit of it with me when I head south — well, we’ll see what I can comfortably fit in the Turtleback, anyway. Maybe it’ll motivate me to get a little more creative on this trip. With so much equipment at my disposal, there’s really no excuse not to be able to capture the images I want.