In waiting — and planning — mode.
Autumn is just about over. The leave are mostly gone and nighttime temperatures are dipping into the 30s. There’s been frost on the ground every morning. As the sun rises and fills the valley north of my home with light, odd little patches of evaporation fog form over the Columbia River 800 feet below the shelf where my home perches. I often stop my morning activity to watch, wishing I had one of my good GoPros around to create a time-lapse of the slow cloud formation and dissipation.
Of course, by the time that happens, I’ve already been up for a few hours. I’ve had my coffee and usually my breakfast. I’ve probably finished my daily journal entry and maybe even a blog post. I wake very early no matter what the season is, usually between 4 and 6 AM, although sometimes earlier. I’m a morning person and I have been for at least the past 20 years. It’s hard for me to believe that I had trouble attending 8 AM classes when I was in college. These days, by 8 AM, I’m usually ready for my mid-morning snack.
Sunlight and the Shadow Time
Living this far north — latitude 47.34° — the days start getting very short around the middle of October. By mid November, there’s only 9 hours and 15 minutes of daylight each day and we’re losing about 2 minutes of it every day. By the Winter Solstice, the sun is up for only about 8 and a half hours a day. That means the sun isn’t up for 15 and a half hours a day.
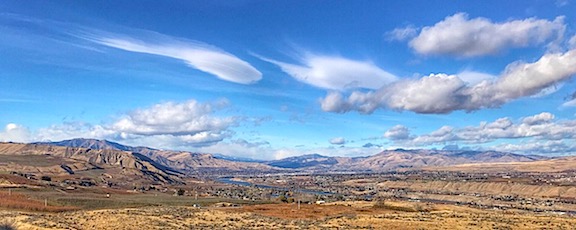
But worse than that is what I call the Shadow Time — the six weeks each year that the sun fails to clear the cliffs south of my home. For that brief period, sunlight does not shine at all on my house, although it does still reach out and fill the Wenatchee Valley. For the days leading up to the start of Shadow Time — December 1, I think — there’s less and less light on my house. Yesterday, there was about an hour of it starting around 1 PM. I love the way it shines into the high windows on the south side of my home, sending warm light at weird angles into my living space. But it’s weird looking out the north windows and seeing a big shadow in the foreground with the brightness of the valley behind it.

I shot this photo yesterday afternoon from my deck. The clouds were great and the river was so blue. It’s a panorama for a reason — I cropped out the shadow in the foreground.
And I don’t have it bad at all. Some of my neighbors on the south side of the road have been in it for weeks already. Their Shadow Time lasts months. I can’t imagine living that long in the shadows, without the rejuvenating properties of warm, direct sunlight coming through the windows. Honestly, I don’t know why some of them built their homes where they did, especially when I see the occasional boulder coming down off the cliffs dangerously close to one neighbor’s backyard. It seems like it’s only a matter of time before one of those basalt columns lets go and ends up in their living room.
The Shadow Time is one of the reasons I go away for the winter. I’m a sunlight person — I need to be in the sun. That’s one reason why I like living on the east side of the Cascade Mountains. People think it rains a lot in Washington, but that’s not true. It rains a lot in Seattle. It doesn’t rain much here. And those short days turn into gloriously long ones in the summer time; it’s actually light out when I wake up and sometimes when I go to bed.
My goal is always to be gone during the Shadow Time and I’ve been pretty good about that for the past few years. But this time, I’m can’t get out quite as early as I hoped to.
Killing Time
So as November winds down, I find myself waiting for my departure date.
I’m spending much of my time at home goofing off and doing odd jobs around the house, with a few occasional forays down into town to catch a movie, have dinner or cocktails with friends, or run errands. My home and its menagerie — currently 13 chickens (including a rooster just learning to crow properly) and two garage cats (for rodent control) — are pretty much prepared for winter. There’s always something to do around here, but none of it is pressing and some of it has to wait until spring.
I’m also working on glass projects again — something I haven’t done for years. The goal is to create some recycled glass wind chimes for sale in Quartzsite, AZ in January. I’ve been working with my new kiln for a few days now but have had disappointing results. Apparently, I’ll be spending a few more days troubleshooting before I can start churning out new pieces.
And, of course, garage reorganization is something I’m always working on. I’ve still got boxes to unpack. I’m also prepping for a garage sale in the spring. I have a lot of stuff I don’t want/need anymore — some of it from my old home/life in Arizona. While Craig’s List has been instrumental in offloading the larger items, there’s a ton of little stuff I can sell cheap.
My helicopter business is slow this time of year — and only gets slower as winter creeps in. I do have a nice charter later this month; I’ll be working with two other helicopters to take a group of nine men on a flight to various points of interest (to them) around the state. I’m hoping our flight path takes us past my house; my next door neighbor’s kids love it when I fly by with other helicopters — they say it’s like an air show.
Then, of course, is the primary thing keeping me in the area: my December 3 flight bringing Santa to Pybus Public Market. This is a community service I do every year. (Last year was the first time I missed a flight but that’s because the helicopter was in Arizona for overhaul.) The last time I did it, about 300 kids and parents were waiting on the ground when we landed at Pybus in my bright red helicopter. There were photos in the newspaper. I usually shut down and stick around for a while so folks can come up to the helicopter and get their photo taken with it. I’ll do that this year if the weather cooperates.

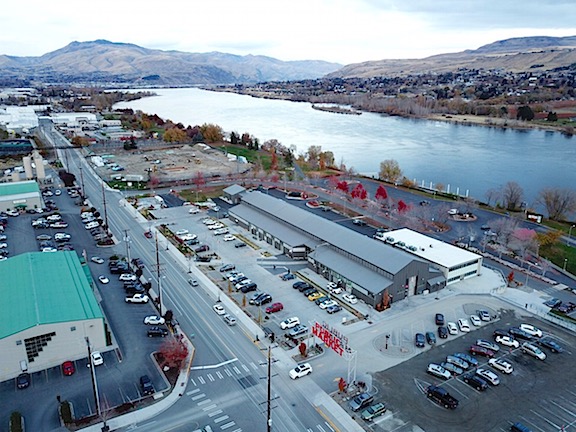
An aerial view of Pybus Public Market, shot with my Mavic Pro the other day. I land the helicopter in the corner of the parking lot in the lower right part of the photo, not far from the white building. One year, we rolled the helicopter into the main (gray) building where I left it on display for a week.
Of course, that doesn’t mean those are the only days I’ll fly the helicopter. There’s a pretty good chance I’ll take it out today. I have two wine club shipments waiting for me at Cave B Estate Winery down in Quincy. That’s an hour drive but only 20 minutes by helicopter. I figured I’d take a few friends down there for lunch — I fly for food — and pick up my wine while I’m there.
And the helicopter will go to California for its sixth season of frost control work, likely in mid February.
Going South
Once I’m done with the few things I need to do in the area, I’ll hop on a flight to Phoenix with Penny the Tiny Dog. My truck, camper, and boat are already down there waiting for me. With luck, a month from today I’ll be camped out on one of the Salt River Lakes, soaking up the sun while I explore the lake in my silly little boat.
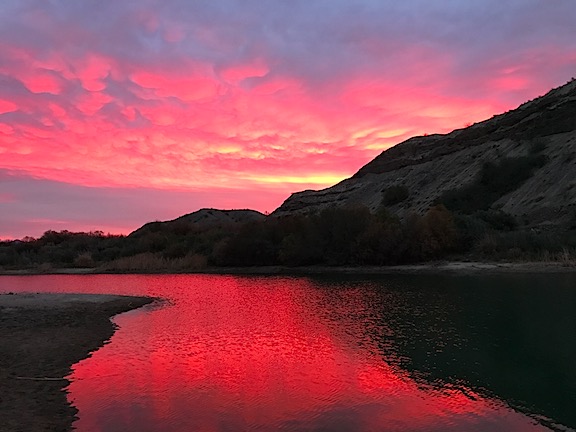
I’ll spend Christmas along the Colorado River with some friends, camped out in the desert. The site I hope we get — we got it last year — has a boat ramp and easy access to a stretch of river that runs 76 miles from the Palo Verde Dam north of Ehrenberg, AZ to the Imperial Dam north of Yuma. I brought along my new tent and some tent camping gear so I can do overnight boat camping trips along the river. My friends are seriously into fishing and I know we’ll do some of that, too. Last year, we had fish tacos a few times. We have a campfire nearly every night; it gets cold but not too cold to enjoy the outdoors.
We were treated to a few amazing sunrises during our stay along the Colorado River last year.
Then in January, we move to Quartzsite where my friend sells her artwork at a 10-day show at Tyson Wells. This year, I got a booth, too. I’ll be selling drone aerial photography services for folks camped out in the desert, as well as my recycled glass wind chimes (if I can get the problems with the new kiln worked out). It’ll be weird and it might not make any money, but I’m really in it for the experience more than anything else. Besides, my booth at Tyson includes a full hookup and it’ll be nice to get a bit of “civilization” after more than a month camped out in the desert.
After that, I’ll likely start heading north along the Colorado River with my truck, camper, and boat. I’m hoping to do some camping and boating at each stretch of the river between dams, all the way up to Hoover. I’ll definitely revisit Arizona Hot Springs — this time in my own boat — and tent camp for a day or two in the mouth of the canyon there.
In mid-February, I’ll come home (via commercial flight), fetch the helicopter, and take it down to the Sacramento area for its frost contract. From that point on, I’m “on call.” This is different from cherry season, when I need to stick around with the helicopter to be called out on a moment’s notice. Instead, I get my callout at least 12 hours before they might need me. That’s enough time to hop on a flight from wherever I am to Sacramento.
I’ll be in the Vegas area for a week or so in late February to explore Lake Mead, visit some friends, and see HAI’s big helicopter show. When that’s over, I’ll continue north and west, eventually ending up in the Sacramento area. I’ll stick around there, boating on Lake Berryessa and Clear Lake, wine tasting in Napa Valley, and hiking in the foothills of the Sierra Nevada Mountains until March. If I’m lucky, I’ll get a few callouts while I’m already there; this can really be lucrative when I don’t have to hop a commericial flight, rent a car, and get a hotel room. Then, depending on weather in California and back home, I’ll make my way back north. I did a coastal route last year, but I might try a more inland route this time. It’s all about going new places and seeing new things.
It’s the typical migratory route I’ve been doing with minor variations since 2013 but I’m going to make it count this year. It might be the last season I go to Arizona for the winter; I’m hoping to begin researching retirement destinations in Mexico, Costa Rica, Belize, and possibly New Zealand in future winter seasons. We’ll see.
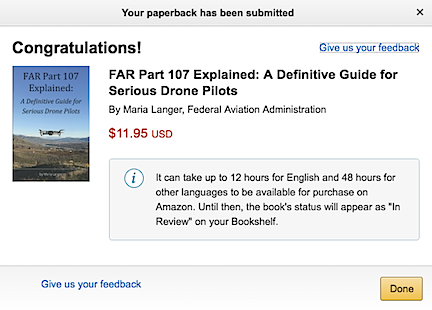
Of course, I will be working every day. I’m writing a book about my flying experiences and am determined to finish it before I get home. So I expect to spend at least 4 hours at the keyboard daily — likely early in the morning — to knock out a manuscript. I’ll handle publication next spring.
While I’m gone my house will be in good hands. I have a house-sitter who will live there for the entire time I’m gone. We did a trial in October when I took a 2-week vacation south to visit friends, re-explore a few national parks in Utah, and reposition my portable winter home in Arizona. While I’m gone, he’ll make sure the chickens and cats have food and water and collect eggs. Maybe he’ll even put up my Christmas decorations, which I haven’t bothered to do in years.
Waiting
So I’m in a sort of limbo right now, waiting for my departure date to roll along.
I feel as if I spend most of my life waiting. In the old days, I was waiting for my wasband to get his head out of his butt and start enjoying life. It was frustrating, to say the least. The older I get, the less time I have left. Waiting for someone else was like idly watching my life slip by without being able to do anything to enjoy it.
Now, with him out of the picture, I do a lot less waiting and a lot more doing. I spend a lot of time traveling when I’m not busy with flying work. When I’m home, I spend my time building and learning new things. My life is much more full and interesting; my time is much more flexible.
But I still have responsibilities that tie me to my home, even if I’m not kept here by work. So I’m waiting for calendar pages to flip by again so I can do the few things I need to do.
And then I’m outta here.


 One of my favorite clients,
 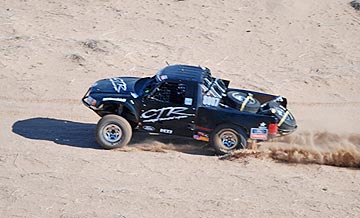 There’s nothing quite like chasing trucks through the desert with a helicopter.