Helicopter Photo Flight: 737 MAX Airplanes at Moses Lake

A video from the FlyingMAir YouTube Channel.

SIT ON THE NOSE OF MY HELICOPTER as I take a professional photographer over Grant County International Airport in Moses Lake, WA to shoot photos of Boeing 737 MAX airplanes parked there. There are over 100 planes, parked in three big areas, and this video gives you a good view of all of them.

The video starts with a cockpit POV radio call requesting permission from the tower to make the flight. We’d taken off at sunrise from Wenatchee, so it was still early when we arrived and there was no other aircraft traffic. The tower told us to “proceed as requested,” giving us free-rein to conduct the flight as needed. The view then switches to an unobstructed forward view from the helicopter’s nose. The photographer was sitting behind me so we both had the same view; that made it easy for me to get into position for his shots. Iit also meant that the best shots were off the right side of the aircraft and not the nose where my camera was. Still, I think you’ll agree that I got some good footage of a lot of parked planes.

A few more notes about this video:

You can find the photos David Ryder took that morning here: https://www.gettyimages.com/search/photographer?photographer=david%20ryder&assettype=image&events=775425765&family=editorial &phrase=David%20Ryder&sort=newest#license His photos are AMAZING and I highly recommend taking a look.

David also flew with me back in 2016 to shooting aerial news photos of the aftermath of the Sleepy Hollow Fire that destroyed 25 homes in a Wenatchee subdivision.

The big runway at Grand County Airport is 13,502 feet long and 200 feet wide. This is big enough for 747 airplanes to land.

(When I did an air-to-air photo flight with the Global SuperTanker some years ago, this is where the crew landed to refuel between passes. You can learn all about that flight and see video of the inside of the Global SuperTanker here: https://aneclecticmind.com/2016/06/25/flying-with-the-global-supertanker/)

You can learn more about the retired Quantas 747 at Moses Lake here: https://www.sfgate.com/travel/article/Qantas-747-final-flight-14540153.php

About Me and the Helicopter

  • I have been flying since 1998. My nearly 4,000 hours of flight time is in Robinson R44, Robinson R22, and Bell 206L (Long Ranger) helicopters.
  • My helicopter is a 2005 Robinson R44 Raven II — the same one that appears in the photo near the beginning of the video. You can learn more about R44s here: https://robinsonheli.com/r44-specifications/ This is the third helicopter I’ve owned since 2000.
  • My helicopter has ADS-B Out and is picked up by radar facilities. You can see my track for recent flights on Flightradar24: https://www.flightradar24.com/data/aircraft/n7534D This is a great site for tracking any almost any flight, including the airlines.

About the Video

I try to drop cockpit POV videos every Sunday morning and “extras” with more info about owning and operating a helicopter midweek. (Some channel members get early access to some of these videos.) I also host occasional livestreams with Q&A chats. Subscribe so you don’t miss anything new! And tell your friends. The more subscribers I have, the more motivated I am to keep producing videos.

Some links on my channel are affiliate links, including all links to Amazon (https://amzn.to/32PLHTD). If you click one of them and buy something, I get a small referral reward. It doesn’t cost you anything so I hope you’ll shop with one of those links. Thanks.

Want to see YOUR name on the member list? So do I! Becoming a member financially supports this channel and gets you a handful of benefits — including discounts on merchandise in my Etsy store (https://www.etsy.com/shop/FlyingMAir) — on an ongoing basis. The Join button or this link will get you started: https://www.youtube.com/channel/UCLGD_GbGsS6YKK_Ekx0QMqQ/join

Helicopter Flight: Autumn at Mission Ridge & Wenatchee

Two videos from the Flying M Air YouTube channel.

COME FLY WITH ME as I take a flight in the Wenatchee area to show off the autumn colors. There are two versions of this video, as I explain in both videos:

The cockpit POV version of my Autumn at Mission Ridge & Wenatchee flight enables you to reference the instruments as I talk about them:

If you check out this video at 7 AM PT on Sunday, November 3, 2019, you’ll be able to participate in a “Premiere,” which includes live chat as I watch the video with multiple viewers. (It’s fun!)

The nosecam version of my Autumn at Mission Ridge & Wenatchee flight gives you a complete, unobstructed view from the nose of the helicopter

Some notes about this video (one of which applies to the cockpit POV version only):

Start to 4:20 – Yes, the carbon monoxide detector light is on during the beginning of this flight. I had been idling on the ramp for a while before the flight and when the wind blows just the right (or wrong?) way, it blows enough exhaust into the cockpit to trigger that very sensitive detector. I had opened the main (front) vent prior to starting the video and later, at 3:20, opened the vent on my side door. The light went off at around 4:20 and I closed that side vent. It really was cold!

9:50 – Hear the difference in the sound of the helicopter? I’ve reduced power and slowed down and what you’re hearing is called “blade slap.” It goes away when I pick up speed beyond around 80 knots as I start my descent.

12:40 – I’m descending at 1700 feet per minute! That’s about the same as an autorotation.

14:30 – The top end of Pitcher Canyon is on my right.

15:08 – Sorry about the throat clearing sound. I thought I edited them all out.

19:30 – There is no control tower at Wenatchee. Pilots use the Common Traffic Advisory Frequency (CTAF) to report location and intentions in flight. This is NOT required but is highly advisable. (Technically, a radio is not required at all for Part 91 operations at Wenatchee.)

20:15 – Yes, I can make what’s called a “quick stop” or turn very sharply away from the runway to avoid traffic there. I always look both ways and make a call before crossing the runway. If a plane is landing or taking off, I’ll usually alter my course to pass behind it.

About Me and the Helicopter

  • I have been flying for about 20 years. My nearly 4,000 hours of flight time is in Robinson R44, Robinson R22, and Bell 206L (Long Ranger) helicopters.
  • The helicopter is a 2005 Robinson R44 Raven II — the same one that appears in the photo at the beginning of the video. You can learn more about them here: https://robinsonheli.com/r44-specifications/ I own this helicopter. It is the third helicopter I’ve owned since 2000.
  • My helicopter has ADS-B Out and is picked up by radar facilities. You can see my track for recent flights on Flightradar24: https://www.flightradar24.com/data/aircraft/n7534D This is a great site for tracking any almost any flight, including the airlines.

About the Video

  • The video was recorded with a pair of GoPro Hero 7 cameras (https://amzn.to/2Lxyzwl). The cockpit POV view comes from a camera mounted on the bar between the two front seats, which is part of the helicopter’s frame, using a MyPilotPro (https://mypilotpro.com/shop/?wpam_id=13) Helicopter Mount (https://mypilotpro.com/product/helicopter-gopro-mount/?wpam_id=13) in conjunction with a few customized RAM mount components. (I’ll do a show and tell about my camera mounts in another video.) The nosecam view comes from a camera mounted on the nose of the helicopter. That camera contributed ambient sound to both versions of this video, which includes wind, engine, and rotor noise, from the camera’s built-in speaker and has been incorporated into this video at 25% normal volume.
  • Narration was done using a Røde Podcaster microphone (https://amzn.to/2IFnbNr) connected to a Macintosh. I recorded the narration while I was watching the video in the editing software because the in-flight audio feed did not work.
  • The video was edited on a Macintosh using Screenflow software. Learn more about it here: https://www.telestream.net/screenflow/overview.htm
  • The intro music is by Bob Levitus, famed “Dr. Mac.” You can find him here: http://www.boblevitus.com/

I try to drop cockpit POV videos every Sunday morning and “extras” with more info about owning and operating a helicopter midweek. (Some channel members get early access to some of these videos.) I also host occasional livestreams with Q&A chats. Subscribe so you don’t miss anything new! And tell your friends. The more subscribers I have, the more motivated I am to keep producing videos.

Some links on my channel are affiliate links, including all links to Amazon (https://amzn.to/32PLHTD). If you click one of them and buy something, I get a small referral reward. It doesn’t cost you anything so I hope you’ll shop with one of those links. Thanks.

Want to see YOUR name on the member list? I do, too! Becoming a member financially supports this channel and gets you a handful of benefits — including discounts on merchandise in my Etsy store (https://www.etsy.com/shop/FlyingMAir) — on an ongoing basis. The Join button or this link will get you started: https://www.youtube.com/channel/UCLGD_GbGsS6YKK_Ekx0QMqQ/join

A Tab-Mounted Gemstone Pendant

I make my first tab-mounted gemstone pendant.

Cabochon Definition
The definition of cabochon from Merriam-Webster dictionary.

I have about 500 gemstone cabochons in my collection these days. When customers marvel at them on display, I joke that “I make jewelry to support my stone habit.” Sadly, although it’s a pithy punchline, it’s also kind of true.

Picasso Stone Pendant
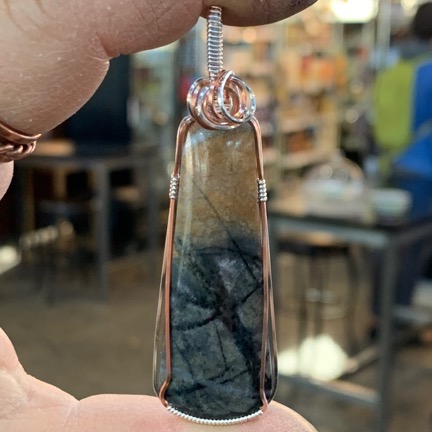
I made this Picasso Stone Jasper in sterling silver and copper pendant recently.

I use the cabochons (or “cabs”) three ways:

  • I make silver and/or copper framed pendants from cabochons I select from my collection.
  • I let customers select cabochons from my collection and make silver and/or copper framed pendants for them.
  • I sell cabochons from my collection. (Yes, I mark them up from their purchase price. No, I don’t double the cost to come up with my price.)

That Rose Quartz Cab

I purchase most of the cabochons at gem and mineral shows or directly from lapidaries. I do, however, also have a CabKing cabochon maker, which I can use to make my own cabs from rough or slabs. While I’m glad I have the CabKing, I honestly don’t use it enough to make it worth buying. The trouble is, it takes a long time to make a cab — sometimes an hour or more per stone. So unless I can’t get a cab elsewhere, it just doesn’t make sense for me to make it myself. At this point, I use it to make cabs from local stones such as petrified wood, obsidian, Ellensburg Blue agate, and Washington State jade.

But back when I first got it, I made a bunch of cabs from stones I’d bought to tumble. One of them was a piece of rose quartz that, for some reason, I’d cabbed into a triangle. (What was I thinking?) The piece sat in my collection for well over a year. It was time to do something with it.

Tab Mounting Ideas

I pulled it out on Sunday and took a good look at it. I wanted to use it with one point down, but I knew that it would look ridiculous framed in wire. And then I realized that it might be a candidate for a new (to me) technique I wanted to try: tab mounting.

Tab mounting requires you to take a piece of metal and cut tabs into it that you can then bend up and over the stone to secure it in place. I had seen a few videos about the technique and even read up on it in some of my jewelry making books. Coincidentally, I had passed on a jewelry making class in Tacoma that very weekend that covered tab-mounting. (I had already driven to the west side of the mountains three times this autumn and felt that was enough.) Maybe it was time to try it myself.

I took out a piece of paper and started sketching — which is something I rarely do. (I have no drawing skills.) I came up with an idea that might work, however, and got very excited about giving it a try. Unfortunately, I was at my day table booth in Pybus Market for the day and had agreed to meet a friend at the neighborhood winery afterwards. So it wasn’t until Monday morning, after dropping off my truck for some maintenance, that I had a chance to explore my idea.

Making the Pendant

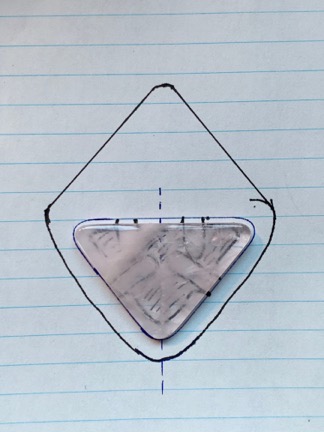
Sketch 1
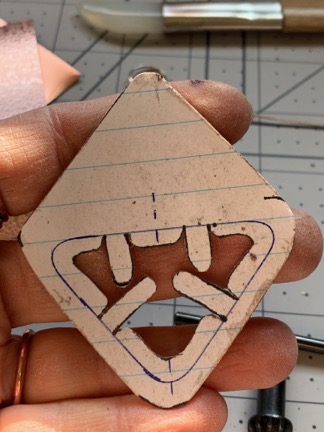
Here’s the sketch with the stone positioned on top. Because the stone was translucent, I wanted the area behind it to be mostly empty.

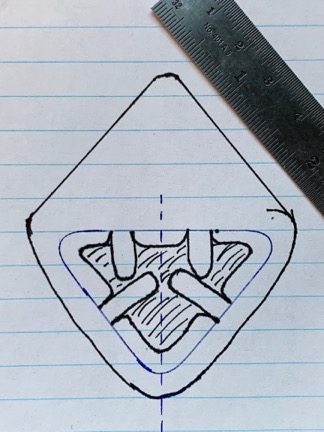
Sketch 2
Here’s the sketch without the stone. I shaded in the area that would be cut away.

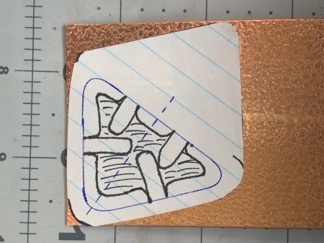
Sketch Glued
I glued the sketch diagonally on one end of the metal strip.

After cutting
Here’s what the piece looked like after it was cut.

I started by re-sketching the idea. You see, it required a lot of cutting with a jeweler’s saw — a skill I learned last year during the three-day Beginner Intensive Metalworking class at the Tacoma Metal Arts Center. I’d been taught to take what I wanted to cut and paste it onto the metal with rubber cement. After it was cut, the paper could be peeled off.

So I traced the stone on paper, drew dashed lines to mark the center, sketched in the tabs I’d need to cut out, and then drew the pendant’s border around the stone. I shaded in the area that would be cut away, mostly so I wouldn’t make any mistake about where I cut.

Then I prepared the metal. I planned to use 22 gauge copper for this first experiment. I needed a piece approximately 2-1/4 inches wide so I cut a strip that wide with my bench shear. I wanted the metal textured and decided to use my rolling mill to keep the texture uniform. It was important to roll the copper before cutting it since rolling it tends to stretch it a bit. I picked a texture plate and rolled it out.

Next, I cut out my sketch with a pair of scissors and glued it to the textured metal. It didn’t matter which way the texture ran so I placed it on the metal to minimize waste.

Now the fun part (not!): cutting. There were two cutting techniques required for this piece:

  1. Cut around the outside of the template. This was easy — I did it with a pair of metal shears.
  2. Pierce cut along the black lines inside the pattern to remove the shaded area. This required me to drill a small hole in the shaded area (to pierce it) and then thread a thin blade on my jeweler’s saw through the hole. Then, resting the piece on my bench pin, I sawed on the lines. Although this wasn’t particularly difficult — the jeweler’s saw is made for this kind of work — it was time consuming. And I did break three saw blades. (#4/0 blades are a lot thinner than the #2 blade I use for most of my work. Fortunately, I buy all my blades in 24-blade package.)

Once it was cut out, I peeled away the paper and cleaned any remnants of glue off the piece. Then I spent a while doing my least favorite thing: filing and sanding the rough edges. One of these days, I will find the perfect tool for doing this quickly and consistently. Monday was not that day.

At this point, I could have mounted the stone and finish up. But I wanted to use another technique to add some creative elements to the metal: fusing sterling silver onto its surface. I dug into my sterling scrap bag — I recycle all my sterling silver — and pulled out a piece of 22 gauge square wire. I cut it to length and curled its ends into a pair of spirals. Then I took my beloved solder cutting tool and chopped up the remaining square wire into tiny pieces. I positioned all this silver onto various places on the textured copper and laid it out on the charcoal block at my soldering station.


I cannot say enough good things about this torch, which can supposedly reach 2500°F and doesn’t have sissy features like child-proof ignition.

I used my new Blazer Big Shot butane torch to melt the silver onto the copper. This is something I’d learned earlier in the month at a jewelry making class. It’s not difficult to do, but it does require your full attention and quick reflexes. I wanted the tiny chips fully melted but I wanted to retain the shape of the swirls. I think I did a decent job, although I wish I could have melted the left swirl a little better.

As you might imagine, the copper got very hot — glowing red. I let it cool naturally on the block for a short while, which really didn’t make sense because charcoal really holds the heat. Finally, I quenched it in some water and dried it off. It was very black. I used a 280 grit radial polisher on my flex shaft to clean it off, then repeated the process with a 400 grit polisher to give it more shine.

I was going to do some fire painting to bring some more color into the copper, but so little copper showed through the silver that I didn’t think it was worthwhile.

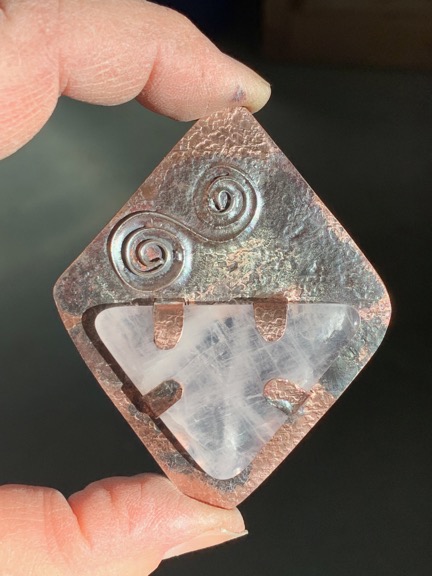
Finished Pendant
Here’s the almost finished piece. I still have to add a bail at the top. It’s interesting the way the silver appears shiny in some places and blackened in others. I like that look. I’ll probably make a pair of simple copper with fused silver earrings to go with it, using the same spiral motif.

So, instead, I just mounted the stone. It was easy enough to do: I pulled the four tabs forward, bending them where they joined the rest of the piece. To my utter amazement, the stone fit perfectly between them. I bent the tabs back over the stone. It was all very easy to do since the piece had been annealed when I melted the silver.

I’m very happy with the results. I know that this kind of jewelry isn’t for everyone, but neither are my sterling/copper framed cabochon pendants. I think it’s important to have a variety of items to appeal to many people. I can see making a “line” of jewelry in this style. Every piece, of course, would be different.

I can make silver pendants this way, but I can’t melt copper onto them. I’d have to use other techniques to make the pendant’s backing interesting: texturing, stamping, antiquing, etc. It’s exciting to me, in a way, because I get to try different things. When I show them at art shows, etc., I see the reaction of shoppers and learn what works and doesn’t work.

Picking Up My New Old Trailer

I take delivery of a new used cargo trailer for my mobile jewelry shop.

My October trip to Tacoma, which I cover in another blog post, was the first half of a two-part trip. The second half was a stop in Yakima to pick up a trailer I’d seen there back in September. I’d told the owner, a guy named Mike who owned the local Lance dealership, that I’d be there around 11 AM on Monday. It was Sunday afternoon when I finished my business in Tacoma.

Researching the Trip

I’d originally planned to spend another night behind TMAC, but since there was nothing really appealing about the place as a campsite, I figured I get started on my way to Yakima that afternoon and camp along the way.

I did some homework. First, I checked out the most direct route which, I as expected, had me going through Chinook Pass near Mt. Rainier. Chinook is usually the first pass to close every winter. WADOT reported that it was still open with no restrictions. There was a slight chance of snow that day, so I knew I’d have to check again later.

Then I looked for a campsite. I have an app (Ultimate CG) that lists all public land camping areas. I didn’t want to be too close to the pass because I didn’t want to have to run the heater all night with the cooler temperatures at altitude. It took time — a surprising number of campgrounds were already closed for the season. I found a campground near Naches called Cottonwood that was open year-round and picked that as a destination.

After class, I walked Penny, secured loose items in the camper, and climbed into the truck. I checked Chinook Pass again; it was still clear with no restrictions. It was nearly 5 PM when I rolled out of the parking area and started on my trip to a destination 73 miles away.

The Trip to Yakima

It was freeway driving until I got off of Route 18 and headed toward Mt. Rainier. Eventually, I passed through the last town and started climbing on a two-lane road that wound through the forest. Although the weather was overcast and the light was disappointing, I enjoyed views of autumn colors all around me, especially the bright yellow larches. Unfortunately, the road was full of frost heave bumps that forced me to drive 5 to 10 miles below the speed limit. Google Maps kept adjusting my arrival time. When I still had cell service, I asked Siri what time sunset was at Yakima. 6:15, she reported. Google told me that I would not arrive until 6:45 PM.

I passed a few spots where I knew I could find a campsite in the National Forest. I was eager to get over the pass that day in case it snowed overnight. I didn’t want to have to start the next morning by backtracking to a different pass. So I kept going.

Clouds hid Mt. Rainier at a view point I passed. Soon I was climbing up into those clouds. The fog got thick on the narrow road. The pavement was wet. The outside temperature was only 39° then 37°. I slowed down even more. The guy in front of me speeded away and the guy behind me got closer, but there was nowhere to pull over to let him pass.

I didn’t realize I was near the pass until I saw the sign for the parking area for the little lake up there. I couldn’t see the lake or the mountain peaks I knew were beyond it. I couldn’t even see the parking area. Then I drove under the underpass right at the top of the pass. I knew there was a parking area to my right and I pulled into it so the guy behind me could pass. The air was already clearing; the clouds were mostly caught up on the west side of the mountains. The guy passed and I got back on the road, now able to see quite well.

But it was getting late; sunset was only minutes away. I still had 30 miles to go. As I came down the east side of the mountains, I began looking for an alternative place to spend the night. I passed a few closed campgrounds and then came upon an area where gravel roads led off to the left or right. There was a bridge over a creek and a road just before it. I slowed down but was going too fast to stop. It didn’t matter; there were people camping in there anyway. But on the other side of the creek was another turn. I stopped just past it, backed up a little, and drove in.

The Perfect Campsite

There was a flat area just off the road that would have been okay to camp in — if I didn’t mind being right next to the road. But beyond that was a short steep hill with an empty campsite beyond it. I got out to take a look. If I could get the truck up the hill, there was plenty of level space for me. I got back in and drove up the incline. It was no problem for my big 4WD truck. I spotted a perfectly flat area cleared of all forest debris that looked as if it had been occupied by a very large tent. I turned the truck around in the relatively tight space and backed in.

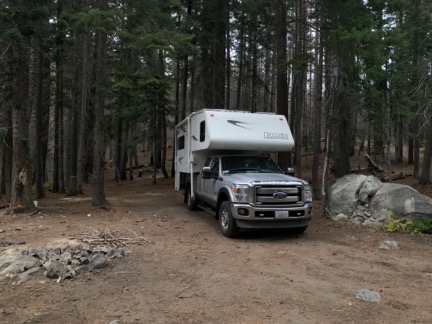
Perfect Campsite
This was, by far, one of the nicest just-off-the-road campsites I’d ever had the pleasure to spend the night in. Level, quiet, private.

With nothing but forest out my back door and a rushing creek off to one side, I had found the perfect campsite. I shut down the truck and got out with Penny. I took a picture of my truck parked against the woods. It reminded me of why I’d bought a truck camper instead of a pull trailer and how glad I was that I did.

It was already getting dark, so we didn’t spend much time exploring. I was hungry and it was getting chilly. We went inside. I turned on the heat, gave Penny some more food, and made myself dinner. With absolutely no cell signal to distract me with web surfing, I spent most of the evening writing this blog post. Then I climbed into bed and read for a while on my iPad. I saw the moon rising through the trees through the window by my head. It was dead quiet.

Later that night, I woke up and spent some time listening to the sound of the rushing creek and watching, through my big plexiglas skylight, the full moon peeking down at me through the trees and clouds. It really was the perfect campsite.

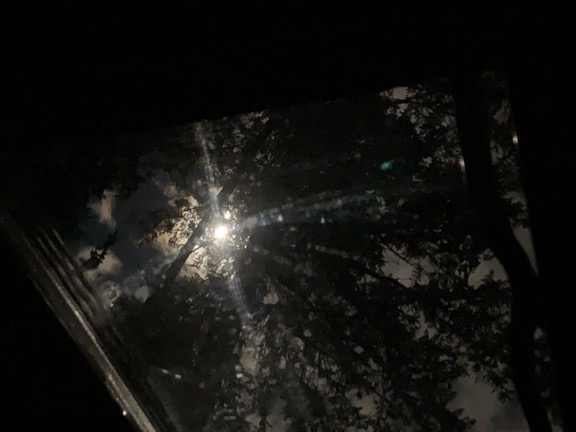
Moonlight thru the Trees
I know it isn’t a great photo, but it was a great moment. The full moon as seen through my camper’s sunroof, poking through scattered clouds and evergreen trees.

Picking Up the Trailer

American River
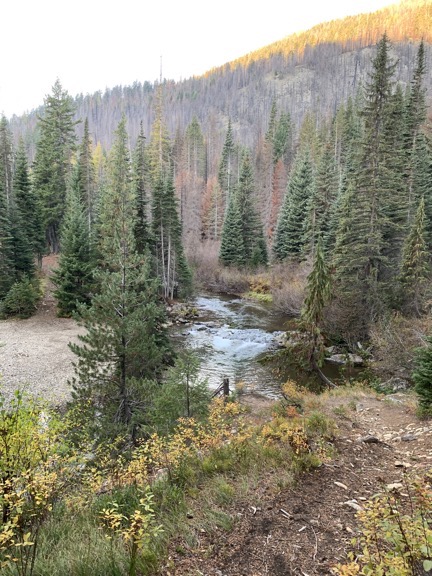
The American River separated my campsite from the one I’d seen the night before.

The next morning, I made coffee and spent some time at my table writing the first part of this blog post. It didn’t get light until around 7 AM. That’s when I let Penny out and made some breakfast. I took a photo of the creek next to my campsite — actually, the American River — before going back in to do the dishes, strip the bed, and secure loose items for the last day of my trip.

I had a minor “black ice” experience not long after getting on the road. It was about 31°F outside and the road was just wet enough to have a thin layer of ice on it. I was driving along at about the speed limit when I realized that I was sliding ever so slightly. I took my foot off the gas and complete control came back quickly. I drove slower until the temperature topped 35°F.

I had no internet connection so I couldn’t use Google to navigate. It wasn’t a big deal; I figured I could find Yakima easily enough. But I also wanted to check out Cottonwood Campground for future reference. I found it about 20 minutes after leaving the campsite. It was a nice little campground with a few campers in it. I stopped to dump my garbage. If they had a dumping station, I probably would have used that, too.

Internet came back with a flurry of text messages and notifications. I pulled over for a moment to see if I’d missed anything important. Mike had texted me to see if I was still coming that morning. I checked the time and realized I was right on schedule to arrive at 11 AM and texted him to let him know.

Eventually, I rolled up at the Lance dealership and pulled around in back. Mike greeted me and spent some time showing me the trailer again. The only other time I’d seen it, it had been parked in a fenced in area that made it impossible to get the back ramp down. We got the ramp down all the way. I was pleased to see that the door lock was not only there but it actually worked. So did the lock for the front toolbox. The lights inside even worked. It was spotlessly clean — he’d washed it inside and out. He’d even checked the tire pressures and the torque on the lug nuts.

Resized952019101295165139954891 Trailer Ramp
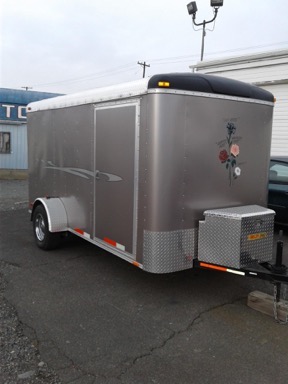
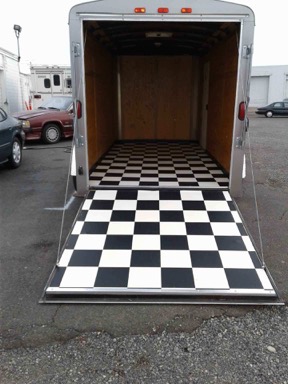
My new old cargo trailer. It’s a 2013 (I think) and in amazing condition. The names painted with the flowers on the front are the original owner’s dogs’ names. (I can’t make this stuff up.) I know it has only one axle and I know a lot of people think two axles is a lot better. But a one axle trailer is easier to maneuver for parking and that’s what I wanted. I also wanted the interior lights and ceiling vent. The only thing I didn’t want was the ramp door — I wanted barn doors in back — but I know ramps are better for resale. I don’t expect to own this more than a few years.

Mike spent a lot of time looking for a spare tire for it. He thought it had one but his co-owner brother said it didn’t. They’d owned the trailer for a long time; Mike had bought it for personal use and never actually used it. In the end, he didn’t find a spare. I was okay with that; I’d buy one at the local tire shop. I’d gotten a good deal and didn’t mind spending a little more to make it perfect. I knew I’d be spending about $300 to install E-Track in it within the next month or so anyway.

We did the paperwork and I gave him a check. Then he guided me to hook it up behind my truck with the camper on top and the extended tow hitch on back. After we had it all hooked up, he stood back to admire it. I think he was tickled that the color of the trailer kind of matched the color of my truck. “Nice looking setup,” he said.

I thanked him and got on my way.

The Trip Home

The trip home went smoothly. The trailer towed like it was nothing — probably because it was empty. My truck, which had been giving me some engine cooling issues on the way to the Seattle side a few days before, didn’t give me any trouble at all on the way home. Although I was really hungry and wanted badly to stop for lunch, I motored through, stopping in George for fuel.

At home, I played my parking game. I dropped the trailer in my gravel driveway and backed the truck and camper onto the concrete apron. Then I used the front tow hitch on my Jeep to move the trailer into position beside my truck. Eventually, everything went into my cavernous garage. That’s where I’d prep the trailer and camper for my winter trip.

If you’re a regular reader of this blog, you might recall that I bought a cargo trailer very much like this one in January. It was kind of beat up and I never really liked it for a variety of reasons so I sold it a month or two after getting home. I know I’m going to like this trailer a lot better, mostly because of how clean and new-looking it is. I hate buying old crap; this is not old crap. I’m looking forward to customizing it for my travels.

Two Jewelry Classes

I take the camper to Tacoma to learn more about making jewelry.

Note: I actually wrote this and much of the post after it about my new cargo trailer back in early October while I was still traveling. I can’t tell you how many blog posts I start writing and don’t finish. This one’s done. I’ll try to get the other one done this week, too.

Last September, I took a 3-day intensive beginner metalworking class at the Tacoma Metal Arts Center in Tacoma, WA. It was an amazing experience that really transformed the way I think of making jewelry. I learned a bunch of metal working skills and how to use new (to me) tools that would take me to the next level in my work: cutting, soldering, texturing, shaping, and polishing sheet metal using jeweler’s saws, shears, torches, flex shafts and attachments, dapping blocks and punches, rolling mills, texture plates, and burnishing tools. I left class with the basic tools I’d need to practice what I’d learned.

Getting Serious about Jewelry Making

Over the winter, I decided to get serious about making jewelry. I paid a contractor friend to frame in a 12 x 24 foot space in my absurdly large garage so we could make an insulated shop for me. That would give me a climate controlled space to work on jewelry projects. While I was in Arizona over the winter, I shopped for the tools and equipment I’d need to set up a full-blown annealing/soldering station and jeweler’s workbench. When I returned from Arizona, I ran the wiring in the new shop and my friend returned to put in the insulation and drywall while I fastened T1-11 paneling to the two outside walls facing into the garage. Then I painted the inside of the room and added some trim around the windows. I installed the two glass-paned doors last week with another friend. The room is large and bright from its two windows and four track light setups, with an 8-foot ceiling and 288 square feet of loft space above it that I’ll likely never use.

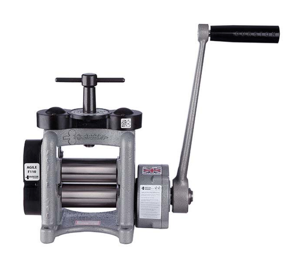
Durston Rolling Mill
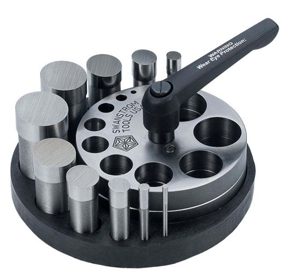
Swanstrom Disc Cutter
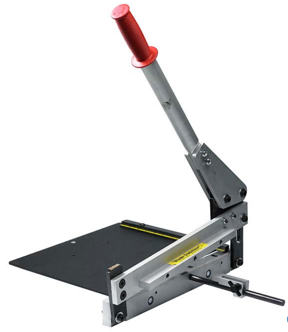
Bench Shear
Some shop tools purchased from Rio Grande earlier this year: a Durston Agile 110 Rolling Mill, a Swanstrom Round Disc Cutter, and a Precision 12″ Bench Shear. (Catalog photos not to scale; the disc cutter is actually quite small.)

With the help of the folks at Rio Grande — my primary supplier of metals — I purchased a few rather costly quality tools: a Durston rolling mill, a Swanstrom disc cutter, and a PepeTools ring bender. I also acquired a set of dapping blocks/punches and a metal shear almost as good as a true guillotine style cutter. I moved my jeweler’s bench into my new space, putting it right beneath one window where I’d get plenty of natural light. I built a solid workbench for the corner where I bolted down the rolling mill. Then I moved in the rolling storage cabinets I’d been collecting for years, set up one as my soldering station, another as my rock storage and jewelry photography studio, and a third as storage for the display and packaging equipment I’d accumulated. Half the room is set up as a jewelry studio while the other half is my regular workshop with the big workbench I built several years ago, my tool chest, and the rolling cart I’d converted into a storage and charging area for my power tools. My table saw, miter saw, tile saw, and Cabking cab making machine remain in the garage, on the other side of the wall. (The room is big, but not that big.)

Now, in addition to the sterling silver and/or copper framed gemstone cabochon pendants I’ve been making for a while, I also make textured and etched silver and copper earrings, soldered silver and copper stack rings, hammered bangle bracelets, silver plated “spoon rings,” and novelty keychains. This gives me a full range of products to offer customers when I show and sell my jewelry. I make these items in my shop and make my cabochon pendants when I go to shows.

This summer, however, I realized that I was ready for more.

Classes at the Tacoma Metal Arts Center

The Tacoma Metal Arts Center (TMAC) offers a variety of jewelry classes. Although I wanted to take the three-day course again with a different instructor to polish my skills and learn things from a different person, the dates and times it was offered did not work with cherry season, which requires me to be at home every day for three months — roughly June through August. There were a few one-day classes in September and October that looked interesting, but I wasn’t interested in coming to Tacoma for just one day. And then I saw the two one-day classes offered on the weekend of October 12 and 13: Molten Magic and Possibilities of Precious Metal Clay.

Molten Magic’s description was as follows:

Ruth [the instructor] will show you how to cut a shape from copper sheet for your project, then you will cover it with texture through the molten magic of melted silver! The result is a wonderfully rich surface texture of ridges and waves. Then, you will learn how to apply an iridescent patina with a torch by flame painting the surface.

Possibilities of Precious Metal Clay was described as:

PMC (aka Precious Metal Clay). Create fine silver jewelry from a clay: this material works like earthen clay so it can be shaped and formed, textured and refined and then fired. The result is precious metal in pure silver. Once it is finished into silver you can polish it or apply a patina for that vintage look.

These two seemed perfect for me. I was interested in taking my sheet metal work to the next level and fusing silver and copper sounded very interesting. As for PMC, I had actually bought some of the stuff and a bunch of tools to work with it but because of its cost, I was hesitant to get started. This would give me the information I needed to try it with confidence — or realize that it wasn’t really for me.

I signed up and planned to spend the weekend, camping out in their back parking lot in my truck camper as I had done the year before. Not only would I save on overnight lodging, but I could bring Penny the Tiny Dog along.

Molten Magic

Although I’d been hoping to get to Tacoma the evening before Saturday’s class, a big project at home kept me busy until 4 PM. By the time I prepped the camper, it was 6 PM and sunset was less than 30 minutes away. I try hard not to drive in unfamiliar places at night, so I didn’t depart until 5:30 AM the next day. Of course, I still had to drive in the dark over Blewett Pass, which I seldom drive. It wasn’t light until I got to Snowqualmie Pass.

Mushrooms
To give you an idea of the variety of food items Metropolitan Market offers, he’s a shot of some of the mushrooms they had for sale that day.

Traffic was light and I got there early. So I kept driving and stopped at Metropolitan Market, a supermarket that is so posh it makes Whole Foods look like a Smart and Final. I parked in the lot, got out to visit the restroom and buy some snacks, and then took Penny for a walk down the adjoining residential street. Then it was back to the TMAC, where I drove into the alley behind the place and backed the truck into the narrow parking area, trying (and failing) to use up only half the width of the space. The back gate was locked (as I knew it would be), so I got Penny set up in the camper with food and water, locked it up, and walked around front to the main entrance.

I was the first student to arrive. I met the instructor and chatted with her for a while. She must have thought I was a nut, talking to her as if I’d known her for years. I do that. The second of four students arrived before the 10 AM start time. The third arrived loudly 20 minutes late, after class had already begun. The fourth never arrived.

The instructor, Ruth, did not have a very structured teaching style. It was all very casual. There would be no specific project. Instead, she told us about the techniques we’d be using, handed out sheets of copper and scraps of sterling silver, and encouraged us to practice on the copper scraps in a bin near the rolling mill. Then she took us back to the polishing and soldering stations and demonstrated how to clean off the metal with wheels on three bench grinders there and then use heat from a torch to oxidize the copper enough to get different colors and patterns. She showed us how to melt silver onto the copper, including how to somewhat control how the silver melted by using heat to guide it across the copper.

Then she let us go to it.

There were three soldering stations and three of us so it worked out well that the fourth person hadn’t shown up. We each played with the sample copper for a while. One of the scrap sheets I’d taken had been run through the rolling mill and had a pattern on it. I managed to get shades of orange and pink on it. Later, I’d turn it into a pair of twisted metal earrings suitable for sale. (Yes, I can make jewelry out of scrap metal.) My silver melting wasn’t quite as interesting. I couldn’t come up with a suitable shape, so I’d traced a plastic spoon. No matter how I looked at it, it looked like a spoon. And I didn’t like the way I melted the silver on it.

Meanwhile, my two companions were working on nice projects. I felt uninspired. And disappointed. You see, I had already played with “fire painting” copper so it wasn’t new to me. The only thing I’d learned was that you could polish off the color to start over — I normally used “pickle,” which is an acid that removes oxidization — and that it was possible to melt sterling silver with the same little butane torch I used to solder and anneal.

Ruth spent a few minutes showing us how we could create a chain for a pendant using sterling silver wire and jump rings that she provided. I liked the chain on the sample piece she’d brought along, but it had been created with 14 gauge wire and she’d give us thinner 16 gauge wire. I played around with it for a while but didn’t like what I was doing.

File Painted Pendant
Here’s the pendant I made in class. I finished it with a leather necklace and added a pair of matching earrings. They sold as a set on the first day I displayed them in my booth.

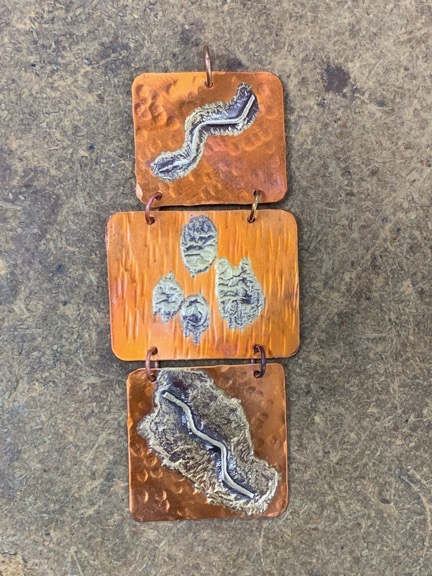
Then I got an idea for a pendant that would consist of three textured copper panels, each of which had silver wire melted on it. I’d join them together with jump rings. So I cut some of the copper sheet and went at it with two different hammers. Then I took some of the wire she’d given us to make a chain and made a zigzag pattern with it. I made tiny dots with more wire. I melted the wire to the copper without allowing the zigzags to get completely molten so they were fused onto the copper without losing their shape. I polished off the oxidation and then used the torch to apply just a tiny bit of color. I liked the result. I fetched some copper jump rings from my camper, colored them a bit with the torch, and put the whole thing together. Funky, but I liked it.

By this time, the day was pretty much over. Amy, the owner, came in to do some paperwork and she took photos of what we’d made. I felt that I made a respectable showing; everyone seemed to like the pendant and earrings. My companions had created more things than I had, but I didn’t mind. I had some ideas and that’s all I needed.

More at Metropolitan Market

After class, I went back to the camper — I’d checked on Penny at lunchtime — and put Penny on her leash. We walked the mile or so to Metropolitan Market. I parked Penny at the outside dog parking area where an Australian Shepherd was waiting for her human. I bought some things for dinner from their extensive prepared food area, remarking to the person behind the counter that if I lived nearby I’d be 300 pounds and flat broke.

Penny and I shared a gelato — I scooped some of mine out into the lid of the container for her — and walked back. Then we climbed into the truck and drove to a local U-Haul place that filled propane tanks. One of my tanks was completely empty and the other was only 1/4 full. I did not want to run out of gas overnight. That done, we returned to our parking spot and I backed all the way in so my back door was only a few feet from the back gate.

I heated my dinner in the camper’s oven — I wasn’t plugged into power and hadn’t brought along a generator so the microwave was useless — and worked on some earrings while I waited for it to finish heating. After dinner and another quick walk with Penny, I stretched out on my bed to read.

I slept well. During the night, I was treated to a rainstorm. The only thing I love more than hearing rain on my camper’s roof is hearing it on the metal roof of my home.

The Iliad and The Odyssey

I was up at 5:30 the next morning. I lounged in bed for a while, like I do at home, and then got up, threw on a pair of sweatpants, and made my coffee. I did a little web surfing at the table while I had my coffee. Before I knew it, it was 7:30. I made breakfast and ate it as Penny came down off the bed to let me know she was ready to go out.

I put the leash on her and we walked down the alley. There was a Bartell’s pharmacy about two blocks away and it looked like the kind of place that might have a refrigerator case. I really felt like having some orange juice. They had every sugar or alcohol drink in that case except real orange juice.

We crossed the road to a coffee shop. They didn’t have orange juice either. But they had a nice staff that let me bring Penny in so I bought a latte and caught up on Twitter at a table near the window while Penny ate a dog biscuit and a nearby dog watched her.

At one point, a young guy came over and complemented me on how well behaved my dog was. That got us into a conversation about dogs in public and how the owners really needed to keep them under control. I pointed to the other dog. “That’s a well-behaved dog,” I said.


This is the edition recommended by my friend.

I noticed that he was reading The Iliad and asked him if he was reading it for a class or if he was just reading it. He told me that he’d always wanted to read the classics and figured he’d start with the first one. (At that point, I found myself wishing he was about 20 to 30 years older and single — I felt the same way about reading the classics but needed a bit more motivation to actually do it.) I had recently explored reading a specific translation of The Odyssey that a friend had recommended. I told him about it and looked up the translator’s name for him. He said that was next on his list and he’d look for that version. I think he really will.

Possibilities of Precious Metal Clay

By that time, it was 9:45 and I was running the risk of being late for class. So Penny and I hurried back. I put her in the camper and went into class. I arrived at about the same time as one of the previous day’s students, Ellen. Two other students joined us. Again, there was a no-show.

This instructor, Meredith, had a more structured approach — but not much more. She spent some time talking about PMC — what it is, how it works, etc. She sent around examples of her own work — some of it with problems she pointed out as examples of what can go wrong. She handed out 9 gram packets of PMC3, bunches of 10 standard playing cards (which are used to gauge thickness for rolling), tiny pieces of plastic needlepoint grid (for a simple texture, a small sheet of foam (for creating our own textures), and long pins with masking tape flags on the end (for cutting clay). She seemed a bit disorganized; she’d forgotten to bring along work surfaces for us. Instead, we’d be rolling out the clay on the same teflon surfaces we’d use to dry it on. All the other tools were laid out in piles on unused benches and workspaces.

And then she let us go to it, again, without a specific project.

I guess wanting a specific thing to make is something that affected me more than my companions. I suspect that it’s because I’m pretty new to art — so new that I usually don’t provide a straight answer when people ask me how long I’ve been making jewelry.

Although I’m a visual person when it comes to learning, I’m not visually creative. (My creativity has always come with words; I have always been a writer.) Show me how to make something specific using a set group of techniques or skills and I’ll make it. Then, as I make it over and over, the creativity comes out. You can see that in my silver framed jewelry. Dorothy taught me how to make a pendant in her style using her materials and tools. The more pendants I make, the more my materials, tools, and final products differ from hers. I look at a stone and I think about how I could make an interesting pendant from it. The idea clicks and I make something creative and new. But when it all comes down to it, I’m just doing the same thing over and over, with minor twists that make something new.

Although Ruth had provided a project idea — the sample pendant she’d made for the course description — I hadn’t been interested in duplicating that. And Meredith did provide many examples of what we could do with PMC, but there were too many. I guess I was expecting her to walk us through the process of creating some of these things rather than giving us an overview of how to make them and then answering questions to help us complete our own personal products.

My problem was that I lacked ideas.

I made two textured pieces that could be earrings or charms. It took only minutes to do, even with the custom texture I created in the foam I’d been provided. I was interested in creating a bead and had picked out a small piece of cork clay to form a bead around. I had a few false starts — you have to surround the cork with clay before applying a texture (duh). My mistake was choosing such a small piece of cork; it meant that I was working with a very tiny object. But the damn clay is so expensive that I can’t imagine using it to make anything large. And we’d only been provided with 9 grams of the stuff so I was afraid to use too much right from the start.

Around lunchtime, Meredith set out a timeline for the rest of the class. All of the pieces had to be fired for about 45 minutes in a kiln. It took 30 minutes to ramp up the kiln to 1470°F. After that, we’d have to brush, tumble, and burnish our pieces, which would take at least another 15-30 minutes. With the class ending at 4 PM, that meant we’d need to get everything in the kiln by 2:30 at the latest.

I decided to use the rest of my clay to make a rectangular pendant with shapes adhered to it. This would enable me to practice “gluing” pieces together. What I made was ugly, but it did let me practice techniques. I worked and fine-tuned my pieces until 2:15 and laid them all out on the heating pad with the others to dry.

Compared to everyone else’s work, mine was pitiful. I didn’t even take a photo of them.

Meredith loaded the main kiln, which she’d brought along with her, and, while the kiln was coming up to temperature, talked to us a little about kilns. She’d brought along a smaller kiln designed for enameling that also worked with PNC and wound up firing that up for a few more pieces. Then we waited, asking questions and looking at more examples.

Finally, it was done. Meredith opened the kiln shortly after it was finished firing, opening and closing the door at short intervals to cool it slowly. She pulled out and quenched our pieces in a bowl of water. As I expected, they were all covered with a white film. She had us brush them off with a brass brush that put scratches in my pieces. I was pleased to see that none of them had any problems, although none of them had gotten any nicer.

Then she prepped the tumbler and dropped all of our pieces in. We cleaned up our workspaces while we waited. The owner, Amy, had come in and we shopped. TMAC is an excellent source of jewelry making tools and equipment at reasonable prices. I bought a small hand drill and two silver hallmarking stamps (.925 and .999FS).

Out of the tumbler, my pieces still had a lot of white residue on them. Meredith told us to burnish them with steel. I found a suitable tool and went to work on one of the pieces. The silver shine popped out. So now it was ugly and shiny.

Of course, I’m half joking here. Although my work wasn’t anything to be proud of, I had learned quite a bit about working with PMC and am no longer afraid to play with the 30 grams I bought earlier this year. I’m hoping to get my tiny desktop kiln running again; it’s the perfect size for this kind of work.

I just need some ideas.

After Class

Although I’d originally planned to spend the night in Tacoma, it was early enough to get a start for my next destination: Yakima. I needed to pick up a cargo trailer that I’d be converting into a mobile jewelry studio.

But I think you’ve read enough here. I’ll cover that in another blog post.