I expand the circuit in my shop area to include more outlets and an arc lamp.
On May 20, 2014, I began blogging about the construction of my new home in Malaga, WA. You can read all of these posts — and see the time-lapse movies that go with them — by clicking the
new home construction tag.
Back in early September, I finally had the ground work done to bring electrical power, water, fiber optic cable, and a septic system line into my building. I got all the required inspections done, including the one with Washington State Labor & Industries (L&I). That required, in part, to set up a circuit that included an outlet, a light, and a light switch. Although I wanted to do more than just that, I decided to keep it simple to pass the inspection.
Of course, once the initial inspection was done and the power was turned on, I was free to wire my building however I liked — as long as it was within the requirements of the local electrical code. An inspection would be made before the walls were closed up — likely sometime in the spring. I didn’t have to keep the original circuit as it was on inspection day. I could expand the circuit to include more devices: outlets, lamps, switches.
So that’s what I did. I finished the wiring of my shop/RV garage area — the 36 x 48 foot space on the left side of my building.
More Outlets
One double outlet was clearly not enough — although I was making it work through the use of extension cords and outlet strips. I’d plugged in my Internet router and chest freezer on one side of the big garage door, with an empty outlet for the drill I’d need to get through the studs to run more wire. On the other side of the big garage door, I’d plugged in my mini fridge, wine cooler, radio, and four battery chargers (for power tools). There were spare outlets for my tile saw and kiln, which I use for my glass projects. To get the power from the outlet on one side of the garage door to the other side, I’d run a heavy-duty extension cord across the garage floor at the door. Not the best solution for long term.
So I started laying in outlet boxes. One by the fridge, one by my work desk, and one on the other side of the post in my storage area. I had to do some creative work with scrap lumber to hammer the outlet boxes on the underside of the girts — the L&I inspector had warned me that outlet boxes in unfinished walls could not be above a girt. And then I had to run the wire around the two windows in my shop area and behind two posts to connect them. Wiring them together wasn’t much of a problem at all.
What was a problem was getting the wire from the first outlet on the circuit over the garage door and back down to the next outlet near the fridge. The garage door is 14 feet tall and 20 feet wide.

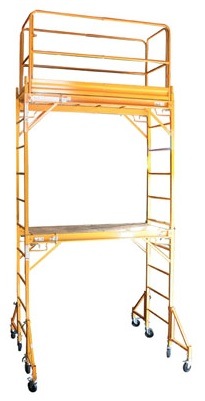
The nearly $500 I spent for this set of scaffolding is probably the best money I’ve spent so far on building equipment. I’ve used it dozens of times — this post just lists a few.
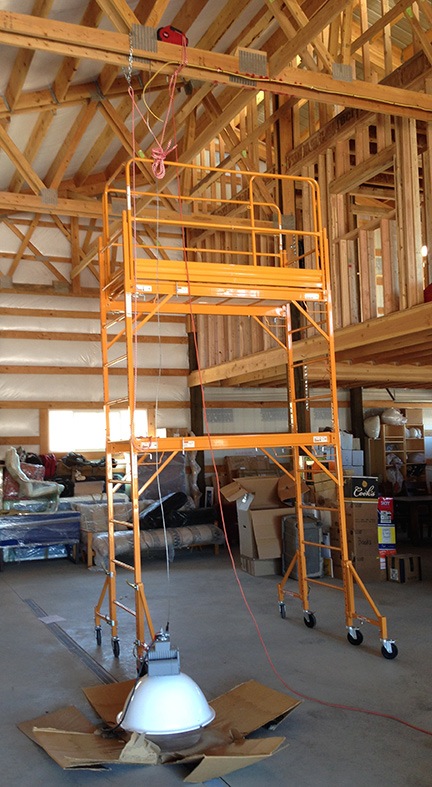
I’d bought scaffolding on Amazon a few weeks before and a friend had helped me assemble it. (It’s simply not possible to put together a 12-foot scaffold by myself.) The scaffolding consists of two 6-foot scaffolds stacked one atop the other with outriggers to prevent the whole thing from toppling over. A guardrail around the top scaffold platform gives me the illusion of safety — I’m not fooling myself: if I fall sideways while standing up there, that flimsy rail is not going to prevent me from falling over the edge.
It took some time getting used to climbing up and down the side of the scaffold, but after doing it a dozen times, I became quite proficient. Not only did all those trips up and down make me more comfortable about climbing the scaffolding, but it was great exercise that really wiped me out by the end of the day.
I brought the coil of wire upstairs and set it down on the floor. I fed it through the framing toward the post at one side of the garage door. Then I went downstairs, positioned the scaffolding, and climbed up. I fed the end of the wire between the post and metal wall — remember, the metal is fastened to the girts, not the posts — and into the space atop the garage door. I pushed it as far as I could, then climbed down the scaffold, repositioned it, and climbed back up to pull. I got about halfway across the top of the garage door when the wire got hung up on something at the other end. Back down, climb the stairs, free up the wire, push some forward, down the stairs, up the scaffold, pull the wire. It was clearly not a one-person job, but I was making headway.
That is until I got to the far end of the garage door and needed to pull the wire down to the outlet. Several trips up and down the stairs and scaffolding got me only a few inches. At that rate, it would take the rest of the day. I needed help.
Fortunately, a friend was coming by to help me move my heavier furniture — the red sofa bed, my bedroom set, a desk — to the back of the building to make room for the helicopter and possibly the RV later in the season. When he and his son were finished with the furniture, I asked him to climb the stairs and push the wire while I pulled it at the other end. Within 5 minutes, we were done.
I suspect that a lot of my friends would be helping me feed wire during visits over the next few months.
Once the wire was run over the garage door and stapled to the posts as required by code, I got back to work wiring the outlets. I did them in a sequence, then covered them up with the cheap covers I’d bought for the garage. (I’d use nicer ones for the living space.)
That part of the wiring was done.
The Arc Lamp
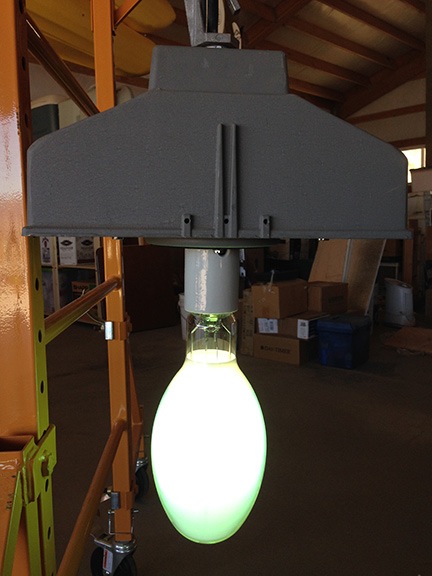
Is it really an “arc lamp”? I don’t know. Donn called it an arc lamp and Tom didn’t correct me when I called it an arc lamp. All I know is that it’s huge, has a big 500 watt bulb, takes a good 3-5 minutes to warm up, and is almost as bright as the sun. I suspect it might get hot.
My friends Donn and Kathryn had built a cherry packing shed on their orchard earlier in the year. They’d lighted the place with arc lamps that Donn had obtained used from some source. Donn had hired an electrician to do all the wiring. When he was finished, he had a few lamps left over. On the day I came to admire the shed, he offered me one. I thought it would make a good light for my RV garage so I took it.
That was months ago. For months, it sat in a big box in the upstairs of my building, out of the way of builders and movers. Four big pieces: transformer, light bulb, reflector, and lens. My job was to make sure the thing actually worked, fasten it securely to the rafters 16 feet off the ground in the center of the RV garage, and wire it to a light switch near the door.
The wire coming out of the transformer was simply cut about 3 feet from the fixture. I had two options to test it. I could hard wire it into a circuit and switch or I could put a plug on it and plug it into an extension cord. I went with the second option.
I also went to Home Depot and bought a two-foot length of chain with a screw-closure carabiner. The transformer, which weighted at least 30 pounds, had a heavy duty hook for mounting. I used the chain to hang the transformer to my scaffolding, screwed in the lightbulb — which is about 16 inches long — and plugged it in. The transformer hummed, but no light.
I wasn’t really surprised. I knew it couldn’t be that easy.
I examined the label on the transformer. It listed four different voltages, including the 120 volts I was using. Maybe the lamp was wired for a different voltage?
I (carefully) put the lamp in my Jeep and drove it down to Platt, the local electric supply store. I brought it inside. No one there could help me. They directed me to a lamp repair shop on Mission Street. I drove over. It was located in what used to be a house. I went in and described the lamp. The guy there said he couldn’t help.
Back in the Jeep, I called Donn and asked him. He said he didn’t know because he hadn’t done the wiring. He gave me the number of the man who had, Tom. I called Tom. We tried to get together that day, but weren’t able to connect. Instead, he came up to my place the next day.

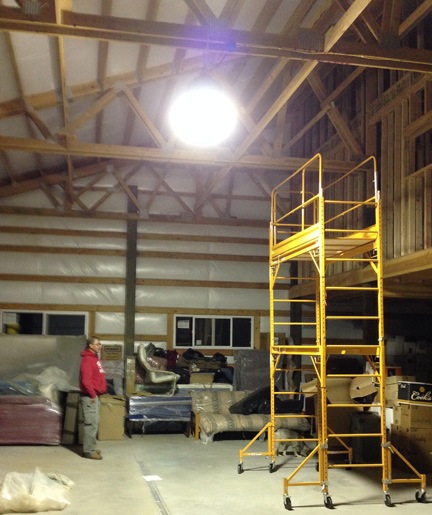
These lamps come to life slowly. Within minutes, it was very bright.
He brought tools. We chatted a bit. He admired my “man cave” and then made the now familiar comment about me having a “great setup.” Then he opened the transformer and fiddled around with the wires. Apparently, it had been wired for 277 volts. He rewired it for 120. He closed it back up and we put the bulb back in. I rehung it on the chain and plugged it in. It immediately came to life with a hum. In about 3 minutes, it was at its full brightness, like a second sun inside my shop.
Whoa.
When he left he gave me a spare bulb. He wouldn’t take my money.
Of course, testing the lamp and making sure it worked was only the first part of installation. I still had to get the wire and the lamp up into the rafters.
The wire wasn’t that difficult. The route I chose was pretty much clear of obstacles, so the wire was easy to run. I did, of course, need to stand on the scaffolding. Up, run wire, staple wire, down, reposition scaffolding, up, run wire — you get the idea.
It was about this time that I got sick and tired of hammering in the wire staples, which were required a maximum of every four feet. There had to be a better way. I took a break for the day and headed out to Home Depot. I came back with a good stapler designed to drive in those damn wire staples. Not perfect — I still needed to tap them a bit with a hammer — but a hell of a lot better than what I’d been doing.
(Any job is easy when you have the right tools, eh, honey?)
Back to work the next morning, I finished running the wire between where the light switch would go and where the lamp would go. Easy peasy.
Next, I had to lift the lamp into place. I fully assembled it with the transformer, bulb, reflector, and lens. Then I tied a rope to it at the bottom of the scaffold, climbed up, and pulled. I lifted it about 2 feet off the ground when I realized that I would probably not be able to lift it 16 feet off the ground. Again, there had to be a better way.

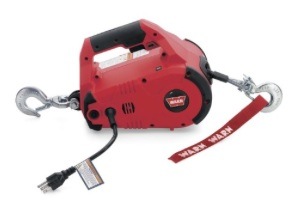
Wow! Is this ever handy for general use around my shop and garage. It makes it possible for me to lift or move up to 1,000 pounds with the touch of a button.
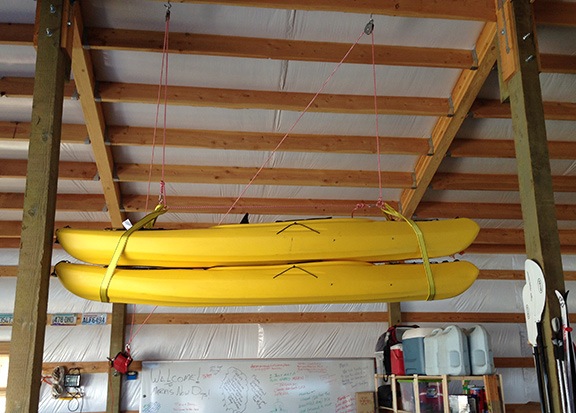
The better way was with a winch that I already had. You see, I’d cooked up a solution to lift my kayaks off the floor of the shop. I was tired of walking around them, so I’d put pulleys in the rafters between two posts and run line down and around them. Because I couldn’t manually lift them, I’d bought a small electric winch on Amazon. I’d fastened the winch to a hook on a post and had fastened the ropes to the winch. Squeezing a trigger lifted the kayaks high enough to walk under them.

Hanging my kayaks was another little project I did this summer. You can see the winch hanging from a post. (If I blogged about all my projects, I wouldn’t have time to do any projects.)

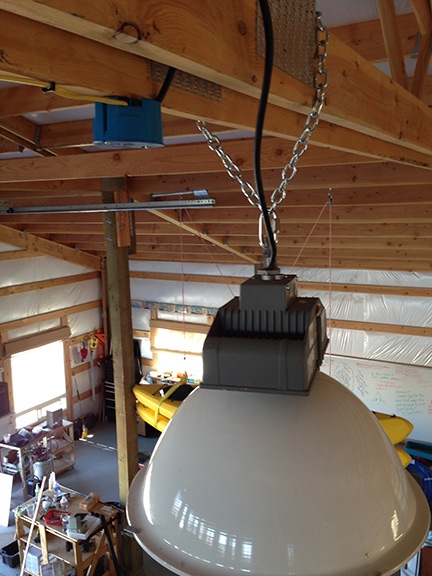
In this shot, you can see the winch attached to the rafters with the cable running down to the arc lamp. If you look closely, you can see the wire I’d run along the bottom of the rafters.
The winch was still holding up the kayaks, but I rigged up a rope on the same hook to do the job, freeing up the winch for other duties. I carried the winch up the scaffolding and secured it with a rope atop some rafters near where I’d hung the chain for the arc lamp. I ran an extension cord to the winch. Then I dropped the winch cable down to the floor — it’s 15 feet long — went down, and hooked up the lamp. Then back up to run the winch. I brought the lamp up slowly until it was high enough to fasten to the hook. That was probably the hardest part: disconnecting the lamp from the winch and connecting it to the chain without dropping it. I was mighty relieved when I was done and the lamp hung securely from the rafters.
I left the wire long in case I wanted to move it someday and needed a longer wire. Rather than leave it hanging, I draped it around the rafter. I hope L&I doesn’t mind.
Next, I had to mount one of those blue plastic boxes to the rafter to connect the wire from the lamp to the wire from the switch. Not a big deal. I hammered the box in place, ran the wires in, and connected them with wire screws. Then I fastened a cap over the blue box. I stepped back on the scaffold to admire my work — and take a picture, of course.
I brought all my tools and the winch back down the scaffold. I had one step left.
Tying It All Together
So far, I had three new double outlets and an arc lamp wired. But none of them were wired to a circuit. That was the last step.
I’d already set up a light switch and outlet beside the circuit panel near the door to my RV garage. I decided to tear that apart and replace it with a box that would house two light switches and an outlet.
I should mention here that L&I, on its inspection, had told me that the outlet needed to be GFCI protected because it was the first one on a garage circuit. Although they passed me, it was contingent on me replacing that outlet. Doing the rewiring to add outlets and the arc lamp seemed to be a good time to make the fix.

The final outlet box after rewiring the outlet to a GFCI and wiring the two light switches. Note that the power comes from this box and crosses over the garage door to the other side of the room.
I shut off the circuit in the panel, rolled over my cart full of electrical tools, and got to work. The wiring wasn’t difficult — I had done it all before. When I was all done, I put one of the cheap plates over it, crossed my fingers for luck, and turned on the circuit breaker.
No explosions, fires, or even smoke. Always a good sign.
I tried the light switch for the existing fixture beside the panel. It worked fine. Then I tried the light switch for the arc lamp. It came to life immediately, sputtering a little as it warmed up. Then I crossed the room and tried the outlets. They worked.
Success!

I’d originally thought I’d need more than one light in the RV garage and that this one would be a good start. But I soon realized that I wouldn’t need any other overhead light in this space. It’s that bright!
Later, I’d ditch the extension cord across the garage doorway and plug everything in to the closest outlets. (Still needed a power strip for all those darn battery chargers.)
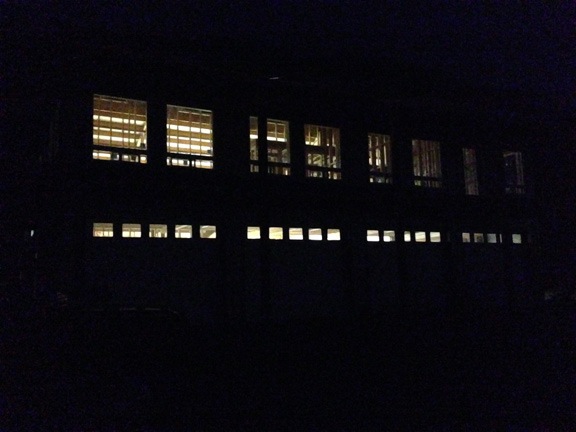
That night, my friend Bob stopped by for dinner. After watching a beautiful sunset from my Lookout Point bench, we went into the garage and I flicked the switch for the arc lamp. The light started off dim but warmed and brightened as it usually does. It lighted the entire space. Not only that, but the light shined through every single window in my place, making it glow from outside.

This was the first time my building had been lighted at night since the night before the concrete was poured.
As far as I’m concerned, my shop/RV garage is now wired. Whether I add another circuit in the future is something I’ll deal with when I find a need. It’s good to go now and extremely functional.
Up Next
My next circuit will include my entrance lighting, entrance hall lighting, one outside outlet (near the front door), a light (with a switch) for just inside the first bay of the garage, outlets inside the first two garage bays (including for garage door openers), and light fixtures for outside the first two garage bays. The entrancee hall lighting will be interesting because it requires a three-way switch that makes it possible to turn the light on or off from the top or bottom of the stairs.
And don’t worry: if the job has any unusual challenges, I’ll blog it.