Why bargain hunting isn’t such a bad thing.
There’s an old saying everyone seems to know: “You get what you pay for.” It’s normally applied to situations where you buy something at a low cost and it breaks. “You get what you pay for” is supposed to explain why it broke — you apparently didn’t pay enough money for it.
Lots of people use this logic when they shop. If something is cheap, it must be crap because “you get what you pay for.” If someone else is selling the same thing or something similar for more money, it must be better, right?
Not always.
My Hair
Yes, I’m going to use my hair as an example.
I dye my hair. It’s no secret. I’ve been doing it since I was in my 20s when those first few grays started making their appearance. I did it myself for at least 20 years, using a reddish shade of brown that got even redder when exposed to Arizona sunlight. The color looked at least somewhat natural — at least no one ever commented on it looking fake. I’ve since switched to a browner color that’s more in line with what I remember my hair looking like. It’s been so long, I’m not sure. And those few strands of gray now account for about 75% of my hair.
Last year, I began living in an RV full time after leaving my Arizona home and waiting for my new home in Washington to be built. If you know anything about hair dye, you know that good water pressure is a must-have for rinsing that crap off your hair. So is a good supply of hot water. My RV is weak on both counts, so I began getting my hair dyed “professionally.”
I put “professionally” in quotes, because I started going to the local Beauty Academy. These are highly supervised girls (mostly) who are training to become beauticians. They do everything, from hair trims to dye jobs to perms. They don’t mix a color without consulting with a supervisor. The “classic color” service I needed cost $28.
I went every 6 weeks for quite a while. There was a different girl doing my hair each time. Based on observations, conversations, and chatter among the dozen or so girls working there, most of them were under 25 and apparently had at least one kid but no husband. Young women learning a good trade to support themselves and their families. We had nothing in common so conversation was minimal. Each girl took a long time to get the color in — a typical dye job would take over 3 hours. But it came out good each time and the color lasted. I was satisfied.
Then I succumbed to peer pressure. (Can you believe it?) When I complained to one of my girlfriends that it took so long to get my hair dyed, she ridiculed me for getting my hair done there. She recommended her woman at JC Penney’s salon. So I figured, why not?
I went to Sally (not her real name) and she did my hair. Although she was closer to my age than the Beauty Academy kids, she didn’t seem interested in striking up a conversation with me. While the dye “processed” in my hair, she disappeared into a back room. I learned to read a book or play a game on my phone.
The first time I went, she insisted on cutting my hair and waxing my eyebrows. I was trying to grow my hair long, but when I came every six weeks, she’d cut off 5 weeks of growth. And I don’t usually mess with my eyebrows. I let them do their own thing. But after waxing, they needed maintenance, so I had to have them waxed every time. The bill? $90. When I cut out the hair cuts and waxing, it went down to $70.
And I didn’t feel as if I were getting any better service than those young girls practicing on my hair.
So yesterday I went back to the Beauty Academy. The girl who did my hair was young but she had a professional attitude and would be graduating in just two weeks. She already had a job lined up. She did a great job on my hair, matching my existing color so she only had to do the roots. Because it was Customer Appreciation Day, the dye job only cost $18.
That’s more than $50 saved. And I got a pumpkin muffin to snack on.
I don’t think Sally will be seeing me again.
As for my peer pressure friend — well, I don’t talk to her these days anyway.
Harbor Freight
I was out with some friends last night, all sitting around a big table in a restaurant. I got into a conversation with a friend who was telling me about a crane he’d bought at Harbor Freight and had attached to his cargo trailer. He’s been collecting and selling scrap metal lately and needed something to lift engine blocks.
Harbor Freight, if you aren’t familiar with it, is a company that sells “quality tools at ridiculously low prices.” That’s what it says on their website. I can confirm the low prices, but I can’t agree about the quality. Most of what they sell is pretty crappy stuff.
But not all of it. My friend and I chatted about this. The “you get what you pay for” phrase was thrown around a bit. We both agreed that you had to think about how you planned to use what you were buying when making that purchase decision. If it was something you’d use occasionally and rather lightly, Harbor Freight was probably a good source. But if it was something that you needed to use hard and frequently — something you wanted to last a good, long time — Harbor Freight probably wasn’t the place to go.
Walmart
Most of my friends hate Walmart. It’s a policy thing — low pay and questionable promotional practices for employees, an abundance of cheap, low quality merchandise, and an atmosphere that appeals to the kind of shopper that most of us simply don’t want to get too close to.
I hate Walmart, too. But I have to admit here that I do occasionally shop there. Why? Because it sells two things I use every day at a price too low to pass up:
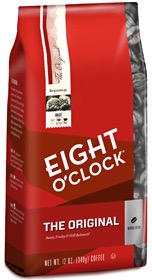
 The first is coffee. I like Eight O’Clock coffee. It’s a medium or perhaps light roast Arabica bean. I grind it myself and brew it strong, by the cup. I’ve been doing this for at least 15 years, if not longer. I’ve tried other coffees over the years but always come back to this one. And if there’s one thing that’s important for me to get right, it’s that first cup of coffee in the morning. Trouble is, Eight O’Clock coffee isn’t easy to find. And when I do find it, it’s expensive. Walmart has it for $4.99/package. That’s $2/package less than I can buy it directly from Eight O’Clock’s website.
- Penny eats Cesar dog food. Yes, it’s the foo-foo dog food that comes in tiny plastic containers. She eats one every morning. They come in many flavors and are easy to store and serve. And travel with. It just makes sense. Unfortunately, Safeway and Fred Meyer sell it for $1.29/container.
 Sometimes, if it’s on sale, I can get it for 10 for $10 ($1/container). But Walmart sells it for 70¢/container. So let’s do the math here. Suppose I’d always buy it on sale at Fred Meyer for $1/container. Walmart saves me 30¢/container. 365 days in a year is $109 saved. And since I’m going to Walmart for my coffee anyway…
 The first is coffee. I like
 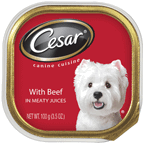 Sometimes, if it’s on sale, I can get it for 10 for $10 ($1/container). But Walmart sells it for 70¢/container. So let’s do the math here. Suppose I’d always buy it on sale at Fred Meyer for $1/container. Walmart saves me 30¢/container. 365 days in a year is $109 saved. And since I’m going to Walmart for my coffee anyway…
Yes, there is a point here. By buying these two things in Walmart, I’m getting exactly what I want for less money than it would cost elsewhere. Quality isn’t an issue — it’s the same exact thing I could get somewhere else. In this case, I’m getting what I pay for but I’m paying a lot less.
Is my monthly shopping expeditions to Walmart to buy two things is supporting Walmart policies? Maybe. But hell, I need my coffee!
More Examples?
I can probably spend weeks blogging about other examples, but I think you get the idea. You can probably even come up with a few of your own examples.
I think the point I’m trying to make is this: when shopping for what’s best for you, it’s important to not only consider price, but to also consider the quality of what you’re getting. Don’t assume that low price means low quality — often, it doesn’t. Often, you can get the same quality for a lower price.
But not always. A smart shopper — especially someone who wants (or needs) to save money — has to look at the big picture with every purchase decision.