New friends and great food on a busy weekend.
Since I live so far from family, I’ve gotten into the habit of spending Thanksgiving with friends. Although I got four Thanksgiving invitations this year — thanks, everyone! — I accepted the one I got first, well over a month ago: to accompany my friend Bob to Friday Harbor for Thanksgiving at his friends’ home.
The Trip Out
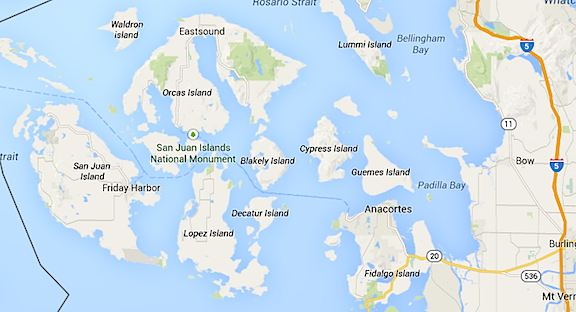
Friday Harbor is on San Juan Island at the very northwest corner of Washington State. It’s so far north, in fact, that it’s north of the lower end of Canada’s Vancouver Island. Getting there requires a 3-hour drive to Anacortes followed by a 1+-hour ferry ride — and that’s if Route 2 through Stevens Pass is clear and open. If Stevens is closed, add another hour to get through Blewett and Snowqualmie passes on Route 97 and I-90. Back in August, when I spent a week with a friend out at Lopez Island, I’d elected to take the helicopter out to avoid the long drive. But in winter, that didn’t seem like a reasonable possibility given the usual low clouds over the Cascades and real possibility of bad weather so I didn’t even suggest it.

San Juan Island is the farthest west island on this map, which also shows the mainland to the east. The black line you can see in the left top and bottom of this image is the U.S.-Canada Border.
Penny and I packed up on Wednesday and spent the night at Bob’s house. We were making an early start to catch the 8:30 ferry out of Anacortes and Bob wanted to leave at 4 AM. It was my job to keep track of the conditions in the passes so we could pick an appropriate route. WADOT offers a wealth of information about its highways and passes on its Website, including up-to-the-minute pass information and webcams. Fortunately Stevens looked good so we headed out the most direct route in Bob’s pickup. Although I’d offered to take my 4WD pickup on the trip — its tires had less than 5,000 miles on them — Bob had prepped his 2WD pickup with a set up studded snow tires, just in case weather turned bad along the drive.
Penny and Bob’s dog, Skip, settled down in the back seat for the long drive. There was no one on the road. Well, no one going our direction, anyway. We did pass a few cars coming east on Route 2. The road was clear and dry and other than a few foggy areas, easy to drive. Crossing Stevens Pass was a non event and we headed down the west side, still in the dark. The days here are short this time of year and it wasn’t until we got near I-5 that it started getting light.
We stopped for coffee at one of Washington’s ubiquitous drive-up coffee stands — honestly, how do coffee-drinking people live without these? While I chatted with the girl at the window — who was working a 6:10 AM on Thanksgiving Day, mind you — Bob took the dogs for a quick walk. Before leaving, I thanked the girl for being there and gave her a big tip to really show my appreciation. The eggnog latte was good and hot.
We stopped at Safeway in Anacortes before getting on the ferry queue. We’d brought along the fixings for quiche — 15 eggs from my chickens, along with chopped ham and scallions from Bob’s fridge — but needed a pie crust, cheese, and half-and-half. I ran in to get all these things while Bob waited with the dogs. I also bought a small Poinsettia for our hosts. I hate going anywhere empty handed — not that we were going empty-handed. In addition to our quiche ingredients, I’d brought 2 bottles of wine, a bottle of local hard cider, and a jar of honey and Bob had brought 6 bottles of Martinelli’s sparkling cider in two flavors. We had a cooler and a box full of goodies in addition to our luggage.

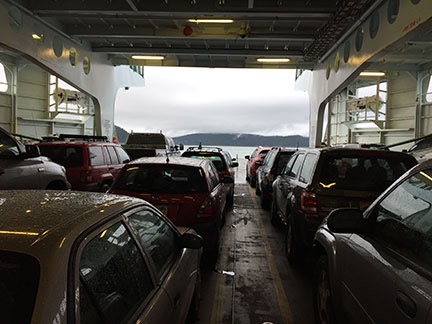
Inside the ferry to Friday Harbor.
The wait for the ferry wasn’t long, but we did have time to get out and stretch our legs with the dogs one more time. Then we loaded up with the rest of the cars, winding up in the middle of the main deck on the Elwha. We hung around in the truck for a while, then went upstairs to take in the view of the islands as we sailed past. By then, it was fully light out, but overcast. The ferry boat moved along at a good clip and I used Google Maps on my phone to identify the islands as we zipped past them.

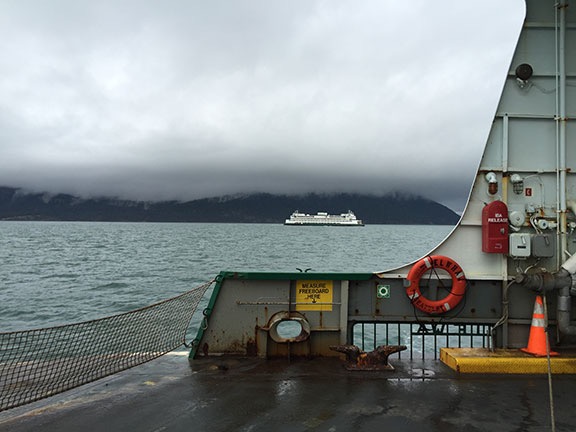
Our ferry boat wasn’t the only one on the water that gray morning.
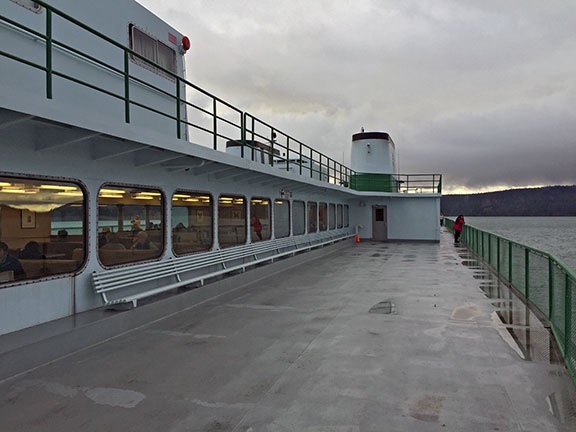
A look back down the deck of the ferry.
Thanksgiving Day with Friends
The ferry was an express that stopped at Friday Harbor and Sidney, B.C. only. We got into Friday Harbor just before 10 AM. From there, it was a short drive to Liz and Brad’s house on 20 acres. I think they were surprised to see us so early. Liz was just putting in the turkey.
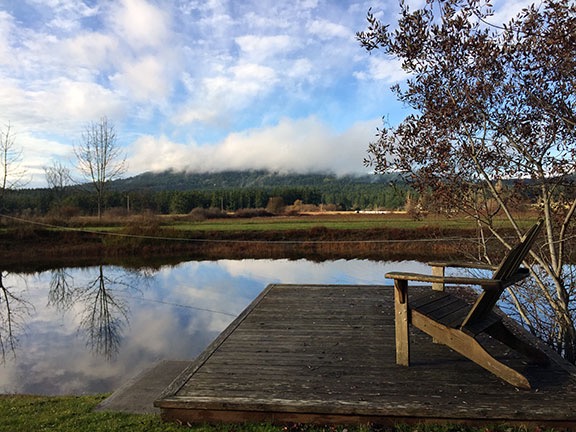
The pond behind Liz and Brad’s house shortly after Penny chased away all the ducks.

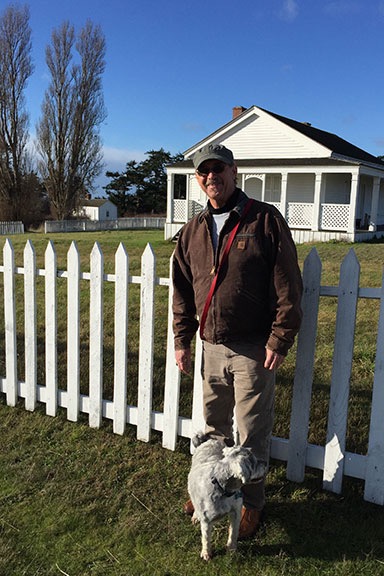
Bob and Skip pose for a photo at American Camp. Skip seems more interested in what Penny is doing than the camera.
After quick introductions, we established that Bob was hungry and Liz and Brad had already eaten. So Bob and I headed back out to find some breakfast in town. We wound up at a bustling local market, which was just the kind of upscale small supermarket I love, and ate breakfast sandwiches on the tailgate of Bob’s truck. Then we drove around the island to kill some time. We wound up taking a walk out at a place called American Camp, the site of an almost-war back in the 1800s. It was a good opportunity for the dogs to run around. By that time, the sky had cleared and it was becoming a beautiful day. We got as far south as the lighthouse I’d flown over back in August before heading back to the house.

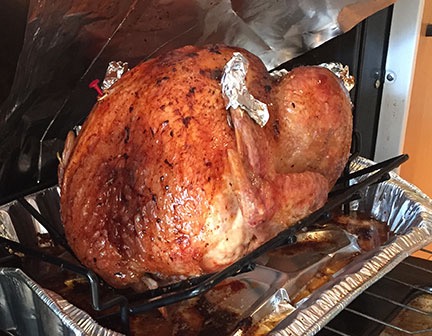
The turkey tasted as yummy as it looked here.
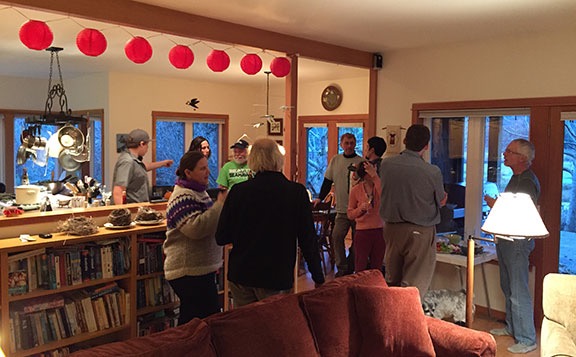
Back at Liz and Brad’s house, we relaxed while the turkey cooked. Liz and I popped open that bottle of hard cider and drank almost all of it before the other guests began arriving. And there were a lot of guests. Soon the house was crowded with adults and young people drinking cider and wine and munching on crab dip, salmon spread, and hummus, chatting and having a good time.

I took a break to snap this photo, not realizing that only half the guests had arrived at this point.
Brad carved the turkey and Liz set up a buffet line at her kitchen island. Soon, 15 of us were sitting at a pair of tables put together on an angle to fit in the dining room. The food was great — as you’d expect a Thanksgiving dinner to be — and there was a ton of it. Fortunately, I was boxed into my seat so I couldn’t easily get up for seconds. I made up for that by trying both the homemade cheese cake and apple pie for dessert.
Cleanup went quickly with so many people helping and about half of us went into the living room to watch the football game. The local team, the Seattle Seahawks, were playing the San Francisco 49ers — the perfect game for a Washington crowd. The game had started about a half hour before and Brad had DVRed it so he could fast-forward through all the commercials. I settled down on the floor with Penny on my lap. But since I’d been up since 2:30 AM — thanks to Penny needing to take a pee at Bob’s house — I was exhausted and fell asleep. I missed most of the game but woke up at the end to find the Seahawks victorious again.
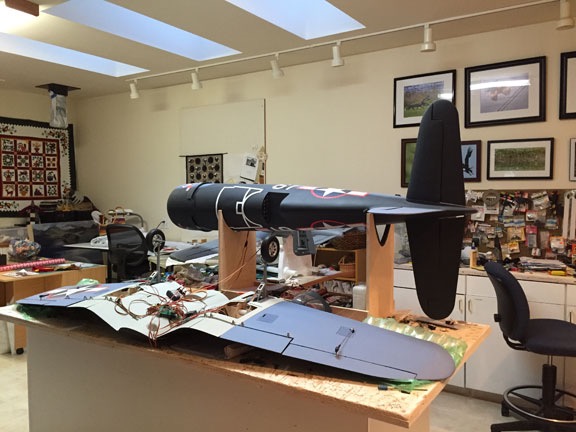
The guests left in small groups after that. Soon it was just Liz, Brad, Bob, and me. We cleaned up a bit more, then retired to sleeping quarters. Penny and I were staying in the “craft room,” which was where Liz does her quilting and Brad builds large scale radio controlled airplanes that he flies on a grass strip in his back yard. The walls of the room were covered with quilts and Brad’s photos of wildlife and airplanes.
One of Brad’s projects in the craft room.
Black Friday — without Shopping
I slept reasonably well, waking up only once to wonder where I was. Hearing noise outside my room, I put on my slippers to join Liz while Penny went looking for and eventually found Skip. Soon Liz and Bob and I were drinking coffee while I was whipping up two quiches — one with cheddar and the other with mozzarella. I was horrified to see that I’d bought fat-free half-and-half — I mean, what’s the point, right? — but that quiche turned out just as good as the one I made with Liz’s regular half-and-half. The three of us polished off a whole quiche. Brad missed out; he had to go to work.
Afterwards, we dressed and went out for a drive in Bob’s car. It was cloudy again and cool. Liz took us to see the lavender farm, which was closed, and a handful of parks. Then we drove up to the top of a ridge where some private developer had tried (and failed) to sell 20-acre parcels that were virtually unbuildable for $210K+ each. The land now belonged to the San Juan County Land Bank, which buys up land in the area to prevent development. In the future, it would be a park with trails. We drove through Roche Harbor, where I’d flown in by helicopter for dinner with my friend Don years ago, and then headed back to Friday Harbor.
Back in town, we met up with Liz’s son Chris, his wife Kelly, and their two kids at a local holiday market. There were about 30 artists and other vendors there, selling their wares. It was refreshing to attend one of these that wasn’t full of the same southwestern stuff I’d seen over and over in Arizona when I lived there. I bought a beeswax lip balm and some locally sun-dried sea salt. I was sorely tempted by some wall sculptures, but held back by my new rule: No buying anything for my home until it’s done.
Afterwards, we went with Chris and Kelly to a house Chris and his partner are refurbishing. (Chris is a carpenter.) Originally built in the 1940s, it’s a small place with a lawn that goes down to the harbor and has the added luxury of its own boat dock. With lots of trees on its end-of-road lot, it was a pleasant location. They’d gutted the house and rebuilt it from the inside out. Although they’d been working on it for about 16 months, they were still at least a few months from completion. I looked around and got some ideas for wood trim around my windows and flooring. The countertop material, PaperStone, was amazing and I will definitely check it out for my own kitchen countertops.
From there we went back to Roche Harbor to look at another house that Brad is overseeing the construction of. This was an upscale home, 3800 square feet, with vaulted ceilings, sweeping staircases, and lots of extras. Pretty amazing for a 2-bedroom home. The two projects — Chris’s and Brad’s — couldn’t be any more different. Here, I took mental notes on the great room’s ceiling, which was tongue-and-groove cedar planks, and bathroom tile work. I also liked the track lighting, which I’d already decided to use in my hallway, which would double as a photo gallery. The home’s owner was there, fiddling around with his computer and the various light switches that made up his smart home system. Although I plan to include some smart home accessories in my place, I don’t expect to do it to the extent that he did.

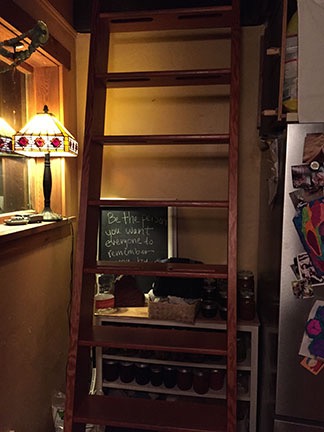
I shot this photo of the ladder to the loft in Chris’s house so I could remember some of its details. My home also has a loft — mostly for storage — and I’ve been thinking of how it could be easily reached from below.
We headed back to Liz’s house and took it easy for a while, just chatting in the kitchen over tea. Later, when Brad got home from work, we headed out to Chris’s house for a taco dinner. His family lives in an expanded cabin at the end of a long, steep dirt road. We arrived and departed after nightfall, so I didn’t get a chance to really see it. But it was cosy inside, with an eat-in kitchen, sunken living room, and wood-burning fireplace. After dinner, I got so comfortable on the sofa that I almost fell asleep again.
The Trip Home
We were up at 5 on Saturday, packing up for the trip home. Bob wanted to get on the 8 AM ferry and we’d been advised to get the car on line by 6:45 at the latest. We headed out there and got the first spot in lane 3, then walked up to The Hungry Clam, which was already almost full by then. Apparently, the place exists for ferry traffic meals. Liz and Brad joined us for a big farewell breakfast.
Outside, it was very cold and very windy. There were whitecaps on the harbor. We paid the bill just as the ferry rounded the corner and headed into the dock. We said our goodbyes with a lot of hugs and promises by Liz and Brad to come see us on “the dry side,” then hurried down to the truck. Poor Penny and Skip needed a lot of hugging and rubbing to warm up!
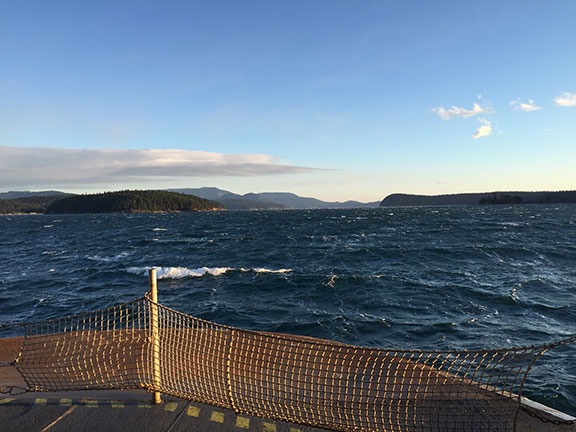
Because the second car in line 1 was empty and there was a truck in line 2, the ferry loaders waved us aboard as the second car on the boat. This positioned us right at the front — although they didn’t load us all the way to the line. (It later became apparent why they didn’t have us drive up closer to the edge.) Ahead of us, the water was more than a little choppy and the wind was mostly blowing right in. I got out to take a photo closer to the edge and thought I was going to get blown away.
I got got right up to the pedestrian rope to take this shot. It was wicked windy and cold!
We stayed in the car for the whole trip, mostly so we could periodically start it and warm it back up for the dogs. I was glad we did. The water got progressively rougher as we got closer to Anacortes. About 30 minutes out, a loudspeaker warned of the rough ride ahead. The boat rolled in the waves and we could clearly hear waves breaking across its side. Occasionally, the front end would dip down just enough to send a wave of water onto the deck. One wave came so far into the boat that it splashed the hood of the truck. There was water sloshing around all over the deck. Several of the chocks the loaders had placed around the front tires of the cars at the head of the lines got loose and washed back and forth. I think a few might have gone overboard.
This minute-long video gives you an idea of what we experienced. A larger wave than these washed over the hood of our truck, which was at least 50 feet back from the bow. You can see Mount Baker in the distance throughout much of this video.
After hearing about so many ferry accidents overseas, I admit that I was more than a little nervous — especially when the captain kept cutting power to slow us down more and more. But then we got closer to Anacortes and the water calmed a bit. Soon we were pulling into the dock and the crew was moving the ramp into position. I was very glad when Bob steered us off the boat and onto dry land.
Of course, that wasn’t the end of our homeward bound adventure. All morning long, I’d been checking conditions in the passes. Stevens Pass, our preferred route, was reporting 24° with compact snow on the roadway and snow falling. Restrictions were “traction tires advised, oversized vehicles prohibited.” But things were worse at Snowqualmie: falling snow, areas of low visibility, and chains required. It looked as if Stevens would be our route.
All around us was fresh snow that had likely fallen overnight. It was beautiful to see — I don’t think they usually get much snow on the Seattle side of the mountains. There were a lot of cars on the road, too, but not enough to make what I’d consider “traffic.” We got on Route 2 eastbound and stopped at the Sultan Bakery for some baked goods to snack on along the way. One more stop at a park-and-ride nearby for the dogs to take a break. Then back on the road for our climb up into the mountains.
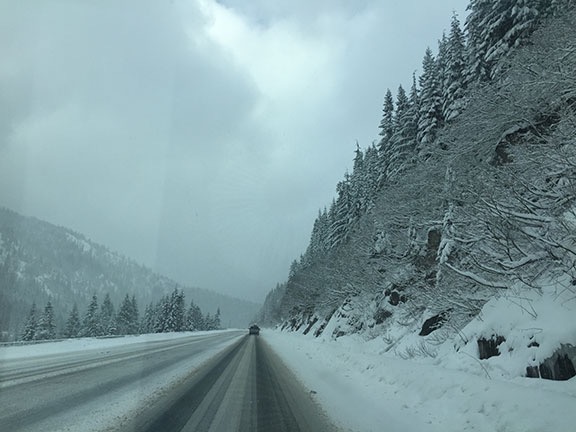
Soon it was snowing on us. The road looked remarkably as it had in the webcam photos I’d studied all morning on my phone: covered with snow with just patches of pavement showing through. Bob’s studded snow tires came in handy as we followed the other cars up the mountain. Snow fell all around us. I was glad Bob was driving. I absolutely detest highway driving in the snow.
Snow on Highway 2 on our way to Stevens pass and beyond.
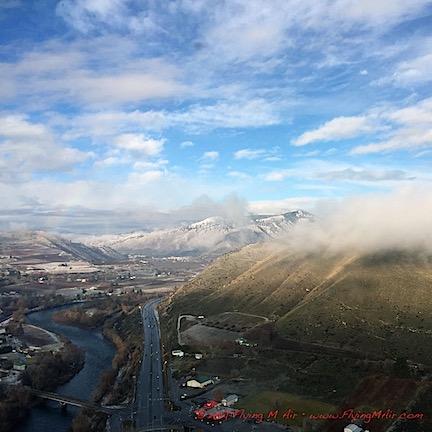
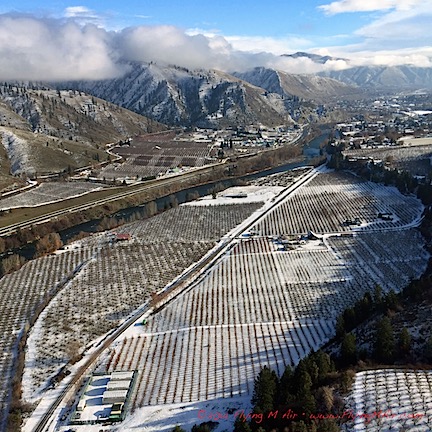
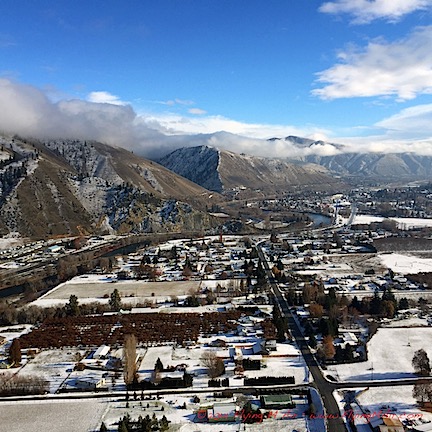
We were both very surprised to see most of the cars turn into Stevens Pass ski resort, which I didn’t realize was open. The road was worse on the west side of the pass, but soon cleared up, although snow continued to fall past Coles Corner. By the time we got to Leavenworth, it was mostly sunny — a beautiful day with fresh snow on the ground and in trees. There was less snow in Wenatchee and, when Bob dropped me off at home, I estimated only about an inch of fresh stuff at my place.
I’d had a wonderful weekend away with Bob and his friends. Not only had I met some great new people, but I’d come away with a lot of new ideas for finishing my home. It was well worth the drive — and the adventure that had gone with it.