Great Loop 2021: Doing My Homework

I research my part of the route.

The Girl Scout motto is “be prepared,” and it’s something I’ve taken to heart ever since I was a scout. The best way to ensure a smooth endeavor is to be prepared for what may come up along the way. While I wanted my two-month boat trip to be smooth, I also wanted to make sure I didn’t miss anything.

Of course, I am limited in what I can see and do on the trip. After all, I am not the captain of the boat and the captain — like an aircraft pilot in command — makes all the decisions. I assumed I’d have some kind of input, but I couldn’t be sure. Still, I wanted to know all of the options — or as many as I could discover through research — so I could share an educated opinion when one was requested.

That meant hitting the books.

What I’d Already Done

If you haven’t read the previous posts in this series, let me recap my early research.

AGLCA
I had discovered and explored the American Great Loop Cruisers’ Association (AGLCA) website where there is lots of basic information for non-members. I wound up joining the association and ponying up even more money to attend a web-based Rendezvous which was very informative. (I blogged my thoughts about the AGLCA and Rendezvous here.) I’ve been back to the website, which has since been revised, to see if I could learn more, but stopped short at paying to watch narrated slide shows, wading through forum questions and answers, and participating in the new social networking features. I have a budget and limited time; I need to spend both time and money wisely. While I believe that the forums can be a valuable resource to get specific questions answered, I don’t see them being very helpful until I have a specific question. As for social networking — well, until I actually start my cruise, I really don’t have anything to network about.

Crossing The Wake
Here’s the book I read first about motoring the Great Loop. I keep looking at that photo and imagining all the salt water corrosion on that poor bicycle.

Crossing the Wake
I read Crossing the Wake: One Woman’s Great Loop Adventure by Tanya Binford, which I reviewed briefly in the first blog post of this series. The only thing I learned from the book was that a barely prepared middle-aged woman could do the trip “solo” in a 25-foot boat. (I put “solo” in quotes because apparently there are so many people doing this trip that it’s common to join up with one or more boats and do lengths of it together.) The book was more of a personal memoir than a useful travelogue because it lacked most of the details a cruiser would need to plan and execute this trip.

Needing — or maybe just wanting? — more detailed information about the trip from Jersey City, where Captain Paul, first mate Dianne, and the Motor Vessel Nano would pick me up, to Chicago, where I’d leave them, I started digging deeper

Waterway Guide

I learned about Waterway Guide at one of the “Lunch and Learn” sessions at AGLCA’s Rendezvous. Lunch and Learn sessions basically give an AGLCA sponsor time in front of members to sell their product. They are informative and can be helpful, especially if they’re selling something you’re interested in. Waterway Guide was definitely something that interested me. It’s an online service that provides a wealth of navigation, marina, anchorage, service center, and points of interest information for east coast waterways, including the entire length of the Great Loop. (They do have a database of west coast marinas and some other services, but it is not maintained anywhere to the level of the east coast information; they apparently focus on the east coast, leaving me to wonder if another organization fills the void out west.) Of course, membership is required to get access to all of the information they have online and, of course, I joined to get that information. (My AGLCA membership got me a discount, which was nice.)

Waterway Guide Online
Waterway Guide’s website showing New York Harbor. I love the fact that it displays charts and plots various features on it. Zooming in provides more detail. If I turned on location tracking in my browser, it would put an icon near my position.

Waterway Guide Cover
The printed Waterway Guides offer detailed information about various east coast waterways.

The membership level I chose also came with two of their printed guides. I chose Northern, which would take me up the Hudson River, and Great Lakes Volume 1, which would take me through the Erie Canal and into Lake Erie. These books, which are revised annually, include all of the information that’s on the website in a handy spiral bound format that’s easy to leave open and consult while traveling. (Sadly, they are not small so I won’t be bringing them with me on the trip; there’s limited space on the Nano. I hope Captain Paul will have his copies with him.)

I have a love-hate relationship with these books. First, I love the amount of detail that’s included. Reading through them makes me want to go ashore and explore every place they talk about. But what drives me nuts is the way the book is organized. Each section is broken down into segments that can be 5 to 25 miles in length. Within each segment are subsections:

  • An overview or notes section discusses the segment of waterway in terms of geography, geology, and points of interest.
  • Navigation tells you more about navigating each part of the segment, including which chart(s) to use. This has some more points of interest information.
  • Dockage/Moorings tells you where you can find marinas or other places to tie up. This information is repeated in chart format for the section.
  • Anchorage suggests places to drop anchor and provides useful information about each place such as how it is protected and whether there is noise.

Sounds great, right? Well, it is and isn’t. The information is great but the presentation isn’t presented logically. For example, in the “Tappan Zee Bridge to Bear Mountain — Mile 27 to Mile 46.7” segment of the Northern guide, the overview takes you through that roughly 20 miles of Hudson River with a separate heading at the end for the Bear Mountain Bridge. Then Dockage/Moorings takes you back from the beginning of that stretch to the end. Then Anchorage takes you back again from the beginning to the end. So there’s a lot of back and forth in a 20-mile stretch of river. What I found, especially in the segments covering the Erie Canal, is that I couldn’t keep track of where a marina or anchorage was without trying to follow along on the online guide, which included charts and icons for many of the things they were talking about.

I think the guide would be a lot easier to follow if the Dockage/Moorings and Anchorage sections were combined and that information was presented together. Or, better yet, combine all information with a much shorter overview. Just take me up the river and tell me what I’ll find along the way without forcing me to go back and forth on a map to see where points of interest, navigation details, marinas/moorings, and anchorages are when moving forward.

I guess what I’m trying to say is that the books could probably use a deep edit to remove repetition and better organize the data. Having more charts/maps and possibly fewer photos would be helpful. As for the photos, I can’t tell you how frustrating it is to see a photo of an interesting or beautiful place that has neither caption nor label to identify where it is.

(Please keep in mind that I spent 20+ years in publishing where I wrote and laid out dozens of books. One of the series I wrote for — Peachpit Press’s Visual QuickStart Guide series — made extensive use of “spreads” where everything you needed to see for a task was either on one page or two facing pages (a spread). I laid out these books, so I know it’s possible to present information in a format that doesn’t require a lot of paging back and forth. It drives me nuts when information could be presented more logically for the reader and isn’t.)

But overall, the books are worth the money — about $50 each — if you need printed detailed information for a trip.

But wait! There’s more! Waterway Guide also has an app, which I downloaded for my iPad.

Waterway Guide App
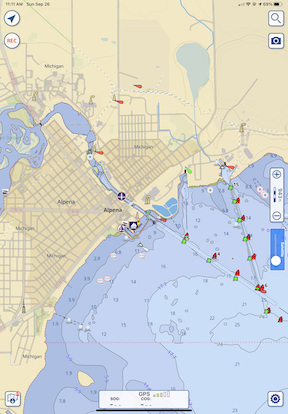
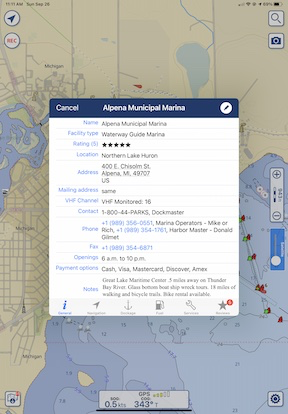
The Waterway Guide app doesn’t even use nautical charts as the base map layer.

So far, I’m not impressed. In order to get the kind of detailed information the printed guide has, you have to subscribe to each chapter — even if you’re a member, logged in, and have already obtained the printed version of the book containing that chapter. I subscribed to the New York Harbor & the East River chapter for $2.99/year to give it a try. The content is the same as what you’d find in the book, including the organizational shortcomings I mentioned above. It’s basically an ebook that you pay for each chapter you want to read using a subscription format that hits you up for another fee every year. (I can only assume the old information becomes inaccessible if you cancel the subscription.) And yes, it does include ads — although I admit I didn’t see many (yet). I’m bummed out because I was hoping it would be an offline version of the website and it falls far short of that. It doesn’t even have real charts. I’d much rather use the web browser in my iPad to access the website, where I have all the information without having to pay more subscription fees.

Skipper Bob’s Guide

Skipper Bob's Guide
Skipper Bob’s guide, Cruising America’s Great Loop, is an excellent overview of the entire trip.

If you want the “Cliff’s Notes” version of Waterway Guide specifically for the Great Loop, try Cruising America’s Great Loop, a Skipper Bob publication. This $19 book provides 108 pages of information about cruising the Great Loop. It’s a good overview that tells you which charts to use, what you’ll see along the way, and things to watch out for.

My opinion: If you’re considering the Great Loop and want to learn more, start with this book. It really is a good overview to help you decide whether cruising the Great Loop is something you really want to do. It’s also a great visual aide when you’re trying to explain to friends and family members what the Great Loop is all about.

New York State Canal System Cruising Guide

Cruising Guide
I got my copy of the Cruising Guide for free from the New York State Canal Corporation, but I’m not sure how.

I think it was the Skipper Bob book that recommended getting a copy of The Cruising Guide to The New York State Canal System from the New York State Canal Corporation. I tracked it down online where I found a printable (!) order form. I filled it in, sent a check for $29.95, and waited. About two weeks later, I got a thick envelope with a spiral bound book, a bunch of other informative pamphlets and maps, a letter, and my check. The letter informed me that they were no longer accepting payment for the guide; it was free. For the life of me, now I can’t find a link on their website to order the book, but there’s some good navigation info here. I did find the same book on a website that is charging $29.95 for it.

The book breaks down the canal from west to east — the opposite direction I’ll be traveling in August — with charts, photos, and descriptions on full-page sections along the way. (This is the format I wished Waterway Guides would use.) It’s got a LOT of information specific to the canal, inlcuding the amount of time between points and the expected time to lock through each specific lock. It’s easy to see why the book is now free: there are ads throughout. But the ads don’t distract from the content and are strategically placed near where they apply. For example, an ad for a marina will be on the same or facing page as the map where it can be found.

This is a great book that I would definitely bring with me if Captain Paul hadn’t already assured me that he also had a copy and it would be on board.

Quimby’s Guides

The one book I bought that I really regret buying is Quimby’s Cruising Guide. This well-known resource for eastern U.S. boaters is nothing more than a listing of commercial establishments and locks on various inland waterways. While it might have a lot of value for folks doing the entire Great Loop, it didn’t provide any coverage for the area I’d be cruising: the Hudson River, the Erie Canal, and three of the five Great Lakes. I don’t know what made me think it would provide coverage; it’s my own damn fault that I didn’t read the description thoroughly. At $42, it was a costly lesson.

I should mention here that although the information it provides is extremely limited and the book has quite a few ads, I do like the way the information is presented: in order of river mile. There’s no bouncing back and forth in the text to get the big picture. Instead, it’s just a list, by river mile, of the facilities and related contact information.

Summing Up

I think one of the things that has me so excited about my trip is that there’s so much that I can learn along the way. I’m familiar with just a tiny stretch of this trip — from Jersey City to just beyond West Point, where my family took our small motorboat on outings when I was a kid. The rest is new and full of challenges and history. How can that not be exciting?

Preparing for the trip by researching it as much as possible can help me make the most of the journey. I’ll keep reading right up to the day I head east.

Great Loop 2021: Plotting the Course

I put the planned overnight stops into a navigation app to get a general idea of the route.

When Capt Paul was interviewing crew members for his trip from Maine to Chicago by way of the Hudson River, Erie Canal, and Great Lakes, he sent each of us a PDF of a spreadsheet that he had created that listed the days of the journey, the expected stopping point each night, the distance between points, and expected dates of arrival and departure. I had taken a look at the list and had even tried once or twice to plot the route, but it wasn’t until today that I sat down and entered each planned stop as a waypoint in a navigation app.

What changed? Well, I tried a different, more user-friendly marine navigation app, Aqua Map.

A Tale of Two Marine Navigation Apps

TZ iBoat
Here’s New York Harbor as it appears in TZ iBoat. This is a raster (“r” = “real” is my way to remember it) chart. TZ iBoat will automatically switch to the view magnification that’s appropriate for the scale I’ve zoomed to.

Years ago, when I did the Learn to Navigate the Inside Passage cruise with Northwest Navigation, I looked for (and found) an app that would run on my iPad and display our position on real nautical charts. That app was TZ iBoat. I chose it because it (1) enabled me to download charts so I didn’t need an active Internet connection and (2) it supported raster charts, which are basically scanned and location encoded versions of traditional printed NOAA (or, in the case of that trip, Canadian) charts. I wanted raster charts because I wanted something that looked like the paper I’d need to consult when actually cruising. Call me old fashioned, but I’m the same way with aeronatuical navigation apps like Foreflight — I always consult the sectional chart version because that’s what I’m used to.

TZ iBoat wasn’t terribly expensive. The app was free but I’d need an annual subscription to get the charts. That’s showing as $19.99 today on the App store but I’m pretty sure I paid more. I’m thinking $35. Still a lot cheaper and easier than buying printed charts.

When this Great Loop trip came up, I renewed my subscription for USA coverage. I already knew the software pretty well, so it would be easy enough to use it on this trip.

Aqua Map
Aqua Map’s view of New York Harbor at roughly the same magnification. Because this is a vector chart, the more I zoom in, the more details are displayed.

But then Capt Paul told me about Aqua Map. I downloaded it to give it a try. I immediately realized that it had some major benefits over TZ Boat: it could display data overlays from other sources, including Waterway Guide. So in addition to charts, it would give me data about marinas, anchorages, locks, and other facilities that either aren’t included on charts or have limited information on charts. The app was free; a subscription for the US and Canada, including charted lakes, rivers, and canals, was $14.99. I subscribed and linked it with my Waterway Guide subscription. (This, I’m pretty sure, makes it unnecessary for me to subscribe to the digital version of Waterway Guide in that app.)

The only drawback to Aqua Map: it uses vector charts instead of the raster charts I prefer.

But is that really a drawback? Maybe I just need to face it: vector charts, with their customizable display layers, are probably the future of navigation, whether it’s marine or aviation. Maybe it’s time for me to move into the 21st century after all.

Of course, I’ll have both with me on the trip. My new iPad has plenty of room for both of them and the downloaded charts I’ll need along the way.

Plotting the Route

There were two ways I could plot out the planned route:

  • Create waypoints for each stop along the way.
  • Create a route with connected waypoints for each stop along the way.

I decided to just create the waypoints. I wasn’t going to steer the boat and, even if I did need a route laid out between obstacles, I could always create it on the day of the trip. All this data could easily be stored in the app. For now, all I really wanted to know was the general planned route and I figured that would show up well enough once the waypoints had been entered.

I did that this morning while I had my coffee and breakfast. It took quite a while. There were 51 overnight stops on the plan — some planned for more than one night — and they had to be located and created individually. I quickly learned to use Aqua Map’s search feature to find one point after another and create the waypoint. I named them with the 4-digit planned date (which I already knew was no longer accurate because we planned a later departure from New York) and the stop name. So the first waypoint I created was 0805 Liberty Landing for August 5 Liberty Landing Marina.

I only had one problem and that was when putting in the waypoints for Liverpool and Onodaga (in New York on the Canal). It seemed to me that they were the same place; I’m still waiting for Capt Paul to get back to me on my query.

Once I zoomed out, the route became clear. While it looks like we’re boating across dry land as we cross New York, it also clearly shows which side of each of the Great Lakes we’ll be cruising along and the fact that points seem closer together on the Lakes than in the Canal.

IMG 0081
Here’s the big picture look at our original planned route.

Of course, Capt Paul and his crew will be doing more than this. He’s starting in Portland, ME and finishing up in Stuart, FL. What I did here represents a fraction of his cruise. But since I’m not going to be on board for anything beyond this, I didn’t bother plotting it.

Keep in mind that this is the general plan — a starting point for knowing where we’re going and how long it will take. I seriously doubt we’ll follow this to the letter. Capt Paul is already making changes to overnight stops along the way so we can enjoy a dinner at the Culinary Institute of America in Hyde Park after leaving New York City. I’ll be making an updated version of the route as we travel.

I’m also starting to consider turning the breadcrumbs subscription back on for my ancient Spot Messenger — if I can find it — so friends and family members can track me in real time. It might be worth it if I can get a pay-as-you-go monthly subscription and buy those lithium batteries it sucks down in bulk.

My Thoughts on the American Great Loop Cruisers’ Association

Some thoughts after about a month of membership.

I’m writing this blog post mostly because I said I would elsewhere. I’ll try to keep it brief.

Great Loop Logo
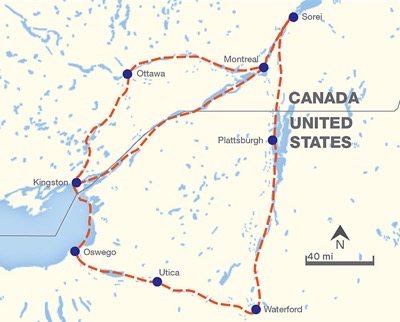
The AGLCA logo and a map of the route(s) on the home page of the organization’s website.

If you’ve been following my blog, you know I’m interested in completing the Great Loop. In an effort to learn all I can about it in preparation for the year-long journey, I began looking for resources online. The American Great Loop Cruisers’ Association was one of the resources I found.

At first, there were just two organizational resources that interested me: videos about the Loop and the Rendezvous.

The Videos

There are a lot of videos and most were tagged $25 each, which really put me off. I honestly couldn’t imagine them charging members a fee to watch existing content, many of which appeared to be narrated PowerPoint slide shows. I assumed that the videos were free to members and it was one of the reasons I joined up.

I was wrong. The $25 per video fee was on top of annual membership. Yes, there are a handful of videos that I could watch for free and my registration to the Rendezvous (see below) included credits I could apply to two (I think) more. So simply joining the organization wasn’t going to get me much closer to seeing educational video content unless I was willing to dish out more money.

Video for a Fee
Is it worth paying another $25 to watch this webinar? I don’t know.

Understand this: I don’t mind paying for content I can learn from. But the price has to be related to the actual quality of the content. $25 to watch a 45-minute narrated PowerPoint slide show seems excessive to me. I understand that videos cost money to produce and host, but I also believe that they’d get a lot more views and likely take in a lot more money if they made the price more reasonable — maybe $5 or $10 each. At this point, I’m not terribly interested in spending $25 on a video that might or might not provide information I can benefit from.

The Rendezvous

The Rendezvous is an event held twice (or maybe three times?) a year. Normally, it’s held live at a location along the loop. For example, they’re planning an autumn rendezvous in Alabama and a new (I think) winter rendezvous in Florida. It’s designed for folks getting ready to start the journey, but it also seems like a good way to just pack in a lot of information.

Because of COVID, this spring’s rendezvous was held as webinars. That was actually good for me because it meant that I could attend without having to travel.

The Rendezvous includes social and educational activities: “docktail” parties, seminars, a vendor expo, etc. It seems like a good opportunity to network with other cruisers, learn about new products, get route briefings, and build a base of information about the trip.

I signed up for the spring rendezvous. It was conducted over a three week period with sessions on Tuesdays and Thursdays. There was a midday (EDT) “Lunch and Learn” which was basically a vendor talking about his/her products. I learned about Waterway Guide, which I wound up subscribing to. In the evening (afternoon for me), there were route briefings, each segment focusing on a different part of the loop. The presenters were actual loopers who narrated their slide decks either in a recording or live. Some were excellent — the couple who talked about the Chesapeake Bay and the guy who covered the Erie Canal were very good. Others were good but could have been better. (These were not professional speakers.) At the end of each presentation, they answered questions we’d ask either live or via text.

There were also two “small group” sessions, which were handled like Zoom meetings. Those were nice because you got a chance to chat with a small handful of other loopers. In person social events would (of course) be better, but this was a good substitute.

There was an online Expo and Q&A sessions concentrating on specific topics. Unfortunately, they were held at the same time. I chose the Q&A session for the Erie Canal so I missed other sessions I might of benefited from, as well as the Expo.

I did learn a lot and the good presentations really fed my desire to do the trip. Unfortunately, I missed or arrived late for some presentations. I didn’t get the links I needed a few times and had to scramble to contact the office to get them. Other times, I simply couldn’t take time off to attend — after all, this was in the morning or afternoon for me because of the time difference. What’s good is that I can apparently watch (or rewatch) any of the presentations as videos without having to pay for them again.

Overall, I think it was worth the cost to attend: $165 (on top of the $89 AGLCA membership fee; you must be a member to attend).

Other Benefits

Of course, the annual membership fee includes other benefits that are listed on the website. The funny thing about membership benefits is that they’re really not worth much if you don’t need/want/use them.

But one of the benefits is discounts at certain sponsor locations. Waterway Guide is one of those sponsors and I used my AGLCA discount to buy my Waterway Guide membership, thus getting two very detailed guides about parts of the loop. I also used the discount to buy another book about the loop. If I use enough discounts, it should (theoretically) cover the cost of membership.

Another benefit is access to a member forum where members ask and answer questions. This is a typical forum like you’d find for any group, but these folks are mature adults who don’t troll and act like assholes. So if you have a question — no matter how basic — you can be assured that someone will give you a good answer for it without humiliating you. They also share information about problems along the route — for example, lock closures or fuel unavailability. They even share opinions about marina service and anchorages. There’s lots there and it can be found on the website or delivered to you via daily emails.

Full access to classified ads is also a benefit, and it’s one I took advantage of to get on the crew of a boat doing part of the loop starting later this summer.

There are Looper Lifestyle seminars held a few times a year at various locations along the loop. I suspect that these have been put on hold during COVID, but they do appear on the calendar for the future, so they might actually happen. Keeping in mind that a lot of folks live full-time on their boats, this is probably pretty informative for them.

Worth It?

I’m pretty leery of “associations.” I’ve been conned into joining more than a few that weren’t what I expected them to be.

Helicopter Association International (HAI) is a perfect example. This organization seems to cater to big helicopter operators while pretty much ignoring the needs of the little guy. I honestly believe that it was started by a bunch of guys who saw a way to make a living traveling around the country to host events while occasionally acting as spokespeople for the helicopter community. I got sucked into joining twice and let my membership lapse with a very bad taste in my mouth both times.

I’ve also had an unsatisfactory experience with Whirly Girls, an organization of female helicopter pilots. I blogged about my experience here, so I won’t cover it again.

So while I like being part of groups of people who share similar backgrounds or interests, I’m not the kind of person who will just pay up to be a member. I need the organization to satisfy my needs.

In this case, my need is for information. The AGLCA does satisfy my need, but there’s a lot of pay-as-you-go along the way. I’m starting out, my knowledge base was nearly blank. They’re helping me fill it in and I believe the forums will be very useful for getting questions answered.

The fee is $89/year with discounts for longer terms or a lifetime membership. Is it worth it? I think it might be, at least right now. If those videos were free to members, it would definitely be worth it.

Footnote:

Last night, I watched one of the webinars that normally costs $25 but was free for AGLCA members. To watch it, I had to follow a link to get a promo code, then log into Vimeo, click to Rent the video, and enter the promo code. It took about 10 minutes for the video to appear in the Vimeo app on my television, but when it did, was able to watch it on the big screen.

It was an Aqua Map app demonstration by the developers. Although the video quality started out pretty bad (on a 4K TV), either I got used to it or it improved because it didn’t seem so bothersome after the initial shock. The developers had recorded and edited a tutorial style video that showed finger tapping on a smaller screen and results on a bigger screen. That was pretty effective, despite the strong Italian accents of the presenters. They gave a good tour of the app, but spent (in my opinion) too much time on the “Master” features that I don’t think will appeal to average users. I still don’t know how they got river mileage to display; they showed the feature but not how to enable it. When the tutorial video was over, they answered questions that had been posted live during the webinar. This didn’t go as smoothly as it could have, but they were definitely trying hard.

On a scale of 1 to 5, I’d give the webinar a 3. That score reflects the length of time they spent on Master features and the difficulty they had answering questions quickly and effectively. It wasn’t a waste of my time, but I sure wish it hadn’t been 90 minutes long.

Was it worth $25? I say no. I hope the other ones I get a chance to view are better.

Great Loop 2021: My (First) Great Loop Adventure

How I found a chance to cruise the Hudson River, Erie Canal, and Great Lakes from New York City to Chicago — without my own boat.

A while back, I blogged about The Great Loop, a boat trip I wanted to take before I turned 65 — which is still a way off. With thousands of miles of river, canal, and even ocean to navigate over the course of about a year, it isn’t a trip to be taken lightly. Not only would I need a boat capable of making the trip — and yes, I’ve been shopping for one — but I’d also need to build a knowledge base and skills to be able to do the trip safely. Although my self-imposed deadline was still years away, I’ve learned that the older I get, the faster the years go. I can’t waste time dreaming about it. I need to get my rear in gear and get to work.

It Started with a Crew Wanted Ad

I started building my knowledge base by joining an organization that provides support for “Loopers,” as Great Loop cruisers are known: America’s Great Loop Cruisers’ Association. (I blogged more about that organization here.) The AGLCA’s website has a number of features, many of which require membership to fully access. While browsing through it, I saw that they had a classified ads section. And while browsing through that, I saw that there were listings for Crew Wanted.

I’d never really thought about doing any of the trip as a member of someone else’s crew. I’m a hands-on person and I guess I kind of like being in control of things I get involved with. But I definitely lacked many of the skills and much of the knowledge I’d need to take command of a boat on a cruise like this. Perhaps being part of someone else’s crew could give me the hands-on experience I’d need to learn a lot of what I’d need to know a lot more quickly than I would without access to a boat.

The Nano
Capt Paul’s boat, the Nano.

There were two ads and I answered one of them. It was posted by Capt Paul, an experienced boat captain who had a 27 foot Ranger Tug — coincidentally the same boat I was interested in buying (although he has the older inboard engine model). He set up a FaceTime call, which I soon realized was one of many interviews he’d be doing to find crew members.

The Interview

The interview lasted about an hour. We discussed what he was looking for and my qualifications for the position.

He was looking for two crew members to accompany him from his home in the Portland area of Maine to the Stuart area of Florida. I originally thought he just planned to go down the coast, moving into the Intracoastal Waterway around Chesapeake Bay. But no! He wanted to enter the Hudson River at New York City, take that to the current incarnation of the Erie Canal, and cruise various Great Lakes to Chicago before heading south of the Illinois, Mississippi, and other rivers to get to the Gulf of Mexico and then cross central Florida in the canal system there. In other words, he wanted to do about 2/3 (or more?) of the Great Loop.

Wow. That was a bit more than my mind could take in. It would be a long trip — maybe longer than I was willing to commit to? I wasn’t sure.

The arrangement would be cost sharing. I think he wanted two crew members not only to deal with the locks on the canals — which are notoriously difficult for solo boaters — but to keep the cost of the trip down. I thought immediately of my friend Bill as another crew member, but family obligations currently have him tied up.

We spent a lot of time talking about my boating experience. I didn’t realize I had so much until I had to brag about it:

  • I grew up in northern New Jersey where my family had a series of small — think around 20 feet? — boats. We’d put in at the boat ramp under the George Washington Bridge and cruise on the Hudson. A common trip would go around Manhattan, but we also went as far north as just past West Point.
  • I’ve been houseboating on Lake Powell twice: a 7-day trip and a 4-day trip. I did a lot of the driving.
  • I’ve rented powerboats on Lake Powell, Lake Mead, and various other lakes and rivers throughout my adult life.
  • I’ve owned a pair of Waverunners, which I used on various Arizona lakes and in the Colorado River on an epic overnight trip from Lake Havasu to Laughlin, NV.
  • I’ve owned a small jet boat for the past 10 years, which I’ve taken on various rivers and lakes in Washington state and Arizona.
  • I took a 12-day “Learn to Navigate the Inside Passage” cruise a few years go where I was one of just four passengers learning about cruising.
  • I’ve been an active passenger numerous times on other people’s boats in various waterways, from inland lakes and rivers to the San Juan Islands.

I also have a huge interest and tons of experience in navigation, on land, on sea, and in the air. Maps have always interested me and I have good map skills, even in this age of Googled driving directions. Hell, I’m nutty enough to put nautical charts on my iPad while on big ship cruises so I can track where we’re going.

Anyway, we hit it off well enough. Capt Paul seemed like a no-nonsense guy and I’m all for that. I apparently didn’t come off as (too) flaky and my experience seemed to score some points. I probably scored more on enthusiasm and apparent financial stability. He mentioned other interviews and we said our goodbyes.

The Plan

A few days went by. I had a chance to wrap my head around the trip. Capt Paul sent a planned itinerary with dates. I had some time constraints — I couldn’t leave Washington until after cherry drying season ended, which was at least two weeks into Capt Paul’s trip.

In the meantime, he found another crew member willing to do the whole trip with him and another willing to join him in Chicago. I had to hustle or I’d miss out.

We started emailing back and forth about me going from New York City to Chicago with them. I really wanted to do the Hudson River — the cruising grounds from my childhood — and the Erie Canal. In fact, I pretty much decided that if I couldn’t do those parts of the trip, I’d skip it. After all, I was facing a big expense just getting out there and back and a lot of work finding someone to take care of my pups while I was away. I may as well do the trip I wanted to do.

We played with dates a little. I found a pilot willing to take over for me in my helicopter if cherry season went long. Capt Paul agreed to wait until August 10 to depart New York City. I could arrive the night before and meet up with him and the other crew member (Dianne) at Liberty Landing Marina. I bought plane tickets to get out there.

And then, when he sent out an email to all the folks who had applied for the crew positions to tell them he’d made his selections, I double-checked to make sure that I was one of them.

I was.

The trip is a go.

Some Closing Thoughts

I have a lot more to share about this adventure now and will have a ton more to share in the future. But I do want to share a few thoughts as I finish up this blog post.

I guess the main point I want to make is this: if you want something badly enough, you need to make it happen. This is something my wasband used to say to me when I was a twenty-something on a career path I hated in corporate America. I took his advice to heart and have been doing so ever since. If you know me and my history, you know that I’ve been making things happen for myself for the past 35+ years.

I was in a Zoom meeting with other Loopers recently — blog post to come about the AGLCA Rendezvous — and mentioned my upcoming crew duties. One of the attendees who was also shopping (with his wife) for a boat wanted to know how I’d managed to get the chance to do it. He sounded — dare I say it? — jealous.

I answered a classified ad, I told him.

You can’t just wait around for opportunities to present themselves. You have to look for them. And then you have to take action to make it happen.

If I hadn’t needed time to think about the possibility — and difficulties — of doing the whole trip, I could have had Diane’s slot — or maybe we could have both been crew members for the whole thing. That’s okay because I’ve bit off exactly what I wanted to chew this time around, but it also brings home the point that if I’d delayed at all, someone else would have had my slot.

If you want something badly enough, you have to make it happen. I’m making this trip happen and I can’t wait for it to start.

Cross-Country Helicopter Flight from Wenatchee to Los Angeles

A three-day journey, part solo, part with a companion.

Earlier this month, I got an offer I couldn’t refuse: a fellow pilot — Skyler, based in Los Angeles — wanted to lease my helicopter for two months so a client of his could experience what it was like to own a helicopter. The terms were set and they were good for both parties. My helicopter was probably going to sit in its hangar until the beginning of May anyway. Why not get it out early and let it earn some money for me?

So I did the necessary paperwork with my insurance company and Skyler’s client. Part of the deal was that I’d get the helicopter an annual inspection before delivering it in Los Angeles — even though that could have waited until the return flight in May. Because the client would cover that expense, was I going to say no? Of course not. So on the Ides of March, I pulled it out of the hangar, started it up, and went south.

Wenatchee to McMinnville

Or I would have. Instead, I pulled it out of the hangar, tried to get it started, failed, put it on a battery charger, waited two hours, tried to start it, failed, put it back on a battery charger, ordered pizza for the maintenance guys, had lunch, tried to start it, and finally succeeded. Three hours after I’d expected to leave, I finally took off. It was 1 PM.

N7534D
Here’s Mr Bleu in Wenatchee, tethered to the ground by a battery charger cable.

(And before anyone freaks out about me flying a helicopter with a less-than-pristine battery, have you never jump-started a car? And, if you’ve done so, has the engine ever failed after you started it? This is the same thing, folks. The helicopter’s alternator charges the battery in flight, just like your car’s alternator does for its battery when you drive. You only need the battery when you start it or if the alternator fails. And even then, the engine won’t quit.)

Watch the Videos
Interested in seeing the cockpit POV video from last year’s trip to McMinnville? It’s in five parts because of all the weather I had to deal with:

The last two have the most weather, if you like watching an idiot in a helicopter running the scud.

The flight to McMinnville, OR, where my mechanic is based, was a lot better than it was last year, as documented in a series of videos on Flying M Air’s YouTube channel. I actually had decent weather — even some sun! — for most of the way. It got a little iffy just before reaching the Columbia River near Cascade Locks, and the wind was howling just before I got there, but once I settled in over the Columbia a trip down the lower gorge, things settled down. I was glad I’d chosen the route I’d picked, which was pretty much a straight shot from Wenatchee to Hood River (modified in flight to Cascade Locks to avoid wind in the gorge), down the river a bit, and then straight to McMinnville. A pilot friend had suggested following I-90 across Snoqualmie Pass to the Seattle side of the mountains and then south along I-5 — a real IFR (I follow roads) route — and that may work for him, but I’ve always had bad luck trying to cross the Cascades there. On this particular day, I definitely made the right decision since there were low clouds west of my route, possibly along the route he’d advised. Flying anywhere west of where I live in late winter or early spring is always a crap shoot and I’m sick of playing craps while I fly.

While on that topic, I should mention that I’m pretty sick of flying in bad weather, period. My helicopter had, at the time of my departure, only 86 hours left until overhaul. I’d fully expected to get it overhauled last year, but 86 hours is definitely enough for another cherry season, as long as I don’t fly it for fun and run down that clock. So I put it away for the winter. That means that 90% of the time I’m flying is either down to McMinnville and back or during/after rain where I live. Flying in rain may keep the blades clean, but it sure isn’t as much fun as flying on a perfectly clear, windless day.

Day 1 Route
Here’s the route I wound up taking. I originally aimed for Hood River, but revised my route to cut the corner and (hopefully avoid some wind) when I got just past the fire tower.

So this flight was relatively uneventful. I’ll post a video when I get around to it. I’ve already posted a video with clips about a fire tower I flew over. Although folks claim they like my long videos, I just don’t understand why. They get boring after a while — even for me, and I’m doing the flying.

Fire Tower
I made a whole video about this fire tower. And yes, that’s Mt. Adams off to the right.

While I normally follow the river closely when I’m in the Columbia River Gorge area, I was eager to get to my destination without wasting a lot of time, so I flew straight lines whenever I could. That put me in a unique viewpoint for the Bonneville Dam, which was kind of cool. For some reason, however, I missed a bunch of the waterfalls on the Oregon side that I usually see — are they above Cascade Locks? If I weren’t so darn lazy this morning, I’d check a map. It could also have been the low clouds distracting me.

Bonneville Dam
Here’s a different perspective of the Bonneville Dam, approaching it from a peninsula into the Columbia River just upstream from there.

I crossed into Oregon just east of Troutdale’s airspace. Along the way, I caught sight of a message for our previous president that someone had planted in their yard. The weather was drizzly, but I had no need to make any detours. I landed at McMinnville almost exactly two hours after I’d departed Wenatchee.

Fuck Trump
This gave me a good laugh as made my way southwest across the northwestern part of Oregon.

At McMinnville

I blogged a bit about my travels earlier this week, so I’ll try not to repeat what I said there.

The short version is, I knew it would take at least a day and a half to do the annual inspection on my helicopter. Jerry Trimble Helicopters, where I go, is kind enough to provide courtesy cars for customers, so I climbed aboard a low-end Nissan — I’d gotten a brand new Volkswagen sedan on my previous trip — and set about finding a hotel and some food. I settled in at a Comfort Inn with some groceries for dinner.

On my full day in the area, I visited the Evergreen Aviation Museum, which is right across the street from the airport where my helicopter was being worked on. It was great touring the place with a docent all to myself and hardly anyone else around. I highly recommend it. (You know the Spruce Goose is there, right?)

SR-71 Blackbird
How often do you get to see an SR-71 Blackbird from the top? This was on the “behind-the-scenes” part of my docent-led tour.

I checked in on my helicopter before heading into town. It looked as if the crew was just past halfway done. The had to replace a hose because of a service bulletin but everything else was looking good. The battery was on a charger. They didn’t have a replacement and I couldn’t wait for them to get one, so I hoped it would be okay. If not, Skyler could get it replaced in Los Angeles. I was confident that it would start the helicopter on the remaining days of my trip south.

I went into town, where I had a wine tasting (and, like an idiot, bought three bottles of wine) and then ate dinner outdoors at a South American restaurant. Then back to the hotel, where I put together that fire tower video mentioned above.

In the morning, I had to figure out how to get the wine I’d foolishly bought home. I’d be flying to Los Angeles in the helicopter, but from there I needed to get on an airliner to get home. I had two carryon bags and was not interested in checking either one. The wine, even in a box, would put me over the limit. So I set about finding a place that could ship it for me. There are restrictions on shipping alcohol — who knew? — and a few hurdles to jump. But after parting with nearly as much money as it cost to buy those three bottles, they were in someone else’s hands. (They arrived at my house yesterday.)

N45PG
At the Jerry Trimble Helicopters hangar, I saw what’s left of Robinson R44 Raven I N45PG. Back in 2003, this helicopter belonged to my friend Tristan, who had big plans to build a business with it. As a CFI, he gave me my R44 transition training in this ship and I leased it from him for three months in 2004 to see if I wanted to get my own. Seeing it in pieces, needing a ton of work to get back into the air again, was bittersweet. I have a photo of it somewhere; I’ll share it if I find it. Tristan, who has an even shorter attention span than I do, is on to other things.

Back to the airport to check on the helicopter and set up the cameras for the next part of the flight. Would it be done by 2 PM? Skyler was arriving at Portland on a 1:30 PM flight and I had to pick him up. Ideally, the helicopter would be sitting on the ramp ready to go when we got back. It looked good. I left.

It was an hour drive to the airport. I arrived about 5 minutes before Skyler’s flight landed. I was waiting at the curb when he came out. We made the hour drive back, stopping at a DQ for lunch in the car along the way.

It wasn’t ready when we got back, although it was outside the hangar. Panels were still off and the battery was missing. The mechanics were kind of swarming around it like a pit crew at a race, but not moving nearly as fast. No one should rush maintenance.

Skyler and I loaded our luggage in back as the guys worked. A fuel truck came and topped the helicopter’s tanks. I paid the bill; I’d be reimbursed the next day.

It was after 3 PM when I did a quick check flight with Jerry. We talked a little about the “hop” in the rotor blades. It could be smoother with a blade balancing, but I didn’t want to spend the money on one so close to overhaul. He didn’t think it was so bad. I was used to it.

Finally, Skyler climbed in and we took off.

McMinnville to Susanville

Day 2 Route
Here’s the second day’s route. It would have been a straighter line if we could have gotten fuel at Klamath Falls.

I’d planned a very boring route down California’s Central Valley, keeping in mind that the winds were forecasted to hit 60 mph the next day at Weed so we needed to be past there by nightfall.

But Skyler had a different idea. He wanted to take a direct route that would have us on the east side of the lower Cascades and then crossing the Sierra Nevada on a diagonal the next day. I was game to try, mostly because I knew the wind would be less severe on the east side. So we headed south with the wishful thought of stopping at Tahoe for the night.

We flew over a whole lot of nothing. After leaving the valley and getting into the foothills of the lower Cascades, it was just snow-covered forest — much of it logged and replanted — and a lot of snow-covered back roads. There was one interesting spot where dead fir trees — possibly killed in a fire? — cast long, horizontal shadows on the bright white hillsides. The effect was stunning. (I’d share a photo but, true to form, the camera that would have caught it crapped out on me not long after departing McMinnville.)

Our flight path, aiming for fuel at Klamath Falls, had us on a direct path over Crater Lake, which I’d never flown over. The view of the seasonally closed park was stunning. I started heading out directly over the lake but changed course when I realized that an engine failure over the middle of the lake would have us freezing to death in cold water before we could get to shore. I changed course and hugged the northeast shore, getting back on course on the other side.

Crater Lake
I flew over Crater Lake while Skyler played tourist. I erroneously thought that my helicopter’s nose cam would pick up footage from our flight, but the damn thing had stopped writing to the video card 15 minutes after leaving McMinnville.

We arrived at Klamath Falls at 5:15 PM. We tried calling the FBO from the ramp, but there was no answer. Skyler walked to the FBO office while I shut down. He returned, cursing. Although they were still in there, they wanted an extra $150 to fuel us because it was “after hours.” Neither of us wanted to pay, so I started up and we continued to the tiny rural airport at Malin just 18 NM away. We used self-serve to put in the maximum allowed — can you believe the pump had a shut off? — which would be enough to get us to Tahoe.

But by this point, it was getting late. We were another hour into the flight when we started doing math. Sunset was just after 7 PM but it didn’t look as if we could make it to Tahoe until well after 8 PM. Neither of us wanted to fly over the mountains in the dark. Where could we stop for the night?

Skyler flew while I worked Foreflight on my iPad. By some miracle, we still had a cell signal. After a few discarded suggestions, I looked at Susanville. The town was about 5 miles from the airport. It would work if we could get ground transportation.

I picked up my phone and called the number for the FBO. Second miracle: someone answered.

I asked if they had a courtesy car for two helicopter pilots who needed to spend the night in town. After a moment of hesitation, the man promised a Crown Victoria (third miracle!), told us where to park, and asked when we’d be leaving in the morning. I told him we’d leave after 8 AM and we needed both fuel tanks topped off before going. He gave me another phone number if I had questions and we hung up.

We arrived in Susanville just before sunset. We parked where a guy on the radio — the same guy? — told us to, unloaded our luggage and my cameras, and walked to the terminal where two men chatted with us. One of them offered us a beer several times — I think he wanted us to hang out. But we where exhausted and declined. Instead, we climbed into the car and headed for town.

It was the Red Lion for our overnight stay, with a stop at the KFC across the street for dinner. I spent the evening transferring video files from my cameras to a hard disk and trying to troubleshoot the problem I was having with my relatively new GoPro Hero 8.

Ah, the glamour of cross-country flight!

Susanville to Los Angeles

Day 3 Route
This turned out to be our route on Day 3. We didn’t really use waypoints at all; the idea was to get around the mountains and then head into the Los Angeles area.

It was overcast the next morning. And cold.

We stopped at a Starbucks for coffee and breakfast and then headed to the airport. They’d filled the helicopter with fuel; Skyler’s client picked up the tab (again, as he would for the whole trip). We chatted with a bunch of guys and a kid in the terminal, including a guy who did a UPS package run across the mountains in his King Air every day. He told us that the conditions were bad where he had come from, which I think may have been Redding.

We discussed our route. Skyler wanted to continue on his original route. I was concerned with mountain obscuration in the Sierra Nevada and the possibility of high winds up in the mountains. The way I saw it, we needed to pick a side of that range: east or west. If west, we should move back to the west side before going further south, although that could put us in the weather the King Air pilot had mentioned. If east, we’d be fine flying past Reno and then dropping into the Owens Valley. We could head west when we got to the desert.

He chose east so we took off to the southeast.

The trip started off a little bumpy with winds and mechanical turbulence. The rule when flying a Robinson in wind is to slow down — keep it below 100 knots. That isn’t so tough given that my ship doesn’t cruise much faster than 110 knots in the best conditions. Skyler did a bunch of flying; he likes to experiment with the way the wind affects the helicopter when flying near mountains. I just wanted a smooth ride. I don’t know too many people who don’t hate turbulence.

The weather settled down by the time we got near Reno. We crossed the metro area on the west side, in the foothills. We continued south. Through more snow-covered, hilly, forested terrain. It was beautiful but kind of monotonous.

Reno, NV
Skyler flew past Reno while I took pictures out his side of the cockpit bubble.

Skyler suggested we stop for lunch at Lake Tahoe. I was game. I was hoping for some decent footage from the nosecam, which was now using one of my GoPro Hero 7s. He flew, trying hard to get some “cinematic” footage along the way. We came through the mountains at a pass; there were low clouds misting rain or snow over the lake, so we had to stay pretty low. It was about as gorgeous as you might expect.

Lake Tahoe
Flying low level down the east shore of Lake Tahoe. I’m not sure, but I think my camera had something on the lens dead center; it doesn’t seem properly focused.

We came in for landing at the airport there and put in a fuel order. He had some paperwork to do for the insurance so he used the computer in the FBO. Afterwards, we went to the restaurant in the building next door. We ate indoors — it was chilly out on the patio — but there were only a few other people in there so I felt safe enough.

After lunch, we climbed back on board and continued the flight. We’d considered hopping over to the Central Valley by way of Echo Pass, but had decided to stay on the more interesting side of the mountains. (If you’ve ever flown in California’s Central Valley, you know what I mean.) The ceilings were kind of low, but not low enough to be a nuisance. Still, I was interested in following a known path that would go through the mountains without having to climb over them. So we headed southeast until we found Route 395 and followed it south.

Near Bridgeport
We crossed this valley on the way to intersect with Route 395. I wanted to avoid having to fly over peaks like the ones in the distance; better to follow a road and fly through the passes.

Eventually, we got to Mono Lake and the town of Lee Vining. After that would be Mammoth Lake and beyond that, at around Bishop, the terrain would finally descend and flatten out into the Owens Valley. All along the way, we’d have the towering, snow-capped Sierra Nevada Mountains on our right with lesser mountain ranges off in the distance on our left.

Mono Lake
Skyler flew low over Mono Lake, giving us a view of the tufa formations on the northwest shore.

I flew for a while when the terrain got too boring for Skyler. Past Bishop, I overflew the radio telescope installation, being careful not to directly overfly any of the telescopes in case they were working. I remembered the installation being a lot bigger than it was that day but chalked it up to remembering a time when I felt smaller and the world around me when I flew seemed so much bigger. For a while, I settled down over the Owens River, flying a staight line as it snaked back and for the beneath us. Then I moved out over the divided highway of Route 395, remembering that I’d driven that road only a month before on my way home from Death Valley and my other winter travels.

Route 395
Route 395, somewhere in the Owens Valley.

It was around 2 PM when we stopped for fuel at Lone Pine. It was self serve and Skyler did the filing job while I handled the ladder and grounding strap. He debated whether he should put fuel in both tanks but decided not to; our original destination airport — Brackett Field, I think — charges a landing fee if you don’t put on at least 30 gallons. He wanted to come in nearly empty. (It actually turned out to be a bad decision because we didn’t have enough fuel to get there with sufficient reserves.)

Lone Pine Airport
There wasn’t much going on at Lone Pine Airport on that Thursday afternoon.

Before continuing south, I ducked behind the helicopter, stripped off my turtleneck, and put on a t-shirt. We’d gone from frigid air to desert heat in just a few hours. I climbed back on board, started up, turned on the air conditioning, and headed out. I don’t know about Skyler, but I was ready to be done flying.

But we still had miles to cover. We passed Owens Lake on the west side and continued down the valley. Eventually, we crossed over some hills, heading toward Isabella Lake. Then down through Kelso Valley. Through one wind farm and then another. Past many solar installations across the high desert north of the mountains north of Los Angeles.

By then, Skyler had decided that we needed fuel. He headed toward Whiteman. I didn’t see the airport until we were nearly on top of it — it’s completely surrounded by roads, businesses, and homes.

By this point, I was a passenger and was enjoying it. I have very little experience with the crowded Los Angeles airspace and no desire to expand my knowledge. Skyler knew it well; he could fly and talk. In fact, when we left Whiteman, we switched seats and I settled back with my phone to be a tourist.

He offered me two quick tours of the Los Angeles area: The coastal route with celebrity homes or downtown LA. I picked downtown, never dreaming that he would get so close to downtown. But before we got there, we went past Universal Studios, the Hollywood sign, and Dodgers Stadium, which was a COVID vaccine site filled with cars. Downtown Los Angeles had more helipads than I thought possible; Skyler told me that every building over 13 floors has one for emergencies.

Downtown LA
Downtown Los Angeles, up close and personal from the air.

From downtown, we headed for his revised destination — he’d been chatting occasionally via text with his client since leaving Tahoe — Hawthorne Municipal Airport, home of SpaceX. He landed on the runway and followed the tower’s instructions to set down at the FBO. We touched down at 5 PM, exactly the time he’s told his client we would arrive. He hurried inside to meet the client while I unpacked my luggage, made a Hobbs book entry, retrieved my cameras and most of my mounts, and said goodbye to Mr Bleu.

I got to meet the client, Chris, inside the FBO. He was heading out with Skyler; they’d do a tour of the area as soon as he got clearance from the tower to depart.

I got a video of them taking off.

Mr Bleu at Hawthorne
Here’s Skyler and Chris taking off from Hawthorne in Mr Bleu.

Left alone in the FBO, I organized my things and worked Google to make a hotel reservation. I’d be in the area until Saturday morning and, without a car, would be Ubering here and there. I was gone before they returned.

Afterword

I collected a lot of video during the trip and a lot of it will get edited for Flying M Air’s YouTube channel over the coming months. My cameras, of course, did not all behave so I don’t have complete footage of the flights from any one position on the helicopter. But that’s okay. I’ll make the best that I can from what I have.

Mr Bleu will be returning before May 15. I won’t be flying him back. Skyler and Chris plan to do the trip over four days. I’m bummed out, but can’t complain. They’ll be paying for that entire flight so it’s all good.

And who knows? They might fly Mr Bleu again in the future.