The easiest path is often not the best.
“Do you have any black obsidian?”
The question came from a guy in his late 30s or early 40s dressed like a biker. You know the look: thin, black clothes, unkept hair, beard. Yeah, I know that could also describe a hipster, but if you saw him standing next to a hipster dressed the same way, you’d definitely know which guy I was talking about. This guy had an entourage that included two more biker guys and two biker chicks.

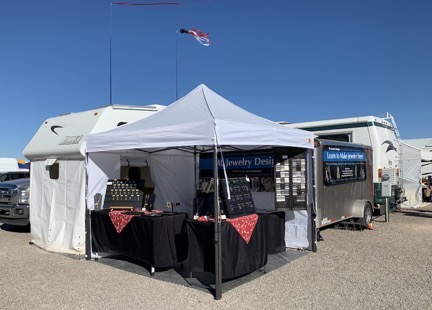
My corner booth at Tyson Wells this year. I managed to cram everything in. I used the enclosed space at the front end of my truck camper as a classroom for jewelry making classes; it was easily accessible from my main tent through a doorway and comfy with a table and chairs inside.
The question was ironic, in a way. I had a shit-ton of obsidian slabs, all from a collection of rough I’d had obtained, in trade, from one of my cherry drying clients. Obsidian is volcanic glass and my client had a lot of it in old, broken cherry bins on a cherry orchard he owned. The previous owners had dug it out of the ground when they planted the trees. The rocks — along with a bunch of petrified wood uncovered the same way — had been tossed into the bins. My client acquired it when he acquired the orchard. He knew I worked with rocks and, for a while, I tried to sell the petrified wood for him. But we eventually traded cherry drying standby coverage for that small orchard for the entire collection of rocks. I managed to pick up about 10% of what’s there and still need to retrieve the rest.
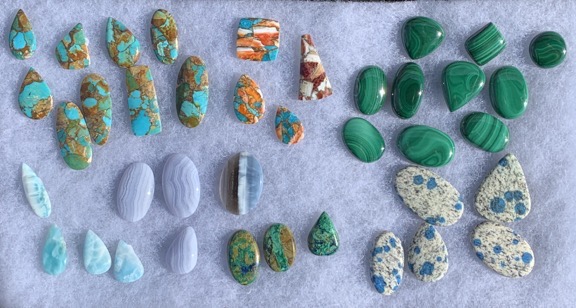
So yes, I had obsidian. But turns out that I only had one obsidian cabochon with me: a piece I’d polished for my “before and after” demo box — the box I pull out when people think my extensive cabochon collection are just “tumbled rocks.” (Hint: they’re not.)
I didn’t really want to sell the rock but I also didn’t think he wanted to buy it. So I pulled it out. He asked me what it would cost to make a pendant from it and I did some quick math in my head and said $59. He thanked me and walked away with his group.
I put the rock away.
Hours later, he returned. I’d just made a few nice unexpected sales on what had begun as a very disappointing day. It was about 3:30, which was the time I normally closed up for the day. He asked again about the stone and the pendant. I brought over the box with the stone and pulled it out.
“How much for a pendant?” he asked again.
“Fifty nine dollars,” I replied. “It comes with a sterling silver chain.”
“What if I don’t want the chain?”
Understand that although the chains are solid sterling silver and made in Italy and they’re all brand new, each in their own individual sealed bag, I buy them 100 at a time and get a very good price. So good that saving a chain doesn’t save me enough money to lower the price by more than a few dollars. So I said, “Still fifty-nine.”
He hesitated and then said, “Would you take fifty?”
I blinked, looked him in the eye, and said, “No.”
He stared at me.
I felt a bit of anger coming up inside me, but stayed remarkably calm. I said, “Listen, I’ve been dealing with this for ten days. My price is firm.”
He nodded, looking disappointed, and started to walk away again. I put the rock back in the box.
One of the women in his crew, who had been looking at my pendant display with the other woman, suddenly seemed to realize that something was amiss. “What’s up?” she asked. “How much is it?”
“Fifty nine,” he said, stopping and coming back to the table.
“That’s all?” she asked. “That’s a great price.”
“It’s more than I wanted to spend,” he said.
“So what?” she replied. “That’s what it costs. If you want it, get it.”
Her straightforward comment worked. What followed was a discussion of how I’d make it. Which style of the displayed pendants did he like? Not like? They finally picked one with a distinctive style — one that required a bit more effort on my part (although they didn’t know that) — and I took his name and cell phone number and told them it would be ready in about an hour. I’d text him a photo when it was done.
(No, I don’t have folks pay in advance. If he didn’t show, I’d put it in inventory and someone else would buy it. I only make them pay in advance if they want a very costly stone or something weird that other folks might not like.)
I sat down to make the pendant.
The Venue
This happened on my second to last day at Tyson Wells in Quartzsite, Arizona. Quartzsite is a weird little desert town 25 miles east of the Colorado River with a year-round population of 3,677 (per 2010 census). I-10 runs right through it, so truck stops — there are four of them — are probably the biggest year-round business. Per Wikipedia:
Quartzsite is a popular recreational vehicle camping area for winter visitors with tourism being the major contributor to Quartzsite’s economy. Nine major gem and mineral shows, and 15 general swap meet shows are very popular tourist attractions, attracting about 1.5 million people annually, mostly during January and February.
Honestly, I think that part of the Wikipedia entry needs an update. While there are still gem and mineral shows and swap meets, that count might be from a few years back. And that visitor count has to be way off. I will agree that there are lots of folks camped mostly out in the desert in January and the population surges to at least 100,000 during the month. (Please don’t get me started on how the sudden influx of 100,000 Facebook users affects cellular internet access here from 7 AM to about 11 PM daily.) Visitors are mostly retirees who stay for a few days or weeks in motorhomes or other comfortable camping rigs, taking advantage of free and low-cost camping on Bureau of Land Management (BLM) land that surrounds the town. There are also campgrounds for folks with bigger budgets who don’t mind the parking lot lifestyle to have a full hookup.

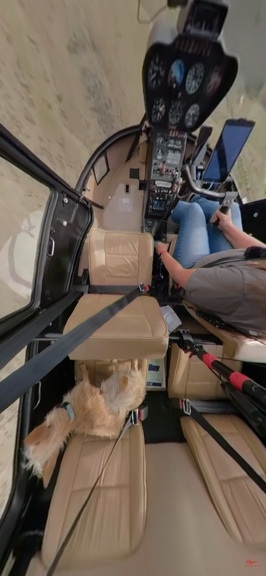
An aerial view of the two big January shows in Quartzsite, AZ, shot from the northeast. Tyson Wells is in the foreground and the RV show with its big tent is beyond it. Those white specks in the desert beyond are some of the thousands of RVs camped out on BLM land.

Here’s another shot of the area, this time from the southeast.
All these folks spend their days roaming the shows, the biggest and best of which is Tyson Wells Sell-A-Rama, a 10-day event that begins in the middle of January. Another draw at the same time is the RV show with its huge tent and hundreds of vendors. The two shows are across the street from each other and take place at the same time. Last year I was at the RV show selling jewelry and aerial photos of campsites; this year I’m back at Tyson Wells selling jewelry.
Or trying to.
You see, the people at Quartzsite — especially this year, it seems — are more interested in buying cheap crap than spending a few bucks more to get something artisan made. It’s the Walmart mentality. Why should they pay me $39 for a pair of fine silver earrings that I designed, textured, cut, filed, sanded, shaped, patinated, and then polished by hand when they can get a pair that look kind of like them made in China out of some sort of silvery metal in that buy/sell booth two rows over for $9.99?
Now I don’t want you to think that everyone here is like that. They’re not. But it’s definitely the majority. How many times have I seen a woman ooh and aah over a pair of earrings, lift them out of the display like she’s ready to buy, ask the price (because she apparently can’t read the sign on the display 12 inches away), and put them right back where they were when I tell her? Too many to count.
And these are my “special show prices,” which are $10 less than what I actually sell for on Etsy and at art show venues.
The Stories
And then there are the stories. I’ve been sharing them on Twitter, but I’ll reproduce a few here for the folks who don’t follow me there:

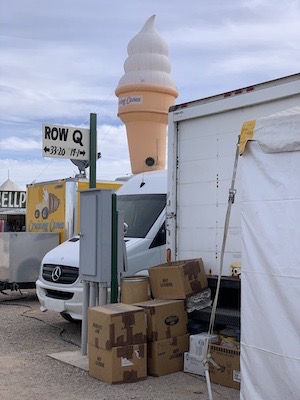
View of the ice cream cone from my booth. My neighbor across the walkway was a bit of a slob.
Woman at my booth facing the booth with the giant inflated ice cream cone on top: “Do you know where they sell ice cream around here?”
Me, pointing: “Maybe under that big ice cream cone?”
Her, all serious: “You think so?”
Me: “Yep.”
(I actually had to lean out of my booth to make sure the ice cream cone was still there before answering her because I couldn’t imagine how she might have missed it. In my location at the corner of an aisle and the center walkway, I became an information booth. The last few days, I just told people I didn’t know where what they were looking for was.)
Old guy walking by with several other old guys and women, talking about how some automated function on his motorhome works: “We’re getting into the 21st Century soon. I have to learn to trust computers more.”
None of his companions mentioned that we’re already 20 years into the 21st century.
(Old people are weirdly dumb sometimes — which worries me because I’m not getting any younger myself. Will I make statements like that? Do I do it already?)

I nearly filled my pendant display while I was there. Every time I taught a wire wrap class, I added another pendant to inventory. Did I mention that I made about as much money teaching how to make pendants as actually selling them?
Woman says to me: “I just started doing wire wrap.”
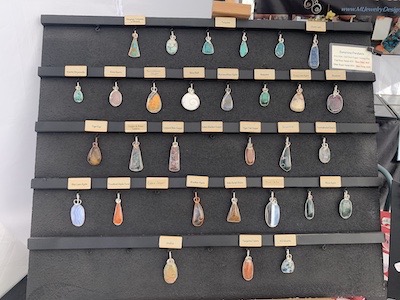
Husband, looking at my pendant display board with 20+ pieces of my work: “Look. Here are some ideas you can steal.”
Wife looks. “Oh, yes.”
Me: “Why don’t you take a card? There are photos on the website.”
(Although she didn’t catch my sarcasm, I think her husband did. They didn’t stick around and, of course, they didn’t buy anything.)
Man comes up to my display of pendants and runs his fingers over every single one of them. When he’s done, he looks up at me and says, “No burs. Nice work.”
Me, thinking: Gee, thanks. I guess I qualify as a professional. 🙄
(That one really got under my skin. I wonder how much french fry grease he had on his hands.)

This banner got a lot of attention.
Man to wife as they walk past one of my 9×3 foot banners: “Look. You can learn to make jewelry here and put them out of business.”
Me, thinking: Oh, please try.
(These two didn’t even slow down as they walked past.)
Lady looking at one of the stones I have for sale says to me: “How much did you pay for this?”
Me: …
Her: …
Me: “Don’t you think that asking me my costs is getting a little personal?”
Her: “No.”
Me: …
She didn’t buy the stone.
(She also asked how much I’d charge to wrap a stone she brought to me. I told her my price was $39 but I only did flat stones. She’d been looking at a Shiva shell, which can be found elsewhere at the show and is seldom flat.)
Woman takes a photo of a pair of earrings. “I’m sending this to my husband. He’s in the next row. I can’t buy anything without his approval.”
Me: ”That’s unfortunate.”
Her: [blank stare]
She doesn’t buy the earrings.
(I really don’t think she understood my sarcasm.)
A lot of these stories have the same theme: a complete disregard for the skills and/or feelings of an artist/maker. I can’t tell you how many people came to look at my work clearly with the intention of studying it for ideas. (Tip: what do you think Pinterest is for?) How many photos were taken on the sly? How many whispered conversations between two people, one or both of which wore similar (but not identical) wire wrapped stones before walking off without even acknowledging my greeting?
Again, this wasn’t everyone. It wasn’t even a majority. It was just enough to get under my skin.
And I generally have very thick skin.
Please Respect Artisans
There are two kinds of sellers in this world: sellers who sell what they make and sellers who sell what someone else makes.
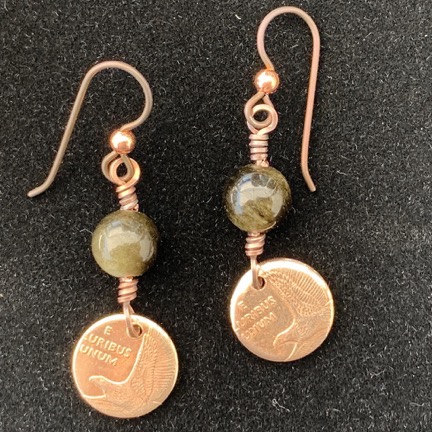
An ExampleOkay, so these aren’t silver earrings, but they’re a good example of my process. I obtained some coin punch outs from a guy who makes coin rings. I tumbled them to clean/burnish them, then drilled a hole in them and filed down the rough edge created by the drill. Then I used double loop wraps on antiqued copper wire (which I antiqued myself in advance) to attach them to a golden sheen obsidian bead. I attached that to a pre-made hypoallergenic niobium ear wire. They’re cute and they have a story. The entire process takes about 30 minutes per pair and I sell them for $19 at shows.

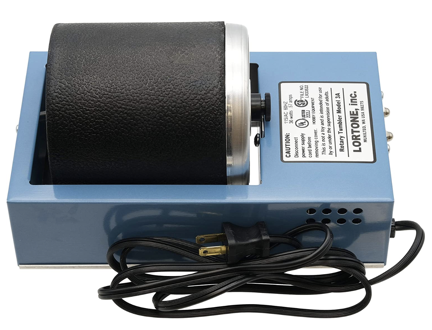
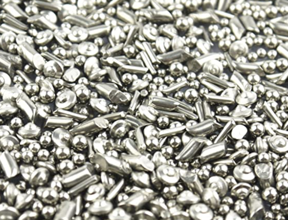
People look at these and they think of the material costs for the coin punch outs, metal, beads, and ear wires. But do they think of the tumbler, pound of mixed stainless steel shot, and burnishing fluid I needed to polish those coin punch outs? Do they think of the center punch and drill and drill bits I needed to drill the hole in each coin punch out? Do they think of the container and chemicals and polishing cloth I needed to antique the wire, stop the antiquing process, and then polish the shine back into the metal? Do they think of the three types of pliers I needed to make the double wrap loops that hold the coin punch, bead, and ear wire together? My investment in equipment alone for this small job exceeds $300. How many pairs of earrings should I need to make to recoup that cost?
And doesn’t my time have any value? Or the time I spent learning and practicing the skills these earrings required me to have?
Sellers who sell what they make — artisans — have a certain level of pride in their work. That pride, along with their skills, equipment cost, materials cost, and selling costs, are what make up their price.
Maybe I can take $3 worth of silver and turn it into a pair of earrings that I sell for $39/pair. But that $3 materials cost doesn’t include the hundreds of dollars I’ve spent on jewelry classes to learn how to make jewelry (and the related travel/lodging expenses), tools and jewelry making equipment, show equipment and displays, show fees, and show travel/lodging expenses. It doesn’t include the hours of practice (and the silver I’ve had to scrap when I didn’t get it right on the first or second (or third) try) and the time it took to form each individual component of the earrings and put them together. And it doesn’t include the pride component — coming up with a new design, pulling it off in such a way that I know it’s good, knowing people will like it and buy it and that it has real value beyond $3 worth of metal.
If you, as a buyer, like those earrings a lot but don’t think they’re worth $39, that’s your problem — not mine. I’m not going to adjust my prices to make you happy. If you won’t buy them, someone else who possibly values them more than you do will. My prices are not outrageous and everything I make eventually sells.
And that’s what I’m telling myself this week, at the end of this rather disappointing show. My next show is an art show where people value the work of artisans. I’ll sell at my regular retail prices and make a lot more money in three days for my work than I made in 24 days at Quartzsite.
The Pendant

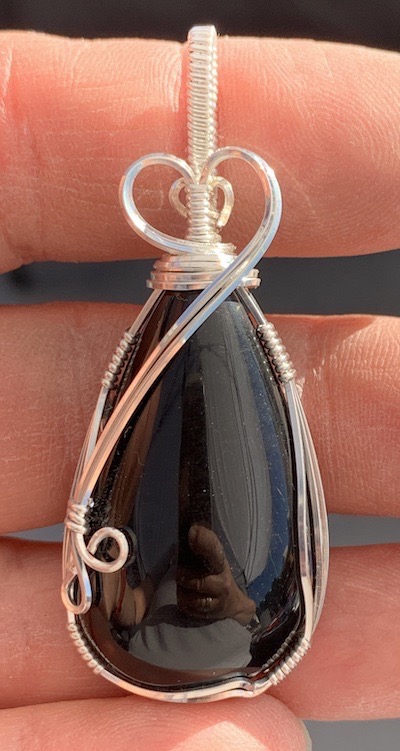
Here’s the finished pendant. You can see my reflection in the rock’s surface; I did a great job polishing it.
Now although my dealings with the biker dude at the beginning of this typically long post weren’t as pleasant as I would have liked, I did my best to create a nice pendant for him in the style he wanted. The stone was kind of thick, so it required a frame of at least four wires (instead of my usual 3; and it might have benefited from five). I didn’t hesitate to use that extra silver. And I made the swooping wire with loops at the end, despite the fact that it required me to attach those swoops to the frame in what’s become a popular but still challenging to pull off decorative flourish. (It’s getting easier every time I do it.) The finished piece looked pretty damn good, if I do say so myself. I polished it up, took a photo, and texted it to him.
He and his companion — the one I probably owed a commission to for talking him into it — arrived just a few minutes later, just as I was packaging it to go. I put the silver chain in the packet. “We love it,” she told me. He seemed to agree. He paid me without comment — I think he was embarrassed — and I handed it over to them. Happy ending all around.
But it was especially happy for me because I stuck to my price and still made the sale. I didn’t let someone disrespect me by convincing me to sell my work for less than I wanted. I was making him a custom pendant. Imagine how bitter I would have felt if I’d done it for less than I thought it was worth? Do you think I would have done as good a job? I’m not sure.
The Easiest Path
I admit that I’m in an enviable position as an “artist.” I put that in quotes because I don’t make my living as an artist — and that’s the basis of my enviable position. I’m not desperate for sales. I can afford to come to a venue like Tyson Wells in Quartzsite, pay a bunch of money for a booth and campsite, and not sell a thing. That would hurt my pride a lot more than my financial standing.
I signed up for my booth at Quartzsite this year for three reasons:
- It was easy. Let’s face it, traveling around and setting up a show booth for just two or three days, and then tearing it down and moving on gets old if you do it a lot. It’s especially tough when you’re dragging around a trailer and have to worry about where you’re going to spend the night during the show. I did two consecutive shows at Tyson Wells and was able to set up at the beginning and then open my booth on my own schedule for the next 24 days.
- It included a full hookup for my camper. I was able to park all of my equipment: truck, camper (off the truck), and utility trailer/mobile shop in my double-sized site with my show tent in the front corner. Not only was I able to tap into power to run my fridge and use the microwave, etc., but I also had the convenience of being able to dash into the camper to use my own toilet or heat up some lunch during the day. I was also able to bring power into my shop trailer without running a generator, making it easy to use my printer, heat up my pickle pot, and charge tool batteries.
- One of my best friends was there. Janet is my best non-Wenatchee area friend and I like to spend time with her. We do a nearly three-mile brisk walk every morning and have a glass or wine and/or dinner together most evenings. She gives me advice about doing shows — which she has been doing as an artist for at least 30 years — and can be relied on for an opinion when I try to make something new and different. I only see her during the winter months and I like to maximize the time we can spend together.
If any one of these things didn’t apply, I probably wouldn’t have come to Tyson Wells for two shows this year.
Going CheapMy friend Janet did well at this show selling note cards with prints of her original artwork on them. They were priced at $3 and she sold enough of them to make every day contribute to her bottom line. She told me that I need something like that and I agree. But I make jewelry and I’m at a total loss for something I can make and sell at a profit for under $10. Right now I have two items priced at $9 (copper rings which are a pain in the ass to make and novelty keychains made from license place letters) and neither one is a big seller.
The answer, of course, is to go the buy/sell route where I’d buy some sort of mass-produced item and sell that among my handmade things. We agreed on a specific relatively popular jewelry item that I can buy at wholesale pretty cheap and sell at enough of a profit to be worthwhile. But to me, that seems like a “if you can’t beat them, join them” attitude. How could I justify stocking this item when everything else in my booth is handmade by me? It just doesn’t feel right to me.
But I have to consider the drawbacks, too.
- Sales were disappointing. I haven’t totaled up my results yet, but I know they’re off from where they usually are, even at the worst art show venues I’ve attended. I like to tell myself that I’m paying for the campsite more than the booth and I really think that’s true.
- Shoppers wanted cheap finds. They seemed more interested in buying items under $10 or $20 than quality items that might cost a little more. This is the main reason I think Quartzsite is the wrong venue for me.
- Too many shoppers were obnoxious. Maybe my skin is thinner than I thought, but when I can sit in my booth on one day and make a list full of items like the ones I tweeted (and shared above), I’m certainly not being too sensitive — especially when I consider how seldom I experience this at other venues. This really ate away at my self-esteem and generated unhealthy anger.
- I had to run my booth by myself. While I always man my booth alone, I seldom have to do it every single day for 24 days straight. It’s okay to leave for a few minutes — I did’t lose any inventory — but shutting down for longer breaks is not a good idea. Still, I quickly learned that there were very few shoppers early or late most days so I wound up opening around 10 and closing before 4.
- I was unable to get much work done during the day. This is partially my fault. If I’d set up my space differently, I might have been able to get work done in my shop trailer while keeping an eye on my booth. So rather than work on projects that required soldering and hammering, which I had to do in the trailer, I stuck to making more pendants, bracelets, and simple earrings. By the end of the day, I was hot and tired and didn’t feel like working on anything new.
- The dust got into everything. Despite watering down the walkway around my booth every day, the light gravel surface is embedded with dust that gets into everything. After a while, I just felt as if everything was coated with a grit that I’d never get rid of.

My space was just big enough for me to park my trailer, camper, and truck and squeeze in my 10×10 show tent.
I was depressed and that depression worsened as time went on. The depression was triggered by a tragic event that I’ll discuss in a future blog post. All I can say is that if Janet wasn’t around to comfort and support me, I would have been lost. I’m dealing with it but I’m also dealing with what I call “The Quartzsite Effect.” That’s the way I feel when I spend too much time in Quartzsite, especially if I’m shoe-horned into a tight campsite like I am at this show. I need to see the horizon, to watch the sun rise or set once in a while. I need quiet and privacy. I figure I’m good for a maximum of two weeks in Quartzsite. I’ve been parked here for nearly a month and I feel almost like a caged animal.

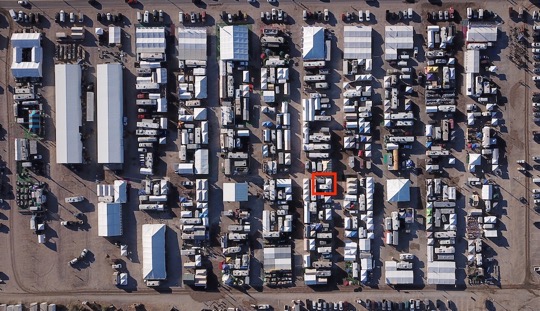
Here’s an aerial view looking straight down at Tyson Wells Sell-A-Rama on the morning of January 25, 2020. My space is marked in red.
When I put all of this together, I can’t deny the truth: Quartzsite is easy but it’s not right for me. The easiest path is often not the best.
Next Year
I had been debating with Janet about whether I should do this again next year. I was thinking I shouldn’t but she was trying to convince me to try again. In the end, it didn’t matter. I’d already decided I had no interest in being in the same spot (or even row) I was in. I wanted a spot in Janet’s row, which had a lot more foot traffic because it had more vendors. But when I went to the office to see what was available in that row or something equally good, I was told that all of the spots were already reserved. The decision was made for me.
I’m putting my name on a waiting list but really don’t care if they call me or not. This is not the right venue for me and it’s time to move on. Not being able to get a good spot in next year’s show might be the prodding I need to try something else.
And that’s probably what’s best anyway. I’ve been coming to Quartzsite almost every year for the past 20 years. It’s only recently that I’ve begun spending a lot of time here. Maybe enough is enough.
