It’s for a lot more than just making shiny rocks.

This is a real workhorse and probably the bestselling tumbler out there. I think everything else is an imitation.
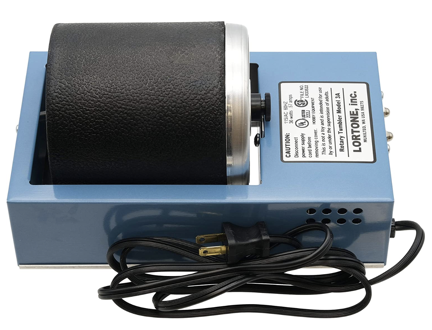
One of my most-used plug-in (as opposed to hand) jewelry making tools is a model 3A Lortone rotary tumbler. This is most commonly bought as an educational “toy” for kids — indeed, that’s how it’s categorized on Amazon.com. The idea is that kids can go rock hounding, put a bunch of rocks in this tumbler, and, a while later, have a bunch of shiny rocks to show off to family and friends.
Making Shiny Stones

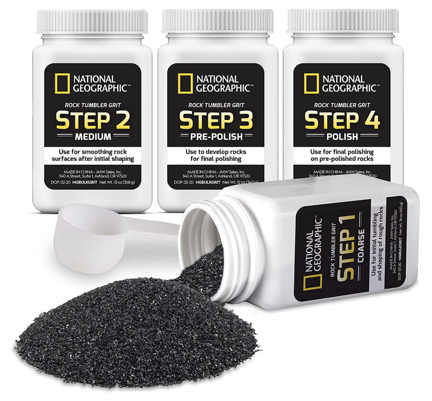
National Geographic makes it easy by selling the four grits you need in a package. (I buy my grits from a lapidary shop.)
Polishing rocks is why I bought mine about 3 years ago. I bought it as a kit, with everything I needed to get started. It’s a good thing I did. While some folks seem to think that the tumbler does all the work, it’s the variety of grits you need to use as tumbling media to grind down the rough edges of the rocks and eventually bring them to a high polish.
The process takes about four weeks, during which time the tumbler operates pretty much nonstop. (This isn’t something you want running inside your house or apartment, folks.) Every week or so, you dump out all the rocks, water, and grit — but not down the drain! It can permanently clog your plumbing! — wash the rocks and tumbler thoroughly, and add the rocks and the next higher grit with water back to the tumbler. Then another week of rattling around in the rubber barrel before you repeat the process again. And again. If you have the right rocks (or combination of rocks) and do everything right, you wind up with randomly shaped shiny rocks after about a month of tumbling.
Interested in working with stones? You should check out
Kingsley North, which sells all kinds of rough and polished rock and the equipment for working with it, including tumblers. You can get a good deal on a
Lortone 3A rock tumbling kit there.
(If you’re really interested in rock tumbling, here’s a great article on RockTumbler.com: Rock Tumbler Instructions.)
I first ran mine with a combination of rose quartz (pink) and sodalite (blue) stones, got excellent results, and gave the stones away to kids shopping with their parents or others at venues where I sold my jewelry. It was a big hit. But because it took so long and because I have so much else going on in my life, that’s the only batch I did. I put the tumbler away.
Burnishing Polished Metal
As I learned more about jewelry making and started branching out to metalworking, I learned that tumblers like mine with different media could be used to burnish polished metal.

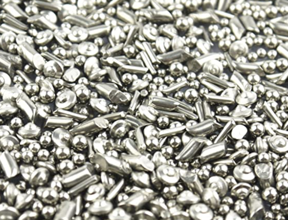
An example of stainless steel shot like what I use for burnishing metal in my tumbler.
The media used for this process is stainless steel shot, which can be bought by the pound. It ain’t cheap, but it’s completely reusable. I use just a pound of it in my 3-pound tumbler. I add water and a bit of burnishing compound — although I’ve been told that a few drops of Dawn detergent does the same thing. I throw in the jewelry to be burnished, close up the barrel, shake it up a bit, and then put it on the tumbler for up to an hour. The jewelry that emerges is amazingly shiny — it I polished it properly to begin with. Whenever I do a batch of new jewelry, I throw in my rings and bracelets for a quick and easy refreshing.
Of course, I can’t do this with any jewelry that contains stones. Although some stones may survive, many others would not. It’s not worth taking a chance.
“Honing and Highlighting”
This past winter, I took a bunch of jewelry making classes in Tucson, AZ. One of the instructors told us about a product she uses to finish “antiqued” metal jewelry: Hone & Highlight.

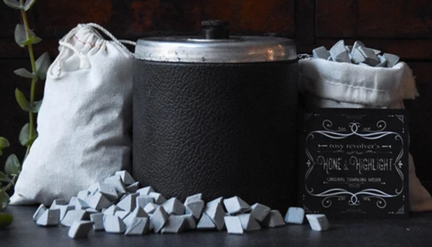
Yes, I lifted this artistic product photo from the Hone and Highlight website. I hope they don’t mind; I’m doing it to send them customers.
I tracked it down online. Hone and Highlight is a silicon carbide with ceramic tumbling media that gently rubs the chemically blackened metal to remove the color from high points and roughen up the metal just enough to give it a satin finish. You add it with the jewelry to be finished to a tumbler barrel, cover it with water, and add 2 drops of Dawn dish detergent. Then tumble for up to 24 hours.
(And no, I don’t know why everyone says to use Dawn but they do. They never say Palmolive or suggest some sort of generic. They always say Dawn. I buy Dawn.)
What I like about this product is that it gives my “antiqued” jewelry a consistent finish that I really like. It also keeps my hands clean. I’ll be frank: using a polishing pad to rub liver of sulfur off jewelry is a tedious, messy task that seldom gets consistent results. This never fails me. Best of all, I can do jewelry in batches, which makes good use of my time (and tumbler).
Again, I can’t use it with any jewelry that includes polished stones. Who knows what might happen to the stones?
Three Jobs, One Barrel?
I soon realized that with three different jobs I wanted to do with my tumbler, each job requiring different media, it might be handy to have more than one tumbler barrel. So I started shopping around for one.

Spoiler alert! This is junk. Don’t buy it.
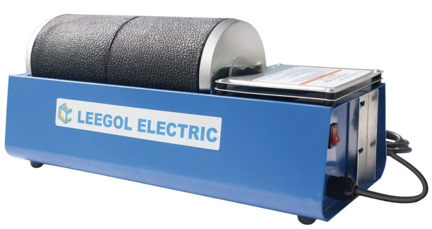
My search led me to Amazon (where else?). They had Lortone 3A tumbler barrels, but they weren’t cheap. They also had a Leegol 2-barrel tumbler with a very similar design. With a coupon, it wound up being cheaper than two Lortone barrels (without the tumbler). It seemed like a good deal — after all, I could be tumbling rocks in one barrel (keeping in mind that it ties up my tumbler for a full month) while burnishing or honing metal in another. So I bought it.
It arrived non-functional with a broken spare belt. I fiddled with it and got it running. But what interested me more was the fact that the barrels seemed to be compatible with my Lortone 3A. They had cheesier inner lids, but they worked. I had the extra barrels I wanted. And since I didn’t have any need to run two barrels at a time, I kept using the Lortone.
Leegol Fails the Test
Fast forward to this week.
I started wondering if I could make beads by using my tile saw to cut local obsidian slabs I had into roughly consistently sized rectangles, tumbling them for a polish, and then drilling them. This would be a project that took time and the sooner I started, the sooner I finished. So I got out my tile saw, cut a thick slab into strips, and then cut the strips into flattened squares. I grabbed all that, set it up in an empty tumbling barrel with the proper grit and some water, and put it on the double-barrel tumbler. I figured that I’d let it run around the clock (as it needed to for the rocks) and, if I needed to do another job with another barrel, I could add it to the running tumbler platform without disturbing the rocks or firing up the Lortone.
Makes sense, eh? Good use of equipment.
And it actually worked out like that, at least for a few days. I made some jewelry earlier this week and put it into a barrel with the honing media for about eight hours. Rocks and bracelets tumbled side by side. I pulled the bracelets off when they were “done” and the rocks kept rolling.
Until sometime Wednesday night.
On Thursday morning, when I went downstairs to let my pups out, the rock tumbling sound I’d become accustomed to hearing from my garage was oddly quiet. I checked. The tumblers motor was running but the barrel wasn’t spinning.
I plugged in the Lortone and got the rocks moving again.

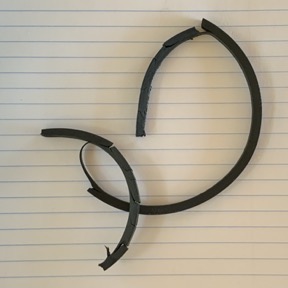
This belt lasted fewer than four days.
Later, I brought the new tumbler upstairs and took it apart. The rubber belt had broken into several pieces. And the spare was broken, of course.
My lesson: You get what you pay for.
(Which is something I’ve known for a while but periodically choose to forget.)
I ordered new belts for the tumbler. They come in packs of 12, likely because they’re so crappy they don’t last more than a week each.
Today I ordered spare belts for my Lortone, too. It’s more than three years old and still on its original belt.
