A look at some Sonoran desert vegetation.
I’m camped out in the desert south of Ajo, AZ for two nights. This video takes you on a tour of the Sonoran desert vegetation around my camper.
Want more videos? Subscribe to my YouTube channel!
A look at some Sonoran desert vegetation.
I’m camped out in the desert south of Ajo, AZ for two nights. This video takes you on a tour of the Sonoran desert vegetation around my camper.
Want more videos? Subscribe to my YouTube channel!
A map of where I’ve traveled so far.
I’m in Tucson now, in the Ringtail dry camping lot of Catalina State Park. I love this park, which is nestled into a little canyon where I can easily fool myself into thinking that the nearest Walmart isn’t less than 2 miles from my camper door. I’m not terribly fond of the campground, though, since the sites are tiny slots and, for some reason, my picnic table and fire ring seem to be located more conveniently for the slot next door. I will admit that it’s a lot nicer than the gravel parking lot I stayed 5 nights in in Quartzsite last week. At least there’s desert out my back yard — instead of a yahoo with a toy hauler and dogs that won’t quit barking.

Here’s where I stayed last night: at a dispersed forest service camping area southeast of Apache Junction, AZ. It was wonderfully quiet — until the shooters camped about a half mile away woke up and started shooting again.
I was trying to visualize where I’d been so far on this trip and decided to enlist the help of GoogleMaps. I took a screen shot of the map covering the area I’m in and drew in lines for the roads I’d traveled, then red dots for where I’ve stayed and blue numbers to indicate how many days at each place. The numbers don’t add up — there’s about 4 days unaccounted for — so I likely spent a few more days at certain locations than I think I did.
Anywhere, here’s the map:

Another video blog entry from my trip.
I’ll let the video say it all. Here it is, followed by the script I was so obviously reading. (Sorry! I’ll work on eye contact.)
Greetings! Maria here with Lily and Rosie the dogs and Turtleback 2, my trusty truck camper, reporting in from the BLM Holtville Hot Springs near Holtville, California.
We got here nearly a week ago, looking for a warm place to spend a few days. I’ve been coming here for the past six or so years — although I didn’t come last year — so I know the place pretty well. The hot springs is at a BLM Long Term camping area. That means you can pay $40 to camp for up to two weeks or $160 to camp for up to 7 months. I paid for the two-week pass, even though I only expected to stay a few days.
The campground is inhabited by mostly retired folks in all kinds of rigs. Most of them are decked out with solar panels for power. There are also some full-time RVers who either live here a few months or pass through like I do. The campsites are nicely spread out and relatively private. The place is quiet because most folks don’t use generators and it’s not the kind of place that would appeal to rowdy folks.
The main feature here is the hot springs, which is just outside the camping area unfortunately close to Interstate 8. The soaking area consists of three tubs. The large one is very deep — I’m 5 foot 8 and it goes to my shoulders — and usually the hottest one. That one’s overflow goes into a smaller tub that’s shallow and is usually the coolest of the bunch. Those two are both concrete. The third one, which is new to me, is a standard stock tank that can comfortably seat three people; its temperature varies on how recently it was filled.
The hot water comes into the tanks from a Frankenstein’s monster of pipes, valves, and hoses. Below the surface of the largest tub is the valve with the hottest water because it’s closest to the source. From there, the water also goes up a vertical pipe to feed another valve with cooler water (because it’s going through the air before it hits the tub) and finally a rotating shower head. Along the way, there’s a valve and a hose to feed the stock tank.
The whole setup is cleaned weekly on Tuesday mornings by a team of volunteers from the campground using a truckload of equipment. They drain all tanks and use a power washer to clean their surfaces. In the old days, they used to put spa chemicals into it, but they don’t do that anymore. Now they just refill the tanks and they’re good to go for another week. Because fresh water can always be added, the water flushes through nicely and doesn’t really get too gross.
All of the area’s overflow drains into a beautiful pond surrounded by palm trees. I used to see ducks in here, but I haven’t seen any so far this year.
I recommend this place if you don’t mind a more rugged hot springs experience. The tubs are nice but they are shared. Clothing is required — if you strip down, you will be asked to dress. You’re also expected to shower before entering any of the tubs. Common courtesy prevails.
There are a number of hot springs sources in the area. Nearby, there’s a geothermal plant that I can sometimes hear humming if I go out at night and there’s supposed to be another hot spring about 10 or so miles north of here that isn’t quite as nice as this.
My pups and I will be here a day or two longer. This has been my most pleasant stop so far, with great weather, lots of sun, two hot tub soaks a day, and plenty of biking and walking. And the Internet access on my mobile devices is wicked fast. I’m not looking forward to moving on.
Let me know what you think about this video in the comments. If you’d like to see more — including livestream video from Quartzsite, AZ during the big rock shows — please subscribe! And check out my blog for more details about my winter travels this year.
See you!
Some luxury camping followed by three nights at a remote beach.
[Note: I had aspirations about vlogging my trip this year, but the response has been pretty disappointing — too disappointing to put a lot of effort into it. Sorry, but I’m really not interested in spending hours creating videos that 25 people watch. I’d rather spend an hour on a blog post that those same 25 people are likely to read — or at least look at. So here I am.]
When I’d last checked in, I’d just resolved my battery issue. Or thought I had. I didn’t know because I camped that night at Willow Beach where I had a full hookup and didn’t have to rely on my batteries at all. That was Thursday, December 16 — the end of my first full week on the road.

Here’s my camper on its concrete pad at Willow Beach. If you need a campground with a hookup, this is a nice one.
Willow Beach is one of my favorite campgrounds in the southwest. High up a canyon overlooking the Colorado River, it has extremely well maintained and nicely spaced campsites that include electricity, water, and sewer hookups as well as a sturdy picnic table and fire pit/grilling area. There’s also showers (with heated rooms; imagine that!) and a laundry facility. The only drawback is that it’s crazy expensive: $60/night is the regular rate and tax gets added to that. I saved a few bucks with my Good Sam membership but seniors 62 and older who have the Senior Pass for National Parks save 50%. I suspect that’s why it’s so expensive: so that when the majority of users show up with a pass, they can still get a reasonable amount of money for the sites.

The lower half of the Willow Beach Campground. My rig is in about the middle of this shot. I had a nice view down into the canyon and could kinda sorta see the river.
The campground also makes a good starting point for boat trips up the river toward the dam or down the river into Lake Mohave. I have made the boat trip from the campground up to Arizona Hot Springs twice — most recently last year with my friend Bill — and would have done it again this year if (1) it wasn’t so damn chilly and (2) the water levels were high enough to permit upriver travel. When they told me that upriver travel was currently not allowed, I didn’t bother renting a boat there.

The laundry room at Willow Beach campground. I washed and dried a load of laundry for $4.
I had a nice, short stay in the park. In addition to enjoying my electric heater (which I can only use when plugged in), I also took advantage of the shower and laundry facilities. Before leaving on Friday (December 17) morning, I filled my fresh water tank, filled one of my 6 gallon water jugs, and dumped my gray and black water tanks, thus prepping me for another 5 to 7 days of boondocking.
On the way out of the area, I stopped for a while to visit the Willow Beach Fish Hatchery, which I’m pretty sure has existed longer than the campground and boat facilities. I walked around the tanks for a while, spoke briefly to one of the workers, and watched the fish being fed. The two species they were currently rearing were rainbow trout and endangered razorback sucker. As water levels rise, they’ll release fish into the river. This is downstream from Hoover Dam, so they’ll wind up in Lake Mohave — the body of water between Hoover and Davis Dams.

The Willow Beach Fish Hatchery.

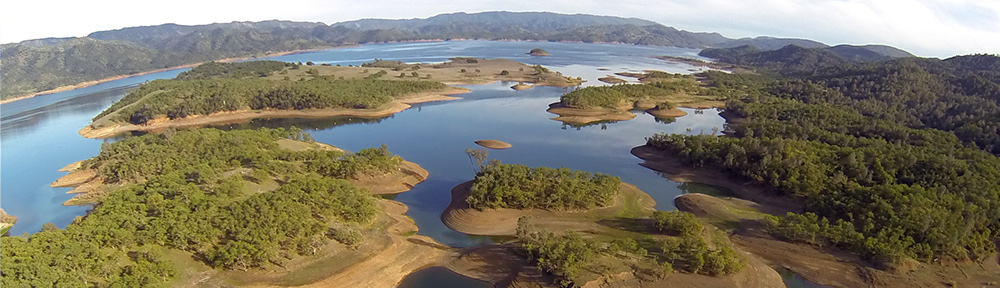
Kingman Wash camping area (the blue dot here) is at the end of a 3-mile long, hilly gravel road.
I was mostly curious about Kingman Wash, which, for the record, is not near Kingman, Arizona. To get there, I had to backtrack up Route 93 to the first exit on the Arizona side of the Colorado River. From there, I got on a maintained gravel road that was hilly and, in some parts, kind of hairy. It climbed into the hills and then descended down to a dispersed camping area at the mouth of a wash on Lake Mead.
At one time, the area had a concrete boat ramp. The boat ramp is still there, but it’s nowhere near the water’s edge. Between it and the water is a lot of rough gravel. And then there’s a sand beach along the water’s edge.
When I got down there on that Friday morning, there was only one car there and it was deserted. I scouted around a bit and then maneuvered my rig into position in the middle of the canyon on a relatively flat spot that dropped off toward the water.

My campsite at Kingman Wash. There was a steep drop behind me and an erosion channel about 50 feet southwest. No one was going to park anywhere near me.
I picked the spot for three reasons: (1) being in the middle of the canyon meant I’d get more sun than being on the southwest side (which would have been easier to park in), (2) being in the middle of such rough terrain minimized the possibility of some inconsiderate idiot parking right next to me, and (3) I had a wonderful view of Lake Mead out my back door and windows. As it turned out, I would have been a little better off farther northeast in the canyon; I wound up getting direct sunlight from just 8:30 AM to 3 PM. But I don’t regret parking where I did. It was perfect for me.

Here’s moonset on Sunday morning, shot from the back door of my camper.
I leveled my rig with blocks and immediately took out the generator and set it up. If the battery fix didn’t work, I wanted to be able to run the generator without a lot of fuss in freezing temperatures. As it turned out, 6-1/2 hours of sunlight was more than enough to fully charge both batteries and I didn’t need to run the generator even once. My battery issues were fixed.
My Internet connection was amazing. Four bars, 5G. Fast speeds. I edited and uploaded that last video.
A few other campers — all in Sprinter vans — showed up later in the day. They parked up the canyon on the boat ramp. As usual, I hit the sack not long after it got dark. Being a Friday night, some rowdy partiers showed up and made a large campfire on the beach. There weren’t very close to me and I didn’t hear much from them other than music and the engines of their trucks as they came and went. They left around 4 AM; I was awake.

It’s really unusual to see coyotes wandering around during the day, but this one was pretty bold. He made his first appearance within an hour of our arrival.
I should probably mention the wildlife. Other than birds, there were two animals in the area. The first was a coyote who made his appearances in the morning and evening. He came very close to my camper more than once, probably looking for food scraps or small dogs to take for dinner. I spotted him in the dark stealing food from the partier’s unattended campfire — I even pulled out my binoculars for a closer look. This was an animal who lived off the people who came down to camp. Needless to say, I had my pups on a leash any time we went walking when he might be around.

I shot this photo of the burros while sitting on the back step of my camper. The closest one was about 10 feet away. Feeding wildlife makes them this friendly. While it’s amazing to see, it’s really not good for the wildlife.
The other wildlife were burros. There was a single burro who wandered around by himself and a herd of six others that included one very young one, two slightly older ones, and three adults. They were bold and came up to whoever was around. It was difficult not to feed them — they really were cute — but feeding wildlife makes them dependent on us and that’s just not a good thing.
On Saturday, a bunch of cars and trucks came down and parked with their rear ends facing the beach in a long line. They turned out to be a scuba certification class. They suited up and spent a lot of time in the water. The herd of burros boldly went right up to them; the coyote was conspicuously absent.
Once they’d gone in the afternoon, two vans and another truck camper showed up, each parking along the beach, spaced apart for privacy. Some other campers showed up on the boat ramp. There may have been more farther up the canyon. Everyone pretty much kept to themselves. In general, people who like to be social don’t camp out alone in dispersed camping areas.

Here’s the beach on Sunday morning. The vehicles parked parallel to the beach (a camper truck and two vans) were actually camped there overnight. Can you believe the nerve of the scuba folks to park so close to them when there’s so much other space? Inconsiderate!
On Sunday morning, the scuba people were back. I watched in amazement as they parked where they had the day before, completely surrounding one of the vans and parking within 10 feet of the truck camper’s back door. It was extremely inconsiderate. There was plenty of room for parking without invading other people’s space. I can only imagine the guy in the van waking up to find people right outside his door. Apparently words were spoken later in the day and the van guy left in a huff.
Of course, I didn’t have to deal with any of that where I was because no one else was nuts enough to park where I’d parked.

Here’s the big picture at Kingman Wash on Sunday. My camper is the one in the middle of the shot on the hill. The white Sprinter van is at the end of the boat ramp.
I spent a lot of time inside my camper, mostly reading. It was cool out and really only comfortable outdoors when the area was in direct sunlight, so I busied myself with inside chores. I didn’t feel comfortable letting my pups out alone so they mostly slept.
We went on a few walks along the water’s edge on Saturday and Sunday, midday and in the evening. Although there were rocky slopes on both sides of the cove, the burros and the action of the water as it receded over the years had formed flat trails at various levels. They were easy to walk on and gave me various views of the area and beyond. On these walks I let my pups loose so they could run a bit; the coyote stayed out of sight. Beyond that, there wasn’t much hiking available from my camper.
I also spent some time chatting with the scuba folks and the guy in the truck camper. The truck camper guy was weird because when he settled in, he set up two chairs, side by side, outside the camper. I assumed he was with someone who was keeping her/himself busy inside. It wasn’t until we chatted on Sunday evening that I realized he was alone. (Maybe that second chair was for his dog?) He invited me to dinner — he was making spaghetti when I visited — but I declined. He was a nice enough guy but I just didn’t feel like that much socializing.
Meanwhile, the weather forecast was not looking very good. Skies would be overcast, rain was possible, and temperatures were dropping. I didn’t come south for cool weather. I came south for t-shirt weather. It was time to move on. I left on Monday (December 20) morning.
A handy index to all of the posts for 2021/22’s winter travels.
Updated 7-Feb-22