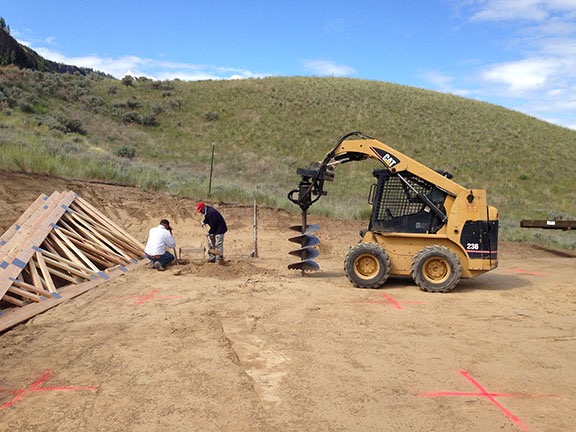
One of the last big projects to finish prior to final inspection.
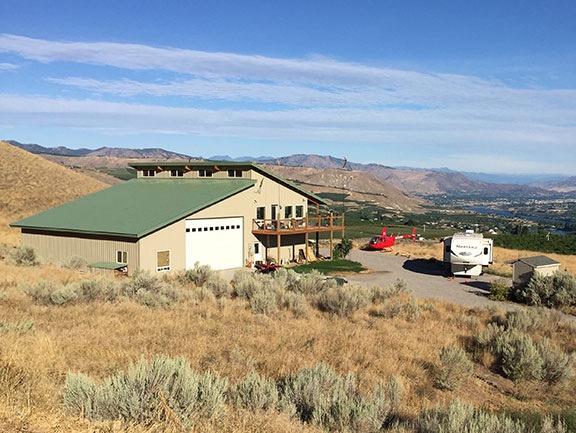
On May 20, 2014, I began blogging about the construction of my new home in Malaga, WA. You can read all of these posts — and see the time-lapse movies that go with many them — by clicking the
new home construction tag.
The living space in my home is small — less than 1200 square feet. I designed it to have a vaulted ceiling which climbs from about 10 feet on the north side to 18-20 feet on the south side. (One of these days, I’ll measure it.) My floor plan is simple, with a large great room on the east side and the bedroom, bathroom, and laundry room on the west side. A hallway on the south side connects these two spaces.

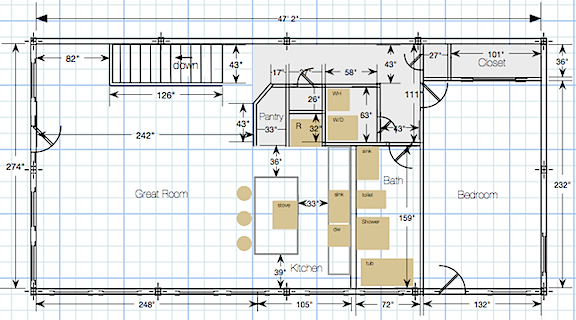
Here’s one of my working floor plans with some measurements. North is down in this image.
Because it made absolutely no sense to have 20-foot ceilings in the hallway and the bedroom closet and because I needed some way to access at least two of the four clear story windows at the top of the south wall (so I could open and close them for ventilation), I added a “storage loft” to the design. You can see it as the gray space in the above floor plan. While I was doing the design work, I envisioned this as a sort of shelf where I could store things that I didn’t want in the garage. But when the framing and drywall work was done, I wound up with a nice-sized room that I figured I’d use for my library — I have a lot of books, including 85 that I wrote — with a futon I had brought from Arizona that could be used for guests. Although the ceiling on the north side of the loft was only about 5-1/2 feet, there was plenty of headspace at the rest of the loft.
That put the loft into a sort of limbo area as far as the county’s building inspectors were concerned. It was clearly not a shelf, but it also was not a room. This was good and bad for me. Good, because I didn’t have to worry about putting in stairs, which I had not designed space for and bad because I still had to surround the entire loft with a guardrail that met county code specifications for height (at least 32″), openings (no larger than 4″), and durability (able to support the weight of a 250 pound person leaning against it. I basically had to build a rail like the one I’d put around my deck outside.
I was not looking forward to this job and, like most jobs I don’t want to do, I put it off. I put it off for a long time. Part of me was trying to figure out how to do it so it would be aesthetically pleasing — I didn’t want anything ugly in my home. The other part of me was just too damn tired of building. I’d already done a bunch of huge projects: I’d wired my shed, my shop, and my living space; I did 95% of the electrical finish work; I’d tiled the bathroom floor; I’d laid 1,200 square feet of Pergo flooring; I’d laid the composite decking and built rails for my 600 square foot deck; I’d set up shelves in various closets and rooms throughout my home; and I’d gotten about 75% finished with baseboard and door trim — a project that’s still in progress. I was worn out.
But putting a job off doesn’t make it go away. This was a job I needed to get done if I wanted a certificate of occupancy for my home — which I did. So by autumn 2015, I was trying to move it to the front burner of my life.
The Hard Part: Design
The hard part about the job was coming up with a solution that would not only be aesthetically pleasing but also allow airflow — some of my HVAC ductwork is up on the loft — be affordable, and be relatively easy to construct. Making that difficult was the fact that the larger of the two spaces was not rectangular, as shown in the above floor plan. I needed to make some adjustments during the framing stage to accommodate a ships ladder to access the loft. For various reasons, that required a sort of cut out. That meant that if I wanted to enclose the entire space, I’d have to have a rail that followed that cutout, with a gate at the top of the ladder.
I have to say that I wasted a lot of time thinking about that. And making measurements. And stressing over how I was going to adequately support each vertical post I needed when I didn’t really have anything to fasten it to. In the end, I decided to just run the rail straight across the top of the ladder, cutting off some of the loft’s floor space to form shelves. Since most of that space was in the low ceilinged area anyway, it wasn’t a big deal.

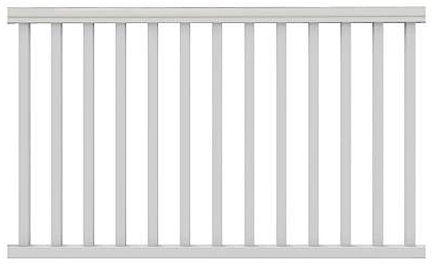
The railing system I originally bought. Ick.
As for how I’d build it, I started by looking at the easiest solution: a packaged railing system. Home Depot had one and I actually ordered enough to do the easier of the two rails: the one over the shelf in the bedroom. This was clearly a “shelf” — it was only 4 feet wide, over my closet and the linen closet — but because it was accessible from the larger part of the loft, it also had to be safeguarded with a rail. I bought a white metal railing kit on a special order from Home Depot and even managed to bring it all up to the part of the loft where it would be installed.
It sat there for at least four months. I just couldn’t bring myself to start installing it.
Why? It was ugly. It was designed for outdoors and it was white metal. Everything inside my building was mellow earth tones and wood. Why the hell would I put an ugly white metal railing inside my home?

Another, more attractive but also more costly option for the railing.
I went to Marson and Marson, the folks who had sold me my doors and had also provided much of the building materials — trusses, lumber, posts, etc. — that the builders had used to build the shell of my home. Rita, the special order lady, priced up another solution: horizontal wire railings. The wire could be combined with hemlock — the same wood I’d chosen for my doors and door trim — for vertical supports and top rails to give me the look I wanted. But by the time she priced up the wire, the special hardware and tools needed to secure it, I was looking at thousands of dollars and a ton of work.
When I balked, Rita suggested another possibility to work with the wood: powder coated “hog panels” from a company called Wild Hog Railing. This would give me essentially the same look I had on my deck outside, but the powder-coated metal would be a bit more polished looking than galvanized wire. I ordered up some panels with black powder coating and then started to think about holding them all together.
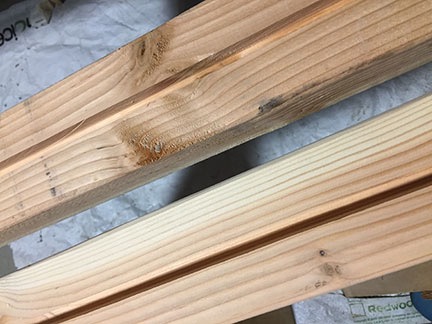
The wood was easy. My doors were hemlock and I’d been trimming them with hemlock trim pieces I bought at Home Depot and cut to size. I’d finished the doors and the trim around them with Danish oil (at Rita’s suggestion) and I really liked the way they looked. On a trip to Home Depot, I realized that they sold hemlock lumber — 2x4s, 4x4s, etc. I’d use 2x4s for the top rail, bottom rail, and side rails affixed to the walls. I’d use 4x4s to create support posts on either side of the gate, in the main loft corner, and at the center of the bedroom loft.
Fixing the vertical supports to the walls wasn’t a big deal — I’d find studs or use anchors. But the four 4×4 posts were a problem. I needed a way to fix them to the floor. I’d been looking for appropriate hardware for months and had been coming up empty. But the folks at Marson came to the rescue. They suggested a pair of brackets for each post that could be attached with lag screws to the 4×4 and through the Pergo floor to the underlying wood floor. I bought eight of the brackets and a box of lag bolts.
Trouble was, the hardware was metal colored. The wire for the railings would be black. When I pointed this out to the guy at Marson who was helping me, he suggested getting them powder coated. So on my way home, I dropped them off at Cascade Powder Coating. They had a bit of a backlog, but thought they could have them done within two weeks. That worked fine for me, since I didn’t have the wire panels yet anyway. The total cost to powder coat the brackets and lag bolts: $70.
Putting It All Together
Once I’d assembled the panels, hardware, and lumber, it was just a matter of doing a lot of measuring, cutting, and assembling.
I figured that I’d fit the panels into a grove I’d cut on the inside of the supports. So I went out and bought a dado saw blade set. For my table saw. If you’re not familiar with dado saws, they basically make it possible to cut a groove of just about any width into a piece of wood. But on assembling my new dado blades to give me the right width, I realized that the plate covering the blades didn’t have enough of a gap for the blades. Some research made it clear why: my table saw could not be used with dado blades. This is one of the drawbacks of buying low-end, home improvement grade tools.

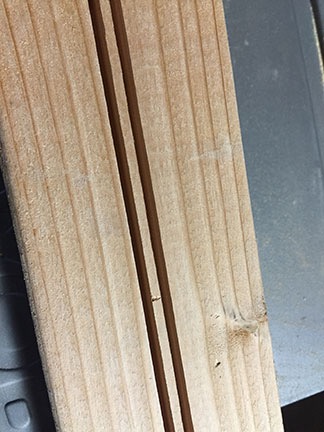
I had the guide set so that I could run the wood through once in each direction to create two grooves like this.
I realized that I could simulate a dado set by running each piece of wood through the table saw’s regular blade two or three times, shifted a tiny bit over for each pass. So that’s what I did. It wasn’t difficult, but it certainly wasn’t fun. And, when I had to do the 11-foot long 2×4 length for my bedroom loft’s top rail, I had to wait until I had company who wasn’t afraid of table saws. (There was no way I could get that long piece through by myself.) My electrician friend Tom and one of his buddies, who’d come by to help me with an outlet for my new freezer, helped guide that long piece through the saw three times.
I then adjusted the guide and ran the wood through a third time to cut away the piece between the two grooves.
Here’s the process I followed to prepare each part of the wood frame:
- Measure the space to be fitted. Then measure again. Do something else and then come back and measure one more time.
- Cut a length of wood to size.
- Run the wood through the saw blade 3 times to cut the groove. I got really good at setting the guide bar on my saw.
- Sand the length of wood with 80 grit and 160 grit sandpaper using an orbital sander. I have a belt sander but don’t like to use it.
- Wipe all the sawdust off the wood with a damp cloth and allow to dry.
- Coat the exposed sides of the wood with 2-3 coats of Danish oil. Allow to dry between each coat.
Prepping the metal was more straightforward: all I had to do was cut it. Fortunately, I had a 36″ bolt cutter I’d used to cut the fencing for my chicken yard. Still, it was hard work to cut it accurately. And if I screwed up, I’d be looking at buying another $50 panel. So I was very careful.

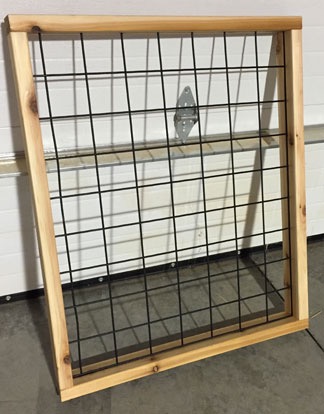
The gate was my proof of concept. I think it came out pretty good.
I assembled all the panels with screws, with two in each corner. I drilled pilot holes in every single one. The gate was the first panel I finished, since it did not have to be affixed to the wall or floor. In a way, it was a proof of concept. I was pleased with the way it turned out.
The rest of the rail had to be installed in place. That meant doing a lot of measuring on the loft, cutting and finishing in my ground-floor shop, and then carrying pieces up the stairs and the ladder I’d put in place for temporary access. By this time, it was mid-December and cold downstairs. It was hard to stay motivated. For some reason, I got it in my head that I wanted final inspection done before year-end, so that drove me and I got a lot done very quickly.
I worked through the main loft in just a few days. I had it down to a science. For each section, I followed these steps:
- Install the vertical posts against the walls. I used 2x4s and ran the screws through the groove so they’d be invisible in the finished product.

Here’s the post at the top of the ladder. And yes, I screwed right through the Pergo. I know you’re not supposed to do that, but at that point, I really didn’t care.
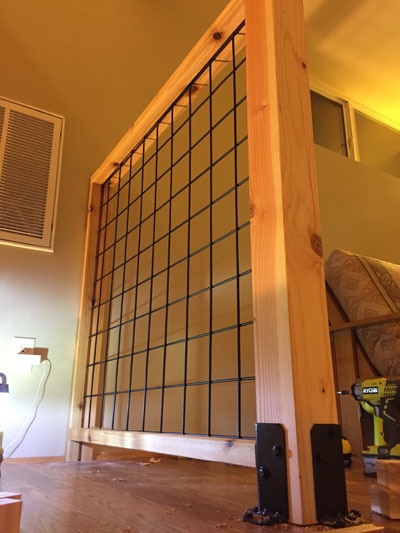
Install the freestanding posts. I used 4x4s and bolted each one in using two brackets and 8 lag bolts.
- Install the bottom rail. I used a pair of blocks cut from 2x4s to prop up the bottom rails while I screwed them into place.
- Measure, measure, measure, and cut the wire panels.
- Slide the cut panel into place.
- Set the top rail over the posts and wire panels and screw it into place.

Here’s the first panel installed.
I drilled pilot holes for every single screw I put in. I was not interested in splitting wood or stripping screws. I wanted it done right the first time. I had my drill set up with two drill bits I could quickly swap out and my impact driver set up with a screw driver bit and a socket that could be easily switched out. (Someone I knew once used to say that any job is easy if you have the right tools. It’s one of the few things he said that are worth remembering.) Because these tools are cordless, I didn’t have to deal with wires up there. But I did do a lot of crawling around on the floor.
I finished the main loft area just before I went away for Christmas. I go cross-country skiing up the Methow for Christmas. It’s become a bit of a tradition for me — this was my third Christmas away. Just me and Penny, winging it.

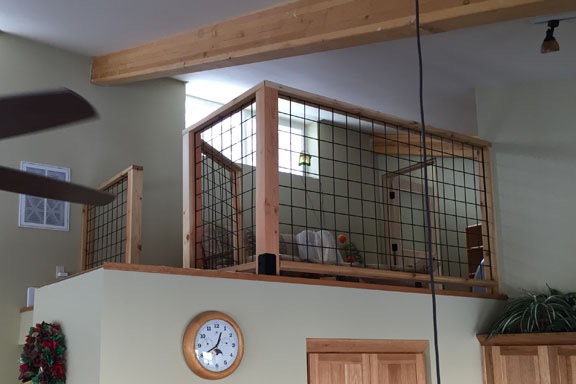
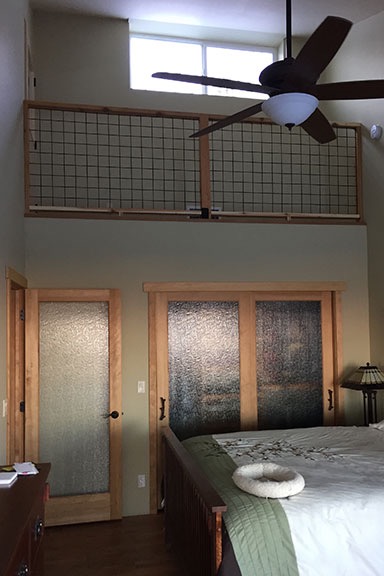
Here’s what the main loft’s rails looked like before I went away for Christmas. The gate is installed and ajar. As you can see, I still have a bit of trim to do up there in the shelf area.
When I got back, I still had the bedroom loft rail to do. All I had installed was the side and central vertical posts. The wood was grooved and cut, but hadn’t been sanded or oiled. But by this point, I’d run out of steam and was thinking only about my upcoming snowbirding trip. It was unlikely any inspector would come during the week between Christmas and New Year. So any thoughts I had about having the project finished by the end of the year were gone. I figured that if it waited this long, it could wait a little longer.
So I left everything just as it was and went on my trip.

The finished loft rail in my bedroom. The top rail is one continuous piece 130 inches long. It’s the one I needed help getting through the saw three times.
My trip included a week home, mostly to relieve my house-sitter so she could go on a trip and to check on things. But while I was home that last week in January, I figured I may as well finish up the rail. It only took about 6 hours split over two days. And then I was done.
It’s a funny thing about the jobs I’ve done at my home. Before I even start, I spend a lot of time thinking about them, planning them out to minimize the chances of doing them wrong and then having to redo them. Then I eventually get to work and, in many cases, work on them for days or weeks or even longer. And then one day, I’m just done. It feels weird to be done because I’ve been so consumed with the project, thinking about it and working on it for so long that there’s suddenly a hole in my life when I don’t have it to work on anymore.
But then I get on to the next project and it’s all forgotten.