It’s not the money — it’s the challenge.
I’m one of the few people I know who is on the cusp of two careers.
My second career, as a freelance writer, has kept me busy since 1990, writing books and articles about using computers. It’s a great career for me, mostly because the work seems to come naturally, so it isn’t very difficult, and because I get to buy a lot of cool computer toys to write about. (Of course, it would be better if someone just gave me those toys, but at least I have legitimate writeoffs.) But as printed publishing begins to wane and the computer users throughout the world mature beyond the need for beginner to intermediate books, my writing opportunities fade. I’ve embraced new media like ebooks and digital training via screencasts, but I believe my heydays as a computer how-to author are over. Sure, I can continue to move forward and earn a comfortable living, but it just isn’t the same as it was — for more reasons than I’m willing to discuss here.
 My third career, as a helicopter pilot, began to get interesting back in 2001, when I got my commercial rating. That’s when I was allowed to fly for hire. In 2005, when I took delivery of my Robinson R44 Raven II and got my FAA Part 135 Certificate, things really took off — if you’ll pardon the pun. In addition to the tour and air-taxi work I get primarily out of the Phoenix area — if I had to do all my flights from Wickenburg, I’d starve — I also get a great variety of other challenging jobs: aerial photography, search, survey, etc. Not only does this keep the flying work interesting, but it’s enough to cover all the costs of owning and operating the helicopter. Lately, it’s even been earning a tiny profit.
The two careers fit perfectly together. I don’t hang out at an office at the airport, waiting for people to come in. (I almost got an airport office here in town. Fortunately, I had enough brains to turn down that opportunity.) Instead, I go about my writing business until the phone rings. Then, when the flight is scheduled, I put down whatever I was working on, head out to the airport, preflight, pull the helicopter out, fuel up, and take care of business. When I’m done, I put everything away and come back to my office to continue work. Or to take the rest of the day off.
Summer Jobs
 I got my first “summer job” as a pilot working at the Grand Canyon in 2004. I wanted a new experience — and I got it. I also got the benefits and drawbacks of working as an employee, which is something I hadn’t experienced since 1989 when I left my last “real” job to go freelance. Benefits: steady paycheck, social interaction, learning new skills with guidance (as opposed to self-teaching). Drawbacks: fixed work day and work week, social interaction, company politics, relatively low pay.
I need to comment here on the low pay aspect of that job, since so many people seem to zero in on it. For me, it was low pay because I could make a lot more doing my other work. In fact, sometimes I did. For example, if I were a “spare” pilot who was not scheduled to fly except perhaps at lunchtime, I’d bring along my laptop and spend the day writing articles for one of my editors. If I knocked off just two articles in a day — which I could easily do — I’d earn just as much as I would flying for an entire week. And since I was accustomed to making more money, I had to keep doing my other work to maintain my standard of living. So on my weeks off from the Canyon, I’d come home and work on a book. Frankly, just about all of my pay from that summer job went to paying my income taxes on my other job.
This year, I’m flying in Washington state, doing some cherry drying. Because I’m operating my own aircraft and have a lot of associated expenses, the pay is much better — as long as I can collect it. So pay is not an issue. The work is challenging — I’ll be getting some special training in advance — and even a bit dangerous — I’ll be wearing a helmet and Nomex flight suit. And I’ll be living in a trailer either with or without a hookup, far from home and family and friends.
At the same time, I’m scheduled to write two books, one of which is a revision. Those two books are likely to earn me the same amount of money that the whole season in Washington earns me.
Why Bother?
So you might wonder: why bother?
These summer flying jobs offer benefits that I couldn’t get any other way: regular work that comes with a paycheck and tasks that challenge me to perform beyond what I normally do. By meeting these challenges, I learn and perfect skills.
The regular work part is a no-brainer. If I stayed here in Wickenburg for the summer, I’d have to deal with the brutal heat. Would you want to fly in an un-airconditioned aircraft when it’s 110°F outside? (That’s about 41°C for you metric folks out there.) I’ve done it and I don’t want to do it any more than I have to. And most potential passengers are smart — they know that summer heat is not just uncomfortable, but it causes turbulence that makes for a rough ride. So not only are you slow-roasting under a plastic magnifying glass-like bubble, but you’re being bounced around enough to make you sick. And it isn’t as if there’s a lot of this work. Last July I only had one paying gig that didn’t even take in enough money to cover my helicopter loan payment.
So if it’s regular work I’m after, leaving the area is the obvious solution. But it’s the challenges that I really want.
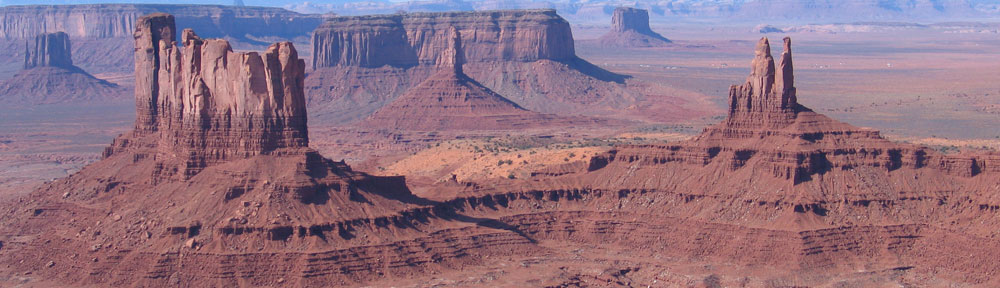
Flying at the Grand Canyon in the summer of 2004 taught me more about flying in wind, high density altitude, and poor visibility than any other flying I’d done up to that point. I’ve used those skills numerous times since then to operate in conditions far windier than I would have without that experience and to safely make my way through questionable weather conditions. I also picked up tips about ground safety, passenger briefings, and just dealing with passengers, as well as the entire business of flightseeing.
This year, I’m entering a whole new world of agricultural flying. It’s more precise, more dangerous, more lonely. My first field has 108 acres. Depending on how the grower wants me to fly, it’ll take 2 to 3 hours to dry it all. That’s 2 to 3 hours hovering over the tops of trees, flying a precision pattern at a constant speed and altitude. When this is over, I expect to be able to hover in any direction in almost any condition. That could set me up for other agricultural work, like frost control or possibly even spraying.
This is why I look for summer jobs. To learn more and to develop my flying skills.
Career Pilots Need to Get Serious
And I think this is why I always advise new pilots to include a season at the Grand Canyon or some other challenging environment as part of their career path. Sure, a pilot could build 2,000 hours as CFI working at or near sea level in a place where the weather is close to perfect. But what skills — beyond autorotations and other emergency maneuvers — would that build? It’s the challenging work that pilots should be hunting down. The flying that takes them to the next level.
The flying that makes them better pilots.

 The direct route (red on the map) would take us northwest through Arizona, Utah, Nevada, and Oregon before hitting Washington state. I think it calculates out to 9 flying hours. The big problem with this route is that there’s nothing along the way — just a lot of barren desert. The airports are few and far between and the fuel stops are even more rare. In fact, if we went that way, we’d be basically flying from one fuel stop to the next with few, if any, other landing opportunities in between. If we had a problem and had to land off-airport, we’d be in the Middle of Nowhere (note the capitals — I’m talking about the actual place) and it could take a while to get help. Think Steve Fossett.
 My third career, as a helicopter pilot, began to get interesting back in 2001, when I got my commercial rating. That’s when I was allowed to fly for hire. In 2005, when I took delivery of my Robinson R44 Raven II and got my FAA Part 135 Certificate, things really took off — if you’ll pardon the pun. In addition to the tour and air-taxi work I get primarily out of the Phoenix area — if I had to do all my flights from Wickenburg, I’d starve — I also get a great variety of other challenging jobs: aerial photography, search, survey, etc. Not only does this keep the flying work interesting, but it’s enough to cover all the costs of owning and operating the helicopter. Lately, it’s even been earning a tiny profit.
 I got my first “summer job” as a pilot working at the Grand Canyon in 2004. I wanted a new experience — and I got it. I also got the benefits and drawbacks of working as an employee, which is something I hadn’t experienced since 1989 when I left my last “real” job to go freelance. Benefits: steady paycheck, social interaction, learning new skills with guidance (as opposed to self-teaching). Drawbacks: fixed work day and work week, social interaction, company politics, relatively low pay.