Cramming in as much of the Big Apple as I can swallow in one day.
At the end of October, I went to the New York Metro area on family visit. You can read about most of the trip here.
On Monday, October 28, my last day in the area, I went into the city, leaving Penny behind again. My sister-in-law dropped me off at the Rahway train station and I took a New Jersey Transit train into Penn Station. It brought back too many memories of my days as a commuter going into New York from Queens and later from New Jersey — especially when I joined the crush of people filing onto the escalators to street level.

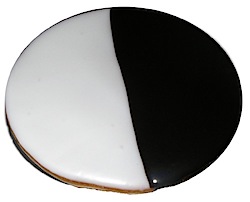
This public domain image of a black and white cookie by Ben Orwoll is from Wikipedia. The black side is really dark brown (chocolate).
I caught sight of a bakery on the main concourse and detoured into it. I picked up a real cheese danish to eat along the way and a real black and white cookie for later. (You can’t get a good black and white outside of the New York area and this one was like heaven. Have I mentioned how much I miss the food in New York?)
I got back into the crowd and funneled onto the escalator to street level. I stepped outside and paused for a moment to get my bearings. It had been a long time since I stepped through that door — maybe 25 years? I immediately saw the Hotel Pennsylvania (owner of the phone number in the Glenn Miller song, “Pennsylvania 6-5000“). Then the 7th Avenue and West 33rd Street signs. I was at Madison Square Garden.
Not wanting to look like a tourist, I started walking uptown at standard a New Yorker pace — i.e., fast. I had a mission — to sell my engagement and wedding rings — and I wanted to head uptown, possibly to the place the engagement ring had been purchased 29 years before. I figured I’d take Seventh Avenue up to 57th Street and then head east. I’d stop along the way and see the sights I hadn’t seen in a long, long time.
The city looked the same as the last time I’d been there. Well, not exactly the same, of course. But if asked to identify what was new, I probably couldn’t do better than guess. Some parts of New York are ageless.

I walked just over three miles before hopping on the subway. It felt good.
My route took me past Macy’s and up through the garment district. I’d worked for a few months in the garment district back around 1983 when I audited the Taxi and Limousine Commission for my job with the New York City Comptroller’s Office Bureau of Financial Audit. Other than pedestrians walking to work at 8:30 in the morning, there wasn’t much activity on the streets. In a few hours, however, there would be men pushing racks of clothes up and down the avenue.
Don’t think the streets weren’t crowded — they were. If you’ve never been to New York, you can’t imagine the foot traffic on the sidewalks in midtown Manhattan. Thousands of people, all going somewhere. And tourists, wandering about, looking like tourists.
Tour sales guys prey on them, trying to sell all kinds of city tours and show tickets. I like to think that most of them are legit, but I’m sure there are more than a few con artists making the rounds. One approached the man next to me as we were waiting for a light. I didn’t hear his come on line, but I did hear the man’s indignant response: “I live in New York.” None of them approached me. In my jeans, walking shoes, and flannel jacket I looked like a native. After all, I was a native. (And glad I still looked like one.)
It felt good to walk the streets of New York again. Really good. Not good enough to make me want to move back there, though.

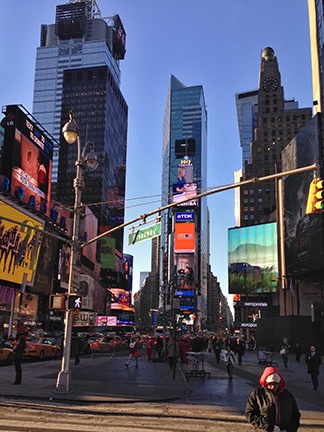
Times Square, before the tourists arrive.
I reached Times Square and paused to look around. It was pretty empty; the tourists would arrive later. I snapped a photo to remember the place, then continued on Seventh. At one point, a man stopped me to ask if I’d be willing to answer some questions. I said no even before I saw his companion’s FoxNews microphone. Real New Yorkers don’t get interviewed in Times Square — and I knew I’d be wasting my time giving my opinion to Fox News anyway.
I continued north through the Theater District and turned right on 57th Street. I stopped at a jewelry store to take care of business, then continued on my way. When I reached Fifth Avenue and saw the Apple Store, I realized it would be a great opportunity to descend into the cube (for the first time) and see about getting my phone fixed by a “genius.” (The battery life had gotten very bad.) So I stopped in for a visit. While waiting to schedule an appointment, I helped the guy on line behind me fix his locked up iPhone by simply teaching him how to reset it. Because I couldn’t get an appointment that morning in that store, I made one for 10:30 at Grand Central. Then I climbed back to street level and continued on my way.
I got as far east as Third Avenue. This wasn’t far from where a college boyfriend’s parents had lived — 58th and First. I’d spent a lot of time there in my senior year (1981/1982). Although the place felt the same, I didn’t recognize any landmarks. I turned south. But not liking the neighborhood on Third, I headed west and took Madison south. I made one more stop at a jewelry store on Madison before making my way to Grand Central.

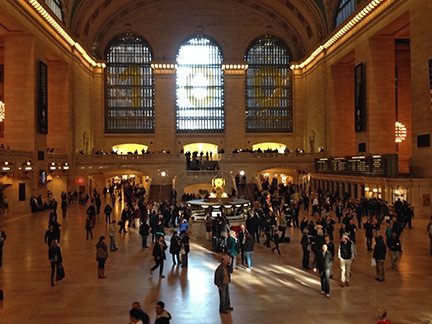
The main concourse at Grand Central Terminal. The Apple Store is under those big windows.
If you’ve never been to Grand Central Terminal (not Station), the next time you’re in New York, go see it. If your time in the city is limited, skip the touristy sights like Times Square (big deal) and (dare I say it?) the World Trade Center site — Grand Central is a magnificent piece of architecture celebrating its 100th birthday this year. Wander around on the main concourse and in the myriad of tunnels leading to surprising locations. Admire the famous clock. Visit the food court down below. And step into the Apple Store.
This is, by far, the best Apple Store I’ve ever been into. It sprawls along the east end of the upper level of the terminal, in full view of the main concourse. It’s an amazing mix of old architecture and new technology, two different worlds of design with 100 years separating them, melding together in a delight to the mind and senses. Really. It’s pretty cool.
At the Apple Store, I learned that my phone battery is almost bad enough to be replaced. Almost. I have 32 days for it to get worse and be replaced under warranty. (I guess I’ll be driving into Seattle later this month.)
Subway Journey
When I finished up with the Apple Genius, I headed down into the subway system. I bought a Metro Card, which I’d never had before. When I rode the subway, we used tokens. I think it was 75¢ then.
Neighborhood ethnicity is strong in New York. Maybe that’s why I’m not so critical of immigrants — I grew up in a true melting pot.
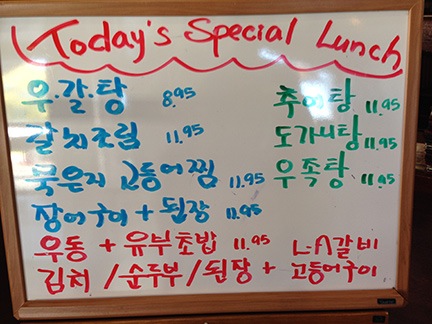
I took the train to visit some friends in Queens. I hadn’t seen them in a very, very long time, although we’d been in touch by phone and through Facebook. We swapped stories and memories. There was lots of laughing and crying. We walked to lunch at a Korean restaurant where we were the only non-Asians. The food was great. Even the walk was nice — fall colors on quiet streets.
And I got more of the closure I realized I was looking for. It felt good but sad at the same time. Is that what they mean by “bittersweet”? I think so.
All too soon it was time to head back into the city. My friend dropped me off at the subway station, I swiped my Metro Card, and I climbed on board a Manhattan-bound train.
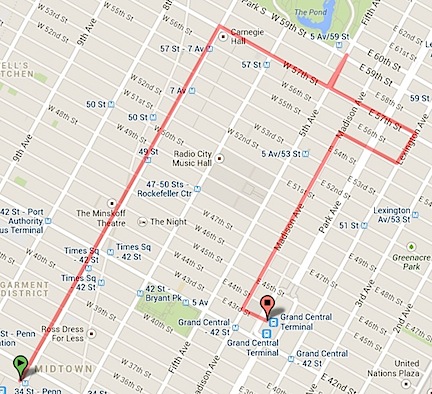
Downtown
Here’s where I walked downtown. It’s nearly 2 miles.
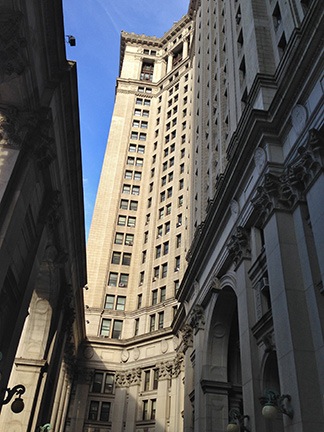
I changed trains at Grand Central, switching to an old IRT express train heading downtown. A while later, I stepped out on street level in the covered portico at the Municipal Building, where I’d worked in my first job out of college.
Built in 1913, the Municipal Building is home to many New York City government offices. My old office window is the one near the top dead center in this photo; the window air conditioner is still there — I hope its a newer one!
The place had changed. The building lobby was empty, with just security guards and metal detectors. The newsstand near the entrance — where I’d bought a copy of the Daily News the day the Space Shuttle Discovery exploded on takeoff in 1986 — was gone. I was at an employee-only entrance and it only took a minute for security to notice me.
I told them I used to work there and that I was just taking a peek. And then I left. I did get a photo outside, though. So weird that so few people were around on a Monday afternoon.
I crossed the street toward City Hall. The entire park was fenced off, supposedly for City Hall renovations. A group of black and hispanic men were entertaining a small crowd with synchronized dancing and acrobatics while hip hop music blared. I watched for a while, then wandered on, remembering the “break dancers” I’d seen performing on pieces of cardboard on sidewalks nearly 30 years before.
I crossed Park Row and turned down Nassau Street. Years ago, I’d often come down that street on my lunch break for banking or shopping or lunch. I recognized very few of the storefronts. Only Wendy’s remained from those days.
New towers over old in this shot down a side street in the Financial District of New York.
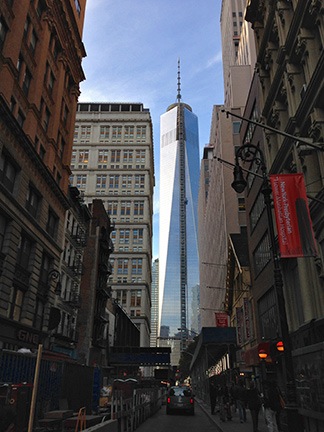
At one point, I looked west down a side street and saw something that hadn’t been there at all in the 1980s: Freedom Tower. Still under construction, it filled the view, its glass and steel a stark contrast to the much older buildings on the street. When I’d worked in that neighborhood, one of the two Twin Towers — possibly both of them — would have been visible down this street. Even though I didn’t live in New York when the towers fell, I think I’m nearly as scarred by 9/11 as most other New Yorkers. This was my first chance to see the new building and I liked what I saw. It was different. We need different. We need to move forward.
Church Visit
A while later, I turned right and joined back up with Broadway. I turned south toward Wall Street and crossed at Trinity Church, where I bought bought a bag of fresh, hot, honey-roasted peanuts from a street vendor. (Do you know how I feel about food in New York?) On a whim, I went into the church. There were some tourists there, talking in hushed tones. One woman was wandering around the altar — which somehow offended me. (Yes, I’m a non-believer, but I do have respect for places of worship. To me, the alar and everything beyond it was off-limits, restricted to church officials. I guess I’m wrong, but it still bugged me to see that woman wandering around back there.)
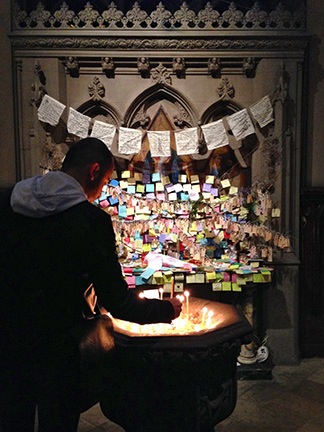
I lit a candle here for my grandmother, godfather, and mother-in-law.
I wanted to light a candle for my grandmother, which I always do when I’m in a church that has an area set aside for that. I know she would have liked it. There was a special place set up — the Altar of Remembrance, it was called — where you could leave notes and photos for people who were gone. There was also a book where you could write down the names of the departed so they’d be mentioned in a Mass on November 4. I wrote three names: Maria Soricelli (my grandmother, who passed away in 2002), Jack DeGaetano (my godfather, who’d passed away the previous Monday), and Julia Chilingerian (my mother-in-law, who passed away during the summer). Then I deposited a dollar into a small box nearby and took a tall, skinny beeswax candle. I lit it from another candle and planted it in the sand in front of the altar. I lingered for a while while my eyes teared up. Then I took a quick picture and hurried out the door.
I continued down Broadway as far as Battery Place. That was also blocked off, although I don’t know why. I could see the damaged sculpture that had stood between the Twin Towers, moved into the park during cleanup years ago. I walked past the fan building for the Battery Tunnel — known to movie fans as the headquarters of Men in Black — and turned up West Street. From there…well, I felt done.
The Path Back
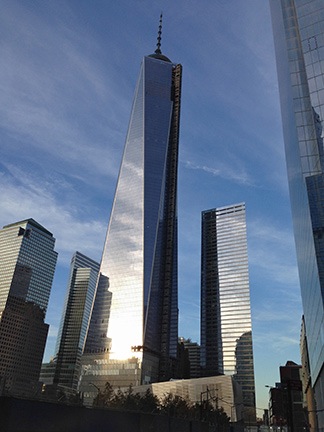
Freedom Tower, still under construction, in the late afternoon light. I guess I am a tourist after all.
It was after 4:30 PM and I realized that I was ready to go back to New Jersey. I wanted to hop on the Path Train, but I needed to find it. It used to be in the station under the World Trade Center; I assumed it was still in that area somewhere. So I headed east, crossing back to Trinity Place, and then north. I took a slight detour and found myself among a gaggle of tourists photographing Freedom Tower in the late afternoon light. A security guard stood behind barricades with construction fencing behind him. I asked him where I could find the Path train and he gave me directions: north on Church, west on Vesey, follow the signs.
I walked around the construction site and joined the crowd of commuters heading for the train. I descended into the station, spent some time figuring out which train I needed to take, and bought a ticket. A while later, I was on board, heading for New Jersey.
At Newark’s Penn Station, I got on a New Jersey Transit train to Rahway. It was an express with just one other stop. My brother picked me up at the station at 6 PM.
It had been a great day out with nearly 5 miles of walking. I was tired but satisfied. If I ever do get back to New York, I’ll do something like that again. There’s plenty left for me to revisit.


 The other day, I spent some time with a friend of mine who just happens to be a psychology intern at the local hospital. We talked at length about some of the things I’ve gone through in the past few years. Recent events have left me concerned that I might be suffering from PTSD from