Construction Posts a Big Hit

A quick note about site stats.

I just wanted to share a quick note about this blog and the new home construction posts I’ve been sharing for about a month now.

Traffic Stats
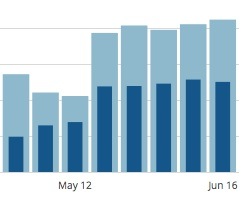
The weekly stats for this blog clearly show a consistent overall rise in hits since May 20.

I can only assume that the huge bump in popularity of this blog is due to the construction posts — the timing of the bump roughly corresponds to the timing of the first few construction posts. Site stats show about a 100% increase in total blog hits beginning around that time. The fact that these posts are on the radar (so to speak) is confirmed by a recent request by an advertiser to place a banner ad for construction materials on the site. (I don’t do advertising so you won’t see the ad here.)

What’s odd, however, is that none of the construction posts have ever appeared as the most popular post on any given day. For the past few years, the post with the most hits is “The Real Cost of Helicopter Ownership,” which gets about 60 hits almost every day. The construction posts fall at various points below that and sometimes don’t even appear on the list of the 10 ten posts for the day. Instead, older posts about flying and my divorce remain very popular every day.

So why the bump? I suspect it’s an overall increase in “Google Juice” — the mysterious calculation that makes sites appear high in Google’s search results. Somehow the construction posts have caused a rise in my site’s page rank, which had taken a hit when GoDaddy and Bluehost Hosting caused numerous slowdowns and errors. When a site’s response time is slow, Google page rank suffers. About half of each day’s hits come from Google searches with a handful of others from other search engines.

Is this boring? Probably. But I’m a stats person and this information fascinates me.

And I’m thrilled about the new attention this blog is getting.

Construction, Day 20: Doors In, Front Wall Finished

A little more temporary patchwork, but looking good otherwise.

Eating Cereal
The time-lapse camera caught me looking at the building early Thursday morning, cereal bowl in hand.

Thursday was one of those perfect summer days when there’s just enough cloud cover to keep it from getting hot and there’s very little wind. Great for the builders to move forward and finish the metal on the front side of my building.

They started by installing the three man doors: the main entrance downstairs and the two doors to the deck upstairs. I’d specified glass doors for the upstairs — I wanted to be able to see out even when the doors were closed. I don’t like sliding glass doors so I didn’t get them. Although I’d considered french doors like I had in my old house in Arizona, they would have been too wide for the space I had. And, in all honesty, I never opened more than one of those doors anyway.

On May 20, 2014, I began blogging about the construction of my new home in Malaga, WA. You can read all of these posts — and see the time-lapse movies that go with them — by clicking the new home construction tag.

I didn’t care much about the downstairs door, although I did want to be able to look out. Tanya suggested half glass. Why hadn’t I thought of that? So that’s what we ordered.

Angel checked twice with me to make sure the doors opened the right way before they installed them.

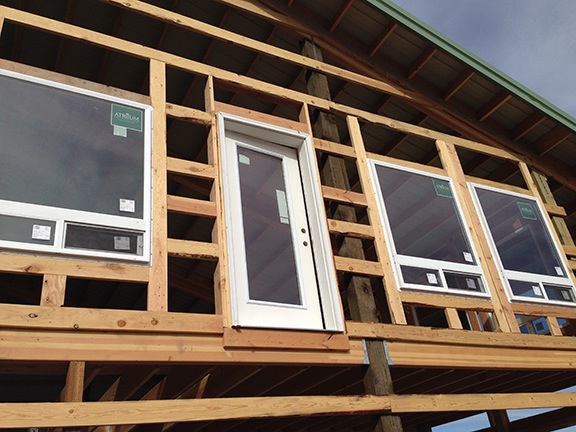
Upstairs Front Door
This door will lead from my front deck into my living room.

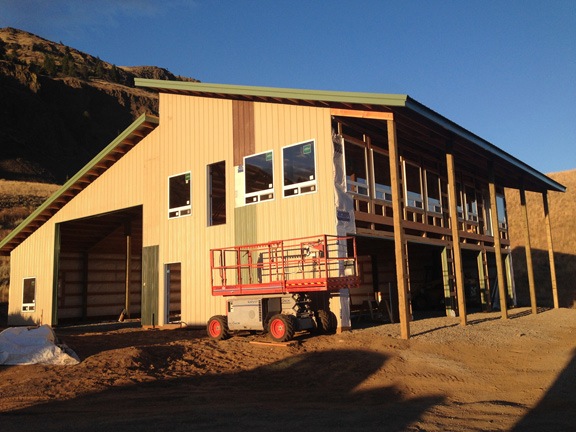
Once the doors were in, they got to work on the rest of the front wall, covering it with plastic and then metal. They had to patch another area where they’re waiting for additional long pieces of metal to arrive; this time, they left part of it exposed. It looks kind of funky weird — hope they get the metal soon!

I missed most of the work — after planting two trees and inspecting three of my seven beehives, I had to run some errands in town. Then I got sidetracked letting a friend into my hangar so he could get some tools out of an RV stored in there. I ran into Angel and the crew on my road when I came back. That’s when they told me I’d get a bonus day this week — even though they normally work 4-day weeks, they’d be back Friday to finish the metal.

When I got home, I repositioned the man-lift to the front upstairs door and rode up with Penny to check it out. I can’t believe how different it feels with the walls on.

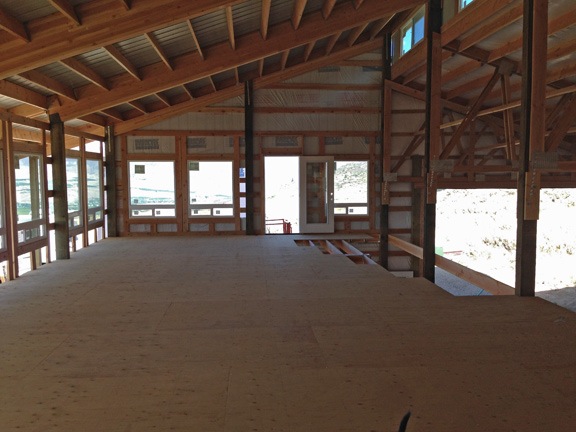
Inside Looking East
In this shot, I’m standing against the west wall looking east through my future bathroom and kitchen into what will be my living room. The floor needs some work where the stairs will come up.

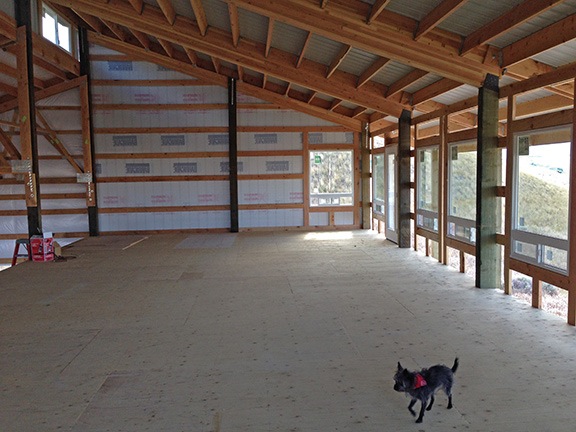
Inside Looking West
In this shot, I’m standing against the east wall looking west through my future living room, kitchen, and bathroom into the bedroom.

Day 20 End
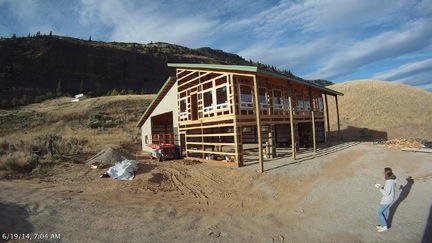
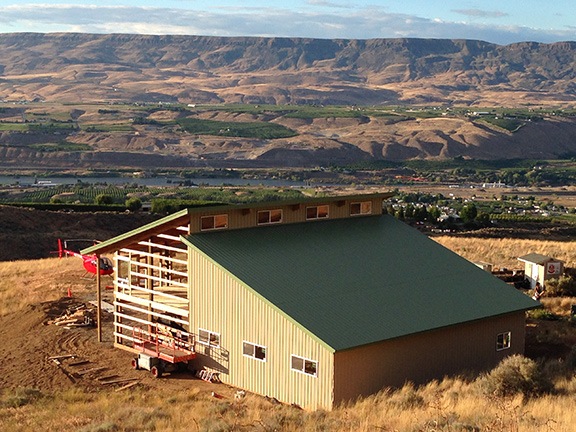
Here’s the front wall after the work on Day 20. I shot this on Friday morning when the light was shining on it; this wall faces east.

Ready for the time-lapse movie? Here it is. The red “flag” on the upper right in many of the frames is the protective electrical tape coming lose. Oops.

Construction, Day 19: Back Wall Finished, Front Wall Started

The workers continue to put the metal “skin” on my building.

On May 20, 2014, I began blogging about the construction of my new home in Malaga, WA. You can read all of these posts — and see the time-lapse movies that go with them — by clicking the new home construction tag.

Wednesday was a much mellower day for me. The weather was nice and there was nothing at all on my calendar. I took it easy in the morning, catching up on blog posts and trying to get control of my email.

Realizing that I’d been too exhausted the night before to check out what had been done the previous day, I took a break to go outside and look at the building. I took photos of the plumber’s work, mostly to document it for future reference.

Plumbing
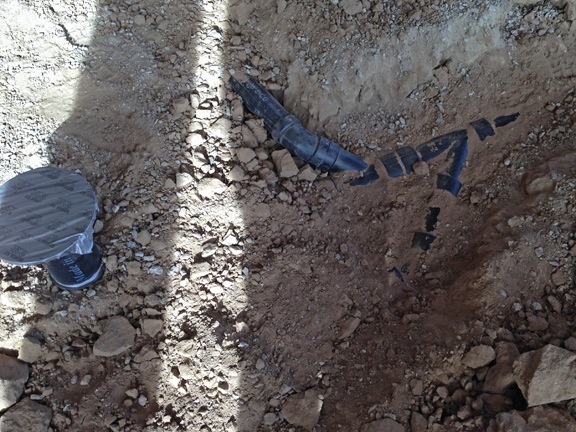
My contract with the builders included stub outs for the plumbing. This means doing all of the plumbing that would be under the slab. This image shows the sewer pipe where it comes into a future downstairs bathroom and splits off for venting and connection to upstairs plumbing. The concrete will go to the top of the circular thing on the left, which is actually the fitting for a toilet.

Angel’s crew arrived promptly at 7 AM and continued working on the building, putting the metal skin on the back side. While the RV garage/shop side of the building got rolled insulation in the walls, the living space/garage side got only a plastic moisture barrier. I expected this; the living space would get thick insulation after it was framed and the garage would be insulated sometime in the future.

Back Wall Finished
They finished the back wall relatively quickly — it had been half done the day before.

A pilot friend of mine from Arizona came for a visit late in the morning. (You can see his red truck in the time-lapse video below.) The last time he’d been to the site was the year before, when nothing had been done. He was blown away by the progress and the sheer size of the building. As we sat in the shade in the front of my RV, looking out over the view with a cool early summer breeze blowing, he made it clear that he was as sick of Arizona summers as I had been. We talked about him buying my RV when I’m ready to sell and camping out on the east end of my property in the summer during cherry season. Heck, why not?

After finishing the back wall, Angel and the guys got started on the front. That’s where they hit a bit of a snag. Apparently, Tanya had goofed in her metal order and they were two long sheets short. Rather than leave a gap, they patched together some of the odd-colored protective metal sheets as a temporary cover and kept going, finishing the metal on the RV garage/shop side of the building before quitting time. An order for the correct metal sheets is in; they’ll replace the temporary metal when it arrives.

Day 19 Progress
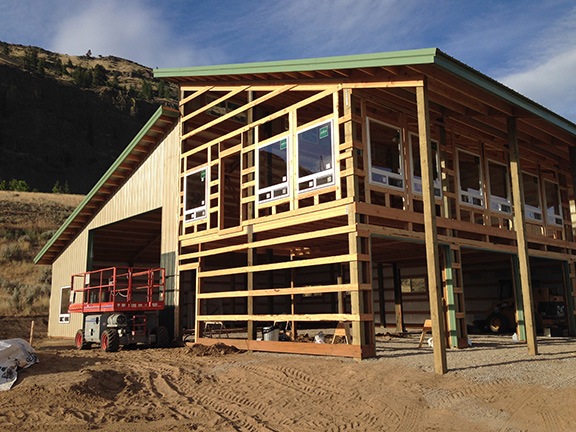
Here’s how far they got on Day 19; I shot this the next morning when the light was on the front of the building.

After they left, I wandered around the inside of my building — which now felt like I was inside a building. Despite the hot sun outside, it was cool and shady. It was still bright though; I suspect I won’t need much daytime lighting, especially during the summer months.

Inside the Shop
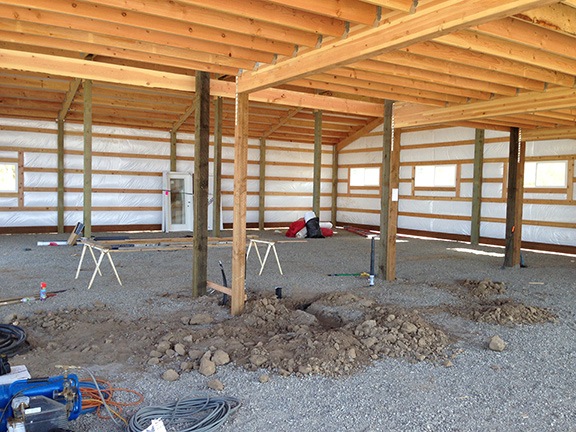
This view from inside my first garage bay is looking through the RV garage and into the shop. Eventually, a staircase will block much of this view.

Here’s the time-lapse movie for the day:

Creating Time-Lapse Movies

How I do it.

I’ve been fascinated with time-lapse photography for as long as I can remember — and believe me, that’s a long time. I love the idea of compressing a series of still images into a short movie. But what I love more is the way it speeds up the process of things that happen slowly: clouds moving across the sky, shadows changing with sun angles, and things being built or moved. There are a lot of time-lapse movies on this site; click the time-lapse tag to explore them. I do want to stress that my time-lapse movies are very simple. If you want to see something amazing, look at the work of a master like Ross Ching’s Eclectic series.

I rely on certain equipment and software tools to create my time-lapse movies. Since I’ve been sharing daily time-lapse movies of the construction of my home, I thought I’d take a minute to explain how I make them.

The Camera

Hero HD
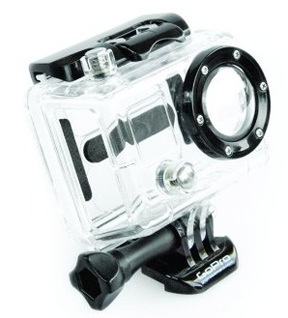
I use my old Hero HD for most time-lapse work these days.

The first thing you need to create a time-lapse movie is a camera capable of snapping an image at a regular interval. These days I use a GoPro. Although I have three of these great cameras — Hero HD, Hero 2, and Hero 3 — I tend to use the oldest (the Hero HD) for this kind of work so if it’s lost, damaged, or stolen, it’s not a huge deal.

The GoPro has an interval or time-lapse mode that I use quite often. Because the process of building my home is relatively slow, I set it to the most amount of time between images: 1 minute.

(In the past, I’ve used a Pclix intervalometer — that’s a time-lapse timer that triggers a shutter release on a camera at a preset interval — attached to an old Canon G5 digital camera. Again, the camera was old and worthless so if someone walked off with it, no big deal. Losing the intervalometer would have been worse.)

Skeleton Housing
The skeleton housing gives me access to the USB port and SD card on the GoPro.

Power is an issue when you run a camera for hours on end. I use the GoPro Skeleton housing around the camera so I can run a USB cable to it. The cable then feeds into a window on my RV where it plugs into a power source. The added benefit is that I can remove the SD card without opening the housing and changing the camera angle. I use electrical tape to cover up the two sides of the housing to keep dust and rain out.

The Camera Mount

For time-lapse photography, it’s vital that the camera be held still (or moved smoothly, if you’re going for that kind of effect). That means a tripod or camera mount.

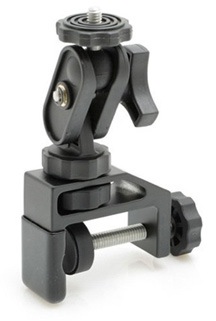
Pedco UltraClamp
This is a must-have mount for anyone with a GoPro or lightweight digital camera.

I routinely use a Pedco UltraClamp with my GoPros. I can’t say enough things about this clamp-on camera mount. With a GoPro, all you need is a tripod mount adapter and you’re good to go.

For my construction project time-lapse movies, I clamped it onto one of my RV slide-outs, pointing at the construction site. Easy.

The Software

Okay, so the camera has been running for hours and it has collected hundreds of images. Most of my time-lapses run from 6:30 AM to 4:30 PM. That’s 10 hours with 60 shots per hour. 600 images.

The images are 2592 x1944 pixels. That’s way bigger than I need. In addition, I want a 16:9 aspect ratio, which is better suited for video projects these days. So I need to do some processing.

EasyBatchPhoto IconThe first thing I do is run the images through a program called EasyBatchPhoto. (Remember folks, I’m using a Mac.) I have the app set up to crop the image to 1920 x 1080 — that’s standard high definition. This basically crops away the edges of the image, focusing on what’s in the middle. The app also slightly sharpens the image and applies a date and time stamp watermark based on the EXIF data saved with the original file. It then saves it as a medium-high quality JPEG in a folder I specify. I do this for only the images I want to include in the movie; no reason to process them all. The rest of the images are discarded when I wipe the SD card.

EasyBatchPhoto Settings
EasyBatchPhoto can process huge batches of images at a time.

I should mention that you could probably do all this with another app. This happens to be the one I use. I’m sure some readers will share their solutions in the comments.

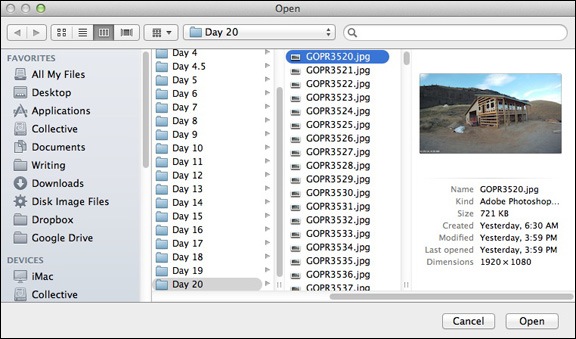
QuickTime Player 7 IconOnce I have the images in a folder, I open up QuickTime Player 7, which I’d updated to the Pro version years ago. This is an old version of QuickTime. The current version does not have the feature I need, which is the Open Image Sequence command. I use that command to get a dialog box prompting me to choose an image. I select the first image in the folder containing all of the images for the movie.

Choose the First Image
Use this dialog box to select the first image in the folder of images for the movie.

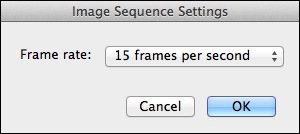
Image Sequence Settings
Use this dialog box to set the frame rate.

I’m then prompted to set the image sequence settings — basically the frame rate for the movie. There are a lot of options on that pop-up menu. After some experimentation, I decided on 15 frames per second for this project. That compresses 10 hours worth of images into about 40 seconds. Any faster and you miss a lot of the action. When I click OK, QuickTime makes the movie and displays it in a window. After taking a look at it, I save it to disk, usually in the same folder as the images.

Why YouTube?
I was really pissed off to discover that Viddler, the site I used years ago to host video, has made my videos unavailable for viewing. I think it’s because they expect me to pay for hosting, which just ain’t gonna happen. This screwed up a lot of embedded video on this site. Because some of the videos are very old, I can’t find the source files so those videos are gone forever. So I’ll use YouTube on a go-forward basis for all video sharing. It’s free and very easy to access.

The last thing I do is upload the movie to YouTube. I do this with the current version of QuickTime. I just double-click the movie’s icon to open QuickTime and use the share command to share it on YouTube. QuickTime prompts me for a movie description and tags. Within minutes, it’s online and available to anyone who wants to see it.

The entire software process takes about 5-7 minutes and is mostly automated.

If you make time-lapse movies and use a different set of software tools, please do use the comments to share your process. It’s always nice to learn about new software that might make things easier or just plain better.

Construction, Day 18: More Windows and Walls Go Up

A possible problem begins to rear its ugly head.

On May 20, 2014, I began blogging about the construction of my new home in Malaga, WA. You can read all of these posts — and see the time-lapse movies that go with them — by clicking the new home construction tag.

Tuesday was an absolutely crazy day for me. That’s one of the weird things about the work I do. I can get paid to just sit around and wait — which is basically what I’ve been doing since May 26 when my first contract started — but every once in a while, I have to actually work for the money I’m paid. And when I work, I work hard.

My day started at 3 AM when I woke up knowing that I’d have to wake up at 4 AM to fly at 4:30 AM. Why I didn’t wake up at 4 AM, which is when my alarm was set to go off, is beyond me. But that early start was part of what left me completely exhausted long before sunset.

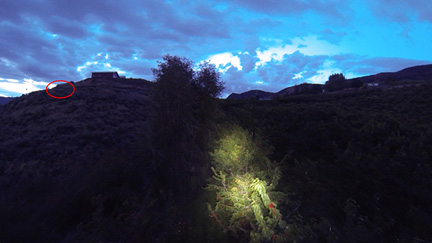
Dry AM
Yes, I was hovering over cherry trees a half hour before dawn on Tuesday morning. Although it’s difficult to see in this shot, my client’s pickup truck was parked on the road overlooking the orchard when I arrived 5 minutes after I told him I would. (See circle.)

I was in the helicopter at 4:30 and over my first orchard at 4:35. Good thing. My client was parked on the road overlooking the orchard. So yes, I was 5 minutes late. But he was also clearly able to see that I needed my landing light to illuminate the treetops in the predawn light. I was one of the first pilots in the air that morning.

I flew for 2-1/2 hours, stopping once for fuel. I got home at 7:20 AM. Angel’s crew was there and they were hard at work on the back wall. They’d run the metal all the way to the end of the wall, covering up the window frame, which was still waiting for the window to arrive.

I had just enough time to change my clothes and head out again, this time in my truck. I had to meet with the building plan inspector at 8 AM in his office. The framer and his builder girlfriend had raised some flags about the way the roof over my living space would be completed and I needed clarification.

(Note to women working in male-dominated industries: Using condescending phrases like “you’re not a general contractor so you wouldn’t know” and “this is woman to woman advice” to a potential female client is not a good way to score points. Never — and I mean never — address me as “girlfriend” unless we are already friends. And for anyone in the building industry: stirring up trouble with a building plan inspector for a job you haven’t been hired for is a great way to lose a potential client. Just saying.)

I got the information I sought but didn’t want. I fired off a bunch of email messages from my phone and left a few voicemail messages. Then I grabbed a breakfast sandwich and latte at my new favorite drive-through coffee shop and headed out to Wenatchee Petroleum. Although I’d hoped to avoid using the on-board transfer tank on my truck this year, I knew it would make my life easier. So I bought 75 gallons of 100LL fuel — saving more than $1/gallon in the process — and headed home.

I ran into Corey, the boss of my construction project, on Joe Miller Road, right before the turn to my road. He was on his way out after visiting the site. I was surprised to see him; I thought he was on vacation. He told me not to worry about the roof, that Tanya would take care of it when she got back from her trip to the east coast. I told him that I wasn’t that worried, that I knew they’d do the right thing. Someone came up behind me on the road and because we were blocking the road, I said goodbye and continued on my way. He called moments later to finish the conversation, pointing out that the project was still moving forward at a good clip.

It certainly was.

When I got home, I saw that not only had all the windows and exterior man-doors been delivered, but the windows had been installed. The south-facing wall was done. And two plumbers were working on the stub-outs for my septic system and water lines.

I’d been hoping to catch the plumbers and give them instructions before they began, but they had already dug a trench for the septic system line and laid in some pipe. This was not done as my friend Bob and I had planned over the weekend. I talked with them for a while to learn about why they were doing what they were doing and tell them what I wanted. We came to a very reasonable compromise that didn’t require them to undo anything and got me the setup I wanted — primarily an extension of the water line for an outside spigot and an additional sewer takeout inside the RV garage. I learned a lot and got a better handle on the plumbing tasks ahead of me.

But I didn’t stop for long. The first of two pilots I’d hired to help me this season had arrived at the airport and I needed to meet him to show him the orchards. But rather than drive out to the airport, I asked him to come fetch me in his helicopter. He showed up with a companion a few minutes later and didn’t bother to shut down. His companion jumped in the back with Penny and I climbed into the front passenger seat. We then proceeded to tour four of the orchards he’d be helping me dry over the next four weeks.

Back on the ground, his companion and I drove my truck and Jeep to the airport. We piled into the truck, saw one orchard from the ground, stopped for lunch, and toured three of the others.

That’s when the second pilot I was meeting today texted to say he was about an hour out. Back to the airport to meet him. He’d come with a companion, too. I said goodbye to the first pair of pilots, who were heading home for a few days before the contract started, and turned the Jeep keys over to the newly arrived pilot’s companion. I was loaning the pilot my Jeep for a few days; his wife with his truck and trailer would be arriving before the weekend. We all went to Quincy where he parked the helicopter and we piled into the truck for a tour of four orchards in that area.

By this time, it was around 6 PM and I was completely exhausted. I’d been going nonstop since about 4 AM and had driven more than 100 miles, much of it on muddy orchard roads. I was glad to leave the two pilots behind at a Quincy motel and head home. I still don’t know how I summoned the energy to stop for milk along the way.

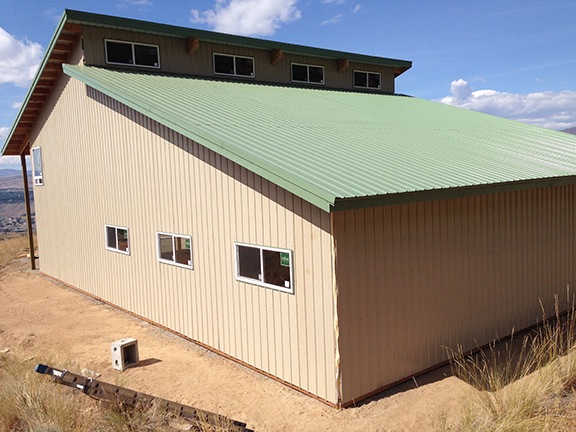
When I got home, I stopped to snap this photo of my building in the late afternoon light. Two walls of my RV garage/shop were completely covered. I really like the color scheme.

Two Walls Done
The windows and two walls are finished on the RV garage/shop side of my building and it’s looking good.

Here’s the time-lapse for the day. Again, most of the work is done on the far side of the building, out of sight of the camera.