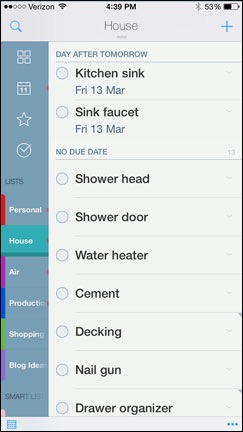
Three out of four bathroom fixtures up and running!
Although I’d originally wanted to do my own plumbing here, I got a case of the smarts and decided that doing my own electrical work was enough for an amateur. I hired a plumber. On Thursday, March 12, they did most of the finish work in my home.
Plumbing and Construction
If you’ve never participated in the construction of a home, here’s some basic information you might find interesting.
There are three basic steps to putting the plumbing in a home:
Stub In
This is where they bring the pipes from the outside of the house into the house. For my home, there would be a concrete slab. The supply and waste pipes had to come in from outside, under the slab, so the pipes had to be laid before the concrete was poured. This was done back in June 2014, while my building shell was under construction. (Later, my earth-moving guy connected the supply and waste lines from the building to the water supply and septic system.)

Because my building is a pole building and the slab was poured as one of the last steps, the building shell was almost done when the plumbers came to do the stub in.
Rough In
This is where they put pipes for water supply — including hot and cold — as well as waste and venting into the walls. They need to know where to run all these pipes and they need to have room to run them. Because I’d originally planned on doing this part myself, I made my home design very simple, with all the plumbing basically running along one wall between my kitchen and bathroom. That wall was framed with 2 x 6 lumber (at my request) so there was plenty of space. This was done back in January 2015, as I was working on the electrical system.

Here’s one of the rough in plumbers working on a drain line in the wall between my kitchen and bathroom.
Finish
This is where they connect fixtures to the supply and waste pipes. When the finish is finished, the plumbing works. That’s what they started on Thursday.
The Fixtures
I’ll admit it straight out: I didn’t skimp when I bought plumbing fixtures. I bought exactly what I wanted.
After too many years of making decisions as part of a two-member committee, it was refreshing to be able to just get what I wanted without excessive research, debates, and delays. Everything from appliances to toilet to water heater to faucets — I looked at what was available, pointed to what I wanted, and had it delivered or loaded onto my cart. Done!
Some things I cared about — for example, my kitchen sink and faucet fixture. I wanted a specific style and look and took some time to browse the options before picking one. Other things I didn’t care much about — for example, my water heater. Any electric unit with a 50 gallon tank should be fine.
I should mention here that in addition to standard items normally connected to a plumbing system — kitchen and bathroom sinks, toilet, dishwasher, refrigerator (for ice maker), water heater — I had a few unusual items. The most unusual was my bathtub. And yes, that was something I labored over the decision-making process. The reason: I had to order online because there was no showroom where I could see options.
You see, I wanted a soaking tub. I’ve always wanted a soaking tub. Unfortunately, the tub I’d dreamed of having simply wouldn’t fit in my bathroom given the location of the window. So I had to find another tub that would fit the bill. I eventually decided on the 67-inch long Coley freestanding tub. I’d position it at the far end of my bathroom, right in front of my window, so I could take in the view while I soaked. (Sounds pretty good, huh?)
The reason this is unusual? Well, most folks don’t have a freestanding tub. Most folks have a tub that’s built into the wall or shower area. My freestanding tub required a freestanding faucet. It also required careful positioning to get the drain just right — no small task with the rafters under the floor. (As a matter of fact, we wound up installing the tub backwards with the drain opposite the faucet just so it would fit right.)
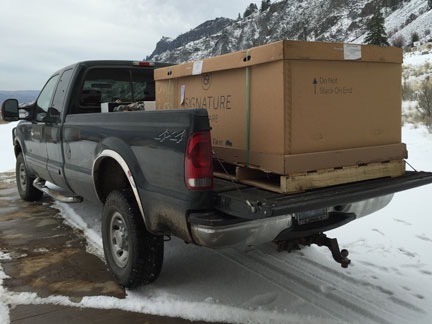
My tub came in a very large box.
The tub arrived in January, when my road was iced over and the delivery guy was afraid to drive to my home. I had to take my truck out to the main road where the tub was transferred from his truck to the back of mine. Then I utilized the services of a friend of mine who happened to stop by for lunch to get it off the truck. For months it sat in its box on a dolly under my 5th wheel RV’s hitch. It would be the first plumbing fixture to be installed.
My shower was also different. Rather than buying a manufactured shower stall, I would be building mine onsite with acrylic block walls. And I couldn’t build it until the tub was installed because they’d never get the tub past the constructed shower stall.
Because of that — and because the kitchen sink would be mounted with the countertops at March month-end — it would take two visits from the plumbers to finish my plumbing.
The Start of the Finish
I used the same plumbers for each step of my project construction. They’re good, reliable guys who do good work and have patience for someone like me — a homeowner in the role of inexperienced general contractor who is making things up as she goes along.
After a rush to get my bathroom floor done and last few plumbing fixtures purchased, Dave and his son arrived on Thursday at about 11 AM. They got right to work.
The tub was first. After securing the special faucet I’d bought for the tub, they carried the tub up the stairs. I was working on the electrical connection for the water heater in the laundry room when they wrestled it past the doorway. Within minutes, it was in position, snug at the end of the room.

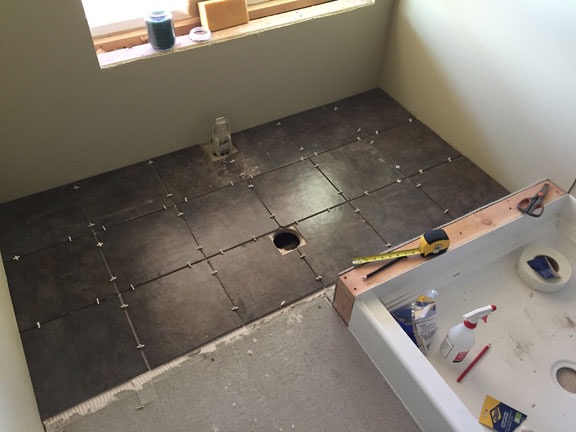
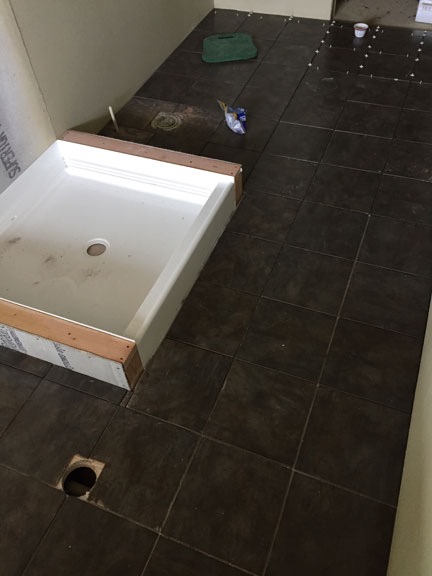
The tub and shower pan with drain installed.
Next was the drain for the shower stall. They drilled a hole though the floor to meet up with the drain pipe they’d installed at rough in. Back then, I didn’t have the shower pan so they’d estimated where the drain should be. They were off by about 8 inches, but would meet up with the P-trap. Before they put the shower pan back in place, I laid in some floor repair paste that would cement the shower pan to the floor.

Oops! The shower drain and drain pipe were off by about 8 inches.
They went downstairs to connect the two drains to the pipes under the floor. I’d instructed the drywall guys to leave the drywall panels off the garage ceiling under those two drains — it took some measuring to figure out exactly where they needed to be once the insulation was in place. They pulled the insulation away and connected the pipes.
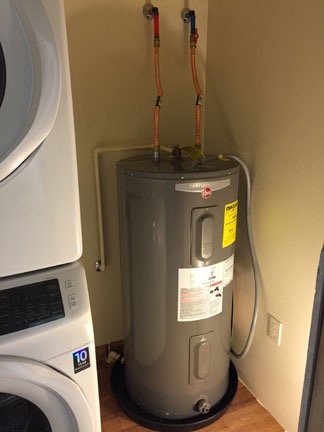
The water tank is shorter than the rough in guys anticipated.
Next was the water heater. Dave and his son carried it up the stairs and Dave left. I chatted with Dave’s son as he prepped it for installation. It was shorter than they’d anticipated. I’d wanted to put a shelf over it, but they’d run the rough-in plumbing for a much taller tank. The end result was a rather odd looking configuration with two long pipes coming out the top of the tank and going into the wall.
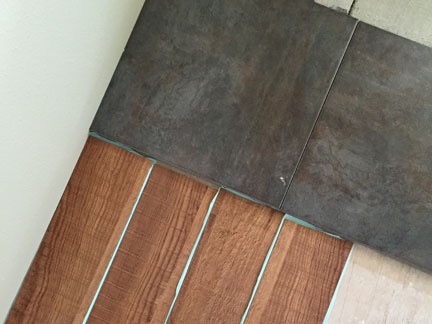
The toilet was next. I think he told me three times that I’d bought a very good toilet. I was just glad to see that its base completely covered the drain hole in the tile.
Meanwhile, my friend Tom had exchanged the cracked vanity top with sink at Lowe’s and returned with the replacement. I was supposed to have the top in place for the plumbers to install the sink fixture. But Tom couldn’t stick around to help me carry it upstairs. So, I opened the box down in my garage and waited.

Here’s where the plumbing comes into the building. Everything under the 90° angle is mine: a main shutoff valve and a drain line with valve currently used to supply my RV with water and provide a hose spigot. The black thing after the angle is the pressure regulator. The black pipe coming out of the floor on the left will be used to supply water to a hose spigot on the front of the building; they’ll do that when they come back.
Next, Dave’s son got to work downstairs. After shutting off the water at the street, he had to clean up my Frankenstein’s monster of a pex plumbing job that I was currently using to get water into my RV. He shortened the source pipe, at my request, and bracketed the whole thing to a piece of plywood I’d fastened between the posts supporting the stairs. He then added a shutoff valve and a pressure regulator — I have extremely high water pressure here — and connected that line to the cold water pipe the rough in guys had dropped from upstairs. The resulting configuration looked funky but was functional and secure.
When that was done, I looked at him and said, “You know what’s next, right? The bathroom sink.” I pointed to the vanity top with sink sitting in its box on the garage floor. “I can’t carry it alone. Can you help me?”
He kindly agree to. I ran a bead of silicone sealant I had around the top of the vanity on three sides and we carried it upstairs. He helped me align it. And then I stepped aside and let him install the faucet I’d bought.
While he was working on that, I was finishing up the wiring for the water heater. I had a heck of a time with the grounding wire and will probably have an electrician friend check it to assure it meets code. In the meantime, I know it’s functional, even if it isn’t pretty.
Dave’s son went out and turned the water back on. Then he turned on the valve downstairs. Soon I could hear water coming into the water heater. A moment later, he was upstairs, testing the fixtures one by one.
I think I was too shocked that these things were working to really register what was happening. After all, only a week before the bathroom had been nothing more than a plywood floor with a shower pan and two stub walls. Now it was 75% done and everything installed was fully functional.
Once the water heater tank had filled, I flipped the circuit breaker switch to turn it on. Upstairs, I could hear a faint hum from inside the tank. I’d have hot water in less than 30 minutes.
Other appliances already connected to the plumbing — the refrigerator’s ice maker and washing machine — would work as soon as I turned them on.
I helped Dave’s son pack up his things, thanking him over and over again for getting so much working that day. I told him the kitchen sink would be installed by March 27 and that I’d do my best to get the shower ready for installation by then, too. It would be a quick job for them to hook up the shower head, kitchen faucet, and dishwasher. And then the plumbing would be finished.
When he left, I wired the last outlet in the laundry room, thus completing the circuit that the washing machine was connected to. I went downstairs and turned on the breaker.
And then I did something I’d been dreaming about doing since I left my Arizona home in May 2013: I did a load of wash in my own washing machine.