My five-step process.
I’ve been making (and tweeting about) the wire wrapped jewelry (my hobby gone wild) that I picked up this past winter in Quartzsite, AZ for about three months now.
I currently do one style of wire-wrapped jewelry; there are many. The work I do features multiple thicker wires bound together info frames using a thinner wire. My wire wraps are tiny and as close to “perfect” as I can get them. Another style, which I’d like to explore — possibly next year with a tutor — uses a single thicker wire, often hammered flat, to wrap the stone in a more freestyle look.
I thought I’d take a few moments to provide some basic how-to information to give readers an idea of what I do and what it entails. True to my how-to book author roots, I’ve broken it down into five steps. Here they are.
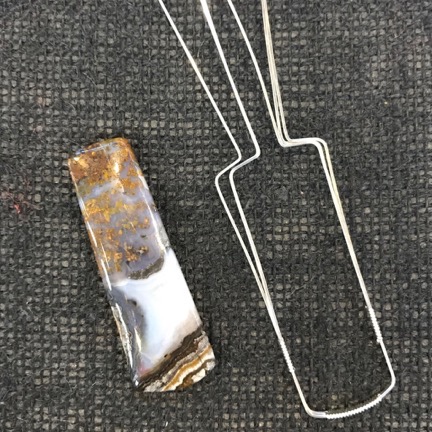
Step 1: Choose a stone and wire for the job.
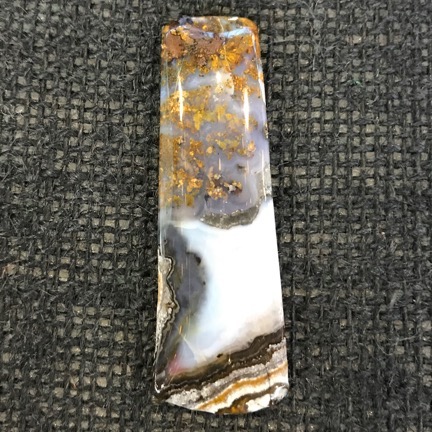
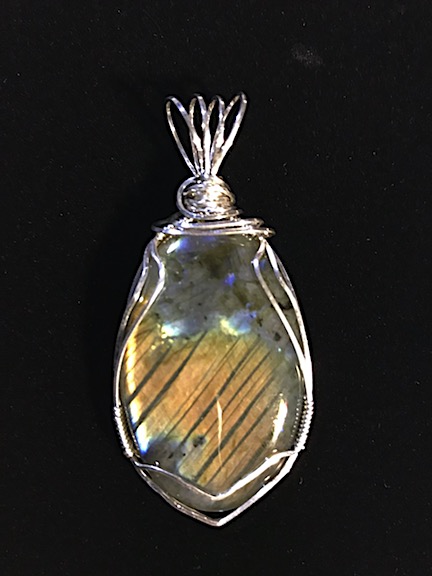
For this example, I chose a 57mm long Bull Canyon Agate cabochon. This is a little larger than most of the stones I use.

I buy wire in bulk from RioGrande.com. For this project, I used 22 gauge square and half-round dead soft sterling silver wire.
I start by going into my collection of cabochons and choosing a stone I feel like working with. Maybe I have an idea I’ve come up with while doing something else during the day. Or maybe I want to try a wrap similar to one I’ve seen in a video. Or maybe I’ve realized that a certain color is missing from my collection of finished pieces and I choose a stone to fill in that gap.
For some stones, I get to choose which end is up. (Actually, I can do that for all of the stones, but certain shapes are easier to wrap when held in certain orientations; for example, teardrop shapes are best wrapped with the pointy end up, although I have wrapped them with the pointy end down.) I hold the stone in a variety of directions and decide which looks best.
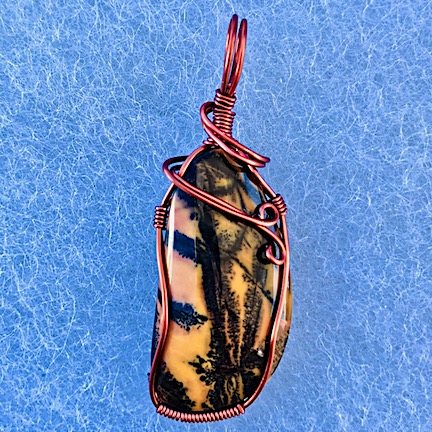
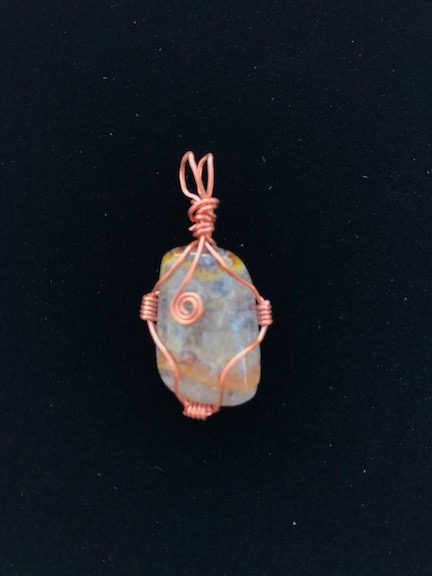
Then I choose the wire. I use thinner wire for smaller stones because I don’t want the wire to hide the stone. I use more wires for thicker stones because I want the sides of the stones suitably covered. I use dead soft sterling silver wire for just about all the pieces I create now, although I do have some copper wire on standby if I feel like working with copper. (So far, all the pieces I’ve sold have been silver-wrapped, so I have to assume copper is less desirable.) I always keep 21 and 22 gauge square wire and 22 gauge half-round wire in stock.
By the time I’ve selected the stone and wire, I already have an idea for the style of wrap I’m going to do.
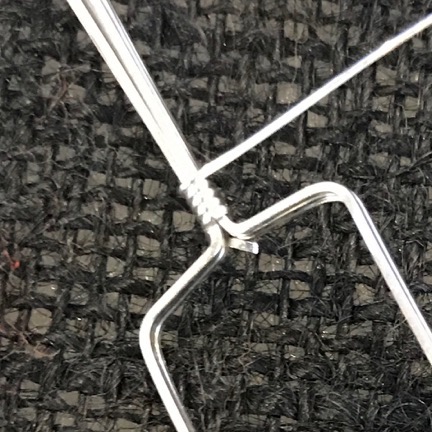
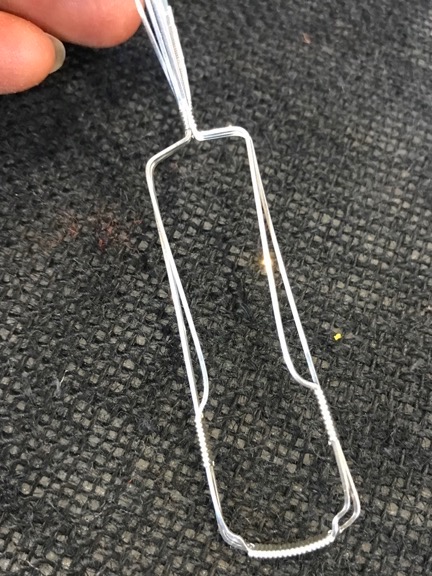
Step 2: Create the frame.
For this frame, I created three anchor wraps and made tight bends so the stone would fit snugly.
Here’s the same frame after making the bends at the top. A stone like this is tough because not only do the corner bends need to fit the stone exactly, but the top bends need to meet exactly in the middle.
The stone is held in place by a frame. Creating the frame normally entails using half-round wire to secure the thicker wires together in anchor wraps and then bending the thicker wires into a shape that will completely surround the stone.
The number of anchor wraps I do varies depending on the size of the stone and the style of the wrap, although I normally do two to four of these wraps. For example, if I’m working with a small oval or teardrop shape, I can probably get away with just two anchor wraps, one near each side of the bottom of the stone. If I’m working with a larger or odd-shaped cabochon, I’ll use more anchor wraps.
The bends must exactly match the stone. This is probably one of the trickiest parts, especially when dealing with odd-shaped stones. If I put a bend in the wrong place, I have to straighten the wires and then rebend them.
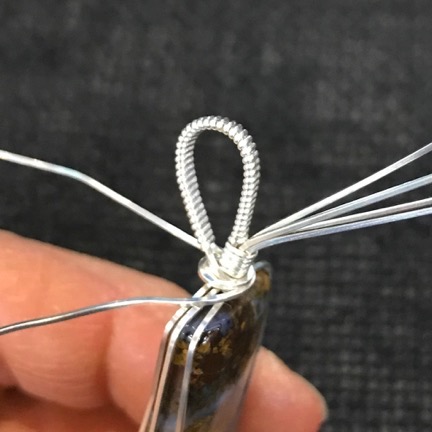
Step 3: Complete the frame and create the bail.
I use the half-round wire to close up the top with tight wraps around all six wires.
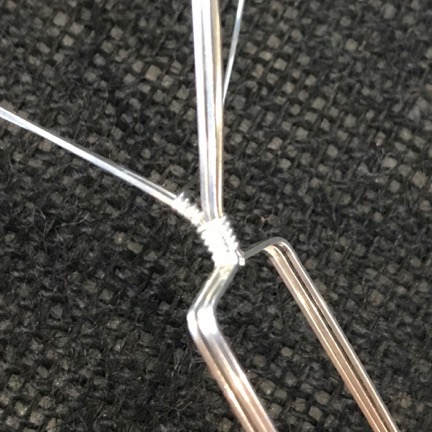
Then I separate out the two back wires and wrap them separately to start the bail.
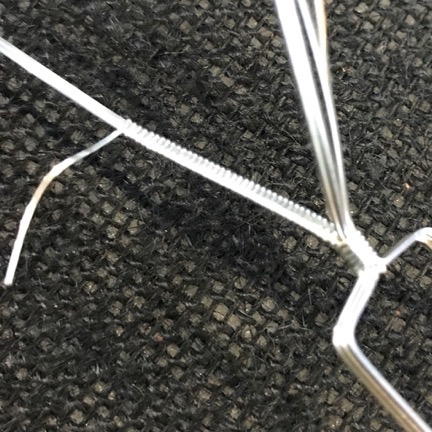
I continue wrapping until I have enough wrapped wires to create the bail.
Completing the frame means closing up the gab at the top of the frame with wire wraps. This is probably the most difficult part of the process; the finished frame has to be the exact size and shape of the stone.
Sometimes I’ll finish the frame with the stone taped inside it using masking or painters tape. But as my skills improve, I’m able to finish the frame without the stone in place.
Once the frame is closed I usually follow up by wrapping two of the six or more wires sticking out the top and bending them back to create the bail. Sometimes I finish the bail then, before the stone is secured; other times, I wait until after I’ve secured the stone to finish it.
Step 4: Secure the stone and (if necessary) complete the bail.
In this example, I’ve begun bending the front of the frame to hold the stone before inserting the stone. Doing this makes it easier for me to do the bends without scratching the silver wire.
This step is crucial and can be tricky. I need to get the stone into the frame and then carefully bend the frame wires so they hold the stone in place.
The hard part is making sure the bends are the same on both sides of the stone; if the stone’s shape is symmetrical, it’s important (at least to me) to have symmetry in the wires that hold it in place. The harder part is making these bends without scratching the metal with my tools. I use my thumbnail a lot as a tool — it won’t scratch metal — and it’s really screwing up my thumbnails.
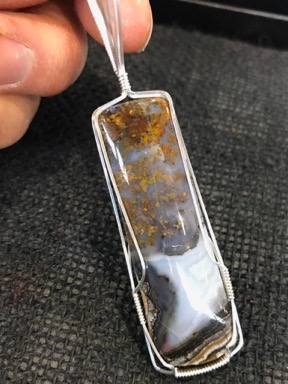
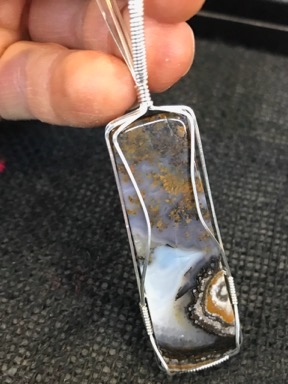
Here’s the front and back of the piece once the stone has been secured. Although I concentrate my efforts on the front, which is what most people will see, I try to make the back even, too.
Once the stone has been secured, front and back, I can finish the bail (If I haven’t done so already) by securing the tail end either with half-round wire or one or two of the loose frame wires.
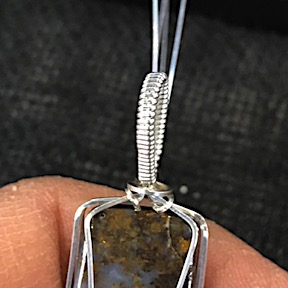
In this example, I’ve finished off the bail by using the two loose ends of the bail wires and wrapping them around the top of the piece. I then trimmed off the excess and tucked them into the back of the frame.
Step 5: Add decorative flourishes, trim off excess wire, and tuck in all wire ends.
At this point, I have a stone secured in a wire frame with a bail and four or more frame wires poking out the top. I need to take those wires and creatively finish them off.
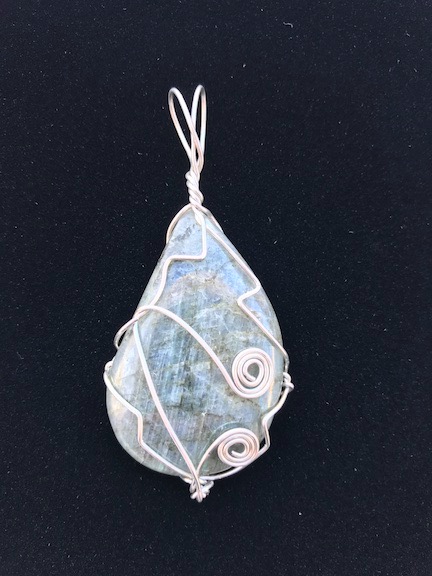
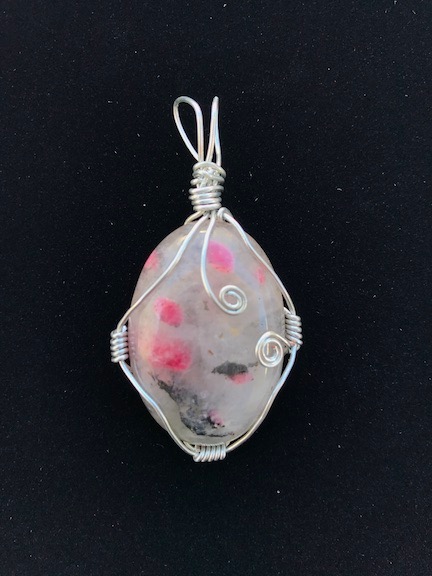
This is where the swirls at the top of each of my pieces come from. There are all kinds of things I can do. I like draping the wire around the base of the bail or creating loops in front of the bail, but I occasionally bring the wire down into the piece and finish with a loop.
I cut off all wire beyond what I need and finish the cut edges, which could be sharp, by tucking them into the metal work or creating tiny loops. After some final adjustments, the piece is done.
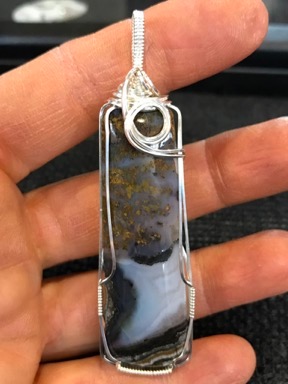
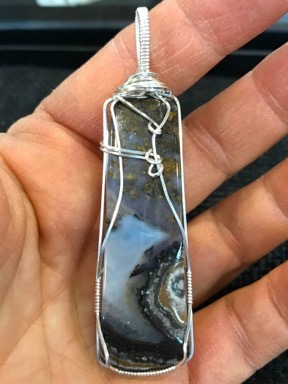
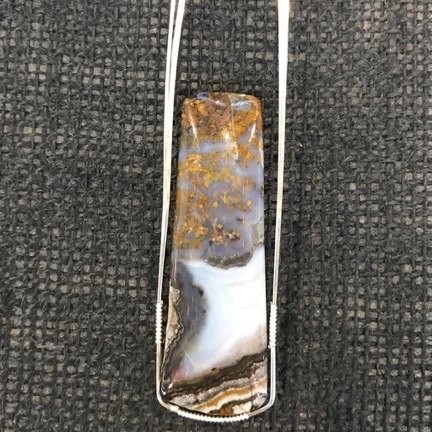
Here’s the finished piece, front and back. I don’t usually leave the wire ends visible in the back of pieces, but for this piece, I wanted a little extra security for the stone.
It Takes Time
It takes me from one to three hours to make a piece of jewelry.
I don’t rush. I’d like to do it in 90 minutes or less, but I still sometimes have trouble with steps 3 and 4 above. I’ve learned that some shapes of stones are easier to work with than others and when I want to do a piece quickly, I work with an easier stone.
I’ve also learned that the more I try to get experimental, the more likely I am to struggle. Still, if I don’t try new techniques, I won’t improve my skills and learn what works and what doesn’t work.
Try It!
This blog post isn’t enough info to try it for yourself; you really need to see it done to do it. If you can’t get one-on-one instruction like I did, you can try videos on YouTube. Although an earlier post on this topic linked to one or two wire wrap jewelry videos there, I’ve since found a better artist: OxanaCrafts. The work she does, although often a lot more ornate than I do or like, is quite similar to what I do and I’ve gotten a lot of ideas from watching her videos. I credit her for the neatly wrapped bails I’ve been doing in almost all of my recent pieces. But while her work seems to feature the actual wire work, I prefer to feature the stones. That’s the main reason my wraps are simpler than hers — and my stones are usually a lot more interesting.
Want a good basic tutorial? Try this one: Quick Beginner Wire Wrap. Just keep in mind that a single anchor point, as she uses in this video, probably won’t work for larger or thicker stones.
If you want to give it a go, remember that there are certain tools and wires that you’ll need to get started. You might find them at your local craft store; I got my start using silver plated copper “hobby wire” which I’ve seen in Michael’s and Hobby Lobby. Tools are important; don’t be tempted to use standard pliers you might get at the local hardware store. The ridges carved into these tools will mar the wire.
Nice cabochons are a little tougher to find; I get many of mine from gemstone dealers and rock and mineral shows. I choose my cabochons individually — and pay for them accordingly — but you can often buy them in lots. If you don’t care what your stones look like and just want cheap stones, this will probably work for you; try eBay. But if you care and don’t mind paying for quality, you’ll find that it’s worth the effort to find the stones you want.
A great source of quality wire, tools, and even cabochons to get you started is RioGrande. That’s where I buy my wire and I can’t say enough nice things about them. (Thanks, Dorothy, for recommending them!) I’m not sure if they sell the cheaper craft wire, although I know they do sell better quality silver, gold, and even platinum.
If you do try it — or if you have already created your own wire-wrapped jewelry pieces — please use the Comments for this post to share a link to your finished work. I’d love to see it.
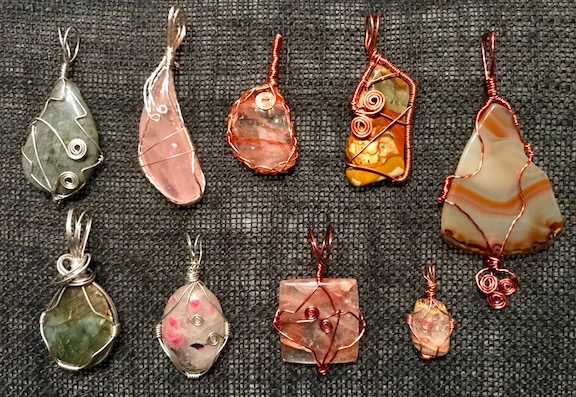
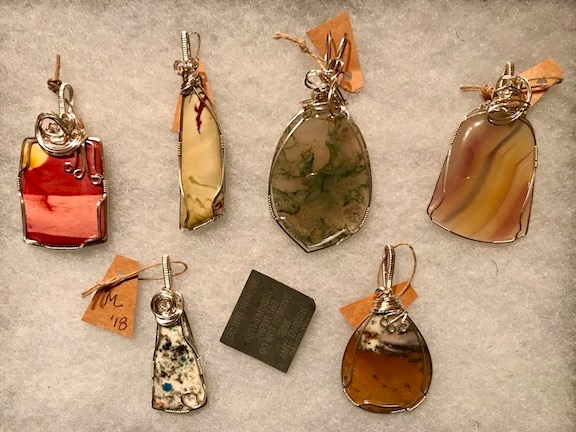
Support My Jewelry Making Habit!
But you know what I’d really like? I’d really like it if you visited ML Jewelry Designs and picked out a piece of jewelry for yourself or a loved one. You can support my jewelry-making (and stone collecting) habit while getting a truly unique piece of wearable, handmade art. Many thanks to blog readers who have already done so!
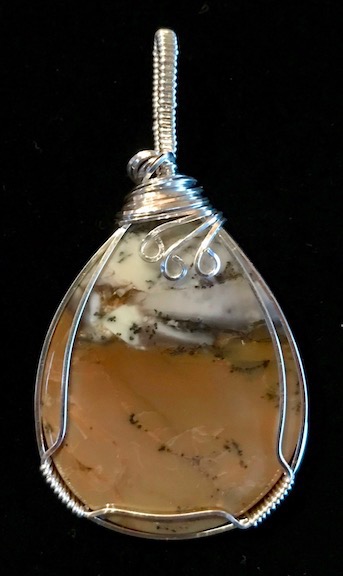
And if you want this piece, you can find it here in my online store. But don’t wait; all of my pieces are one-of-a-kind and when this one is gone, it’ll be gone for good.