Glue? In a Silversmithing Video?

I vent a little about people who should know better showing junk jewelry shortcuts in their jewelry-making videos.

I watch a lot of videos about making jewelry. I must have seen hundreds of them by now. Most were on YouTube, but I’ve also purchased in depth jewelry making videos on DVD or streaming services. I learn a lot from these and they can inspire me.

My favorite jewelry makers on YouTube

Want a few suggestions for getting started? Here are my top 5 favorite jewelry makers on YouTube:

  • Soham Harrison. Soham makes no-nonsense videos that really teach techniques. His camera setup isn’t fancy but it does the job. Lots of his videos are great projects for beginners, but there’s some advanced stuff, too. Soham is based in Australia but his accent is American.
  • Online Jewelry Academy. This one uses a set to record videos on a wide range of topics. The host, Professor John Ahr, is knowledgeable and a little weird. Lots of great videos for beginners here.
  • Andrew Berry. Andrew Berry is another jeweler who teaches jewelry making. His videos cover a wide range of topics. I believe he’s based in the UK.
  • Estona Metalsmithing. I recently discovered this channel and have watched quite a few of her videos. She seems to be making an effort to build up her subscriber base with quality tutorials. There’s a great beginner’s series and a bunch of other videos that go beyond the basic. She’s based in the Netherlands and speaks with a heavy accent, but her English is perfect. Just be aware that her terminology doesn’t always match the terms we use here.
  • Rio Grande. Rio is a jewelry making supplier and they’ve got a bunch of videos that teach techniques, many of which are related to items they sell. While some are strictly marketing videos, there’s lot of good how-to material, too.

Before I go any further, however, I need to warn wannabe jewelry makers that there are a lot of crap videos out there. Videos that show you how to make junk jewelry or videos made by people who obviously don’t know what they’re doing and make videos out of their experiments. I also occasionally have trouble with the personalities (or voices, even) of some of the video makers. I have zero tolerance for people who spend more time talking about how smart they are than actually showing you how to make something great. And that woman who talks like Cindy Lauper? Sorry. I just can’t keep tuning in. So although I encourage you to watch videos to learn, be prepared to wade through a lot of crap to find gold.

All that said, yesterday I watched a video from Durango Silver, which is a well-known turquoise and jewelry seller seller based in Durango, CO. The video covered making a basic gemstone pendant and although I’ve seen dozens of videos on that topic and have made many of my own, I checked it out, hoping to learn a few new tricks.

The guy who was making the piece — John — definitely had experience and knowledge. His narration was better than average, but far from perfect — for example, he occasionally used the wrong word for something or left sentences unfinished as he was working. It amazed me when he started talking about how much he loved a particular pair of pliers, pointing out that they were made in Pakistan (like 75% of jewelry making tools) and struggling to get the name Wubbers out with a laugh. Why did that amaze me? Well, Wubbers is generally recognized as a quality brand of tool and I really think he should have been familiar with the name.

The camera work was excellent. Most videos are one-person affairs where the camera sits on a tripod that may or may not be in the best position; this video had a camera guy who did a great job staying focused (literally and figuratively) on what we needed to see.

The video was long — 50+ minutes — and I watched it on my new bedroom TV setup. That means I fell asleep before he was done. (I cannot read or watch TV in a horizontal position without falling asleep.) In the morning, however, I finished watching it on my iPad while I had breakfast. I did learn something — a new (to me) technique for attaching a bail — and, because of this, I consider watching the video time well spent.
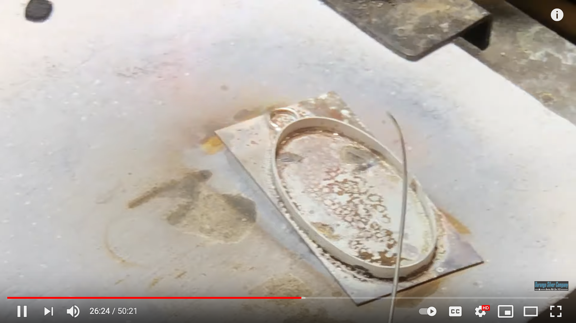
Stick Soldering
Screen capture from the video showing John soldering the bezel and a jump ring to the back plate. One of the things I learned in this video was a new (to me) technique for using a jump ring to connect a pendant bail. He also demonstrated stick soldering, which I’ve seen a few times but haven’t tried yet.

That is, until I got to the end. You see, John was creating a bezel setting for a cabochon. A bezel is a strip of thin metal — silver, in this case — that is formed to fit the stone and soldered onto a back plate. When all the soldering and polishing is done, the very last step is to fit the stone into the prepared bezel and use a variety of tools to bend the top edge of the metal down around the stone to hold it in place. This is a standard bezel setting technique. Look it up, take a class, watch a bunch of bezel set videos and 99% of them will show you this correct way.

The video started going off the rails for me when John reached for a coffee mug full of sawdust and put some into the bottom of the finished piece, under where the stone would go. Sawdust. A wood product. In a piece of sterling silver jewelry.
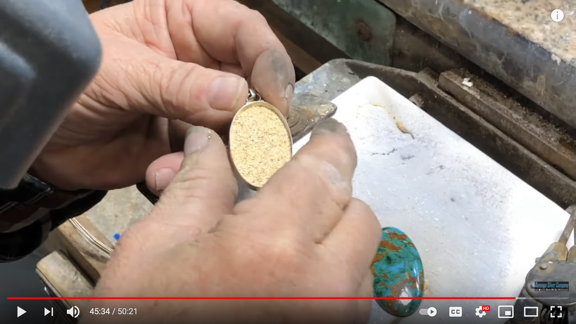
Sawdust in a Bezel
Here’s another screen grab from the video. This one shows the layer of sawdust at the bottom of the bezel.

He then put the stone on top of it. The sawdust’s job was to raise the stone a bit so the bezel wouldn’t come up too high on the stone.

Let me take a moment to explain how getting the bezel the right height for the stone is usually done. There are two techniques to choose from:

  • Before shaping and soldering the bezel, cut it to the right height. This is the correct way to do this. It’s a pain in the ass because you’re normally only trimming off a millimeter or two and it’s important to make a good, level cut. If your cut is bad, you can level it out with sandpaper after soldering it closed.
  • Put something under the stone to raise it. Folks who do this normally use some sort of material that will not decay in any way. Tiny cut up pieces of credit cards are popular. I have, in the past, used copper sheet cut to size. (I once made a pair of earrings with bezel set cabochons and although the stones matched in appearance, one was definitely thicker than the other; I used copper under the thinner one to make it match its mate.) I’ve never seen anyone use a biodegradable product like sawdust.

Okay. So this guy used sawdust. He called it “jeweler’s sawdust.” I’ve never seen it before — and I’ve shopped at a lot of jewelry supply sites and stores. Maybe that’s acceptable in the business? I didn’t know but I also wasn’t going to switch.

What he did next, however, floored me. He pulled out a bottle of liquid glue and, using the needle-tip applicator, glued the stone into the bezel.
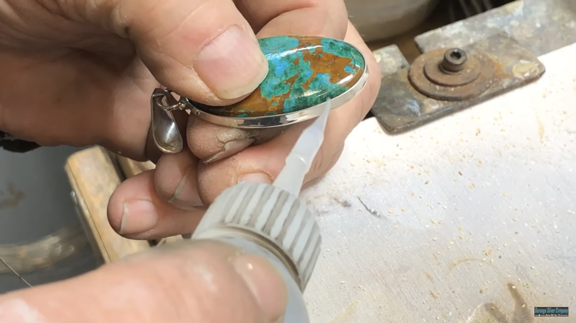
Glue
He called that stuff “superglue.”

I screamed at my iPad: “Not glue! Don’t fuck it up with glue!”

Of course, he kept gluing. I turned it off. I couldn’t bear to watch him permanently affix, with “superglue,” a beautiful cabochon to a very nice sterling silver setting and the sawdust beneath it with glue.

(I later watched the end. He did use a bezel setting tool to close up the bezel over the stone. But why the glue? Ugh.)

Later, I went back to look at the comments people had left on the video. Everyone loved it. Half of them said that they’d been wanting to try something like this and now they thought they were ready to do it.

I was horrified. He was teaching new jewelry makers a lazy way to do a bezel setting. A way that allowed makers to rely on glue instead of design and skills to set the stone.

But what was worse was that he was showing me that the jewelry made and sold by Durango Silver is likely held together with glue rather than the skill of the jewelry artist.

I guess the moral of the story is this: don’t just watch one video about how to do something. Watch a bunch. Pay attention to the details. If there’s a technique that most of the video makers are using, maybe it’s the right technique.

With very few exceptions, glue has no place in fine jewelry.

B&S Gauge Thicknesses, Saw Blades, and Drill Bits

Another handy chart for jewelry makers.

The other day, I published a chart of Minimum Metal Gauges for making jewelry. I’d made the chart for my own use, based on information I got from the Rio Grande website.

But what I’ve really wanted for a long while was a single chart that listed B&S gauge sizes, the corresponding measurements in millimeters and inches, and the correct jeweler’s saw blade and drill bit sizes for each gauge. For some reason, I could not find all of this information on one chart anywhere.

So I made one by combining information from the Contenti and Livingston Jewelers websites. Here’s the result:

Thicknesses, blades, and bits
This is the chart I’ve been looking for! In the end, I had to make it myself from multiple sources of information.

You can download this chart as a PDF from my public Dropbox folder.

Keep in mind that although I do have a set of jeweler’s drill bits, I don’t use them. Instead, I have a set of bits in various fractional mm sizes — I pick the drill bit I need from that set because I can get a much closer drill bit size for my needs.

Minimum Metal Gauges

A handy chart for choosing metals for jewelry making.

My “day job” may be flying helicopters, but I moonlight as a jewelry artist. I’m constantly looking for reference materials to help me choose the right tools and materials for making jewelry. I find charts extremely handy since I can print them out and attach them to a wall beside my jewelry making bench in my shop. No need to rely on my memory since the chart is right there.

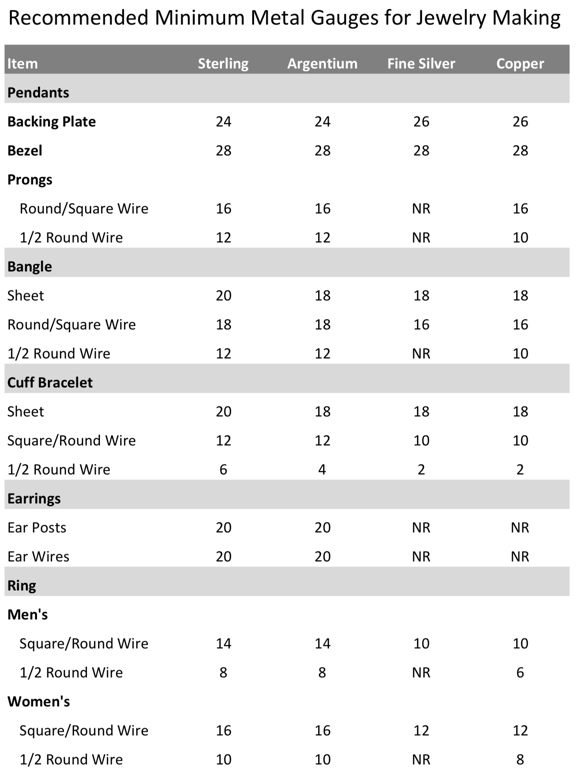
I stumbled upon one on the Rio Grande website recently. It was almost what I needed. I modified it to add information I needed and remove metals I don’t work with. (I only work with sterling, Argentium, and Fine silver and copper.) Here’s the result:

Recommended Metal Gauges
Table of metal gauges. “NR” means not recommended.

You can download a copy in PDF format from my public Dropbox.

If you find posts about jewelry making interesting, please take a moment to leave a comment and let me know. Thanks!

Adding Power to My Utility Trailer

I splurge on batteries and an inverter for my utility trailer/mobile jewelry shop.

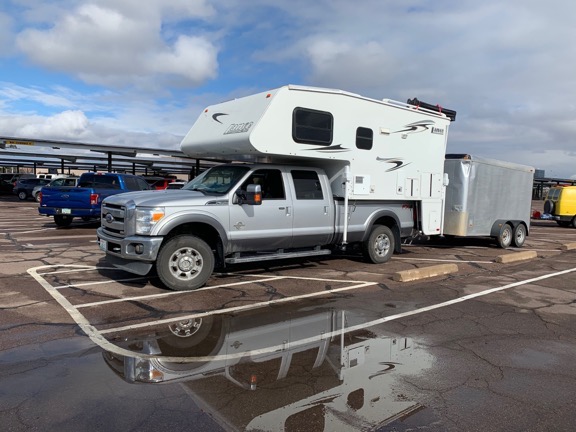
For the past five winters, I’ve been traveling south in my truck with a slide in truck camper on the back. It started with “the Turtleback” in 2016/17. That was a very large and rather deluxe Lance model with all the bells and whistles, including an onboard generator and a slide-out to expand living space when parked. Then I downgraded to a smaller, newer rig, “T2,” which was roughly the same length, not quite as deluxe, and lacked both the slide and generator. What I gained in the swap was a 400-pound weight loss and a lot more inside storage space.

Why a Utility Trailer?

Over time, however, I started bringing more additional items south than I could fit inside the camper or truck. Normally, I’d have my portable Honda generator in the truck, along with my bicycle and wrangle my plastic kayak onto the roof of the camper. In 2017, I brought my little jet boat south with me and loaded it up with extras, including that kayak, for the trip south. It was nice to be able to store extra stuff in a trailer.

In 2018, on my way to my first camp, I stopped in Lake Havasu and bought an inflatable Hobie pedal/paddle kayak. Sure, the 11-foot boat deflated and fit into a bag with wheels, but that bag was both bulky and heavy. I shoved it into the entranceway of my camper for the rest of the drive to camp, but quickly realized that dealing with it in transit was going to be a royal pain in the ass.

My Rig
Here’s my truck, camper, and original utility trailer not long after I bought it. Note the dent in the upper corner.

So I got on Craig’s list and bought a 12-foot cargo trailer. It was a bit “rough,” as I blogged not long after acquiring it. I hooked that up to the back of my rig and stowed all the extras I’d crammed into my truck and camper. It had two axles, but I had trouble getting the tow ball height just right to distribute weight evenly on both of them. It was also a bit rickety and had me worried about long distance driving with it. But it made it back to Washington intact. I wasted no time selling it to a friend who was looking for a tool trailer that could be parked on job sites.

Truck and Trailer
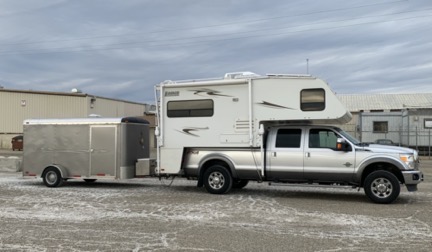
Here’s my current rig. The newer trailer is in much better condition than the original one and includes a toolbox on the tow hitch.

I went hunting for a new one. Literally new. My search brought me down to Yakima, where I stopped in at the Lance dealer for a part I needed for my camper. I mentioned that I was going to look at some utility trailers at a dealer down the road. Mike, the co-owner, mentioned offhand that he and his partner brother had a utility trailer that they never used and would consider selling. I took a look. It was almost exactly what I wanted. I looked at the new ones, then called Mike back and started negotiating for his. About a month later, at the tail end of a trip to Tacoma, I picked it up.

I started customizing the interior almost immediately, adding E-track to the walls so I could secure various items to it. The goal was to turn it into a sort of mobile jewelry shop that could also haul the things I needed to do jewelry shows and camp. I loaded it up and secured everything, but wasn’t very happy about its setup as a shop — I had to take out too many things and set up a workstation on folding tables and then be sure to stow everything before moving. Boxes were big and piled up and difficult to access. The IKEA drawer units I’d put in had limited storage space for the weight they added to the rig. It was uncomfortable and inconvenient and it just didn’t work out the way I’d imagined it would.

So this year I built the tables and shelves I needed to make a real shop area in the front of the trailer, leaving the back wide open for show equipment and camping stuff.


Here’s a brief video I shot the other day that shows off my mobile studio space while I’m parked. It also includes a glimpse of my new inverter. And did you know that I maintain a YouTube channel for ML Jewelry Designs? Find it here.

My Power Needs

Before I discuss my needs, I need to make it clear that I camp off-the-grid. I’m usually not in a campground, but if I am, that campground usually does not have any utilities running to the site. That means I need to be self-sufficient with power (as well as water and sewer). I rely primarily on solar power but also travel with a 2kw Honda generator, just in case I have cloudy weather or unusually high power needs in my camper.

What I’m discussing here is my jewelry-making power needs.

My primary jewelry-making tool is a flex-shaft. The popular brand name is Foredom and that has become a bit of a generic term for that kind of tool, but mine is a Eurotool brand. It’s basically a hanging drill motor attached with a flexible shaft to a hand piece that can accept Dremel sized tools. You turn it on and off with a foot pedal that controls the speed of the motor. Because this tool requires AC power and the only way I can get continuous AC power while camping off the grid is to run my generator (which I don’t like running because of the noise), I didn’t bring it. Instead, I brought my battery operated Dremel, with its spare battery and charger.

I also use a small rotary tumbler quite a bit, as I discuss in this blog post. That also requires AC power, but it only needs 36 watts. Unfortunately, sometimes I need to run it for hours at a time. I was able to run it with a portable 150 watt inverter attached to the power port in my truck or in a battery pack I’d bought primarily to run my telescope. I quickly ran down the battery pack and had trouble getting it charged back up. And the idea of draining my truck batteries to run a tumbler was not very pleasing.

I also found myself with lots of other little batteries that needed charging. My camper does not have an inverter; due to limited space, it only has two 12v batteries. (Higher capacity 6v batteries will not fit in the storage cabinet — I’ve already looked into it.) On short winter days with a low sun angle, the 200 watts of solar flat-mounted on the roof can basically keep those batteries charged and let me use DC power ports to charge my phone, watch, and iPad but not much more.

The Solution

Last year, I’d looked into getting a solar charged battery power system installed into the cargo trailer. The trailer has a metal toolbox on the hitch bars and I figured it would make a good place to put the batteries. I already had a Zamp portable solar panel that I could attach to my camper. Why not use that to power a 2kw system on the utility trailer? But the estimate I’d gotten — more than $3,000! — gave me pause. A whole year’s worth of pause

This year I went forward with a less ambitious setup that included just two 6v batteries and a 1kw inverter. I had it installed in Quartzsite, AZ, where there are numerous solar power dealers who work on RVs. (I went to Solar Bill’s, but Discount Solar is another dealer there.) It still wound up costing about $1200. But if I kept the batteries charged, I would have all the power I needed to run my tumbler and charge just about any device that needed charging.

Solar Panels PM
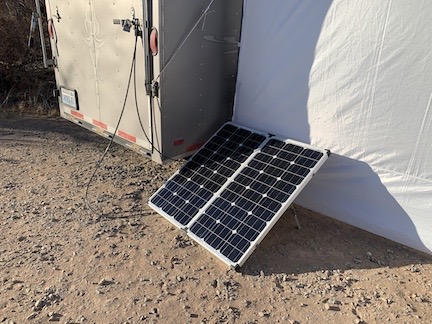
Here are my solar panels in my current setup location. The original location had the panels in full sun from around 9 AM to 5 PM; in this new spot, they get sun at 8 AM but start falling into shade around 3:30 PM. The cable for the panels is only 12 feet long and the plug for it is at the front of the trailer. Poor parking planning on my part, but it’s all good.

Plug and Outlet for Solar Panels
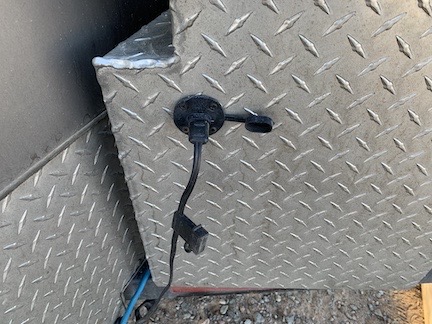
Here’s where the panels plug into the side of the toolbox where the batteries are.

Batteries for Solar Setup
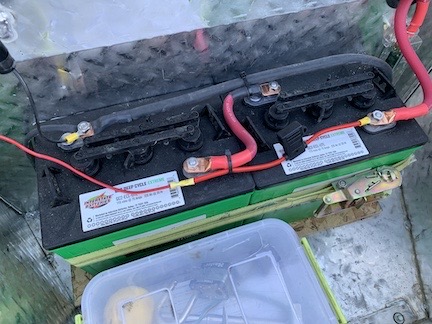
Here are the batteries inside the toolbox. There’s a vent hole behind them. I lost about half the box capacity to store things; I can’t put anything on top of them.

1000 Watt Inverter
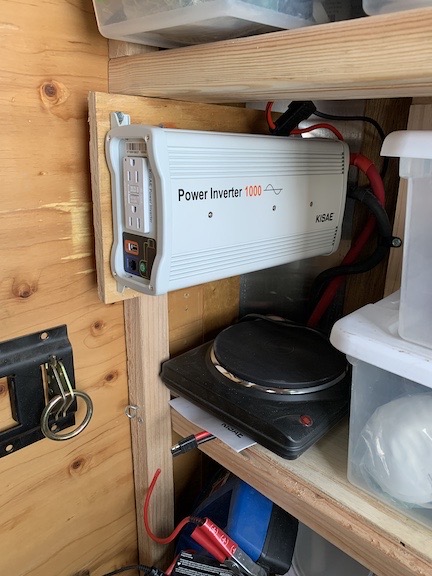
Here’s the inverter, mounted in the front corner of my trailer just under one of the shelves. I’ll likely use the area around it as a charging station for various batteries in the future.

I brought it all back to camp, set up the solar panel in a good spot, and let the system do its thing. It was a bit iffy at first. Although the batteries were charged when I got them, I don’t think they were at 100%. My immediate use brought their power levels down a lot more than I expected. But after a few days with bright sun on those panels — including days when I didn’t use the power in the trailer at all — I soon had the batteries fully charged and able to share that power with any device I plugged in without a considerable power droop. I even managed to charge that big battery pack overnight without draining the system batteries.

I’ve since set up a little portable table near the inverter where I’ve parked various battery chargers — for my Dremel, my Ryobi tools/lights, my drone, and even my laptop. It has become the go-to place for charging things and it does a remarkable job. In the future, I’ll probably just use the shelf beside the inverter to set up a charging station.

Since moving my cargo trailer closer to my camper, I’ve also moved those portable panels closer. That means that if the utility trailer batteries are charged up and I don’t need them, I can attach another 160 watts of solar to my camper to bring those batteries up to full.

And yes, I did look into putting 200 watts of solar on the utility trailer’s roof. It would have cost me an extra $1400 for the panels, controller (which is built-into my portable panels), wiring, and labor. Not worth it — at least not yet.

Long Term Benefits

I know I won’t be traveling like this every winter forever. In fact, I’m starting to think the this might be my last year at Arizona’s Colorado River backwaters, where I’ve been coming since 2014. I’m starting to feel as if I’m stuck in a rut and and after living too many years in someone else’s rut, there’s nothing I hate more than that.

I’ve been thinking of making some major changes in my life that includes shifting focus on how I spend my free time. There will come a point when I don’t need that utility trailer at all. It seems a shame when I’ve spent so much time and money customizing it.

But the way I see it, the improvements I’ve made to the trailer make it even more flexible for me or a future owner. I can see converting it into a small living space for rugged camping — there are quite a few people camping in converted utility trailers out here in the desert. My jewelry workbench illustrates how easy it is to build removable structures onto the E-Track I’ve installed. Where I’ve put in a workbench, someone else could easily make a platform for a cot or other sleeping space. The storage shelves in the nose of the camper aren’t pretty, but they do make it possible to store lots of things in a way that can be easily secured in transit. And the power makes it even more attractive for off-the-grid use. All it takes is a need and a little imagination.

Until then, I’m enjoying the upgrade.

The Gallery Exhibit

I submit 10 pieces of jewelry to a gallery’s “Gems and Geology Holiday Gift Show.”

I’ve come a long way since I started making jewelry — mostly wire-framed pendants — with rocks. Over time, I’ve stepped up my game by taking classes and trying new techniques. The results are promising. And encouraging.

My friend Cyndi told me about a special exhibit at a gallery we both sell our work at. (Cyndi makes metal art; you can find it on Etsy.) The theme was Gems and Geology, which is pretty much what my jewelry is all about. Although I’d missed the first deadline — intent to submit with digital samples — I wrote to them anyway. I got an enthusiastic response:

We’d love to have your work in our show! … This is just the type of work we were hoping for! I am so glad you reached out.

Whew!

I got to work making pieces that I thought would be appropriate for a real gallery show. I already knew that this particular gallery did not like my wire work, mostly because it simply doesn’t sell there. (Oddly, it sells remarkably well at another gallery in Ellensburg; go figure.) That meant prong and bezel settings, which I was just starting to get comfortable doing.

I made the mistake early on of sharing a photo of one of my pieces on Twitter. Someone wanted to buy it. While I love selling jewelry, I was really hoping to send that one to the gallery. Still, I had plenty of time to make a replacement and I did.

I finished making the 10 pieces two days ago. I spent this morning photographing them for publicity materials. I figured I may as well share the photos here, too.

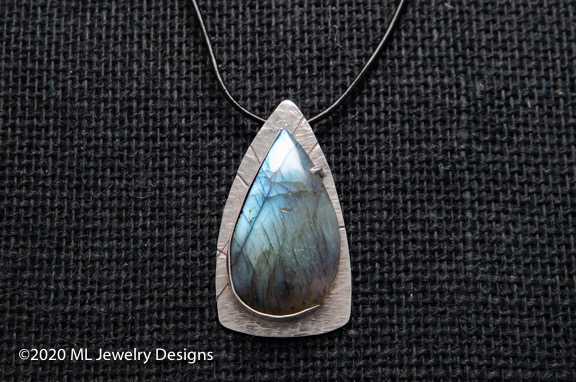
Labradorite Pendant
Labradorite bezel and prong set on textured, reclaimed silver. Black leather cord with sterling clasp. (Learn more about my reclaimed silver in this blog post.)

Kona Dolomite Pendant
Kona Dolomite prong set on polished Argentium silver. Sterling silver chain. (This was not made specifically for the show but meets the requirements.)

Crazy Lace Agate
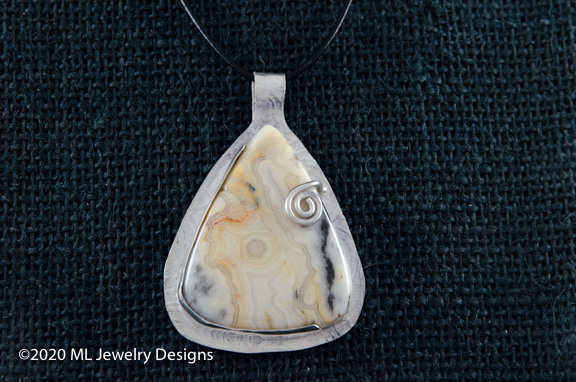
Crazy Lace Agate bezel and prong set on textured Argentium silver. Black leather cord with sterling clasp. (This was not made specifically for the show but meets the requirements.)

Azurite and Malachite Pendant
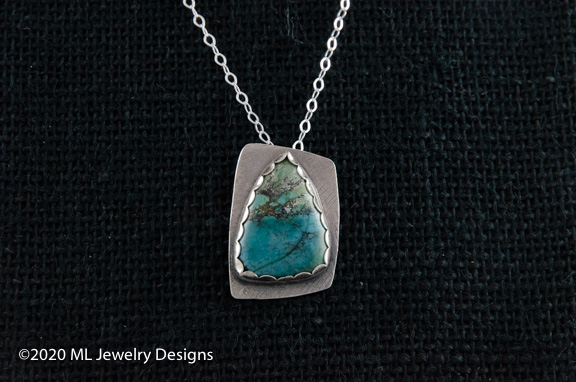
Azurite and Malachite bezel set on textured reclaimed silver. Sterling silver chain.

Brazilian Agate Pendant
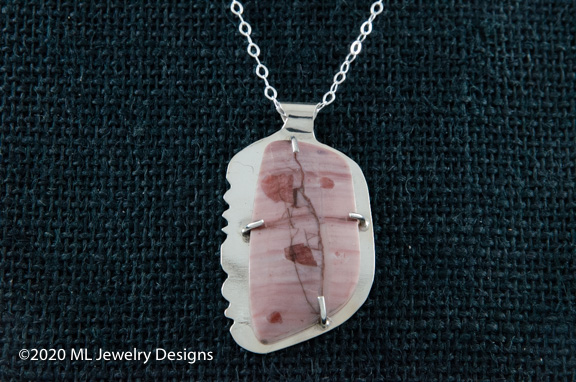
Brazilian Agate prong set on textured reclaimed silver. Sterling silver chain.

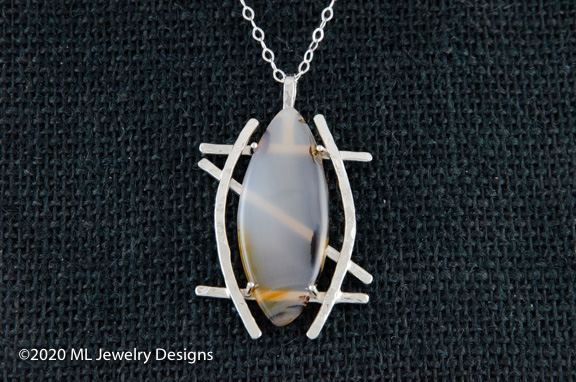
Montana Moss Agate Pendant
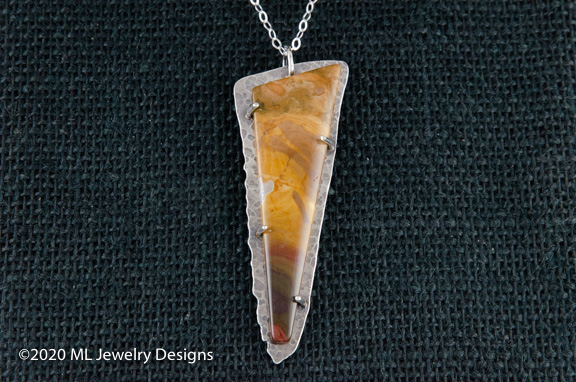
Montana Moss Agate prong set on a textured sterling silver frame. Sterling silver chain.

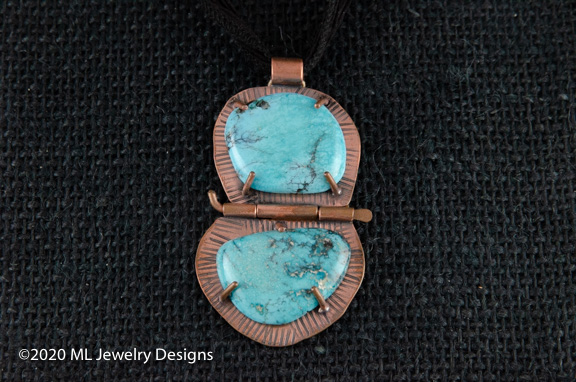
Turquoise Pendant
Two genuine turquoise cabochons prong set on textured and hinged copper. Black silk cord with hand-formed copper clasp. (This was not made specifically for the show but meets the requirements.)

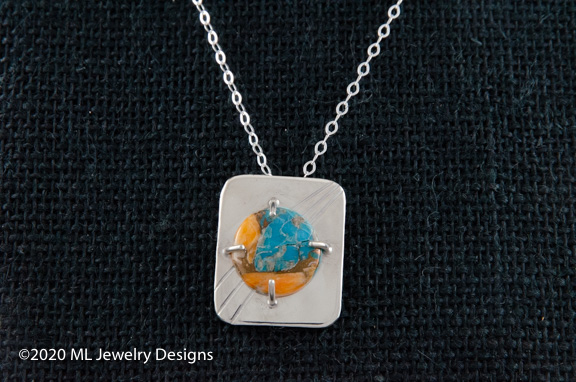
Kingman Turquoise with Spiny Oyster Shell Pendant
Kingman Turquoise and Orange Spiny Oyster Shell with bronze prong set in textured sterling silver. Sterling silver chain. (This was not made specifically for the show but meets the requirements.)

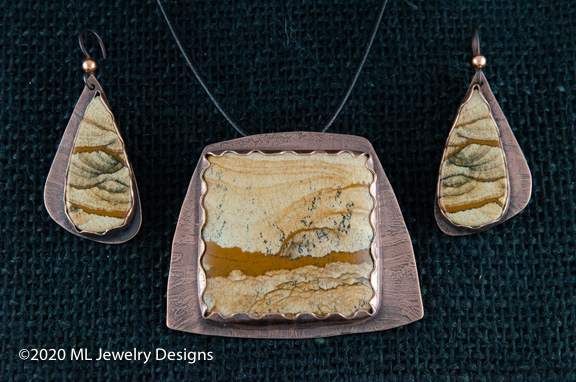
African Queen Jasper Set
African Queen Jasper bezel set in copper for earrings and a pendant. Black leather cord with sterling silver clasp for pendant; hypo-allergenic niobium ear wires for earrings. This is my current “masterpiece.”

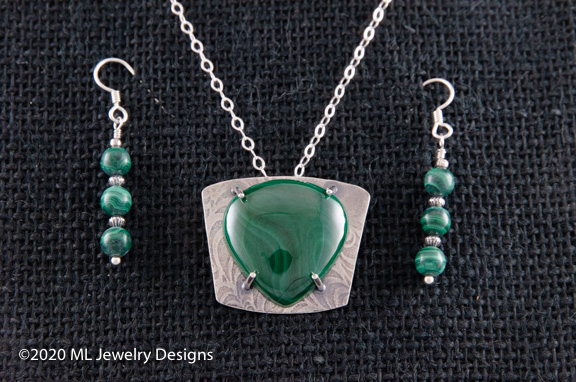
Malachite Set
Malachite prong set on textured reclaimed silver with malachite bead earrings. Sterling silver chain; sterling silver ear wires.

Keep in mind that none of these are currently available for sale. If you want them, you’ll need to go to Confluence Gallery in Twisp, WA between November 28 and January 9. (Twisp is actually a great destination in the winter, especially for cross-country skiing. The Methow Valley has hundreds of miles of well-groomed cross-country skiing and snowshoeing trails and was my Christmas destination before I started going south for the winter.)

If you like what you see here, you’ll probably like some of the jewelry in my Etsy store. Go check it out!