SpaceX: Giving Me Hope for America’s Future

Maybe America can be great again.

At the risk of getting a barrage of hateful comments from people in perpetual denial about the general dumbing down of America, I need to post this.

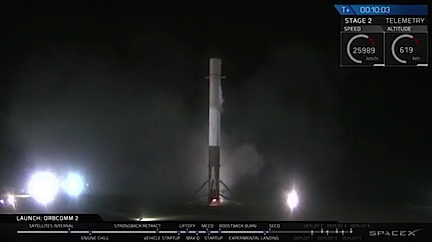
This morning, I watched the 45-minute webcast of SpaceX’s recent history-making launch. If you haven’t seen it, check it out here:

Or better yet, do what I did: load up the YouTube channel on a Roku and watch it on a big screen TV.

There are a few things that struck me about this presentation.

  • Youth. The very first thing that stuck me is the age of the folks who were part of this event. Young people in public relations and engineering positions. Young people everywhere. This wasn’t a dreary circa 1970 NASA launch reel with too many guys in too many white shirts and ties. This was today’s youth in jeans and T-shirts and hoodies. Talking the way we all talk, using words we all understand about an amazing scientific achievement. No, not every young American is spoiled, entitled, and/or unable to think of anything beyond fashion or music or video games. Some of them are today’s rocket scientists.
  • Scientific achievement. I think we’ve become so accustomed to seeing amazing thing in movies and on television that we don’t realize how much of it is fake. So when a company like SpaceX can send a rocket booster into space and then land it successfully in an upright and vertical position on a landing pad only 282 feet in diameter, we don’t understand what a truly amazing achievement that is.
  • Media Presentation. SpaceX apparently did a live webcast of this launch. You didn’t have to tune into a television channel or have cable news access or watch countless advertisements squeezed in to maximize broadcaster revenue. You saw a series of SpaceX staff members telling you what was going on, with an informative timeline and video feeds to show what was coming up and what was actually happening. This was available all over the world — and it still is, for free, on YouTube. Heck, I was even able to embed it here to save readers the bother of searching for it online. The only excuse for not seeing this is apathy.

Rocket Booster
Do you have any idea what an achievement this is?

As I watched the video and saw actual footage from space of the first booster separating from the main rocket, I had tears in my eyes. And more tears when I saw that first booster standing upright on an old Florida launch pad, still smoking from the engine that had enabled it to softly touch down on four landing legs less than ten minutes after being in space. Then, when the chant that I was thinking of started up from the spectators: “U-S-A! U-S-A! U-S-A!” It made me feel really proud to be an American for the first time in a very long time.

When I was a kid, my mother made me stay up to watch Neil Armstrong step out of a metal capsule and walk on the moon. She said I’d be witnessing history and, at 7 years old, I really didn’t care all that much. But I watched it and I remember it and nearly 46 years later, I’m glad I did.

This morning, sitting on my sofa, I watched something almost equally amazing — but have heard only the briefest mention of it on the radio and television. Ho hum. I guess a real achievement by man can’t compete with the box office stats for the latest Star Wars movie.

Making America great again has nothing to do with immigration and war and terrorists and religion. It has everything to do with what made America great in the first place: courage, innovation, the embracing of science and technology, and the willingness to work hard to achieve great things.

When my fellow Americans can put aside their anger and hate and the other things that divide them, when they can stop denying the findings of science, when they can see that moving forward is far more important for the future than dwelling upon real or imagined slights in the past, when they can see that the differences among their fellow men can help them grow and learn and see the world in new and exciting ways — well, then America will start to be great again. Until then, spectators like me, on the downhill slope of life, will have to be satisfied with observing pockets of greatness offered by innovative American companies like SpaceX.

Got something to say about this? Read the Comment Policy first.

Creating Time-Lapse Movies

How I do it.

I’ve been fascinated with time-lapse photography for as long as I can remember — and believe me, that’s a long time. I love the idea of compressing a series of still images into a short movie. But what I love more is the way it speeds up the process of things that happen slowly: clouds moving across the sky, shadows changing with sun angles, and things being built or moved. There are a lot of time-lapse movies on this site; click the time-lapse tag to explore them. I do want to stress that my time-lapse movies are very simple. If you want to see something amazing, look at the work of a master like Ross Ching’s Eclectic series.

I rely on certain equipment and software tools to create my time-lapse movies. Since I’ve been sharing daily time-lapse movies of the construction of my home, I thought I’d take a minute to explain how I make them.

The Camera

Hero HD
I use my old Hero HD for most time-lapse work these days.

The first thing you need to create a time-lapse movie is a camera capable of snapping an image at a regular interval. These days I use a GoPro. Although I have three of these great cameras — Hero HD, Hero 2, and Hero 3 — I tend to use the oldest (the Hero HD) for this kind of work so if it’s lost, damaged, or stolen, it’s not a huge deal.

The GoPro has an interval or time-lapse mode that I use quite often. Because the process of building my home is relatively slow, I set it to the most amount of time between images: 1 minute.

(In the past, I’ve used a Pclix intervalometer — that’s a time-lapse timer that triggers a shutter release on a camera at a preset interval — attached to an old Canon G5 digital camera. Again, the camera was old and worthless so if someone walked off with it, no big deal. Losing the intervalometer would have been worse.)

Skeleton Housing
The skeleton housing gives me access to the USB port and SD card on the GoPro.

Power is an issue when you run a camera for hours on end. I use the GoPro Skeleton housing around the camera so I can run a USB cable to it. The cable then feeds into a window on my RV where it plugs into a power source. The added benefit is that I can remove the SD card without opening the housing and changing the camera angle. I use electrical tape to cover up the two sides of the housing to keep dust and rain out.

The Camera Mount

For time-lapse photography, it’s vital that the camera be held still (or moved smoothly, if you’re going for that kind of effect). That means a tripod or camera mount.

Pedco UltraClamp
This is a must-have mount for anyone with a GoPro or lightweight digital camera.

I routinely use a Pedco UltraClamp with my GoPros. I can’t say enough things about this clamp-on camera mount. With a GoPro, all you need is a tripod mount adapter and you’re good to go.

For my construction project time-lapse movies, I clamped it onto one of my RV slide-outs, pointing at the construction site. Easy.

The Software

Okay, so the camera has been running for hours and it has collected hundreds of images. Most of my time-lapses run from 6:30 AM to 4:30 PM. That’s 10 hours with 60 shots per hour. 600 images.

The images are 2592 x1944 pixels. That’s way bigger than I need. In addition, I want a 16:9 aspect ratio, which is better suited for video projects these days. So I need to do some processing.

EasyBatchPhoto IconThe first thing I do is run the images through a program called EasyBatchPhoto. (Remember folks, I’m using a Mac.) I have the app set up to crop the image to 1920 x 1080 — that’s standard high definition. This basically crops away the edges of the image, focusing on what’s in the middle. The app also slightly sharpens the image and applies a date and time stamp watermark based on the EXIF data saved with the original file. It then saves it as a medium-high quality JPEG in a folder I specify. I do this for only the images I want to include in the movie; no reason to process them all. The rest of the images are discarded when I wipe the SD card.

EasyBatchPhoto Settings
EasyBatchPhoto can process huge batches of images at a time.

I should mention that you could probably do all this with another app. This happens to be the one I use. I’m sure some readers will share their solutions in the comments.

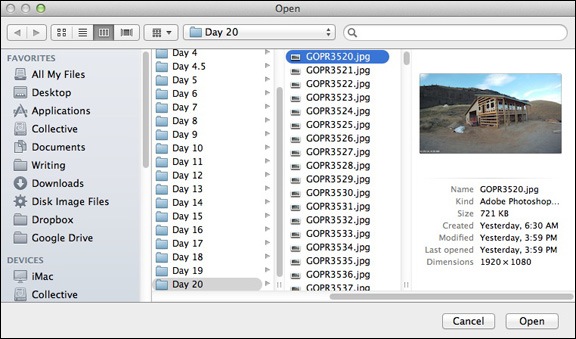
QuickTime Player 7 IconOnce I have the images in a folder, I open up QuickTime Player 7, which I’d updated to the Pro version years ago. This is an old version of QuickTime. The current version does not have the feature I need, which is the Open Image Sequence command. I use that command to get a dialog box prompting me to choose an image. I select the first image in the folder containing all of the images for the movie.

Choose the First Image
Use this dialog box to select the first image in the folder of images for the movie.

Image Sequence Settings
Use this dialog box to set the frame rate.

I’m then prompted to set the image sequence settings — basically the frame rate for the movie. There are a lot of options on that pop-up menu. After some experimentation, I decided on 15 frames per second for this project. That compresses 10 hours worth of images into about 40 seconds. Any faster and you miss a lot of the action. When I click OK, QuickTime makes the movie and displays it in a window. After taking a look at it, I save it to disk, usually in the same folder as the images.

Why YouTube?
I was really pissed off to discover that Viddler, the site I used years ago to host video, has made my videos unavailable for viewing. I think it’s because they expect me to pay for hosting, which just ain’t gonna happen. This screwed up a lot of embedded video on this site. Because some of the videos are very old, I can’t find the source files so those videos are gone forever. So I’ll use YouTube on a go-forward basis for all video sharing. It’s free and very easy to access.

The last thing I do is upload the movie to YouTube. I do this with the current version of QuickTime. I just double-click the movie’s icon to open QuickTime and use the share command to share it on YouTube. QuickTime prompts me for a movie description and tags. Within minutes, it’s online and available to anyone who wants to see it.

The entire software process takes about 5-7 minutes and is mostly automated.

If you make time-lapse movies and use a different set of software tools, please do use the comments to share your process. It’s always nice to learn about new software that might make things easier or just plain better.

Bees: My First Hive Inspection

I open my new hive for the first time to see what my bees are up to.

I started my beekeeping hobby in June 2013 and have been blogging about it periodically. If you’re interested in reading the other posts in this series, follow the Adventures in Beekeeping tag. Keep in mind that the most recent posts always appear first on this blog.

I set up my first beehive and loaded bees into it on Tuesday, June 4. On Tuesday, June 11, I went back to inspect the hive.

Hive inspections are something beekeepers should be doing about once every 1-2 weeks during the productive summer months. The idea is to check the health of the colony, remove things that shouldn’t be in there, and get a general idea of what the bees are doing in their box(es).

Preparing for the Inspection

To prepare, I looked up a few checklists online. I wanted a guideline that would help keep me focused on what I needed to do so I could minimize the amount of time the hive needed to be open. I found two good ones:

  • Hive Inspection Sheet is a great one-page checklist to record information from an inspection. This is the sheet I wound up using, even though it includes many items that I didn’t need for this inspection.
  • Hive Inspection Checklist comes with 7 pages of information to help you understand what you’re doing and how to do it. Although I didn’t like the actual checklist format, I found the accompanying explanations extremely valuable.

I also made notes in a looseleaf book I’ve been using to keep track of things I need to remember. (Seriously: the memory loss that goes with aging and having a very busy life sucks big time.) I divided it into two parts:

Prep:

  • Hive body. I needed to put the second hive body in the Jeep so I wouldn’t forget to bring it.
  • Smoker setup. I wanted the smoker all set up with ignition paper and fuel so all I had to do was light it.
  • Food. Didn’t want to forget the sugar syrup I’d prepared.
  • Camera charged. I was bringing along my GoPro to document the inspection and I needed to make sure it was fully charged.

Tasks:

  • Light smoker. Seriously, I even need to remind myself to do something like this.
  • Open hive. Duh-uh.
  • Remove frames one by one and check:
    • Brood development. Are there larvae? Capped brood cells? The health of the colony depends on a constant inflow of new bees via hatching.
    • Eggs. Is the queen laying eggs?
    • Honey / Pollen. Are the bees making honey? Storing pollen? They should be!
    • Queen Cells / Drone Cells. These are brood cells for queens or drones. They are larger than regular brood cells. I didn’t expect (or want) to see queen cells — one queen is enough and the presence of queen cells indicates either an unhealthy queen or the possibility of swarming. Drone cells should be present, but not in great numbers.
    • How many frames are full? The bees should have filled out their original five nuc frames and begun work building out comb and filling it on the additional five frames I provided in their hive.
  • Add hive box on top. Only if they’d made good progress on the five new frames.
  • Close hive. Duh-uh.
  • Feed bees. I needed to refill their feeder with the sugar syrup.

My notes were the bold text. I didn’t need the explanations. (Those were for you, dear reader.) Not a huge amount to do or remember. Just right for this first time.

I also printed out the checklist. I’d fill it out when I was finished.

The Inspection

I had a great day on Tuesday. Very relaxing. I blogged about it here. By the time I got to Jim and Kriss’s house in Wenatchee, I was feeling good. Very mellow and relaxed. In no hurry. And I stayed that way. That’s really important when you’re working with at least 10,000 live bees.

Hive Inspection PhotoI arrived around 4 PM, when the temperature was around 70°F. A nice warm afternoon when many of the bees would be out foraging. I brought my gear into what I’ve come to think of as the “bee yard” and was happy to see bees coming and going through the hive entrance. I saw Jim and Kriss and Jim came in to keep me company. I lighted the smoker and suited up. Jim remained in plainclothes, but stood back as I got to work.

Rather than give you a blow-by blow of the inspection, I’ll let you watch the video. It’s 9 minutes long, edited down from 30 minutes of raw footage. It was shot with a GoPro camera on a tripod. (I’ll do this again in the future and talk more directly to the camera.) Throughout the video, you’ll hear Jim and me talking about what we’re seeing.

Here’s the video:

The long and the short of it is that I have a healthy hive with friendly bees. Did you notice how Jim gets closer and closer throughout the video until at one point, he sticks his bare finger right next to the hive? My bees didn’t mind. They’re mellow. Mellow yellow bees. Jim says his bees aren’t that nice.

We saw drones and I actually spotted the queen, which surprised me very much. Jim and I seemed to see her at the same time.

We did find one swarm cell — a queen cell near the bottom of the hive. They likely built this before the frames were put into the hive, thinking they were running out of space in the nuc (which they were). I removed it.

We didn’t see any eggs, but we did see plenty of developing larvae and capped brood cells. And tons of honey and pollen.

I got to scrape clean honey comb off the top of the inner box. I munched on it later in the car. Next time, I’ll bring a container just for my spoils. I’ll be leaving most of the honey for the bees this year — they’ll need the stores for the winter.

Next Inspection

My next inspection will be about 10 days after this one — sometime next week. I’ll do pretty much the same thing, but this time I have the challenge of working with two boxes full of frames.

I’ve been giving my frame setup a lot of thought. I’m thinking that I want to reconfigure the hive to have just one deep frame on the bottom and then mediums above it. I’ll still allot two hive bodies for brood, but I think that having medium bodies/frames above the hive will give me more flexibility for honey production while making the hives lighter overall. And I’ll still have the deep boxes on bottom for installing or creating nucs. Of course now that I’ve already put the deep box on top, I can’t really make any change until I get a second hive setup and either split the colony or use the occupied frames from the top box in a new hive. Neither is possible right now.

I’m also thinking of putting in a frame with beeswax foundation might be a nice way to harvest a single frame of honeycomb before winter. I think the bees can spare that for me — especially given the amount of sugar I’ve been feeding them.

More video — but shorter and more pointed — with the next inspection. As usual, your comments and feedback here is always welcome.

Flying M Air Videos on You Tube

I didn’t find what I hoped to, but am still pleasantly surprised.

After taking Santa in for a landing at Deer Valley Airport Restaurant twice and seeing well over a hundred people waiting for us on the ground each time, I assumed that someone would have shot some video and put it on YouTube. After all, people put all kinds of stuff on YouTube and I thought seeing Santa step out of a shiny red helicopter might be YouTube worthy.

So I did a search using various search words and phrases.

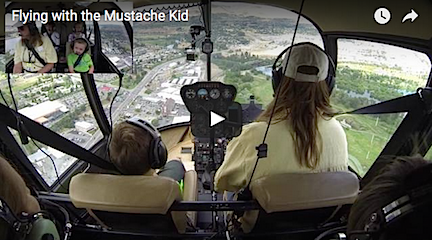
And although I didn’t find any videos of our recent Deer Valley Airport appearances, I did find three other videos shot by my passengers over the past two years and posted on YouTube. They’re kind of fun. Enjoy.