Construction, Day 23: Placing Deck Posts, More Concrete Prep

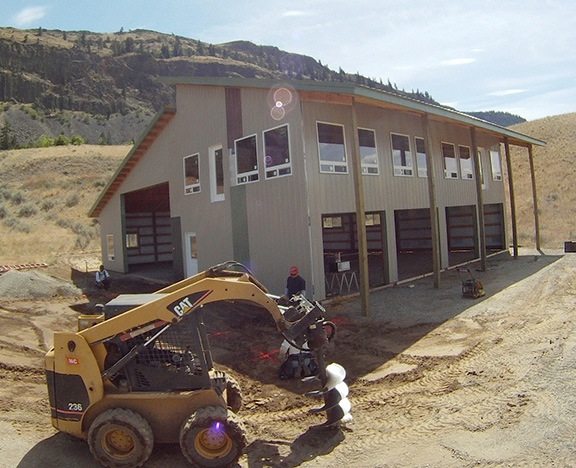
Getting ready for the big pour.

On May 20, 2014, I began blogging about the construction of my new home in Malaga, WA. You can read all of these posts — and see the time-lapse movies that go with them — by clicking the new home construction tag.

The last Thursday in June was busy with various crews of workers doing a few last things before the big concrete pour scheduled for the next day.

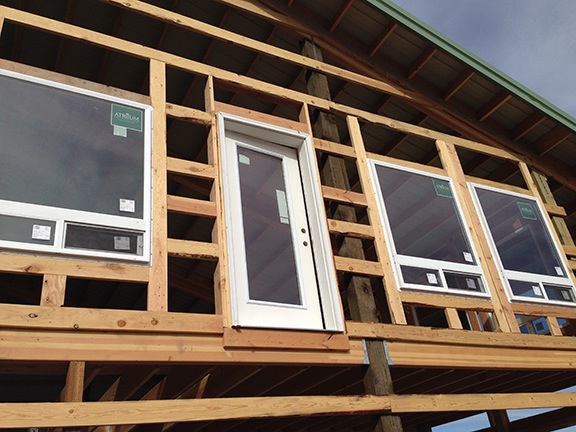
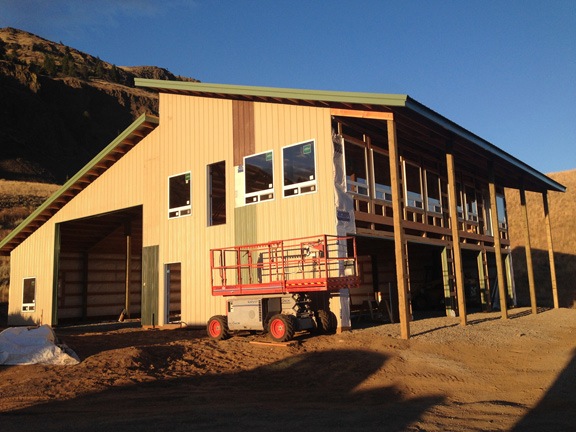
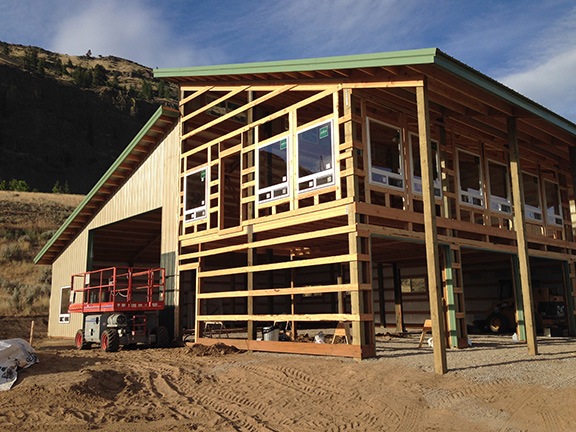
First, Angel and the guys came by to set the posts for my front deck. The deck had been left off the original plans so the posts were never set for it. That was probably a good thing anyway — it gave the crew more room to work around the front of the building. Since deck framing wouldn’t happen until later and this deck didn’t have an overhang, the posts weren’t really needed until the end of the project. It made sense to set them and pour concrete when the slab was being poured.

Once the poles were in place and supported above their holes, the inspector came. We chatted for a while before he left. Nice guy.

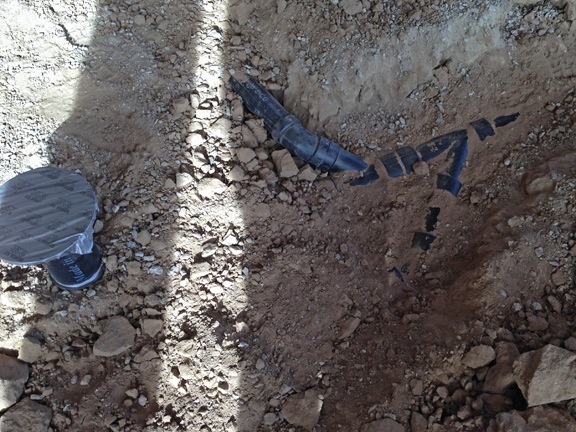
After lunch, one of the concrete guys showed up. He needed to do some form setting for the job. He didn’t stay very long.

Corey showed up later. He spent most of the time setting up lights in the RV garage/shop part of the building. The pour was supposed to start at 4:30 AM and it was still mostly dark then. I didn’t watch because it started raining and I got called out to fly. He was just finishing up when I returned.

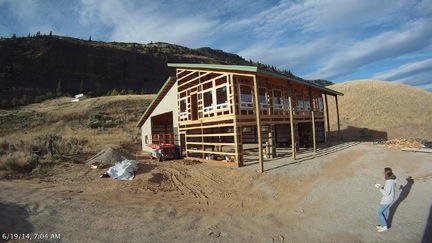
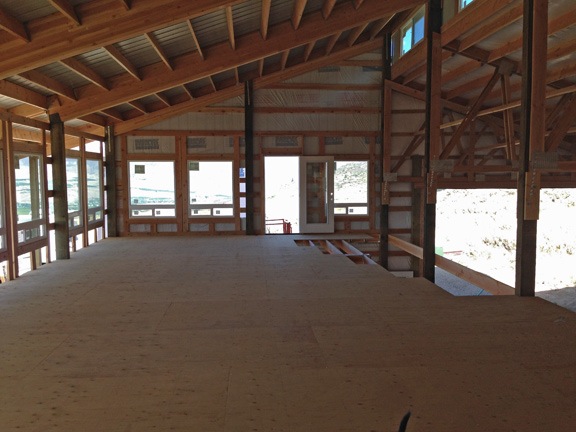
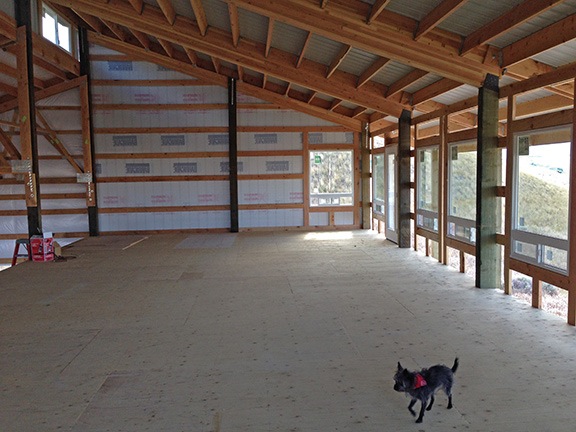
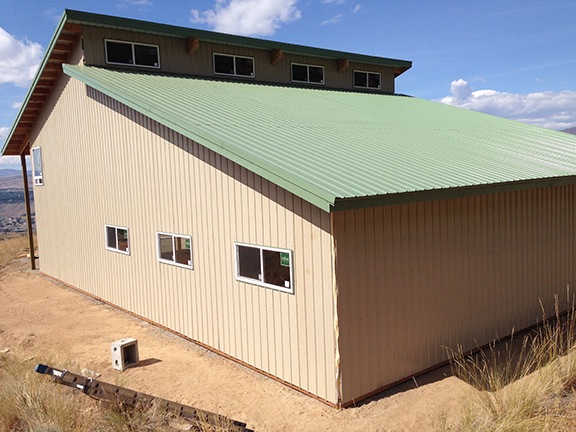
I wandered around the building site later in the day. The interior had been completely cleared out except for a few concrete forms. There was an air of expectancy about the place. Friday would be a busy day.

I went out that night and, when I got home, I was almost surprised to see my building all lit up. Corey had left the lights plugged in. I debated shutting them off and decided against it, mostly in case I overslept and the builders arrived before me. There was something eerie and wonderful about seeing the place glowing with light.

Lit Up at Night
Corey left the lights on when he left so the place would be lighted when they arrived in the morning. I didn’t mind at all.

Here’s the time-lapse:

Construction, Day 22: Prepping for Concrete

Grading, compacting, digging more holes.

On Monday, the builders worked mostly inside the building shell, prepping for the concrete pour. They had a number of tasks to perform.

First, they needed to grade and compress the gravel pad inside the building. The grading was required for the RV garage, which has a 24-foot drain down the center of it. They needed to not only put the drain I provided into the floor, but to slope the floor toward the drain on all four sides.

The garages were also gently sloped toward their doors. I was told that the slope was too gradual to get water rushing, but if I ever parked inside with a wet or snowy vehicle, the water would eventually find its way out.

They also needed to set forms at the door openings to hold the concrete in. (Other forms would come later.)

Outside the building, they needed to dig four holes for the posts that will eventually hold up my front deck. Those posts had been omitted at the beginning of the project because they did not appear on the original plans. They decided to wait until the concrete delivery to dig the holes and plant them in concrete.

In order to dig those holes, they needed to level the area and compact the soil. That entailed using the bobcat to move a mound of soil where my driveway will eventually go to a low spot under the future deck. This was good for me — it would reduce the amount of earth moving I’d need to get my driveway and outside concrete pad in. They ran yellow caution tape around the area to prevent people from falling into the four-foot deep holes.

Digging Holes
Angel’s crew prepares to dig four more post holes.

In the leveling process, Angel “found” my septic system end pipe. (Oops.) The damage was minimal. I gave him a T-post to mark the spot so no one would run it over in the future. Chances are, it will be slightly relocated anyway when I connect the stub outs to the line.

The crew also had to move a pile of wood and remove the pile of gravel that had been put in front of the RV garage door by the excavator who did the pad preparation. They needed to clear the way for the concrete trucks, which would need to get as close to the building as possible. To get rid of the gravel, they spread it on various parts of my driveway that needed it, which is exactly what I was hoping they’d do.

When they were done and left, the building was completely empty except for a wheel barrow and the plumbing stub outs. They took the bobcat with them.

I didn’t know it then, but it would be three days until I saw a worker again. Angel and the crew started a job up in Winthrop. Angel later told me that they were camping up there and had a party every night. Made me feel a little like I’d let them down by simply providing beverages, cookies, and energy bars every day.

Anyway, here’s Monday’s time-lapse. The RV at the beginning belongs to a friend; gotta love it when overnight guests bring their own house.

Construction, Day 21: Walls Finished

The exterior walls are now mostly up.

On May 20, 2014, I began blogging about the construction of my new home in Malaga, WA. You can read all of these posts — and see the time-lapse movies that go with them — by clicking the new home construction tag.

Although the builders usually work 4 10-hour days rather than 5 8-hour days, they added a bonus day on week 5 and came to work on Friday. Angel and the crew wanted to finish the exterior walls on the building. They’d saved the side wall with its seven windows, one man door, and four garage door openings for last.

The building’s metal skin does not come pre-cut. Every single opening in the walls had to be measured and every single sheet of metal had to be cut. It was a long day with lots of tedious work.

It was a great day for working: mostly sunny, in the 70s, with very little wind. I did some work in the yard. I was all suited up in my beekeeper suit, complete with helmet, veil, and gloves, when a helicopter flew by close. It looked like a JetRanger with a spray tank but no booms. On the second pass, he came into a hover facing me about 100 feet from the hillside. I pointed to my “guest landing zone” — a level area I’d cleared of tall grass — inviting him to land. But I suspect the LZ’s proximity to my bees scared him. He flew off, returning about 10 minutes later but declining to land again.

I tended to my bees. I have no idea who the pilot was, but I really wish he would have landed and introduced himself.

I wonder if he got a picture of me standing there in my bee suit with my building under construction, RV, and helicopter around me.

Later, I started work on a new enclosure for my chickens. Yes, I know the one I have is only a few months old. But a friend of mine makes really nice chicken yard enclosures out of wood frames with chicken wire. I wanted one like his but didn’t want to spend the money on the lumber I needed. Fortunately, the metal for my building came on 20-foot lengths of 4×3 lumber. It’s not the best quality lumber, but it should be good enough for my chickens. I realized that cutting each length in half and joining them with 2x4s (which I’d have to buy), would give me a more affordable version of what he had made. I’d bought 3 2x4s the day before so I had the materials I needed. After I finished with the bees, I cut the 2x4s to 6 feet and built a prototype. I then cut some of the horse fencing I had and fit it into one of the 5×6 panels. Unfortunately, I didn’t have the right nails or durable enough staples to affix the fencing. That’s Monday’s project.

Meanwhile, the guys finished up the final side of the building. Before leaving for the day, they each took pictures of their work. Angel said that it was one of the more difficult jobs he’s worked on and I got the feeling he was proud of it. He should be! It looked great!

Side and Back of Building
Here’s a photo from a vantage point I haven’t tried yet: the hill on the west side of the building.

Angel told me that a crew will do the ground prep work for the concrete pad on Monday and probably pour the concrete on Tuesday. I expect that Angel and the crew will work on the decks during that time. I’m hoping the stairs go in on Thursday. It’s getting close to done!

I have two time-lapses to share. If you just want to see Day 21, here it is:

And if you have about 13 minutes to spare and want to see all 21 days, here’s the newly compiled version:

Construction, Day 20: Doors In, Front Wall Finished

A little more temporary patchwork, but looking good otherwise.

Eating Cereal
The time-lapse camera caught me looking at the building early Thursday morning, cereal bowl in hand.

Thursday was one of those perfect summer days when there’s just enough cloud cover to keep it from getting hot and there’s very little wind. Great for the builders to move forward and finish the metal on the front side of my building.

They started by installing the three man doors: the main entrance downstairs and the two doors to the deck upstairs. I’d specified glass doors for the upstairs — I wanted to be able to see out even when the doors were closed. I don’t like sliding glass doors so I didn’t get them. Although I’d considered french doors like I had in my old house in Arizona, they would have been too wide for the space I had. And, in all honesty, I never opened more than one of those doors anyway.

On May 20, 2014, I began blogging about the construction of my new home in Malaga, WA. You can read all of these posts — and see the time-lapse movies that go with them — by clicking the new home construction tag.

I didn’t care much about the downstairs door, although I did want to be able to look out. Tanya suggested half glass. Why hadn’t I thought of that? So that’s what we ordered.

Angel checked twice with me to make sure the doors opened the right way before they installed them.

Upstairs Front Door
This door will lead from my front deck into my living room.

Once the doors were in, they got to work on the rest of the front wall, covering it with plastic and then metal. They had to patch another area where they’re waiting for additional long pieces of metal to arrive; this time, they left part of it exposed. It looks kind of funky weird — hope they get the metal soon!

I missed most of the work — after planting two trees and inspecting three of my seven beehives, I had to run some errands in town. Then I got sidetracked letting a friend into my hangar so he could get some tools out of an RV stored in there. I ran into Angel and the crew on my road when I came back. That’s when they told me I’d get a bonus day this week — even though they normally work 4-day weeks, they’d be back Friday to finish the metal.

When I got home, I repositioned the man-lift to the front upstairs door and rode up with Penny to check it out. I can’t believe how different it feels with the walls on.

Inside Looking East
In this shot, I’m standing against the west wall looking east through my future bathroom and kitchen into what will be my living room. The floor needs some work where the stairs will come up.

Inside Looking West
In this shot, I’m standing against the east wall looking west through my future living room, kitchen, and bathroom into the bedroom.

Day 20 End
Here’s the front wall after the work on Day 20. I shot this on Friday morning when the light was shining on it; this wall faces east.

Ready for the time-lapse movie? Here it is. The red “flag” on the upper right in many of the frames is the protective electrical tape coming lose. Oops.

Construction, Day 19: Back Wall Finished, Front Wall Started

The workers continue to put the metal “skin” on my building.

On May 20, 2014, I began blogging about the construction of my new home in Malaga, WA. You can read all of these posts — and see the time-lapse movies that go with them — by clicking the new home construction tag.

Wednesday was a much mellower day for me. The weather was nice and there was nothing at all on my calendar. I took it easy in the morning, catching up on blog posts and trying to get control of my email.

Realizing that I’d been too exhausted the night before to check out what had been done the previous day, I took a break to go outside and look at the building. I took photos of the plumber’s work, mostly to document it for future reference.

Plumbing
My contract with the builders included stub outs for the plumbing. This means doing all of the plumbing that would be under the slab. This image shows the sewer pipe where it comes into a future downstairs bathroom and splits off for venting and connection to upstairs plumbing. The concrete will go to the top of the circular thing on the left, which is actually the fitting for a toilet.

Angel’s crew arrived promptly at 7 AM and continued working on the building, putting the metal skin on the back side. While the RV garage/shop side of the building got rolled insulation in the walls, the living space/garage side got only a plastic moisture barrier. I expected this; the living space would get thick insulation after it was framed and the garage would be insulated sometime in the future.

Back Wall Finished
They finished the back wall relatively quickly — it had been half done the day before.

A pilot friend of mine from Arizona came for a visit late in the morning. (You can see his red truck in the time-lapse video below.) The last time he’d been to the site was the year before, when nothing had been done. He was blown away by the progress and the sheer size of the building. As we sat in the shade in the front of my RV, looking out over the view with a cool early summer breeze blowing, he made it clear that he was as sick of Arizona summers as I had been. We talked about him buying my RV when I’m ready to sell and camping out on the east end of my property in the summer during cherry season. Heck, why not?

After finishing the back wall, Angel and the guys got started on the front. That’s where they hit a bit of a snag. Apparently, Tanya had goofed in her metal order and they were two long sheets short. Rather than leave a gap, they patched together some of the odd-colored protective metal sheets as a temporary cover and kept going, finishing the metal on the RV garage/shop side of the building before quitting time. An order for the correct metal sheets is in; they’ll replace the temporary metal when it arrives.

Day 19 Progress
Here’s how far they got on Day 19; I shot this the next morning when the light was on the front of the building.

After they left, I wandered around the inside of my building — which now felt like I was inside a building. Despite the hot sun outside, it was cool and shady. It was still bright though; I suspect I won’t need much daytime lighting, especially during the summer months.

Inside the Shop
This view from inside my first garage bay is looking through the RV garage and into the shop. Eventually, a staircase will block much of this view.

Here’s the time-lapse movie for the day: