I go to Idaho in search of a tiny home solution to winter travel needs.
Tiny houses are big these days. People seem unusually attracted to the idea of living in a very small, very simple space. Tiny home communities are popping up all over the west — such as the one in Portland. There are tiny home books and websites and forums. I’ve been told that there’s even a tiny home television show, although since never bothered to get connected with cable or satellite television, I’ve never seen it. (A quick search on Google for a link shows me at least three of them: Tiny House Builders, Tiny House Nation, and Tiny House Hunters. Seriously?)
While I agree that tiny houses are cute, they’re really not much different from living in an RV — which I did for two years and more summers than I care to remember. It’s nice having less space to heat, cool, clean, and furnish. But it’s not nice to live in cramped quarters with barely enough space to store the things you need to live and work. So while I have no problem with short-term life in a small space, I think people — especially families of two or more people — who turn to tiny homes for their primary living space are, well, nuts.
That said, I’m currently considering a tiny house as a replacement for my mobile mansion, which is now for sale.
The Misunderstandings
When I mentioned this on Facebook, I got a few sarcastic comments from friends of friends who (1) didn’t understand that I was considering this for part-time living and (2) apparently know nothing about tiny houses.
One person said, “I don’t like the idea of my toilet being in the same room as my kitchen sink.” Well, neither do I. And I have to say that I’ve never seen a tiny house design with the toilet in the kitchen. So I don’t know what the hell this clown is talking about.
Another person said, “Why would you want to live in a closet?” I wouldn’t. I don’t know anyone who would. But unless you have a 200+ square foot closet, most tiny houses are considerably bigger that your closets. They even have rooms and windows. Can you imagine?
Seriously: what’s with people on the Internet? Why do they find it necessary to shoot out their opinions in such a nasty, narrow-minded way, especially when they obviously don’t know what the hell they’re talking about?
‘Nuff said.
Tiny House RV
My idea is to have a custom tiny house built as a fully-functional off-the-grid RV. What gave me that idea? The Tiny Portable Cedar Cabins website. Dave, who designs and builds these cabins, constructs them on trailer frames using dimensions that keep them road-worthy without special permits. That means they’re no wider than 8’6″ and no taller than 13’6″.
Just like any RV on the road.
Because they’re built like this, they can be licensed as an RV and they follow all the rules governing how RVs are used and transported. That means I can hook it up to the back of my pickup and take it anywhere I can take an RV.
Of course, Dave doesn’t outfit them as RVs. He outfits them as homes, assuming the owner is going to park the unit and plug it into permanent power, water, and sewer line sources. He does offer off-the grid options like a composting toilet and propane appliances. But he doesn’t normally include the features a true off-the-grid RV needs, such as fresh water storage tanks and holding tanks for gray and black water. To me, that’s what distinguishes his “tiny portable cabins” from a true recreational camping vehicle.
But that doesn’t mean he can’t make one with the things I need in a real RV.
But I’m getting ahead of myself here.
Tiny Home in Marlin, WA
Dave works with Janet, who apparently manages his website and blog and helps him sell the his houses. Janet has one of his tiny house models, a custom “Caretaker” unit. She’s parked it on her property in Marlin, WA where it’s currently sitting, waiting for a tenant to arrive.
I drove out there about two weeks ago. Anyone who says that I live in a remote area really needs to go to Marlin (AKA, Krupp) to put things into perspective. The town has about 300 people and sits at the bottom of valley with the tiny Crab Creek running through it. The closest grocery store is 18 miles away; the closest supermarket is 34 miles away. It took me nearly two hours to drive there and once I was there, there was nothing much there. But there was Janet’s tiny house, sitting inside a fenced in area with a lush green lawn.

How fitting that I drove my tiny car to Janet’s tiny house.
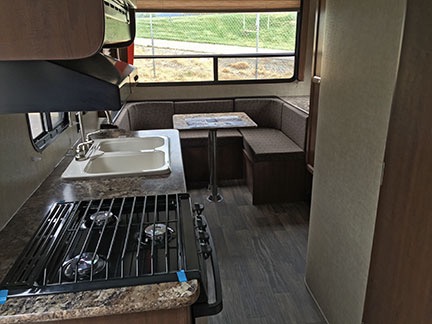
We chatted for a while and then went in to take a look. The house was set up with a generously sized kitchen, tiny — and I do mean tiny — bedroom, and decent sized bathroom that even had a washer and dryer. It had a lot of nice touches, including pocket doors and a stained glass window. It also had two storage lofts that weren’t very tall. The exterior siding was cedar; the interior finish was a natural wood that I really like.
She showed me the composting toilet. Because the house was set in a spot without access to a sewer, she’d chosen this option. As she explained, the “liquids” go through some small holes on the front of the bowl where they collect underneath. If you plan to deposit some “solids,” you prep the bowl by laying in what looks like a giant coffee filter. When you’re finished, you “flush,” which opens the bottom of the bowl and drops the filter and its contents into another container. Somewhere along the line, you sprinkle something on the waste which gets the compost action going. Janet claims that it never stinks, but I find that very hard to believe. And, of course, you eventually have to empty the waste into a compost bin. I don’t know about you, but I’d rather live in a closet than have to deal with a toilet like that on a daily basis.
I asked her about RV-related options and she really didn’t have the information I needed. For that, I’d need to talk to Dave. And since I’m better talking in person to someone than on the phone, it meant making a road trip to Idaho.
Idaho Road Trip
Spirit Lake, where Dave builds his tiny homes, is about 40 minutes north of Coeur d’Alene, where a pilot friend of mine, Jim, lives with his wife Teresa. I figured I’d kill two birds with one stone by visiting them and Dave on the same trip.
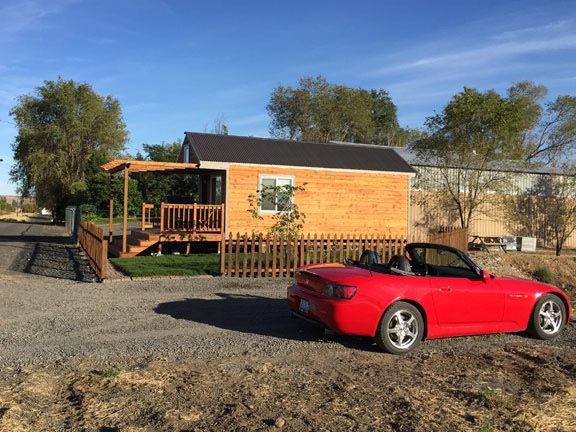
I set off last Wednesday morning with Penny in my distance car: my 2003 Honda S2000. Bought new in 2003, it had just under 60,000 miles on it — indeed, it would roll over to 60,000 on my way home. I’d prepped it earlier in the week with an oil change and a check of tire pressures and fluids. (I’d also had the leather armrest repaired; the leather had been shrinking for years and made the car’s interior look shabby. Fixed!) I put the top down, secured a scarf over my head to prevent my hair from flying around and getting all tangled up, and took off.
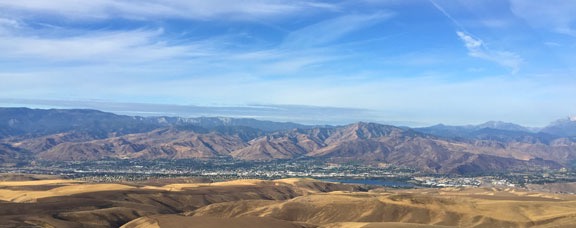
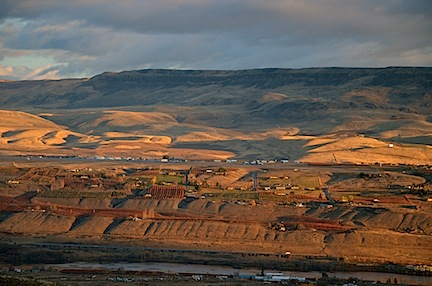
We took Badger Mountain Road up toward Waterville. It was the first time I’d taken that road in that direction at that time of day and it was the highlight of the drive — the Wenatchee Valley looks amazing from a viewpoint along the way in early morning light.

Wenatchee from Badger Mountain.
I eventually hooked up with Route 2 near Douglas. From there, it was mostly straight roads over the Waterville Plateau, past rolling hills of harvested wheat fields and through small farm towns with tall silos. The road dipped down to cross Moses Coulee, then climbed again for more wheat fields and towns on the other side. I crossed the lower end of Banks Lake on the earthen dam in Coulee City and continued east on Route 2, through even more farm towns. I stopped in a small town along the way — Hartline? Almira? Wilbur? Creston? Davenport? Readan? — for bathroom break, buying an egg sandwich to go and then getting right back in the car.
Although I was enjoying the drive — I really do like a good road trip — I wasn’t disappointed when I arrived on the outskirts of Spokane. Route 2 dumped me on I-90 — which I could have taken from George if I wanted a faster route — and that took me through Spokane and info Idaho. Then Google Maps’ navigation feature directed me to exit onto Route 41. I took that north, passing a homemade billboard that said “Pray the Rosary, Vote for Trump,” and after a few miles and a few turns ended up at Dave’s construction lot outside the town of Spirit Lake.
Dave’s Tiny House Construction Yard
Janet had told me that Dave was working on about 20 houses and she wasn’t kidding. There were tiny houses in various stages of construction all over the yard. All different models, from a 22-foot Caretakers Cabin to much larger and longer models. Dave wasn’t doing any of the actual construction work himself — at least not when I drove up. Instead, he had at least a dozen guys working for him, each busy with a specific task on a specific building. Looks like he’s built himself a nice little business that employs quite a few people.
I told him what I was looking for and he led me over to one of the Caretakers cabins. It had exactly the bathroom and kitchen layout I’d envisioned. We discussed weight and tanks and all the other things I needed. I think he was surprised that I was so well-versed in not only construction but the kinds of features I needed and how they might be implemented in his buildings. For example, we discussed the placement of fresh water tanks up in the loft area and how they could be filled using a standard water connection with a value that switched the water flow to the tanks. I asked if having the tanks high would provide enough water pressure for sink and shower usage and he said it would, but not enough pressure for the instant hot water systems he used; a DC pump like the ones found in most RVs would be required.
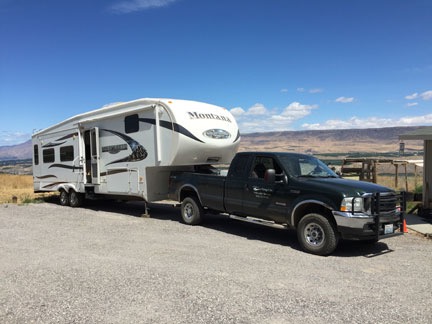
We also talked about ways to make the building lighter. In the size unit I wanted — 24 feet max including a 4-foot porch — he estimated the total weight to be around 12,000 pounds. While my one-ton diesel pickup could easily pull that — after all, it pulls my 15,000 pound mobile mansion like its nothing — I was really hoping to replace the truck with a smaller, newer, gasoline model. That wouldn’t be advisable if I had to tow around a 12,000 pound RV. I asked if he could do 2×4 construction rather than 2×6 construction. He said that would allow for less insulation, which I was okay with. We also talked about using metal on the exterior, with the idea of it matching my building at home. That could drop the weight by another 500 or so pounds.

I absolutely love the upper floor windows in this little house.
After checking out how the stairs were constructed in one of the other units, we stopped to look at an unusual model that was taller and wider than the others with a “shed style” roof. It was a custom unit for a family of three in Sacramento that would become their primary residents. (Remember what I said about that idea earlier in this blog post?) It had an upstairs bedroom and a very small downstairs bedroom, a decent sized bathroom and a great room with a kitchen. The main features I liked were the huge windows; the home would be very bright indeed. I wondered whether I could design a unit with the same style roof and still get the sleeping loft I needed in a space only 8-1/2 feet wide.
And that’s where we left it. I told Dave I liked that style and would rework my design with that in mind. I said I’d send him my floorplan with a list of required features. He could then work up a price and try to estimate weight.
I was supposed to do that last weekend, but didn’t. I’d better work on it soon, though. If I decide to go forward, I’m looking at an 18-week wait.
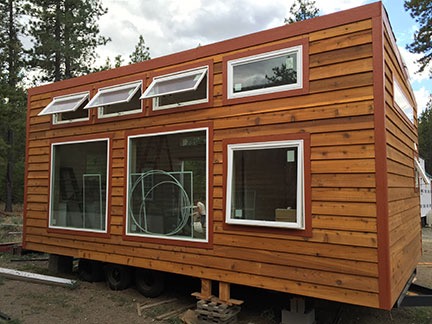
As for pricing — well, one of the reasons I was attracted to Dave’s work is that the prices are within reason. I’d seen 400 square foot tiny homes like the one pictured here selling online for over $80,000. That was absurd. Dave’s prices were much more down to earth and easier to swallow.
Still, there was no doubt that this custom tiny home RV would cost about twice as much as a 20-foot RV — which I’d also been considering.
A Visit with Jim & Teresa
From Dave’s lot, I drove down to Coeur d’Alene. I texted back and forth with Jim and discovered that he was working on a project at his new homesite. I stopped for lunch in town, then drove out to meet him.
Jim and Teresa are building a big, beautiful home on a small lot on the Spokane River just east of the Lake Coeur d’Alene. Their property includes a two slip dock that they share with their next door neighbor. The place is walking distance from one of those Main Street style malls — you know, the ones with shops and restaurants and apartments over the businesses. Odd that we abandon our downtown areas, yet build replicas of those towns to live in.
Teresa and their dog Zeus showed up as Jim was giving me the tour. I saw the whole place and complemented them on the innovative design and unusual features — including L-shaped windows and angular walls. Afterwards, we drove over to the shopping center and had margaritas and nachos while catching up. I hadn’t seen them in two years. Jim, who had been a cherry drying pilot in the Wenatchee area for about 15 years, had sold his helicopter and given up flying.
We walked back to the house from there, letting the dogs run and play off-leash along the way. The we walked along the boardwalk between the homes and the river. The sun had set and nighttime came on. We got back to Jim’s truck, which we’d left at the house, and rode in it back to the restaurant parking lot to fetch Teresa’s truck and my car. Then we rode back, convoy style, to the house they were still living in.
I got the guest room in the basement, which had been their son’s bedroom. It was nice and dark and quiet down there. I slept well.
In the morning, we had breakfast at a restaurant not far from town. I think it was the same business they’d taken my wasband and I years ago, when we’d passed through with my old RV on a sort of road trip vacation. Now it was in a new building. Great breakfast, more great conversation. Teresa recommended that I stop at Blue Dog RV in Post Falls to see what they had in the way of RVs. Since I wasn’t in any hurry to get home, I figured I may as well take a look. After all, there aren’t any RV dealers near where I live.
We said our goodbyes and went our separate ways. It was about 10 AM.
RV Shopping
If there’s one thing I hate, it’s RV shopping. I’d gone through this too many times to like it.
When I bought the mobile mansion back in 2010, I honestly thought it was the last RV I’d ever need. I bought it to fit a specific need: a seasonal home for two grown people and a mid-sized dog. I figured my now wasband and I would live in it every summer for 4 to 6 months, then go home to Arizona for the rest of the year. That’s why it’s so damn big. I wanted it to be comfortable for two people for months at a time. And I fully expected to use it for many years to come, as semi-retired snowbirds.
Unfortunately, plans change. My wasband is now nothing more to me than a sad, bitter memory. I live in my own home in Washington state where I make most of my living in the summer months as a cherry drying pilot. I keep busy enough in the spring and fall to stay home. But I want to travel in the winter and spend some time in California in the early spring, where my helicopter is parked on frost control duty. I figure that I’ll only be on the road 2 to 4 months out of the year and, during that time, I won’t be parked in one place. Since it’s just me and Penny the Tiny Dog, I don’t need a lot of space. And I definitely don’t want a big rig. I want something easy to tow and easy to park. While towing the mobile mansion isn’t difficult with my big truck, parking it is a pain in the ass. And because of it’s size, I’m automatically closed out of more than a few park campgrounds.
So here I am, looking for a new solution to meet a new need.
One thing I learned the last time around is that it’s all about floor plans and features. I want the length under 20 feet, but I want the bigger refrigerator and I want the stove with the oven. That cuts out about 3/4 of the shorter models. I don’t want slides (or pop-outs) — they add weight and maintenance concerns. I want plenty of windows, a power-controlled awning, stereo sound system with DVD player, and television.
I am a sucker for big windows in an RV. This Hideout was a bit longer than I wanted but the big window in the back made it nearly irresistible.
So that’s what I proposed to the very patient salesperson, Lydia, at Blue Dog in Post Falls, ID. After reviewing a few models online, she loaded me into her golf cart and drove me out onto the huge lot. We looked at about a half dozen models. We even drove back to their other lot in Coeur d’Alene to look at models there. Just when I started to glaze over, she focused me back on what we’d seen. She priced up a new and a used Keystone Hideout, each in a different style. The prices were workable, but the deal wasn’t good enough for me buy that day. I wanted to sell the mobile mansion — which was worth far more than these smaller rigs, making a trade-in impractical — before I bought a replacement.
And I was still thinking about the tiny house idea.
Spokane’s Falls
It was nearly 2 pm when Penny and I drove away. By this time, I was very hungry. But I also felt that I needed to see more of the area before I went home. I’d heard of Spokane Falls and decided to check that out. Google guided me.
I knew nothing about the area, but when I drove over a bridge and saw an aerial tram, I decided I needed to get on it. I navigated back to a shopping mall called River Park Square and got a parking space across the street in the shade. I cracked the car’s windows, leaving Penny inside, fed the meter with my credit card, and went inside.
Conveyor belt sushi, Spokane style.
Back in the 1980s, I worked in New York City for New York City. My partner, a Chinese woman from Hong Kong, occasionally took me for lunch at a restaurant near the Empire State Building that served up dim sum and sushi on a conveyor belt that wound past all the seats. Since then, I’d seen conveyor belt sushi only one other time — in San Francisco. Believe it or not, they have it in Spokane at the mall I found myself in that afternoon.
Needless to say, that’s where I ate.
And maybe it won’t surprise you when I tell you it wasn’t that good.
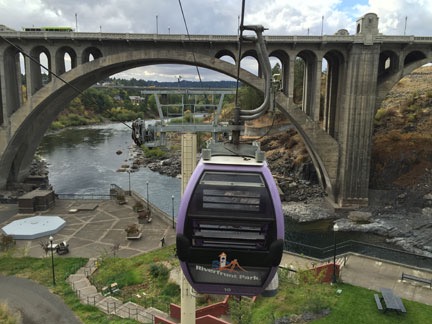
On the Spokane Falls Sky Ride.
Afterwards, I made my way out to the ticket booth for the Spokane Falls Sky Ride. It was pretty much deserted on that Thursday afternoon, so I didn’t have to wait. I paid $6.50 (with a AAA discount) and was loaded aboard my own car.
I’ve seen reviews of this ride and some of them pretty much bash it. But I thought it was kind of fun. I even did a live broadcast on Periscope which had quite a few viewers. And the view of the falls is great!
The Trip Home
By that time, my two hours of meter time was nearly up. I went back to the car, leashed Penny, and took her for a walk around the block. We got back into the car and headed toward the freeway. I’d already decided to pass on the long ride through the wheat fields. I got on I-90 and headed west.
The drive was long and dull, made only marginally more interesting by the string of podcasts I listened to along the way. I exited at George and followed familiar roads all the way home. It was probably around 8 when I pulled into my driveway.
Was my trip a success? I think so. I got a chance to see Dave’s tiny homes first hand and learn that what I wanted was definitely possible. I also got to see some friends I’d missed — and get an invitation to return in the spring with my boat when their house is done. And although it had taken longer than I wanted to price up a few RVs, it was good to see what was available.
Now I’ve got work to do: sketch out a floor plan for a tiny home and see if Dave can make it happen. I’d love to hit the road with something different next winter.


 Here’s the floor plan for my mobile mansion.


 I use an app on my iPad to list and check off the things I need to do. It’s called
 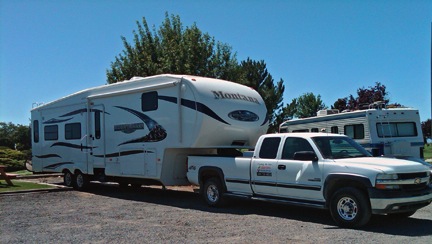 Once the trailer was hooked up and the chocks were collected and stowed, I loaded my potted tomato plant and Alex the Bird into the truck and headed out.
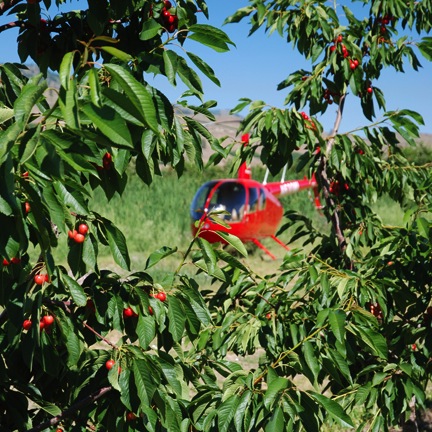 My helicopter is parked down in the orchard. I tried to park it near my campsite, but I couldn’t find a piece of ground level enough to make me comfortable leaving it there. I might try moving it again later today — I really don’t like it being out of sight. Wish I could get my hands on a Bobcat for a few hours to level out a piece of this hilly homesite.