A look at some Sonoran desert vegetation.
I’m camped out in the desert south of Ajo, AZ for two nights. This video takes you on a tour of the Sonoran desert vegetation around my camper.
Want more videos? Subscribe to my YouTube channel!

A look at some Sonoran desert vegetation.
I’m camped out in the desert south of Ajo, AZ for two nights. This video takes you on a tour of the Sonoran desert vegetation around my camper.
Want more videos? Subscribe to my YouTube channel!
The remnants of winter have been raked away.
I have a very small front lawn. The only reason I have a lawn at all is because my dog likes grass. She likes to roll in the grass and drag her belly across the grass and yes, even poop in the grass.
I created my front lawn in the late summer of 2014, when my building was done but my living space was barely started. I bought some sod on Craig’s List for $20. It turned out to be enough to do half the lawn. I seeded the rest. It grew and, before long, the lawn looked like one nice patch of grass.
I bought a push mower. You know — the kind you push and the wheels spin some blades. It’s a small lawn. I don’t need more. It takes about 15 minutes to do if I do it often enough. I’m thinking of buying an electric mower, but I like the exercise the push mower gives me.
In the spring of 2015, I set up a sprinkler system. In the hottest part of summer, it waters the lawn twice a day for about 10 minutes. The grass grows quickly. At the peak of the season, I have to mow twice a week. Otherwise, the grass gets too long and it’s a real bitch to mow.
Last season, I turned off the sprinklers in the fall and waited for the lawn to go into winter mode. It took a long time, I mowed it once in a while and then, when the first frost came, I put the mower away.
It snowed in November. And it snowed some more in December. A lot more. I went away and while I was gone, it snowed even more. The front lawn was covered with snow throughout December and January. It took its time melting in February. I watched while I was away, looking at it through one of my security cameras. Even when the snow was mostly gone, there were still patches on the lawn.
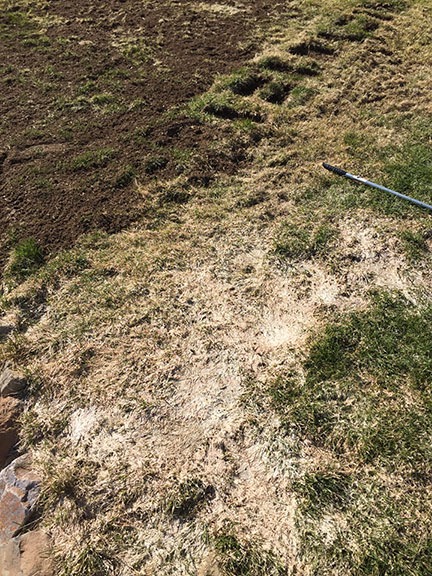
My neighbor called this frost burn. I just call it ugly. It happens when a lot of snow sits on the grass for a long time, crushing and killing it. At the top of the photo, you can see where I’d already raked and added soil.
When I got home in mid February, I discovered that they weren’t patches of snow. They were patches of dead, flattened grass. Frost burn, is what my neighbor called it.
I went to California, hoping the grass would somehow miraculously recover while I was gone. But it didn’t. It looked the same when I got back in early March.
Of course, it isn’t as if it was warm here. It’s true that the land around where I live is “greening up,” for spring, but it’s still in the 30s at night. While the grass is just waking up from its winter slumber, I wasn’t convinced that it would shake off this layer of dead grass on its own. So I began raking it.
It was a tough job, especially when the grass was still wet. I was raking up clumps of it. For a while, it looked as if I were raking more than I was leaving behind.
Still, I kept at it, doing a little bit every day. It was a real upper body workout. I had two different rakes I used: my old RV rake (recently used to roast marshmallows while camping) to really dig down deep and a wide plastic leave rake to gather up all that dead grass. I worked on it, off and on, for a week. I just finished it earlier this afternoon.
While I was doing all this, I also removed my half-hearted front walk, which I’d created when I put in the lawn using some very ugly rectangular concrete pavers. I never liked the way it looked and it was a pain to mow over. No one used it except me. Everyone else walked up the paved driveway.
I also finished the “retaining wall” separating the grass from the gravel driveway. I’d started the wall when I put in the lawn, wanting to avoid sloping the grass right down to the driveway. I used local stone — there’s no shortage of it in the talus slopes of basalt rock that sometimes cross the road. I’d go out on my ATV with the trailer attached and load up the biggest pieces I could find, bring them home, and stack them carefully. I’m actually pretty good at it — but that might be because of my Italian blood. (Italians are excellent stoneworkers.) I’d stopped the wall at the walkway, but when the walkway was removed, I figured it was time to finish the wall. So I did.

I’ve had a lot of good luck with this grass seed.
I then spread about 8 cubic feet of lawn topping on the lawn, concentrating on the low spots that needed to be built up. I bet I could use another 8 cubic feet — but I’ll save that for next year.
I finished up with some Scott Turf Builder Sun/Shade grass seed. I used about half of a seven-pound bag, spreading it with a hand spreader I have. It was important for me to get it done today; there’s rain in the forecast for the next few days and I wanted to let mother nature do the watering, at least for now.
At this point, my lawn is done until it starts growing. I fully expect it to be lush and green in about a month.
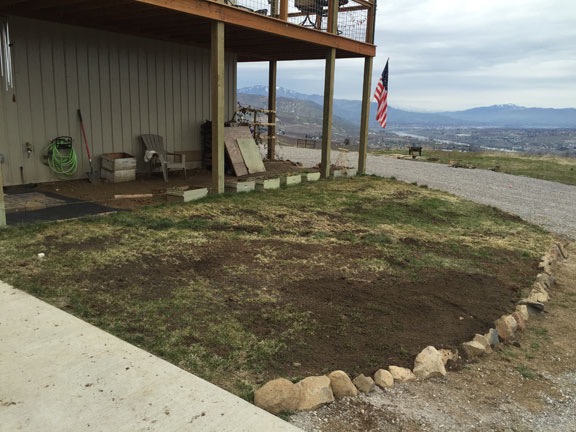
Here’s a shot from the paved driveway. Yes, I know it looks like crap here — I bet it looks great in a month. You can see where most of the soil went.
I do have a few more things to do:
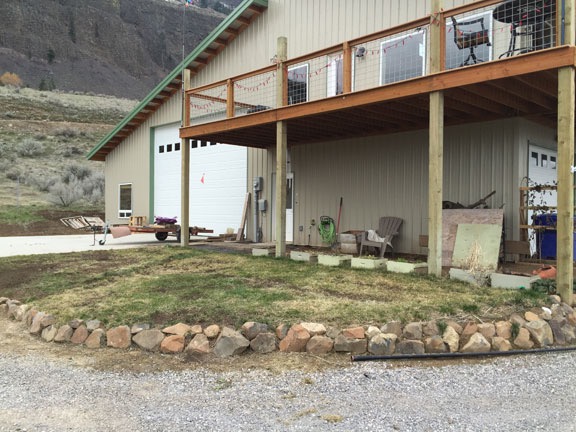
This angle shows the retaining wall I built to avoid the lawn sloping down into the driveway. It also gives you a good idea of where the additional gravel needs to go.
Owning a home is a lot of work. But it’s worth every minute when the jobs are done and you get to admire the results of your labor. And its nice to know that in this case, a little exercise also saved a bunch of money that I could have spent hiring landscapers to do this for me.
But the biggest challenge is not the work — it’s dreaming up ideas to make the space more attractive and usable. Two years ago, as I got ready for the construction of my home, I knew I’d have to put in a lawn somewhere. Later that year, when the building was in place, I had the earth work done to prep for where the lawn would go. I then added the grass and the retaining wall. While the path I added turned out to be a bad idea, it wasn’t so difficult to remove. Since then, I’ve been building on what I have, making the ideas I’ve come up with become reality — which is basically what my entire home project has been all about.
Yes, it’s a lot of work. But I’m loving every minute of it.
Now where’s that bottle of ibuprofen?
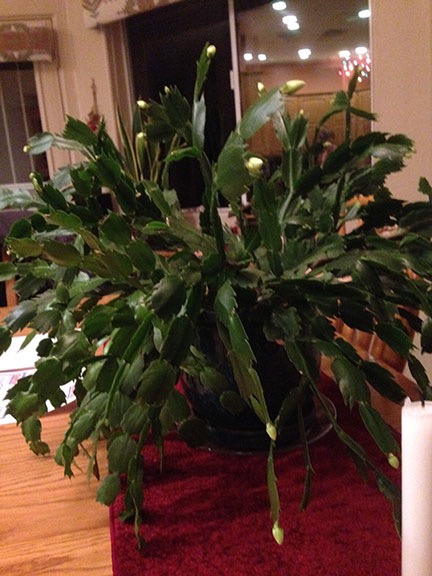
An early blooming Christmas cactus is back in my life.
I’ve always been a plant lover. When I was a kid, the windowsills and shelves in my room were lined with plants. I even belonged to the Horticulture Club in my New Jersey high school.
My love of plants stuck with me throughout my life. I had plants in my various homes — especially in the early years of my life in Arizona. That house was so bright that there was plenty of light for plants — even the ones tucked up on top of shelves in my kitchen. I had a vegetable garden for a few years and did some minor landscaping work out in the yard.
The trouble with plants is that they need water. Watering the plants on the high shelves was a pain in the butt — too much of a pain in the butt for my wasband to deal with while I was away every summer in our later years together. So those plants died and I replaced them with silk plants that actually looked a lot better. (I have those plants now in my new home.)
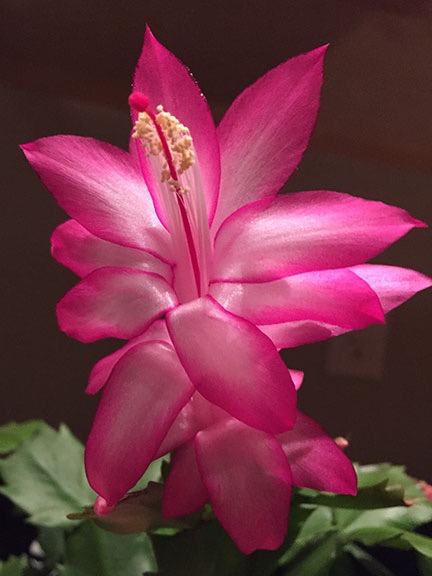
One of the blooms from my Christmas cactus.
One plant I always took care of, however, was my Christmas cactus. Started from a very small plant acquired not long after moving into my Arizona home, I repotted it multiple times, allowing it to grow into ever bigger pots. It lived on a handwoven Navajo mat in the middle of the kitchen table where it was handy enough to get water when it needed it. Christmas cacti are extremely drought tolerant and can take a lot of neglect. The plant survived my summers away — even my wasband didn’t find it too difficult to care for — and thrived.
In late October every year, the plant would produce buds. Then, by Thanksgiving, it would flower. It had two flower colors — likely because it was started from two different plants — fushia and pinkish white. Over a period of two or three weeks, the entire plant would be covered with flowers. It was spectacular.
In 2012, while I was away in Washington for the summer, things back home changed. For some reason, my wasband moved the Christmas cactus off the kitchen table — where it had always been — and put it in the much darker living room. He apparently wasn’t home very often so all the plants in the house left were neglected. When he did come home, he overwatered everything — which was quite apparent from the water damage on the living room floor near a tall potted tree there and water stains on the glass-topped living room tables.
Of course, I didn’t know any of this until I got home in September. That’s when I found the Christmas cactus looking half dead on the coffee table. I brought it back into the kitchen and began nursing it back to health.
As I said earlier, these plants can take a lot of neglect. Within a month or so, it was looking much better. But when late October rolled around, there wasn’t a single bud on it. There were no flowers that Thanksgiving.
All that autumn, I was under the mistaken impression that my future wasband would settle by Christmas and I’d have to leave the house, which he wanted to keep. (What an idiot; he could have saved at least $120K and kept the house if he had.) So not only did I spend much of my time at home packing up my belongings, but I also started giving away my things, including my plants.
For months, every time someone invited me to their house for dinner, I’d come with a potted plant. It became a bit of a joke.
A few weeks before Christmas, I decided to spend the holidays with my family in Florida. Although I wasn’t in any hurry to leave — I had nowhere else to go — I still clung to the hope that my future wasband would see the light and settle. That could mean I’d be out of the house soon, possibly by New Years Day. I might even spend the whole winter in Florida.
The first of many photos Rose Marie has sent me since I dropped my Christmas cactus off at her home.
At that point, the only plant left was my Christmas cactus. It had fully recovered and was just starting to show a few tiny buds. There was a good chance it would bloom, possibly soon. So I loaded it up into my car and took it to the home of two of my friends, Stan and Rose Marie. I was sort of sad to leave it there — it had become such a fixture in my everyday life.
I went to Florida and spent some quality time with my family. On December 17, Rose Marie sent me a text with a picture of the plant: “Starting to bud.”
A few weeks later, she sent another photo.
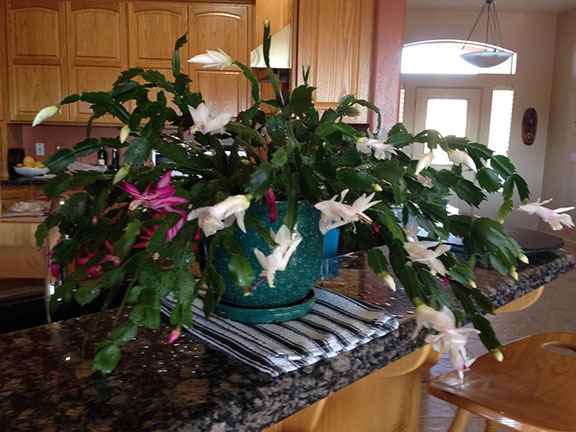
Fully recovered, my Christmas cactus bloomed right around Christmas time in its new home.
Since then, Rose Marie has sent me annual photos of the plant in bloom. It seems to bloom around Christmas time each year in her home. I’m not sure why it blooms a whole month later for her — it might have something to do with the amount of light it gets. But she seems to prefer it blooming around Christmas, so it’s all good.
Early this year I was back in Arizona for a few weeks and had dinner at Stan and Rose Marie’s house. It was February and the plant had finished blooming for the year. I got a sort of crazy idea: maybe I could take a few cuttings from it and try to root them at home? When I left that evening, I had three cuttings from various parts of the plant wrapped up in a piece of wet paper towel.
In the guest house I was staying in, I put the cuttings in a small glass of water. A week or two later, I packed them carefully in my carryon bag and took them home with me on the plane. They looked pretty ratty when I put them into water. Within a week, I’d moved them into some potting soil that I kept moist. I honestly didn’t have much hope for them — it was relatively dark back in my RV where I was living, parked inside my garage for the winter.
But they rooted. And they grew.
I repotted the cuttings into one of the nice painted terra-cotta pots I’d brought with me from Arizona. When I moved upstairs into my new home, which is even brighter during the summer than my Arizona home was, the plant thrived.
And on Thanksgiving day, the plant started to bloom.
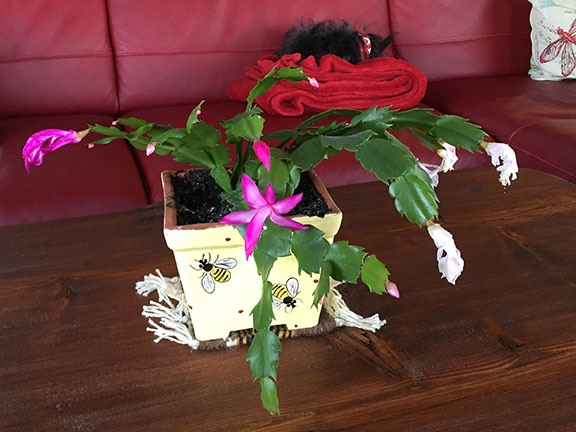
Here’s the descendant, so to speak, of my old plant in its home on my new coffee table.
I just sent a photo to Stan and Rose Marie. Their response: “Good deal! You’re on a roll. Small but looks great. Obviously you have a green thumb.”
It’s a start. I hope to be able to share a much more impressive photo of my Thanksgiving cactus next year.
An easy trail through the woods, with breathtaking views of the Wenatchee Valley and Mission Ridge.
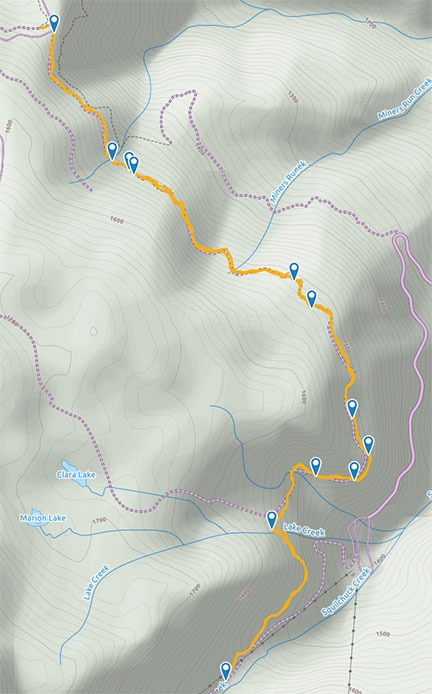
Here’s our track, as recorded with the GaiaGPS app on my iPhone. The markers show where I took photos; click here to see hike stats with all photos. Elevation is in meters, not feet.
On Monday, I went hiking with my friend Sue. We hike on and off throughout the year, but mostly in the spring and fall, when it’s neither too hot nor too cold. Our hikes are always local — there are dozens of trails within 10 miles of my home — so they seldom take more than a few hours out of my day. Since Sue is retired and I’m “semi-retired,” we usually hike during the week when there are fewer people out and about. I’m especially interested in avoiding mountain bikers, who can come up on us suddenly. I usually allow Penny to walk off-leash on these hikes and I don’t want to worry about her causing a wreck with someone on two wheels.
Monday’s hike was on the so-called Pipeline Trail, which runs from Liberty Beehive Road (NF 9712) into Mission Ridge Ski Resort. It’s named for the pipeline that runs under it, bringing water from reservoirs in the mountains down to other reservoirs used by orchards in the Squilchuck area. (It might actually terminate at Beehive Reservoir, which we passed on the way up to the trailhead.) The trail is not marked, but it’s unmistakable — it looks a lot like a road heading south along the edge of the mountain. There’s a parking lot across the road for another popular trail: Devils Gulch. I can’t find the trail we took on any map. But that might be because it’s so damn easy that a serious hiker wouldn’t even consider it a “hike.”
But there’s nothing wrong with an easy hike on a beautiful post-summer day when the sky is clear, the air is fresh, and just a few of the trees are starting to show autumn colors. So when Sue suggested it, I was all over it.
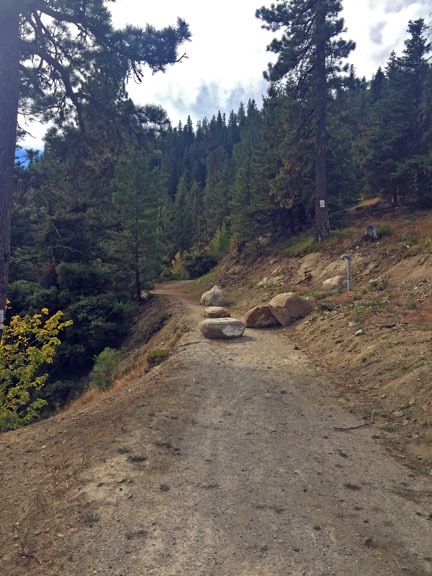
Here’s the start of the trail. The trail is road-like in most places; the boulders were obviously placed to keep 4-wheeled vehicles off.
Getting there is pretty easy — if you can find the turn for Beehive Reservoir.
Go up Squilchuck Road from Wenatchee. Continue on it past Squilchuck State Park where it becomes Mission Ridge Road. Take the right hand turn onto Beehive Road (NF 9712), which is improved gravel. This is right before a sharp switchback curve to the left. I don’t think it’s marked at all and it’s easy to miss, so slow down after you pass the park. (One of these days, I’ll have to find a mile marker to help guide people.) Drive up Beehive Road for at least 3-4 miles. You’ll pass the reservoir on your right and may see people camping near there. Keep going. Eventually, you’ll see a right turn into a parking area with trailhead signage and an old horse loading platform. That’s the Devils Gulch trailhead. Park there. You can then cross the road to where the Pipeline Trail cuts off from the road.
I’m pretty sure you need a Discover Pass to park there. I have one but it wasn’t with me (as usual). Without any other option, I decided to take my chances on getting a ticket. (I didn’t get one; weekday off season is pretty safe.)
We drove up in my truck, which I was using for garbage duty that day. (Long story.) When we got out, the chill in the air hit me immediately. Our climb along paved and gravel roads had brought us to an elevation of about 4800 feet and at 8:30 AM, it was downright cold. I’d dressed in layers — a tank top and a long-sleeved cotton shirt — and donned the third layer, a fleece hoodie, before strapping on my fanny pack and grabbing Penny’s leash. Then the three of us headed out across the road.
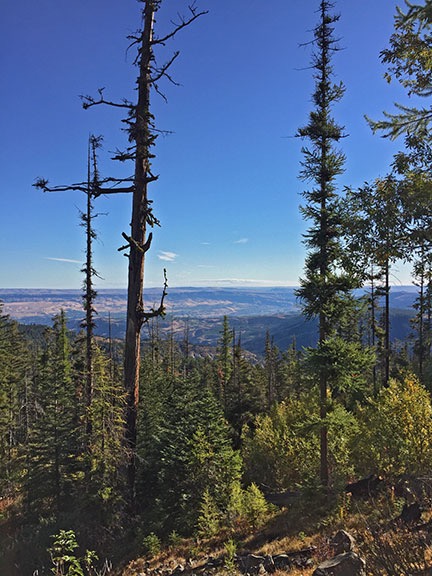
Here’s a view between some of the tall pines — including one dead from a long-ago fire — down the Columbia River.
There’s really not much to say about the hike other than what I’ve already said. It climbs gently along the side of the hill, with sweeping views out to the Wenatchee Valley, Squilchuck Canyon, and Mission Ridge Ski Resort areas along the way. In some places, it’s densely wooded. In others, it’s fully exposed.
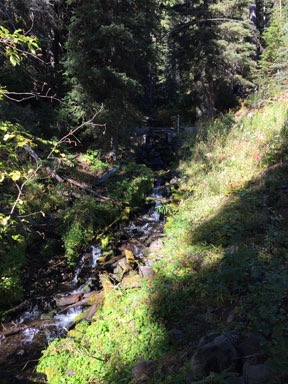
Recent improvements to the trail — it was under construction last year with lots of heavy equipment — included cement blocks designed to prevent runoff damage. Each time we crossed over one of these, we could hear water trickling beneath it. We crossed several tiny creeks and one large one that required hopping from rock to rock to keep our feet dry.
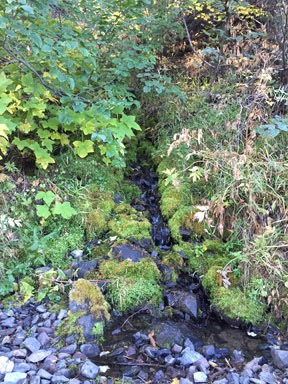
We crossed numerous little creeks along the way. It was nice to see water flowing this late in the season.
That large creek was Lake Creek, which comes down from Marion and Clara Lakes (see map above). The trailhead from Mission Ridge’s parking lot to the two lakes crosses right near the creek. I’d taken that trail up — a steep climb for the first part of the hike! — to the lakes several years ago with some friends. More recently, I’d taken the opposite end of the trail from NF 9712 to the two lakes with Kirk. Either way, that’s a great hike, although I admit I prefer the less strenuous hike from NF 9712, which has the added bonus of a Jeep ride at the beginning and end to get to the trailhead.
Flowers along the trail.
There were some, but not many, wildflowers along the trail. Sue knows flowers (and rocks, by the way) and was able to identify most of them. I didn’t take many pictures because the only camera I had with me was the one on my phone. (I’ve become lazy about photography lately.) But I did capture a few images to document what was blooming at 4800 feet in mid September.
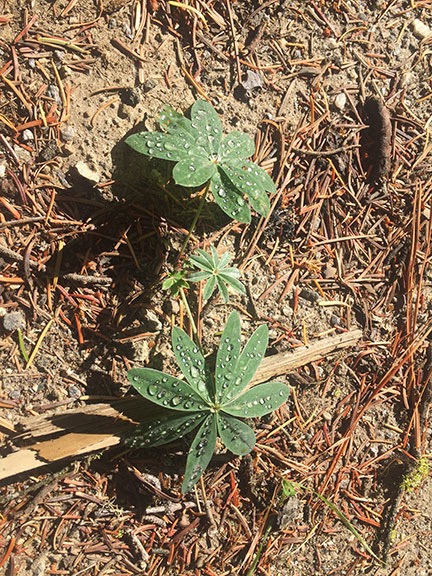
Dew on lupine leaves.
It was also neat to see plants covered with dew along the way. Contrary to popular belief, not all of Washington gets the endless rain showers of Seattle. The east side of the Cascade Mountains is desert-like — indeed, you need to irrigate if you want anything other than native sagebrush and bunch grass to grow. So dew is not a common phenomena. But at this elevation with the low morning temperature, there was plenty of dew on the ground. In many cases, it made the leaves of short plants sparkle in the sunlight.
Sue had come with the idea of looking for chanterelle mushrooms, which apparently grow in densely wooded patches of the forest near here. She had a specific location in mind to look. I’m going on a weekend-long mushroom seminar later this autumn and was hoping that this hike would give me some experience before the trip. But pipeline construction had torn out much of the vegetation Sue remembered being in that area and we didn’t even bother to look.
Eventually, the trail intersected with one of Mission Ridge’s ski trails. Signs facing down the trail we’d just come up warned skiers that the trail was not patrolled. We continued along the trail where it met with one of Mission Ridge’s service roads. We even crossed under one of the ski lifts. From that point, the trail began a steeper climb. I consulted my GPS to see how far we’d walked and was shocked to see that we’d done more than three miles. Sue agreed that was enough so we turned around and headed back.
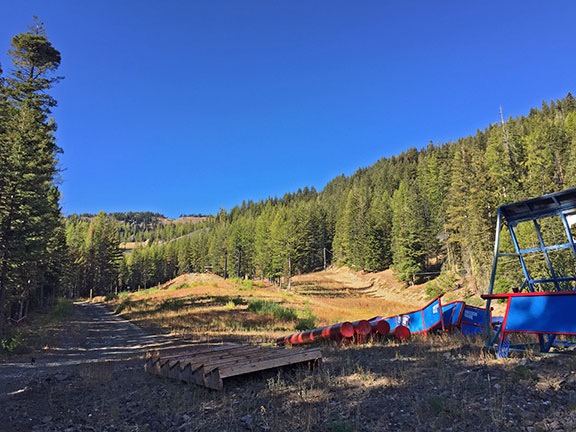
This is as far as we got on our hike. (Coincidentally, it’s the only time I’ve been inside the Mission Ridge ski resort; I do cross-country skiing, not downhill.) The trail climbed more steeply past this point.
The walk back was just as pleasant as the walk out had been. Even though we were covering the same territory, we saw different things. The conversation was interesting; Sue is a great hiking partner who knows how to tell interesting stories and listen without interrupting when her companion tells one.
Penny, of course, had a great time. Although I’d brought along her leash, I didn’t have to put it on her once. There was no risk of bothering other hikers or getting hit by cars on a road. And little wildlife other than birds and some squirrels or chipmunks that I never saw.
We got back to the parking area at about 11:20 AM. We’d been on the trail for about 2 hours and 45 minutes and had covered a round-trip distance of 6.2 miles.
This out-and-back hike is suitable for hikers/walkers of all ages. There’s nothing strenuous about it. I think would be especially appealing in the springtime, though, when there’s more water running and plenty of wildflowers. I hope to be back next April or May.
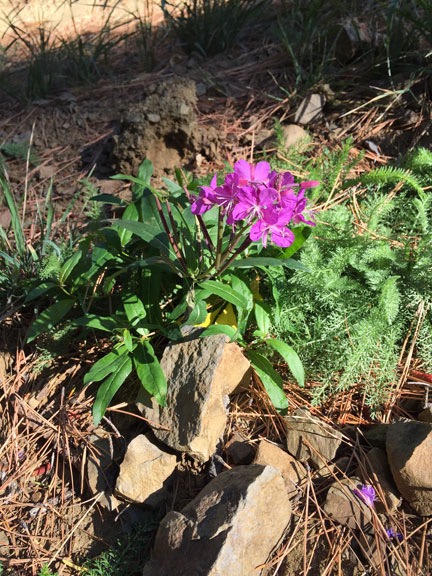
More wildflowers around my home.
I got out with my camera the other day and shot some more images of what’s blooming at my place. I didn’t walk the whole 10 acres; these shots were taken between my home and my “Lookout Point” bench. Once again, I looked them up in my WA State Wildflower app; here’s what I think they are.
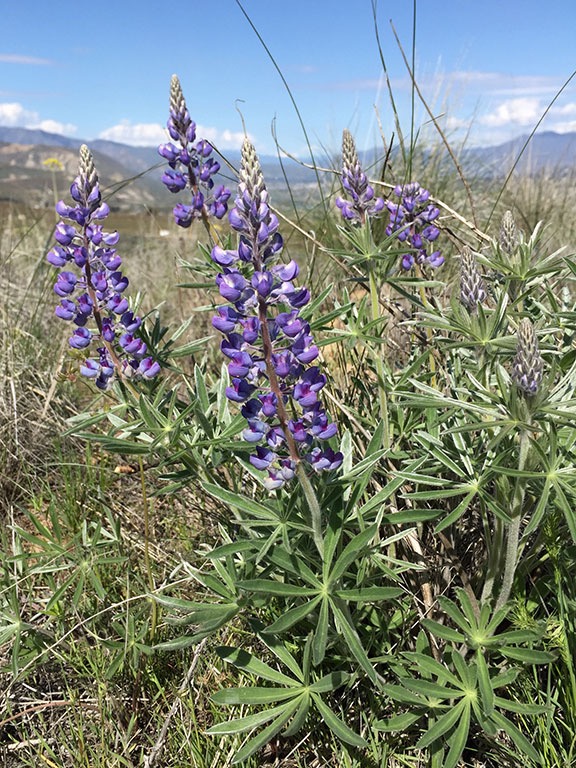
Lupine are extremely widespread here and although they’ve just started blooming at my place, I saw them at higher elevations on a hike with a friend last week. They will bloom throughout the summer, as long as there’s enough moisture in the soil to support them.
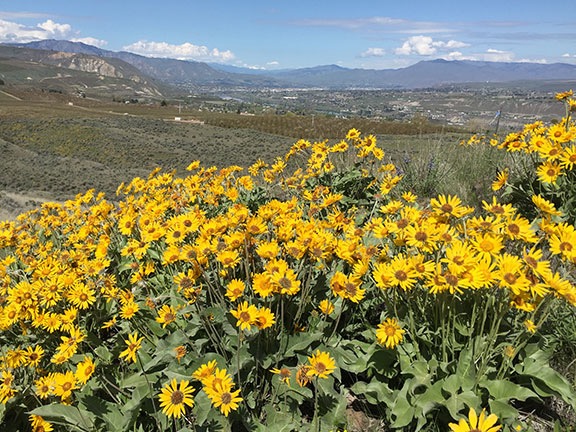
My three big balsam root patches are probably at maximum bloom right now. The biggest of the patches are right on Lookout Point; the other two patches are east near my new bee yard. I noticed this year that they favor southwest-facing hillsides. Because my home faces north, there are tons of these on the hills, as far as the eye can see.
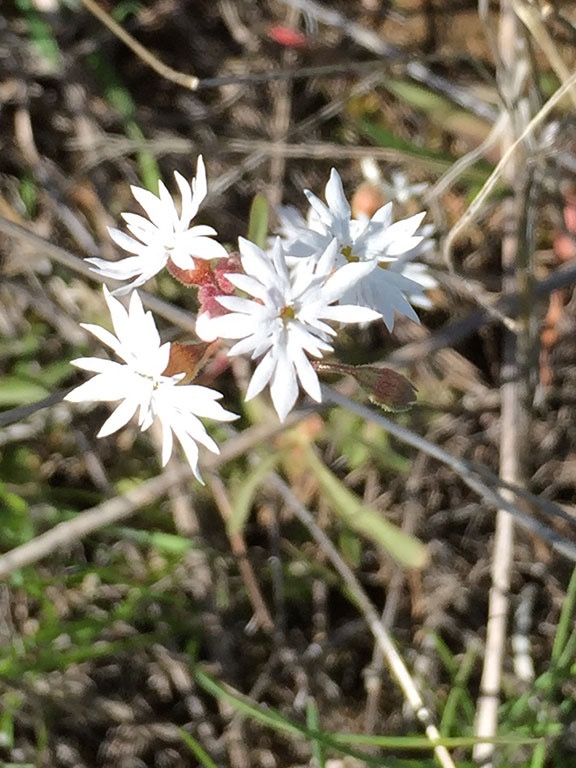
There are bunches of these alongside the path to Lookout Point. I suspect they need a lot of moisture to survive and don’t expect them to last long unless we get more rain.
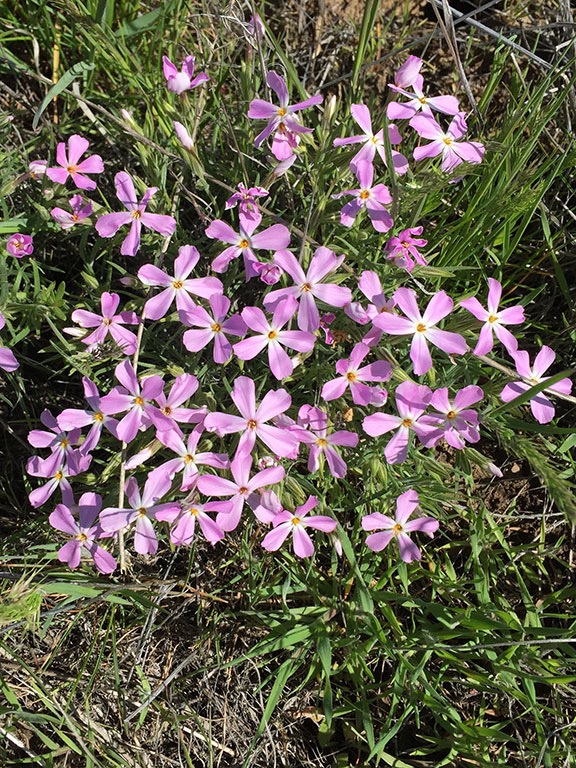
I’m not sure which kind of Phlox these are — the Wildflower app has lots of variants — but I’m pretty sure its Phlox. They’re very tiny flowers.
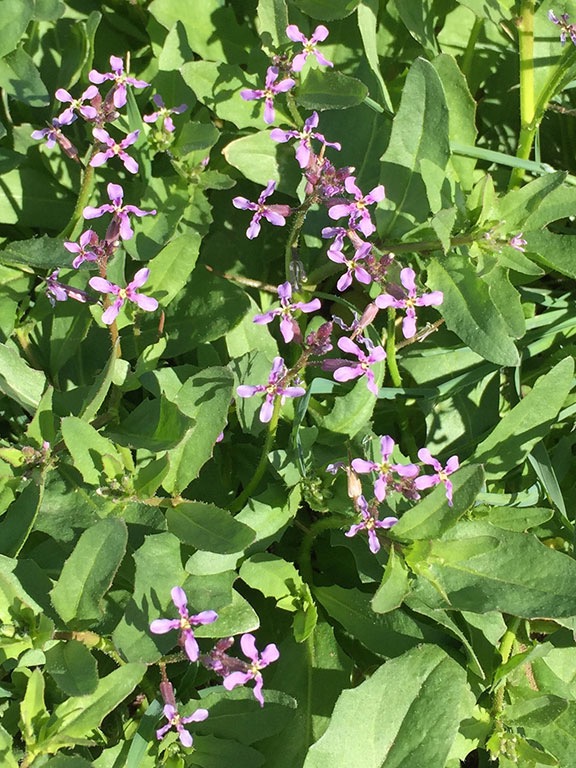
Last month, I identified this flower as Prairie-Star, but this month, I’m not so sure. It’s still blooming in tiny little bunches throughout my property.