I finally make time to do a photo walk in the sandstone canyon.
For the past month and a half, I have been living less than two miles from Antelope Canyon in Page, AZ.
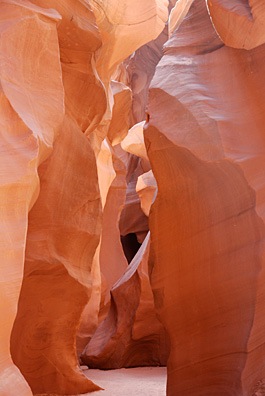 If you don’t know what Antelope Canyon is, you’ve probably never read Arizona Highways or seen any of the “typical” Arizona photos out there on the Web. As Wikipedia states, “Antelope Canyon is the most-visited and most-photographed slot canyon in the American Southwest.” Its reddish sandstone walls glow with direct and reflected light at midday, emphasizing the texture of the swirling patterns on the walls.
There are actually two Antelope Canyons: Upper and Lower. Most people go to the Upper canyon, which is upstream (south) of the other area. Upper Antelope Canyon is a short 1/4 mile stretch of slot canyon cut into a huge sandstone rock in the middle of Antelope Wash. It features cool, swirling sandstone walls and hard-packed, almost level sandy floor. I’ve written about it at least twice in this blog: “Antelope Canyon” (September 2006) and “Four Tips for Great Antelope Canyon Photos” (April 2007).
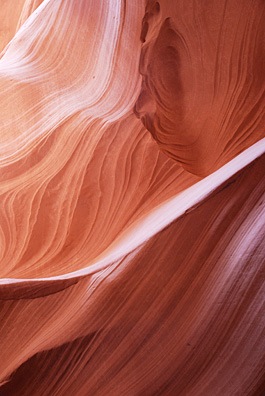
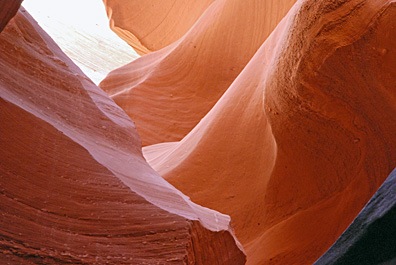
 Lower Antelope Canyon is downstream from upper. It has far fewer visitors. I think it’s more spectacular — with corkscrew-like carvings and at least two arches — but I also think it’s harder to photograph. It’s also far more difficult to traverse, requiring climbing up and down iron stairs erected at various places inside the canyon, clambering over rocks, and squeezing through narrow passages. For this reason, the Navajo caretakers don’t really limit your time in Lower Antelope Canyon. You slip through a crack in the ground — and I do mean that literally (see photo left) — and are on your own until you emerge from where you descended or from the long, steep staircase (shown later) that climbs out before the canyon becomes impossible to pass.
 I went to Lower Antelope Canyon with my next door neighbor and fellow pilot, Robert, today. It had been a whole year since my only other visit. After paying the $26/person entrance fee, I told the woman in the booth that I’d been there before. She told us to go on down, without waiting for a guide.
I had a few things with me that I didn’t have on my last visit. First and foremost was a tripod. I’d left my tripod behind on my last visit, thinking the light would be bright enough not to need it. Wrong. This time, I had a sturdy tripod I’d borrowed from Mike just for this trip. The only problem was, the tripod was old, its legs could not be spread independently, and the tripod was stiff from age or disuse. I also had two lenses I didn’t own last year: my 10.5 mm fisheye lens and my new 16-70 mm zoom lens. I packed light, bringing just the tripod and the camera with those two lenses. Rather than use my camera bag, I put the lens that wasn’ ton the camera in a fanny pack, along with a bottle of water and a lens brush.
 We arrived at about 11:20 AM and the place was unusually crowded. But Lower Antelope Canyon is large and everyone spread out. Most folks only made the walk one way, taking the stairs up and hiking back on the surface. We would have done the same, but we ran out of time. We were in there until 2:30 PM; Robert had to be at work by 4 PM.
 We made our way through the canyon slowly, stopping to take photos along the way. Positioning the tripods was extremely difficult sometimes, as the canyon floor was often only wide enough for a single foot to stand in it. My tripod really hindered me, but I made it work. I think Robert (shown here) had an easier time with his. We were two of dozens of photographers, most of which were very polite and stayed clear of other photographer’s frames. This is the biggest challenge at Upper Antelope Canyon. I find it stressful up there, as I told a trio of photographers from Utah. Lower Antelope Canyon is much more relaxing.
 Near the end of the canyon walk, I was worn out. It wasn’t the hike as much as the struggle to find the right shots and get the tripod into position. I felt as if I’d had enough. So when we reached the last chamber before the canyon got very narrow (and muddy) and I laid eyes on those stairs, I realized it would definitely be better to take the easier route back. I took this shot with my fisheye lens, which was the only way to get the entire staircase in the shot. If you look closely, you can see Robert’s head poking out near the top.
 I took about 95 photos while in the canyon. Some of the better ones — along with some to illustrate the story — are here. There’s a better collection in my Photo Gallery’s new Arizona section. I’ll probably add others — as well as shots I’ve taken around Lake Powell lately — soon.
If you’re ever in or near Page, AZ, I highly recommend taking the time to visit one of the Antelope Canyons. Even if you don’t take a single photo, a walk through the canyon is something you’ll remember for a lifetime.


 When we flew to Seattle on Friday, the new lens was in my camera bag with the rest of the camera equipment I take on the road. But with the back problems that have been slowing me down, I didn’t have time to do anything fun in Seattle, despite the fact that we had the whole day there. (I spent much of it sleeping off some painkillers.) The next morning, we began our helicopter flight from Seattle to Page. I was sitting up front, handling navigation while Louis flew. I had my hands full with directions for our
  My photography was limited to shots taken on the ground, like this photo of my helicopter at the Spanish Fork, UT airport. Although the photo doesn’t seem too interesting in this low-res shot, it’s really impressive in full-resolution, with clear detail of the clouds — enhanced with the use of a circular polarizing filter on the camera (not in Photoshop) — and dramatic mountains in the background. I think it’s my new favorite picture of my helicopter.
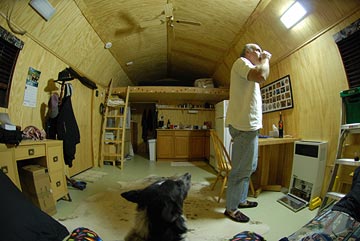 So when I tried it in the shed last night, I turned the flash off. I held the camera steady for the 1/4 second shutter speed that captured this image, which shows my husband, Mike, taking a quick drink before trying to fix the furnace. In the lower part of the photo, you can see my knees (clad in my wild chili pepper pants) and the sofa I sat on. Jack the Dog was sitting between my legs, watching Mike. The shot shows 90% of the shed’s main room.
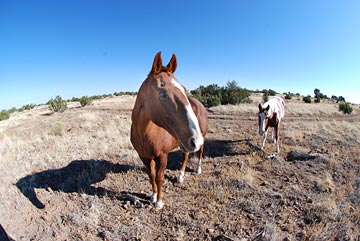 I brought out two apple pieces, which was a bad idea. As soon as they realized I had food, they wouldn’t leave me alone. They kept nosing my camera bag and shirt and it was all I could do to keep the camera out of their reach. But finally they realized that I wasn’t an apple tree and left me alone. Then it got tough to photograph them. They wouldn’t stand still. I managed to capture this shot of Jake with Cherokee in the background.
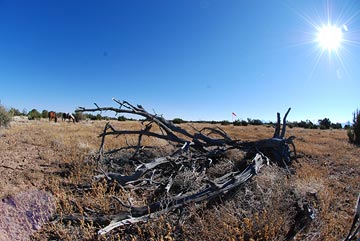 This first shot was taken from about 2 feet from one end of the log. There’s not much curvature at all. And yes, that’s the sun. With the fisheye lens, it’s hard to keep the sun out of photos.
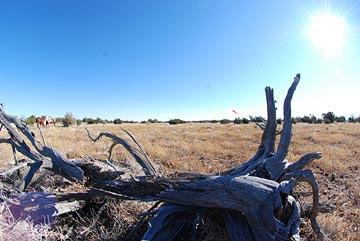 This second shot was taken about a foot and a half from the middle of the log. It’s a bad exposure; I’m not quite sure what I did wrong here. Still not much curvature.
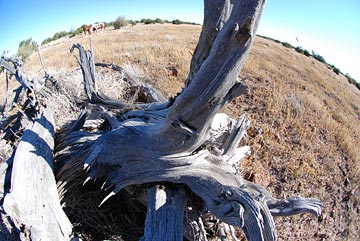 This third shot was taken 6 to 12 inches from the end of the log. I focused on the log, but because there was so much light, there’s a decent amount of depth of field. You can really see the curvature of the horizon, but can still clearly identify the horses and windsock.