But Mike gets to use it first!
I’d treated myself to a new camera lens late last month. When I returned from Washington last week, it was waiting for me at home.
 The lens is a Nikon 16-85mm f/3.5-5.6G AF-S DX ED VR Nikkor Wide Angle Telephoto Zoom Lens. It’ll replace the 18-55mm lens I bought on eBay last year — the same lens that crapped out on me about two months ago. (Another reason not to buy used camera equipment on eBay.) That lens was cheap and it felt cheap — lightweight and plasticky. This lens was costly and it has a weighty, quality feel to it.
But that’s not why I bought it. It was the Amazon reviews that convinced me. Although I’ll never rely on reviews there to buy a book — I’ve been burned before, in more ways than one — I find that reviews of camera equipment are generally fair and reliable. It’s easy to identify fanboys and people with a gripe against the company. Weed those out and you can get some solid opinions of the products. In this case, just about all owners liked the lens.
But it was comments like these that sold me:
I have both the 18-135 and the 18-200, yet this lens has become my everyday go to lens for most of my photography. …Given the great sharpness (especially in the 16-50mm range), VR, and almost total lack of noticeable CAs, I can highly recommend the 16-85 for a general purpose, on-the-camera-all-the-time lens. – D80Shooter
I think 16-85mm VR and 70-300 VR lenses is probably all amateur like me needs, with light and compact 16-85mm VR lens mounted on camera most of the time. – Alex
This is how I was using the 18-55mm lens — as an everyday lens. This one promised more flexibility with better optics.
Of course, when I got back to Wickenburg, I had just 3 days to do a ton of stuff. I didn’t have time to play with the lens other than to snap a few photos in the kitchen to check the focal length range. Photography would have to wait.
 When we flew to Seattle on Friday, the new lens was in my camera bag with the rest of the camera equipment I take on the road. But with the back problems that have been slowing me down, I didn’t have time to do anything fun in Seattle, despite the fact that we had the whole day there. (I spent much of it sleeping off some painkillers.) The next morning, we began our helicopter flight from Seattle to Page. I was sitting up front, handling navigation while Louis flew. I had my hands full with directions for our scud-run south. I didn’t realize it at first, but Mike was sitting in back, snapping photos with the new lens. He continued to do so on both days of the flight and got quite a few good shots from the air. This photo, taken just outside of the Bryce Canyon area, is especially attractive to me because of the shadow created by the big, puffy, low clouds.
 My photography was limited to shots taken on the ground, like this photo of my helicopter at the Spanish Fork, UT airport. Although the photo doesn’t seem too interesting in this low-res shot, it’s really impressive in full-resolution, with clear detail of the clouds — enhanced with the use of a circular polarizing filter on the camera (not in Photoshop) — and dramatic mountains in the background. I think it’s my new favorite picture of my helicopter.
I’ll be uploading the best photos from the flight to my gallery at Flying M Photos.
I’m in Page, AZ now, planning to spend the next month and a half flying tours around Lake Powell and Monument Valley. (You can learn more about my summer flying gigs on the Flying M Air Web site.) I’m also working hard this month to complete my 72nd book, which, unfortunately, I can’t talk about here. So while I’ll be very busy through August, I should have free time in September to go exploring. Antelope Canyon is less than 5 miles away and I expect to spend several mid-day sessions in Lower Antelope Canyon. There’s also an interesting rock formation called The Wave within 50 miles of here — not sure where yet — and if my back heals up, I’ll take a hike there. This new lens should be perfect for these tight locations, since it offers a really wide view without much distortion. (My fisheye lens can take some cool photos, but its a limited use lens.) I might also charter an airplane for some aerial photo work. Airplanes are extremely limited for this kind of work — helicopters are so much better — but it might be worthwhile to give it a try.
If you have a lens like this, I’d love to hear from you. Use the Comments link or form for this post to share your thoughts.

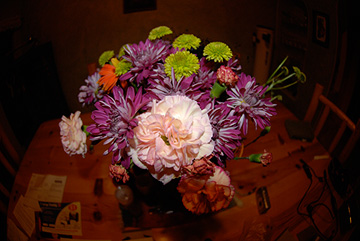
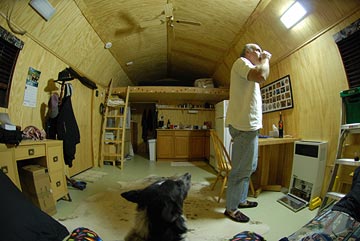 So when I tried it in the shed last night, I turned the flash off. I held the camera steady for the 1/4 second shutter speed that captured this image, which shows my husband, Mike, taking a quick drink before trying to fix the furnace. In the lower part of the photo, you can see my knees (clad in my wild chili pepper pants) and the sofa I sat on. Jack the Dog was sitting between my legs, watching Mike. The shot shows 90% of the shed’s main room.
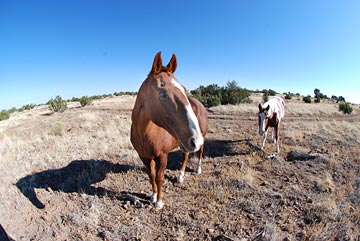 I brought out two apple pieces, which was a bad idea. As soon as they realized I had food, they wouldn’t leave me alone. They kept nosing my camera bag and shirt and it was all I could do to keep the camera out of their reach. But finally they realized that I wasn’t an apple tree and left me alone. Then it got tough to photograph them. They wouldn’t stand still. I managed to capture this shot of Jake with Cherokee in the background.
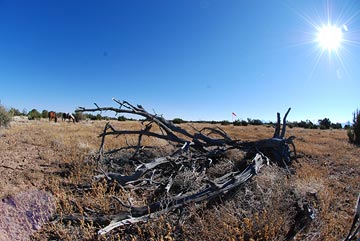 This first shot was taken from about 2 feet from one end of the log. There’s not much curvature at all. And yes, that’s the sun. With the fisheye lens, it’s hard to keep the sun out of photos.
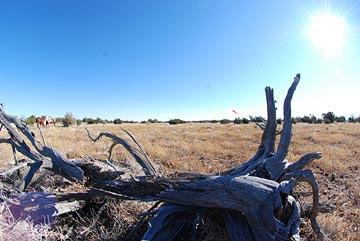 This second shot was taken about a foot and a half from the middle of the log. It’s a bad exposure; I’m not quite sure what I did wrong here. Still not much curvature.
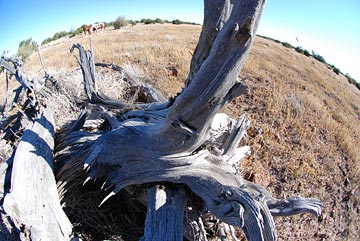 This third shot was taken 6 to 12 inches from the end of the log. I focused on the log, but because there was so much light, there’s a decent amount of depth of field. You can really see the curvature of the horizon, but can still clearly identify the horses and windsock.


 A lot of the photographers I’ve been working with —
  Although lens collection includes a 28-85 mm zoom lens, I only recently discovered that a 28 mm lens for a film camera doesn’t give you a 28 mm focal length on a digital camera. There’s a conversion factor, which I looked up for my camera: 1.5. That means the focal length of my lens is 1.5 times whatever the lens is labeled. So, for example, a 28 mm lens is resulting in a 42 mm focal length. (Please, someone, correct me if I’m getting this wrong. This is my understanding and I’m not an optics expert.)
 So I did some research and found that Nikon makes a 18-55 mm lens. I saw the retail price and decided to see if I could do better on eBay. I did. I bought a used lens in pretty good (but not “mint,” as advertised) condition on eBay for $81 including shipping. I got to play with it on Sunday when we were goofing off at the local airport. The photos you see with this post are examples. I didn’t have much to work with in the way of subject matter, so I took a few shots of my car (parked in front of my hangar) and a cool little airplane sitting out on the ramp.