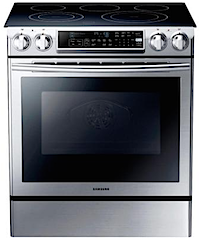
It’s small but functional, with lots of counter space and plenty of light.
I had two main points of consideration when designing my new home:
- The total living space needed to be less than 1,200 square feet. That’s because I’m not building a primary residence here. Instead, I’m building the secondary living space allowed by Chelan County on a lot zoned like my 10 acres. The idea is to leave the primary building location — the one that can take better advantage of the views — available for either me or a future property owner to build a house on. That house can be any size as long as this space is 1200 square feet or less.
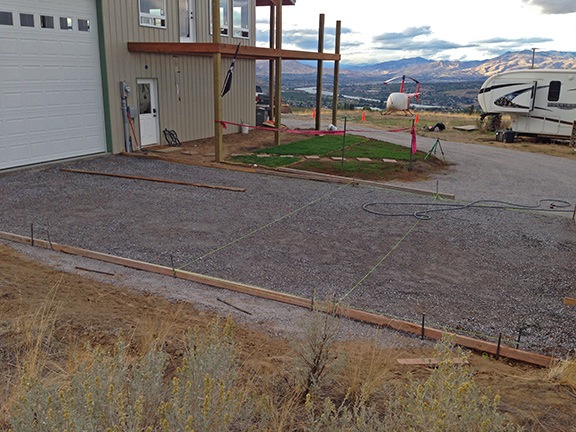
- I needed to include lots of windows. What sold me on the lot is that it has amazing views, especially out toward the Wenatchee Valley. Big windows would not only let me take in those views from any room in my home, but they’d also let in lots of light. So I have lots of big windows. The entire building has 21 windows, not including those on each of my five garage doors or three man doors. Sixteen of those windows are in my living space.

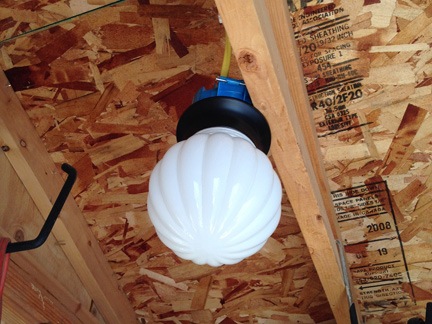
Got windows? I do! My living space is above my garage. I designed it to have regularly spaced, large windows so I could take in the view from indoors.
These two factors combined determined my floor plan. The walls had to be placed between the regularly spaced windows. This made special challenges in the bathroom and kitchen — you can’t put fixtures or cabinets right up against a window that starts 18 inches off the floor and stretches five feet above that.
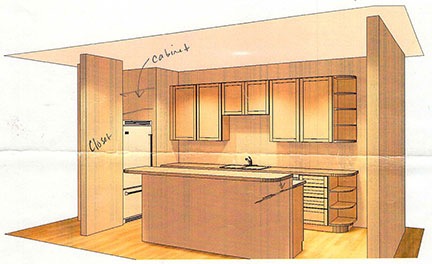
Although I played around with several designs for my kitchen, I finally came up with a design that utilized a “galley” style with an island/breakfast bar. The key was setting the refrigerator into a wall and putting the stove on the island. That gave me more than 47 square feet of counter space in a room roughly 9 x 13 in size, even though I can’t take the counter all the way to the window. And because my ceilings are so high, I was able to use tall wall cabinets and for extra storage space.

Here’s the latest version of my floorplan, with my appliances and some of my furniture included. Measurements are rough and don’t account for the thickness of drywall (1/2 inch). The gray shaded area is a storage loft above the hall and utility area.
Understand that although my kitchen in Arizona was large, it was not ideal. The textured tile countertops made it impossible to do something as simple as roll out a pie crust or cookies — and let’s not even talk about the chore of keeping the grout clean in a household where only one person knows how to use a dishrag to clean up spills. The appliances, although supposedly high quality, left a lot to be desired, as I discussed here. Food storage was in the cabinets rather than in a dedicated pantry; small appliances lined the countertop because there was no other practical place to store them. And while it might be difficult to believe, the abundance of countertop space made cooking a chore by allowing multiple work surfaces to leave bowls, measuring spoons, and ingredients — and to clean up.
While I certainly didn’t have the same amount of space in my new home, I could design a better kitchen to meet my needs.
Help from Home Depot
Getting an idea of the kitchen layout was the first part of the process. Getting actual cabinet configurations was another. For that, I turned to the local Home Depot.
Here’s Home Depot’s first stab at my kitchen. In this original version, I’d planned to mount the microwave in the cabinet below the stove in the island. The island’s breakfast bar was also designed higher in the back. We forgot about cabinets over the refrigerator.
I visited Home Depot back in July to get the process started. This helped me see how cabinets might work in my kitchen. With their kitchen planning software, they selected and placed cabinets to my specifications, then provided me, on request, with a printout of the configuration and a conceptual drawing. This made the room more real to me and gave me some time to think about it and how it might work. It also spit out an estimate of cost, although I wasn’t really thinking much about that yet.
Time passed. I got my living space framed to fit the kitchen we’d designed. I got other things done, like the ceiling/roof insulation and, more recently, the HVAC air handler and ductwork. Although I’d toyed with the idea of going south for the winter, I decided to stick around and finish construction work on my home this winter so I could dedicate early spring to settling in and late spring to putting in the massive garden I was planning.
I’d also had some other thoughts about the kitchen layout. After visiting a new friend’s place in Friday Harbor, I realized that putting the microwave down low would not be a good idea — especially when I considered how much I used my microwave. And although I’d hoped to use the microwave I’d brought from Arizona — the one my parents had given me as a housewarming present for my New Jersey home back in 1986 (!), I decided I deserved a new one. I’d get a large shelf model and put it on a shelf beneath the cabinets. I also decided to keep the island all one level — I saw that at the Friday Harbor home, too, and really liked it. More homey and lots of contiguous counter space for baking and cheesemaking projects.
My goal was to fit a dream kitchen into a small space and I was pretty sure that the changes I had in mind would help me achieve that goal.
Getting Serious
With those changes in mind, it was time to get solid price quotes from at least two sources: Home Depot and Lowe’s. I visited both yesterday.

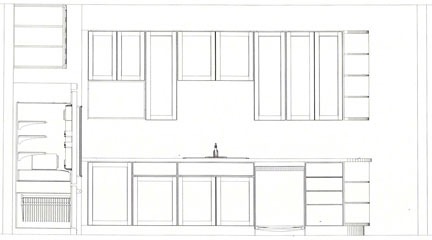
The kitchen drawing as prepared by Lowe’s (top) and Home Depot (bottom). I like the way Home Depot does a cutaway of the fridge.
At Lowe’s, we created the kitchen design on their computer system — which is virtually identical to Home Depot’s — making sure to get every detail. It took a long time and, since my appointment was delayed due to the previous customers taking longer than expected, I ran out of time before we could get into the countertops. Still, she designed the kitchen as I wanted it and gave me a printout of the primary wall’s layout, along with a detailed price quote.
Then I went to Home Depot. Fortunately, my design was still in their computer. We modified it to match what Lowe’s had drawn for me so I could compare apples with apples. I got a printout of the main, refrigerator, and island parts, along with a price quote. We also had time for me to pick out a granite countertop, select options, and get a quote for that. (That’s how I know I have 47 square feet of countertop.)
At this point, I’m leaning toward Home Depot. Their kitchen came in about $1,000 cheaper than Lowe’s for the same quality product — and that’s after manufacturer and retailer incentives. To get the incentives, I have to order at Lowe’s by December 15 or Home Depot by December 21. Both offer an additional 5% savings for using their credit card — which is one reason I have one for each company. Both will charge about $1,500 – $2,000 for installation, which I’ll likely get so I’m sure it’s done right.
As for the countertop, I need to get more estimates. Although the $54/square foot installed price sounds pretty good to me — and the few other folks I’ve asked — I might be able to get a better deal elsewhere. I will definitely check in at Lowe’s.
Keeping It Simple
One more thing… a lot of people have told me not to use Home Depot or Lowe’s for my kitchen. They say there are better options: Ikea, a local kitchen place called Bagdon’s (which I am visiting later today), and various local cabinet makers. But these people need to understand that my decision to use these big box companies is being driven by three factors:
- Cost. I don’t have an unlimited budget. This is a small living space and I can’t pour a lot of money into it that I might never get back. (Although everyone seems to agree that I’ll have no trouble selling this place for far more than I put into it.)
- Time. I can’t wait for various contractors to come and measure and plan. I want this done already. I’ve waited long enough.
- Ease. I’m not interested in buying cabinets at Ikea and cabinet fronts at some local cabinet maker and finding some contractor to put it all together. I want to pick something out in one place, know it will work, and pay one organization to put it in my home. I have way better things to do with my time than play around with vendors and contractors.
While I’d love to spend my money locally with small organizations to get the perfect custom solution, I also need to do what’s right for me. And what’s right now is keeping it simple.