I did what I had to do.
One of the things holding up the progress on my home was the fact that I hadn’t finished the bathroom floor yet. I couldn’t have the plumbers in to install the tub and other bathroom fixtures until the floor was done.
And it wasn’t going to do itself.
The Difficult Flooring Decision
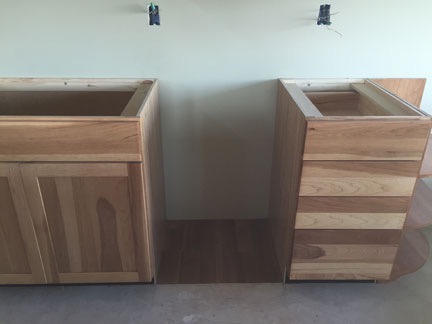
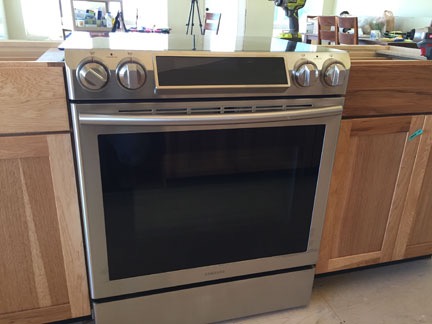
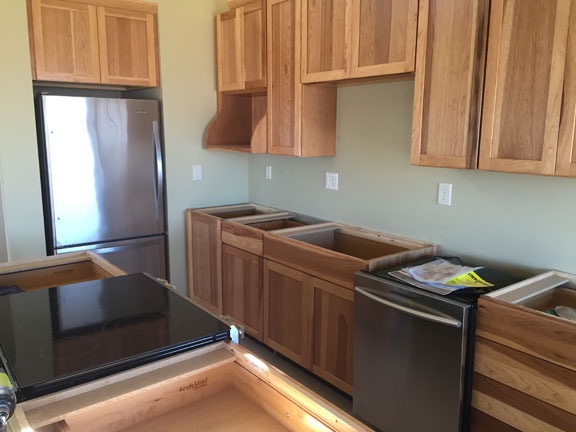
Throughout my home, I’m using Pergo Max wood laminate flooring. This is a “floating floor” with snap together planks. Although it’s highly rated, durable, and attractive, it isn’t suitable for areas where large, heavy items will be placed. That’s why I had to prep for my kitchen appliance installation by putting vinyl adhesive flooring on 1/4 inch plywood under where my refrigerator, dishwasher, and range would go.
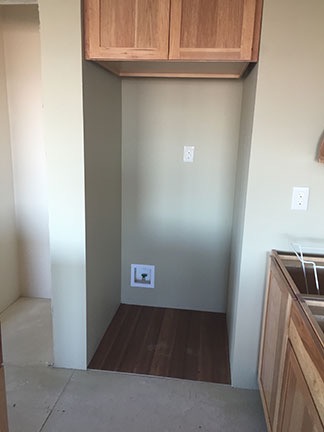
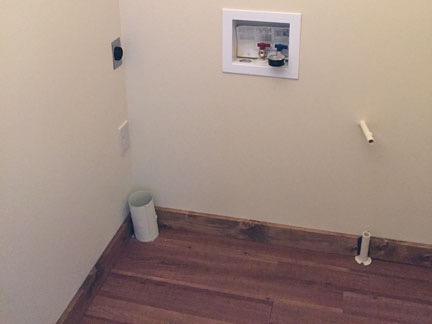
I used the same vinyl plank flooring in my laundry room. It was a test — I figured that if I liked it there, I’d use it in my bathroom. Although it went down easily enough, it certainly wasn’t the kind of quality flooring I wanted in my real living space. (My laundry room is a glorified closet.) So vinyl was not the answer.
And yes, I do realize that there are different levels of quality for vinyl flooring. I still wasn’t interested.
That meant tile.
I like tile. I really do. I had it in the kitchen and entry areas of my old house and, if it were up to me, I would have had it throughout the entire downstairs. (I wanted so badly to tear that dirty old carpet out of the living room and redo the whole room with tile. Not my problem anymore, thankfully.) Tile makes sense in a dry place like Arizona, especially on a ground floor with a concrete subfloor.
But I don’t like installing tile. It’s a lot of work.
I had some experience working with tile years ago in my Arizona house, back when I cared enough about it to want to make it different and special. It had a built-in shelf area in the den — built-ins were huge in Arizona in the 1990s — and I tiled two or three of the shelves. That’s when I learned what a pain grouting was. I lost interest in projects like that once I got a good taste of how tough they could be.
I figured that in my bathroom, I’d compromise. I’d put tile under the bathtub and do the rest of the room with Pergo. That would minimize the amount of tile work needed to be done. I could knock it off in two days.
With that in mind, I bought two sheets of 1/4 inch Durock cement board for underlayment and two boxes of 12-inch ceramic tile that I thought would work well with the oak colored Pergo.
Prepping the Floor, Changing My Mind

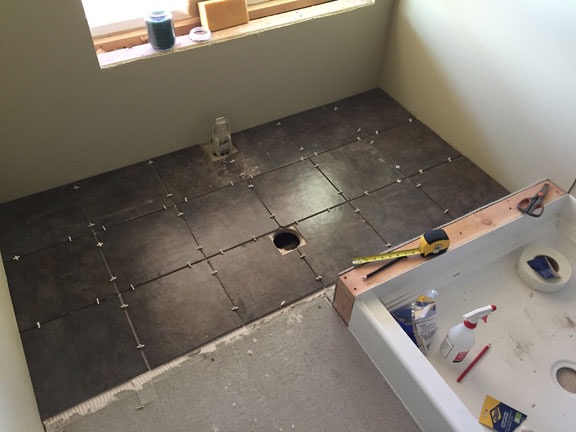
The first piece with cutouts for my tub’s faucet and drain.
I got to work on Friday, March 6. I had to cut the Durock sheets to fit into place on the floor. To minimize the trips up and down the stairs, I brought my saw horses and tools up and set them up in my future bedroom. Then I went at the first board with my circular saw and a 4-inch hole drill. I carried it into the bathroom and lowered it into position. A perfect fit!

Measure twice, cut once. It really does work.
I screwed it into place using a bunch of cement board screws and got to work with the next piece. Within minutes, the far end of the bathroom floor was covered with Durock.
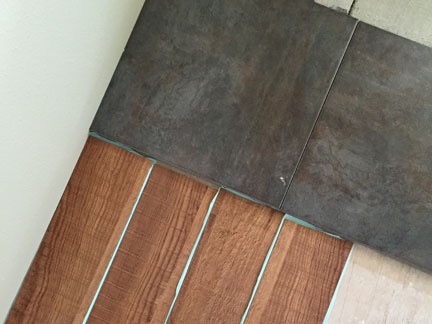
Side by side, the two floor colors didn’t look bad at all.
I decided to give myself a preview of what the finished floor might look like. I laid down two tiles and placed some spare pieces of that vinyl plank beside it. The plank was nearly the same color as my Pergo, which I hadn’t picked up yet. The tile was gray with streaks of brown in it and the two materials, side by side, really did bring out the brown streaks. But I started having doubts about the way the floor would look with two different materials. And I realized that I’d have to put tile under the toilet and probably under the vanity, which was open on the bottom. That was half the floor.
Oh, screw it, I thought to myself. I’ll just do the whole damn floor in tile.
That, of course, meant another trip to Home Depot for four more boxes of tile and two more sheets of Durock. While I was there, I also bought the mosaic tile I’d need for the inside of my shower stall.
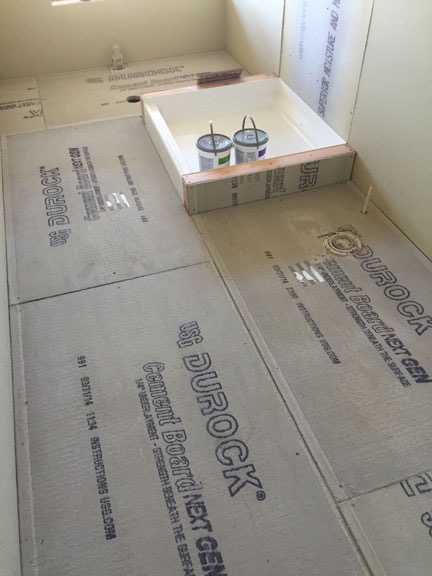
I thought I was finished with the subfloor preparation on Saturday.
I spent Saturday morning cutting and laying out the sheets of Durock. It wasn’t difficult — there were few fixtures to cut around. When I was finished, I shared photos of my handiwork on Twitter and Facebook, as I often do.
The advice came quickly, as it often does. More screws, someone said. Did you place that over thin-set? someone asked. You need to tape and mud it.
This was not what I wanted to hear. I thought the floor was pretty secure.
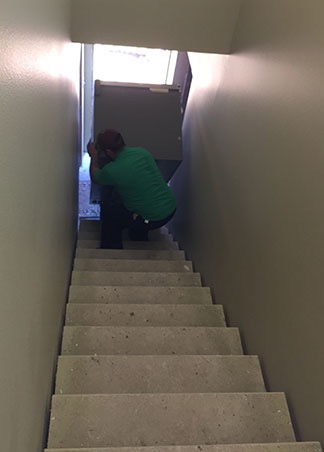
A friend of mine stopped by on Sunday to help me install the fire doors at the bottom of my stairs. (Building codes require me to have 20-minute rated fire doors between my living space and garage.) He’d built his house and he’d tiled his bathroom. I asked him what he thought. It’s fine, he said.
Sunday afternoon, I fired up my web browser and went searching for tile how-to videos. I wanted a refresher before I got to work. I found this excellent series of how-to videos on the Home Depot website and watched all the videos for the type of installation I was doing. That, in turn, included to a link for another video about preparing the subfloor. I watched that video and realized that my Facebook friends were right: I needed thin-set under that Durock and more screws. Although I’d tape the seams, I drew the line at mudding them. After all, I’d be placing more thin-set on top when I laid the tile.
I used some premixed thin-set that I’d bought for the tile to get started that evening. The stuff was expensive and I went through it at an alarming rate, despite what the package said coverage should be. Clearly I needed to buy the less expensive powder and mix it myself.
So Monday morning, bright and early, I was at Stan’s Merry Mart buying a 50-pound bag of thin-set mortar mix. I spent the entire morning pulling up those sheets of Durock, smoothing thin-set under each sheet, and screwing them back down. I carefully covered the remaining thin-set with plastic and headed out to an appointment. I’d start laying tile when I got home that evening.
Buying Thin-set (Again and Again), Laying Tile
When I got home, I was very pleased to see how solid the floor now seemed. I was convinced that I’d done the right thing in taking this extra step. (Thank you, Facebook friends, for your advice.) Although it was after 6 PM, I thought I’d get a good start on the tiling.
Of course, the thin-set wasn’t thin anymore. It was basically garbage.
I reopened the plastic container of premixed thin-set I’d started the day before. I laid three rows of tile before the container was empty. (I wound up buying a 25-pound bag of the mix on Tuesday morning before getting back to work.)
I was extremely fortunate with the size of the room and tile. Believe it or not, the room was exactly 6 tiles across. That really minimized the amount of tile cutting I needed to do.
I was actually very well prepared for all my tile work. When I’d packed up my belongings in Arizona, I eventually got into the garage where I’d stored all my painting and tile work tools in plastic bins. I went through it all and packed up the items I thought I might need in my new home — including all of my tile working tools. I even packed my manual tile cutter. The only extra equipment I needed to buy was a good rubber grout float and a set of tile nippers. I even had a tile saw with diamond blade that I’d been using for my glass work for the past year. So I was pretty much set for the job.
Tuesday’s work went quickly, laying tile after tile, pausing only long enough to make a tile cut with the cutter or saw. I would have finished the entire floor except for one problem: I ran out of thin-set. Again. With just six tiles left to lay. I’d have to pick up another bag that evening when I went out with friends and finish in the morning.
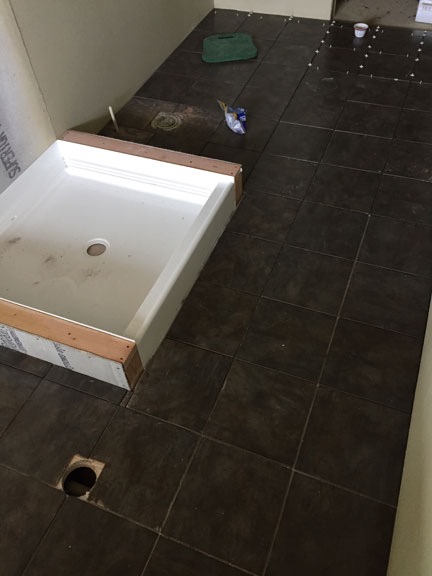
All tiles laid.
And that’s what I did. Rather than mix the entire bag of thin-set, I mixed up a batch just large enough to lay the last handful of tiles.
The Race to the Finish
In the meantime, I’d been trying to get the plumber to give me a date on when they’d come to hook up the water and do whatever else they could do. I’d promised them that the tile work in the bathroom would be done the previous Friday — yeah, the same day I started. The plumber, Dave, had told me it would be at least two weeks and I knew it was vital to get on his calendar. So we’d been playing telephone tag all week and he showed up to take a look at the job on Wednesday evening.
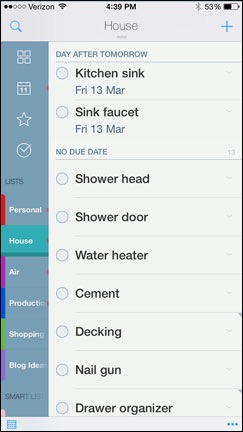
I use the 2Do app to keep a synchronized list on my iOS devices and Macs. Every time I think of something I need, I just add it to a list.
He listed all the things they could do and what I’d need on hand. I had some of it — the tub, tub faucet, vanity, bathroom countertop/sink. But I needed more: water heater, toilet, shower head, bathroom faucet, kitchen sink, kitchen faucet. I already had these things on my list.
“Yeah,” he said as he prepared to leave. “We’ll be by tomorrow. But it won’t be until after about 11 because we need to install a cast iron tub.”
I tried to hide my shock. Tomorrow morning? It was already after 5 PM. Items on my list had been shifted to the top and I still needed to grout the tile. But if I balked, I’d lose this date and I definitely didn’t want to get on the bottom of his list.
“Okay,” I said. “I’ll see you then.”
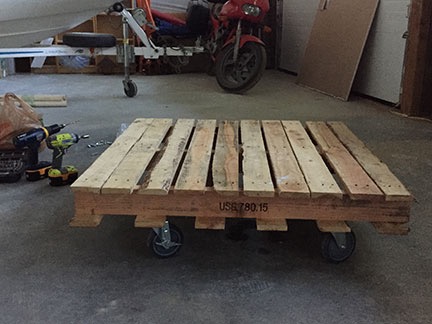
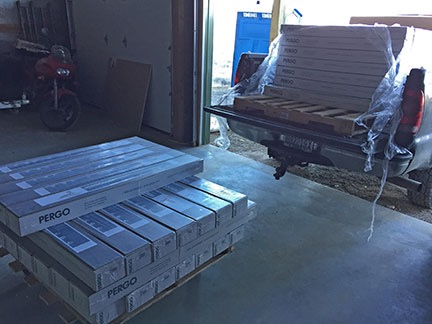
I was then faced with the problem of getting two pallets of Pergo, which I’d picked up on Saturday, out of the back of my truck so I had room to pick up a water heater, toilet, and other bulky items. I compromised. I offloaded just one pallet, leaving enough room for what I had to bring home, and headed out. By 9 PM, I was backing into the garage with the truck bed full again.
Although I wanted to wake up at 4 on Thursday morning and I had to wake up by 5, I actually woke up by 3. That’s how it is when I have lots of things on my mind. As I age, I seem to need less and less sleep. That’s a good thing because it seems to take longer to get things done.
I was on my hands and kneepads on the bathroom floor by 4:30 AM with a grout float, a plastic container filled with light brown grout, a paint bucket filled with clean water, and a sponge. This was the part that I hated. Grouting.
This video makes it look easy. While it’s not exactly difficult, it certainly isn’t any fun.
It’s not spreading the grout that’s a problem. That’s kind of relaxing, in a way. The trouble is, the grout gets all over the tops of the tiles, too, and it has to be removed before it dries. So you’re basically spreading grout on 4 to 8 tiles, then sponging them off. This video was extremely helpful because it gave me the key to doing it right: make the sponge as dry as you possibly can and keep rinsing it.

By 6:10 AM, I was pretty close to being finished with the grout work. I still don’t have electricity finished in the bathroom, so I had to rely on my shop lamp for light.
I did nearly half the floor in the first hour or so. Then I took a break to get fresh water. I got right back to work. It was vital that the grout be set by the time the plumbers came because they’d be walking all over it. It would need at least three hours. I wanted to be done by 6 AM. I was actually done by 7 AM.
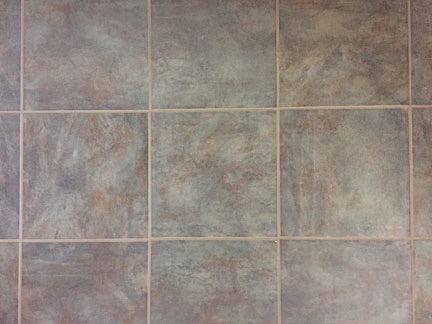
Here’s a closeup of the finished tile. Was it worth all that work? Grudgingly, I’d have to say that it was.
And it looked great.
I’d chosen the brown grout for two reasons:
- Dark grout doesn’t show dirt like white grout does. That was my only complaint about the tile in my old house — that freaking white grout. Who does that? It was impossible to keep clean. I remember cleaning the kitchen floor on my hands and knees, scrubbing grout for hours on end. I was never going to do that again.
- I thought the brown grout would bring out the brown colors in the tile — and it does. It would also look good with the mosaic tile I’d bought for the shower stall.
The plumbers showed up on schedule, right around 11 AM. By that time, the grout was set and safe to walk on. They got a lot done in a short period of time. But that’s a subject for another blog post.


 “Manor Hickory” is a very dark shade of brown with near-black highlights.