The biggest challenge was getting the damn wire out there.
If you’ve been following these posts, you know that in late August, I finally got permanent power run to my building under construction and that I had taken on the task of doing all the electrical wiring in that building. You might also realize that when the Chelan PUD workers left, the only access to electricity that I had was from a single outlet inside the building.
I’d lost my 30 amp RV connection the previous day when I took down the temporary power pole I’d been plugged into. I was living in the RV but had no easy access to AC power. Instead, I was relying on the RV’s two batteries and the solar panel on the roof to keep them charged. While this is a very workable short-term solution, it did mean that I’d have to rely on propane for my refrigerator and hot water and that I wouldn’t have access to some conveniences, such as my microwave and coffee maker. Yes, I do have a 2 KW Honda generator that I could have pulled out and fired up, but who really wants to listen to that noise?
The Task at Hand
My task was clear: get the 30 amp RV outlet set up at the shed, which was on the opposite side of the driveway from my building, about 25 feet from my RV.
I’d run the 2 inch schedule 40 conduit under the driveway to the shed earlier in the week and it had been approved by Labor and Industries (L&I). All I needed to do was run a set of 10 gauge wires through the conduit and set up the appropriate sealed boxes on the other end for the outlet. While I was at it, I’d run a set of 12 gauge wires through the same conduit for a 20 amp circuit so I could put a 115v outlet on the outside of the building as well as an outlet and light inside the shed.
Running the Wire
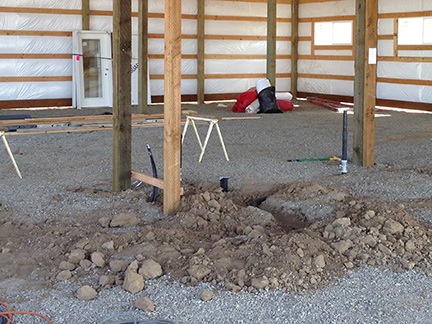
Although the shed was only about 80 feet from my building, the conduit did not run in a straight line. Jeff, my earth-moving guy, had run it with the 3 inch conduit toward the transformer box, then turned left and ran it with the water line to the shed. Near the shed, it turned right to get to the north side of the shed where I wanted the utilities. (The frost free valve for the water was already installed there and running well, supplying my RV, chickens, and garden with water.) I’d walked the trench with my long measuring tape: 96 feet.
It was the bends in the conduit that could pose a problem: 90° at the building, 90° where it met the water line, 45° in front of the shed, and 90° where it came up out of the ground at the side of the shed.
The first job was getting a wire pull line — sometimes referred to as a fishing line — through the conduit. This was remarkably easy. I tied a bunched up plastic shopping bag to the end of some garden twine I had and tied the other end to the water valve near the conduit opening at the shed. I stuffed the bag into the conduit, then went into my building, plugged in my Shop Vac, and put the Shop Vac’s business end to to other end of the conduit. I fired it up and it sucked.
The shopping bag didn’t quite make it. The garden twine wasn’t long enough. No problem. I attached one end of the pull line the PUD guys had given me the day before to the end of the twine, went back to the Shop Vac, and sucked some more. Whoosh! The shopping bag stuck to the Shop Vac hose. I turned it back off and pulled the twine to bring the pull line all the way through.
Necessity is the mother of invention and I can get pretty inventive.
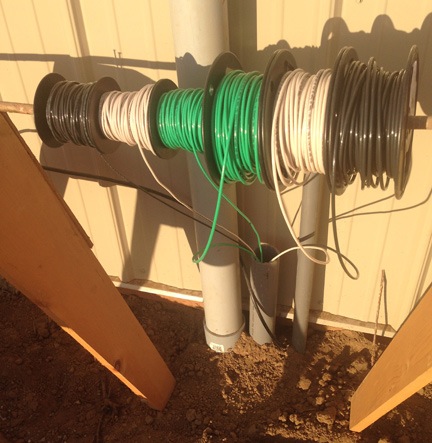
For each circuit, I needed 3 wires: black, white, and green. That meant six wires. I’d bought them on 100-foot spools a few days before. I carefully grouped the ends together, wrapped the strap around them, and used duct tape to make a smooth, somewhat pointed end on the pull line. I pushed it into the conduit. Then I rigged up my old copper grounding rod (from the temporary power pole) on two saw horses near the opening of the conduit, went back to the shed, and started to pull.
It was easy at first. Hand over hand, I pulled the wire, watching the spools turn by my building. Then I hit a snag. I pulled hard but didn’t get anywhere. I went back to the building, pulled back, then went back to the shed and pulled again. The wire started to move again.
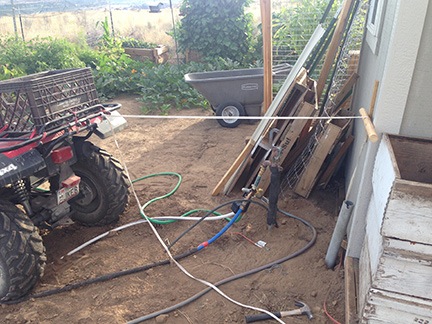
This went on for a while. The wire got harder and harder to pull. So I did what any machine-loving woman would do: I hooked up the pull line to my ATV and used that to pull. That got me another 20 or so feet, but it was pulling sideways and damaging the top of the conduit. I needed a better solution.
My friends tease me about having so much “stuff,” but every once in a while, some of that stuff comes in handy.
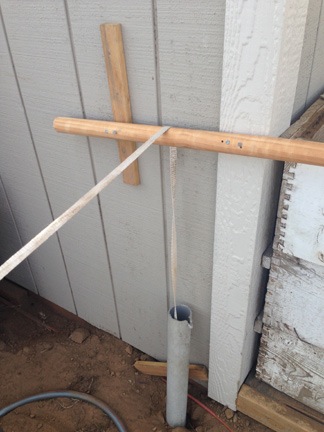
I went into my shop and fetched one of the dowels that had been a curtain rod at my Arizona home. (There’s a funny story about these “curtain rods” and why I took them, but I’ll save that for another post.) I cut it to about 2 feet in length and then rigged it up to the side of the shed with some scrap wood and nails. Then I moved the ATV into position. Now I could use the ATV to pull straight up.
It seemed like a good idea at the time.
That got me another 5 or so feet. That’s all. The wires were stuck hard. Repeated attempts simply pulled the dowel off the shed. (So much for that idea, huh?)
I could tell by the amount of wire left on the spools that I was almost all the way to the shed. The thought of pulling it all back and starting over was too much to bear. My arms already ached from the effort I’d expended. I called it quits to think about it some more.
I called my friend Bob. He told me to pull the wires out and check the connection between the wires and the pull line. He said the connection was probably getting hung up on one of the bends in the conduit. He said I should then bunch the wires together every 3 feet or so and wrap them with electrical tape. Then feed them through again.
I really didn’t want to do it. I knew that once I got the wire out, it would be a two-person job to feed it back in.
So I invited him for dinner. (Did I mention that there are no free meals here?) I grilled sausages and made a nice salad with fresh mozzarella and tomatoes from my garden. We ate outside as the sun was setting. It was very pleasant and relaxing.
After dinner, we pulled the wires out and bunched them with tape as he’d suggested. He reconnected the wire to the pull line using a different technique and we worked together to pull the line through.
And that’s when I got the really bad news: the wire wasn’t long enough.
You see, although I’d measured the trench distance, I failed to account for the sweep down from the building and the sweep up to the shed. The trench was 96 feet long and 3 feet deep. That added at least 8 feet to the length of the conduit, which stuck out at least a foot on either end. The wire was about 4 feet short of what I needed.
And no, splicing additional wires on was not an option.
So now I had about $150 worth of wire I couldn’t use.
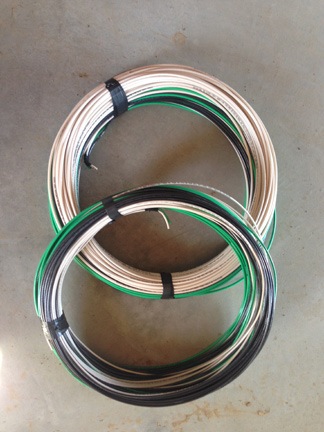
The wire guy at Home Depot gave me two bunches of wire: one set of 10 gauge and one set of 12 gauge.
The next day, I went back to Home Depot and bought 120 feet of each type of wire. I had to buy it off the bulk reels because the next size reels were 250 feet and I already had 100 feet of wire I didn’t need. When I talked to the wire measuring guy about my situation, he told me I could return the unused wire. All I had to do was get it back on the reels. (Talk about a job for a rainy day.) They’d just resell it from the bulk wire area.
Of course, now I had six loose strands of wire — not on reels — to feed into the conduit. Another two-person job. I prepped as well as I could and called my neighbor, Kathy, to come give me a hand. She promised to come later in the day, after work.
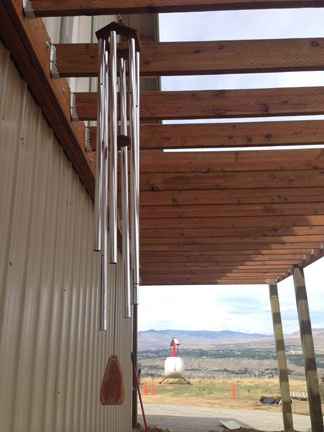
I hung my big wind chimes from the bottom of my front deck, just outside my front door. This spot is relatively sheltered from the wind so they don’t get tossed around much. I love the sound of these chimes and am so glad I didn’t leave them behind.
I busied myself with other odd jobs while I waited. I’d begun unpacking boxes with flower pots and other outdoor items in them. I was using the shed for anything garden or bee related. One of the boxes included my wind chimes. I hung the big, deep-toned ones by the building and the smaller ones by the shed. Later, when I heard them chiming, it brought back bittersweet memories of my home in Arizona, where they’d hung together at the front door for so many years.
This was the Friday before labor day. I was also expecting the Chelan PUD fiber optic guys to come by to re-run my fiber optic cable through the new conduit I’d laid to my building. (I’d cut the old fiber optic line when I took down the temporary power pole on Tuesday and didn’t have Internet either.) That afternoon, a PUD truck rolled up and a guy stepped out with some disappointing news: they wouldn’t be able to run the cable until Monday. No, Tuesday because Monday was a holiday.
Another three days without Internet. Ugh.
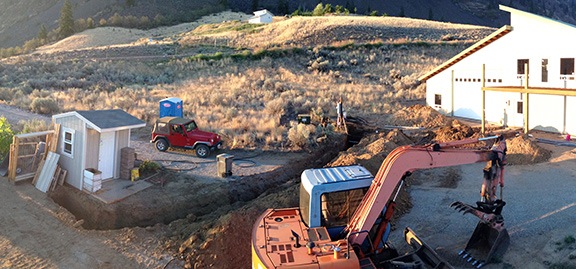
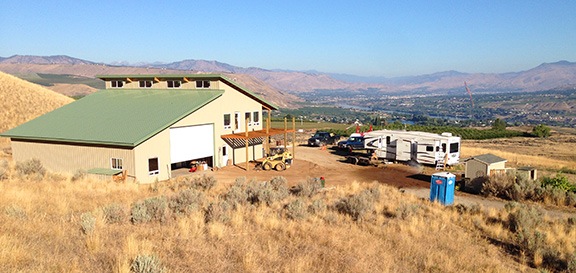
The PUD guy and I chatted for a while. Like everyone who comes by my place to do work, he commented on the view and what a “nice setup” I have. (Everyone uses that phrase: nice setup.) I told him I was doing all the electrical work myself and mentioned my current challenge: getting the wire run to the shed. I told him I was waiting for a friend to come help me.
That’s when he offered to help me.
I’m not an idiot. I said yes.
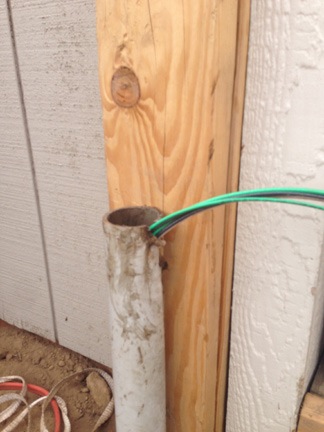
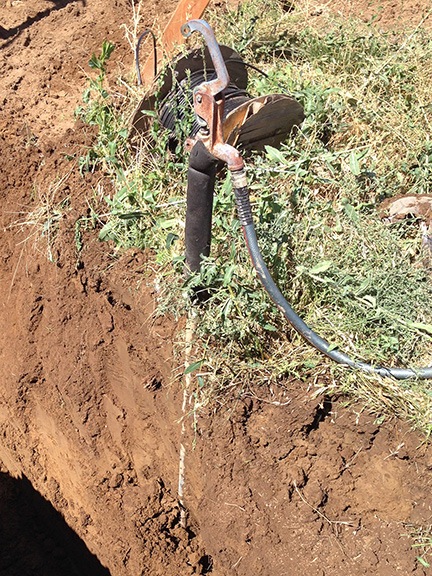
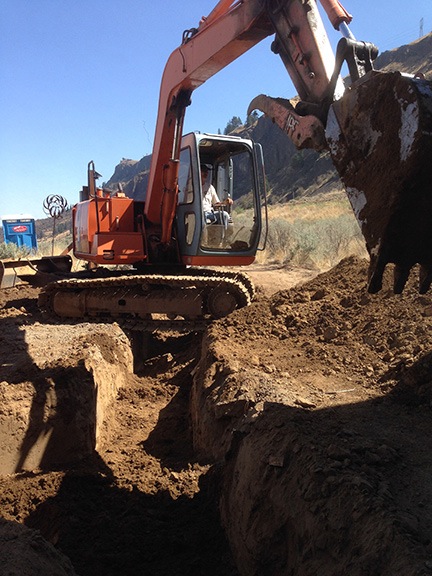
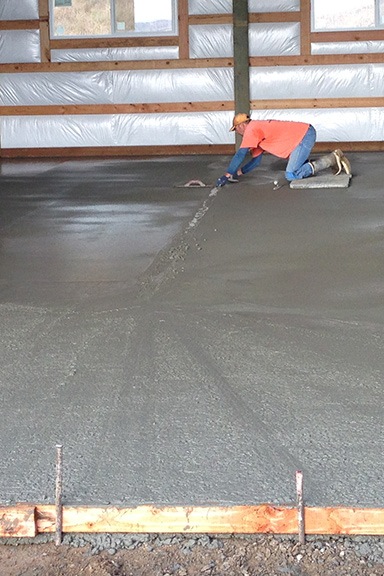
I sent this photo to my friend Bob to show him the hard part of the job was done.
He pulled at the shed, I fed the wire at the building. It took five minutes. I thanked him, still rather shocked at how easily it had been done. Then we wished each other a good weekend and he left.
I called Kathy and told her not to bother coming. Then I took a picture of the wire coming out of the conduit and the shed and texted it to Bob.
Wiring the RV Outlet
Before I could wire the RV outlet, I needed to finish work on the conduit at the shed. This meant adding a junction box and fittings and mounting the RV outlet panel.
It should come as no surprise that I needed another trip to Home Depot to get the fittings. The most challenging part was getting the fittings to downsize the 2 inch conduit to 1 inch conduit. That required a trip to Lowes because Home Depot didn’t have all the adapters I needed.

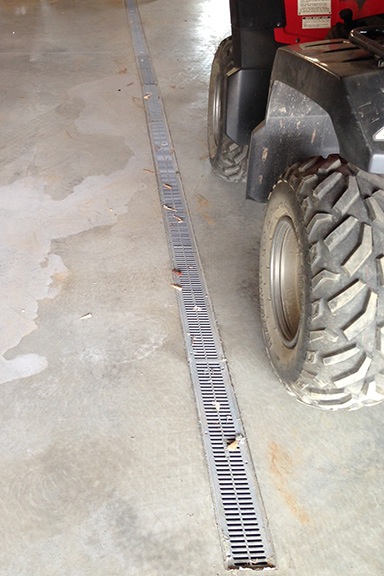
In this shot, the conduit to the RV outlet is complete; the wire hanging outside the junction box is for the other circuit.
Because all this has to pass L&I inspection one day, it was important to do it right the first time. I used some scrap wood behind the conduit so I could clamp it to a solid surface. Then I cut the conduit to remove the damaged edges, assembled the fittings, and glued them all together. I used the junction box to separate the 10 gauge wires for the RV outlet from the 12 gauge wires for the other circuit I’d set up in the building.
Once the box was mounted, I wired the RV outlet. This wasn’t difficult at all; I’d already done one of these on my temporary power pole.
Then I went back to the building side of the setup. I had to drill a hole in my building (!) and fix up the conduit there. Again, I needed a good, weathertight seal that would pass L&I inspection. I also needed another trip to Lowes. (Of course.)
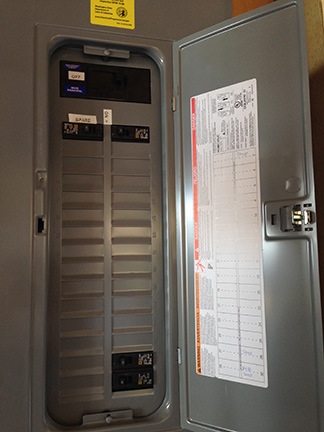
Once the wire was in the building, I ran it up to the service panel above it. I flipped off the main breaker and used my multi-meter to confirm that there was no power going to the board. Then I wired the white and green wires to the grounding bus and the black wire to the 30 amp circuit I’d bought. I snapped the circuit breaker into the board.
Or at least I tried to. The damn thing wouldn’t go in.
It took a while to figure out that the breaker I’d bought wasn’t compatible with the service panel. The breakers that came with the panel had an extra cutout that was necessary for a piece of metal to fit in. My repeated attempts to push the thing in was only scratching the plastic where that cutout should be.
I did not want to go back to Home Depot that day. I’d already been there twice and it’s at least an hour round trip drive.
Fortunately, I still had a 30 amp breaker in the temporary power pole now lying on the ground beside my driveway. I went out and pulled it off. I can’t tell you how relieved I was to see that it was compatible with my panel.
I attached the black wire to the circuit and snapped it in. Then I popped out the metal tabs on the board cover and put it on the panel. Finally, I turned on the main breaker and the 30 amp breaker I’d just installed. No breakers popped. So far, so good.

Plugged into my brand spanking new 30 amp RV outlet.
I went outside and swapped out the 100-foot 30 amp RV cord I’d been using for the temporary power pole with the 25-foot 30 amp cord stored in the RV basement. Then I plugged it in.
I went into the RV and looked at the microwave. The clock was lit up: 0:00. I had power. Success!
I can’t tell you how good it was to use my coffee maker the next morning.
Wiring the Rest of the Shed
After all this — hell, I’m tired from just writing about it — wiring the rest of the shed was pretty straightforward. I started it the next day after another trip to Home Depot.
First, I had to put a rectangular hole in the wall of the shed for the outside outlet. I marked where the outlet would go on the inside of the building and drilled holes in two opposite corners. Then I used my reciprocating saw with the wood blade on it to connect the holes along the lines I’d drawn. The resulting hole wasn’t neat, but it was the right size. I mounted the blue outlet box inside the shed facing out.
Then I mounted blue boxes for the inside outlet, light switch, and overhead light. I ran 12/2 wire from the outdoor outlet box to the indoor outlet box to the light switch box to the light box and tacked everything down with wiring staples.

Here’s what the outdoor wiring looks like on the side of my shed after wiring the 115v outlet.
Next, I had to put a round hole in the building for the wires to come inside. I fed the wires through various conduit and connectors and into the building. I glued and caulked where necessary to seal everything off neatly. From there, I ran the wires into the outdoor box.

The inside wiring, completed.
Then came the fun part: wiring the outlets and lights. The outdoor outlet had to be GFCI protected and I did that one first. Then the indoor outlet. Then the light switch.
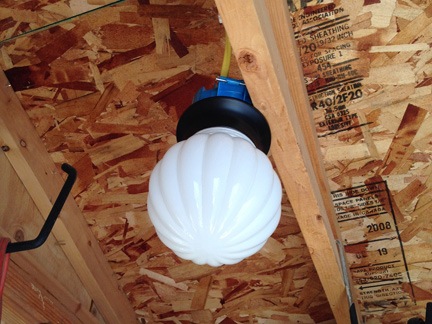
This light fixture was originally mounted on the wall inside my building; it’s much better in the shed.
Finally, the light itself. I’d taken the fixture from the inside of my building after replacing it with a different style that I’d bought during one of my many trips to Home Depot. (Yes, I’m already replacing fixtures.)
When I was done with all the wiring and had checked it over to make sure it was right, I went back into my building to set up the 20 amp circuit. At the same time, I wanted to replace the 30 amp 2-pole circuit breaker I’d installed the day before with a single pole circuit breaker I’d bought to replace the incompatible one.
When I was finished, I had three completed circuits: the small one for the panel area and two for the shed.
So, once again, I turned off the main breaker, tested the board to make sure power wasn’t flowing through it, and did some wiring work. The breakers snapped into place easily. I covered up the panel, turned everything back on, and went out to shed to test my work.
The GFCI had to be reset and tested; I followed the instructions to do that. I used a fan to test the outlets and flicked the light switch. Success!
Lessons Learned
I learned a lot during this project. First and foremost, the most difficult task ahead of me is probably going to be to run the wires. While it isn’t always physically demanding, it often requires two people. I suspect I’ll be making a lot of lunches and dinners for friends in the coming weeks.
I also learned that no matter how many times you go to Home Depot or Lowes to get the things you think you need for a project, you simply won’t get it all. There’s always another trip ahead of you. The solution is to always buy more than you need, including some things you might not need at all. Home Depot has a excellent return policy; each trip I make there starts with a stop at the return counter to bring back things I didn’t need. It all goes right back on my Home Depot credit card. I don’t even need to bring a receipt; they scan my card at the beginning of the transaction and can see exactly when I bought an item. No rush, either. I’ve returned things months after buying them.
I have a lot of electrical projects ahead of me. My goal is to complete one circuit each week, starting in my shop and garage before moving upstairs. I hope to have 90% of the wiring done before Thanksgiving. I’ll blog about the more interesting projects, like the arc lamp project I finished this past week.
Questions? Comments? Suggestions? Want to volunteer to help me pull wire? Use the comments form for this post. I’d love to heard your construction and wiring stories, too!