Why do strangers expect me to share my time and knowledge with them for free?
I’ve been making jewelry for a bunch of years now and have expanded my skillset from the wire-framed cabochon pendants I began with to all kinds of silversmithing work. Along the way, I developed my skills by watching videos, attending hands-on classes, and practicing what I’ve learned. I’ve also invested literally thousands of dollars in equipment and materials.
This is not a “side gig,” as someone once suggested. It’s a real business with income and expenses. I was on track to be profitable (after all that training and equipment) in 2020 — until COVID hit. I’ll likely turn a profit this year.
Understand that I am self employed with several sources of income. Jewelry making is one of them. Making YouTube videos is another. Flying helicopters during the summer months is yet another. So when someone expects me to share my hard-earned skills with them without compensation, I bristle.
Getting My Skills
My jewelry making skillset began through watching a few videos about wire-wrapping stones. In hindsight, I realize that those videos did more harm than good. One of them actually recommended using hardware store pliers, which have ridges for gripping that seriously scratch metal. The finished pieces I created looked just as amateurish as the pieces in the videos. I fooled myself into being satisfied with them.

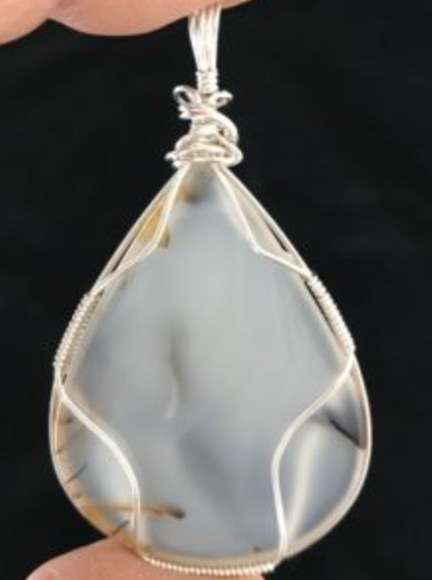
The first true wire-framed pendant I made in sterling silver. Many thanks to Dorothy for sharing her knowledge with me.
But I was lucky in that I had a friend who did much nicer work and volunteered to teach me. We sat down together and I made my first piece in real silver using her technique. I remember that day as if it were yesterday. We were in Quartzsite and she was renting a far-less-than-perfect single-wide mobile home in a trailer park while working for a lapidary who was set up at Desert Gardens. We did it at the kitchen table one evening with a lamp brought over to provide the light we needed. She was very patient. That first pendant took two hours to make.

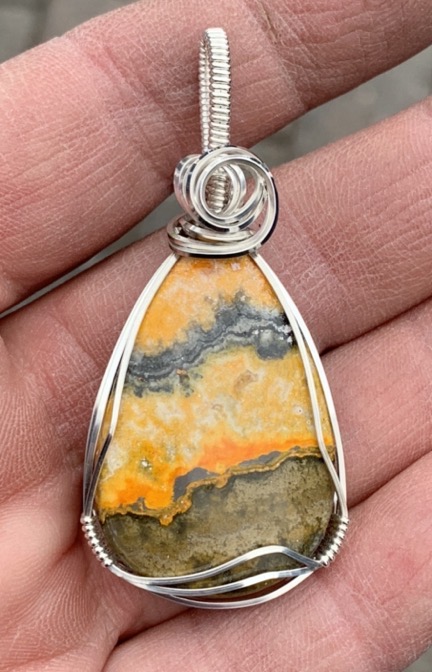
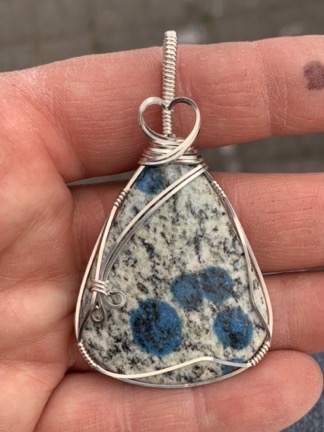
I made this Bumble Bee Jasper pendant this past weekend while sitting in my booth at the art show; it sold the same day. I can now make a pendant like this in about 30 minutes if I’m not interrupted.
I was happy with my first effort, but looking at it now reminds me of how far I’ve come. My style has changed significantly over the years. I now wrap all of my bails for a cleaner (in my opinion) look and work hard to cover the stone as little as possible. I’ve made (and sold) hundreds of these pendants over the past three and a half years and I’ve since moved on to other things.
I should make something very clear here. I never asked Dorothy to teach me how to make pendants. She offered to do it. She wouldn’t take my money, either — even though she’d provided the sterling silver for that first pendant. But I wasn’t satisfied to let it rest. I called up Rio Grande, the jewelry supply company she introduced me to, and asked them to put $50 on her account for her to use the next time she bought something. A sort of gift certificate. Months later, she found that credit and thanked me for it. But the way I see it, I still owe her.
The trouble with wire work is that it’s seen as an inferior form of jewelry making. I’m not sure why. While some wire work — like what I’d started doing on my own — can be pretty crappy, there’s other work that is far more polished and professional. Still, when you apply for a juried art show and the only thing you’ve got to show is wire work, prejudices keep you out, no matter how polished it looks. I needed to take my jewelry making to the next step.
That said, I signed up for a 3-day intensive metalworking class at the Tacoma Metal Arts Center. This was not a cheap undertaking. The class itself cost $375 and I had to get myself over to Tacoma, which is about a 4-hour drive. I also had to get lodging for myself; I lucked out there because they let me park my truck camper in their back parking area every night. I’ve since taken two other classes through TMAC, including a blacksmithing class in Eatonville.

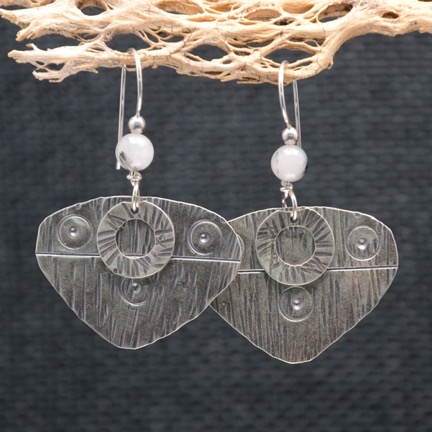
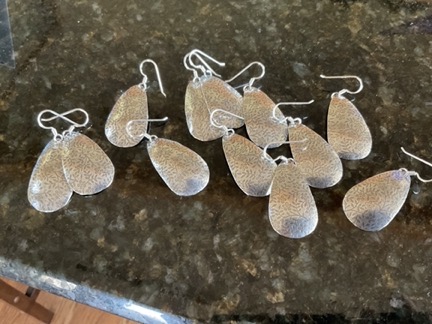
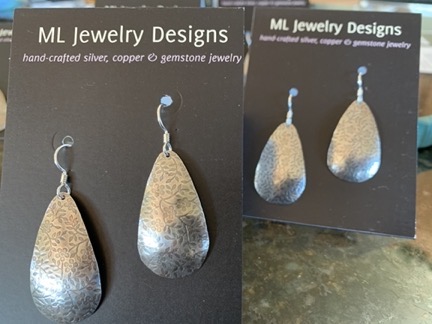
These silver earrings are entirely handmade, right up to the ear wire. (Only the beads are purchased.) I started with silver sheet metal and cut the earring and “washer” shapes. Next came hammering and stamping the texture. Then I applied a patina and used various tools to rub it off the high points. Finally, I created the ear wire with the quartz and silver beads.
I learned a ton there although few of the skills were polished enough to use right afterwards. I had to practice. I started producing different styles of earrings, using the metal forming skills I learned. Soldering, at first, was a stumbling block, but I (mostly) got past it. I began making tab-mounted, then prong mounted, and finally bezel set cabochon pendants.
I also decided to take the deep dive into jewelry making by investing in equipment. A flex shaft. A rolling mill. A table-top metal shear. Hammers and dapping sets. Mandrels. A vice. A grinder. Bench blocks. Finishing tools. Soldering station equipment. The list — and the related costs — go on and on. But if there’s one smart thing my wasband ever said (again and again), it’s “Every job is easy when you have the right tools.” I invested in the tools I needed to explore my design ideas and get the job done.
And I took more classes. In January/February 2020, before COVID hit hard, I signed up for 5 Vivi Magoo classes at the Tucson Gem and Mineral Show. That meant an investment in close to $2,000 on just skills. And $250 for a site in a campground nearby — rather than the $250/night cost of a room at the hotel where the classes were being held. I learned more advanced techniques by actually doing them. The skills I brought home enabled me to come up with new designs and take my work to the next level. I was able to get into most of the juried art shows I applied to — the ones in Palm Springs remain elusive — and to sell my work at shows and in galleries.
Still, I continue to this day to take classes — I just signed up for one in Tucson this coming February — and to hone my skills with new designs.
Sharing My Knowledge
About two years ago, before COVID hit, I did some one-on-one and classroom training. In most cases, it was project based: I’d teach people how to make something I made, including wire-framed pendants, chain bracelets and necklaces, and a variety of metal formed earrings.
Understand that I’ve always been paid to share my knowledge with others. Whether I did one-on-one training at Pybus Market when I sold pendants there or taught small groups at a booth in Quartzsite, AZ in the winter or did classroom training at Gallery One in Ellensburg, I was compensated for my time and the materials I provided to class attendees.
The only exception is when one of my neighbors wanted a copper cuff bracelet like the ones I make out of copper pipe. I invited her over to my shop and the two of us hammered out a pair of bracelets. She is my friend and she takes care of my cats and chickens when I travel. It was a pleasure to be able to teach her how to make her own bracelet and I think she values it more than if I just gave her one. There’s something special about having a hand in making something you wear.
A Stranger Emails
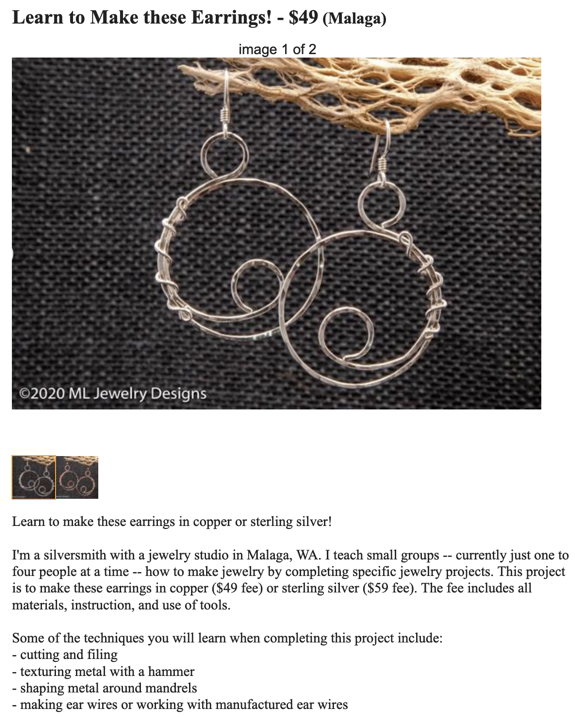
In an effort to generate some off-season revenue before I head south for the winter — as I normally do — I placed a few Craig’s List ads offering my services as a jewelry maker to teach people how to make some of the things I make and sell. The ads go under the heading of “Learn to Make these Earrings!” etc. They basically show a photo or two of the project item and skills they’ll learn while making it. There’s a cost with a discount if more than one person attends. I’d link to them, but chances are they will have expired by the time most people read this. Here’s a screen shot of the start of one:

This is the first pair of earrings I designed and made; ironically, they remain one of my most popular styles.
I also have an ad for general jewelry making where I offer to teach anything I know using any of my equipment for $50/hour/person with a 2-hour minimum. This is for someone who has an idea of what they want to learn but doesn’t necessarily want to do one of my projects.
On Thursday, I got an email forwarded by Craigs List, referring to one of my project-based ads:
Hi:
Saw your post on CL, and I watched your YT video, nice shop.
I am semi-retired and live in [redacted] and process roughs from a local source. I would like to learn how to make jewelry, and I also interested in perhaps contracting with you for some consulting.
In my garage/shop, I have a commercial grade vibratory tumbler, and 3 large rotary tumblers, a 6-inch Hi-Tech saw, and flat lap, a Gryphon router, and the necessary tools, and most of the supplies for making jewelry. Oh yeah, and about 400 lbs of roughs, and about 200 lbs of finished stones (I’ve been tumbling since 2016).
I also had a professional website built in January of 2021 but I have not really given it the focus it needs, in part because I want to add jewelry to the product line.
[redacted]
While I am a life-long (closet) artist, my devotion has been to pencil & paper, otherwise I was a [redacted] in [redacted] for [redacted].
I want help organizing my shop, so that I can make jewelry here in [redacted]. I have also been toying with the idea of hiring a part-time employee to make jewelry from my processed stones, and would enjoy a second opinion.
Best regards,
[redacted name and phone number]
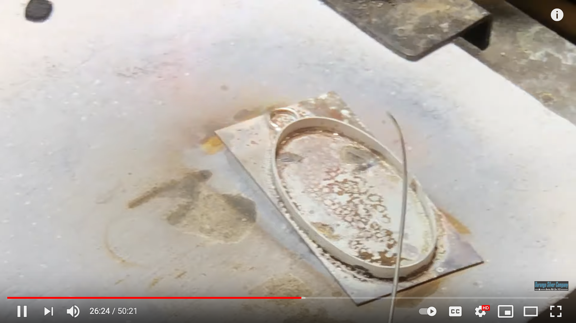
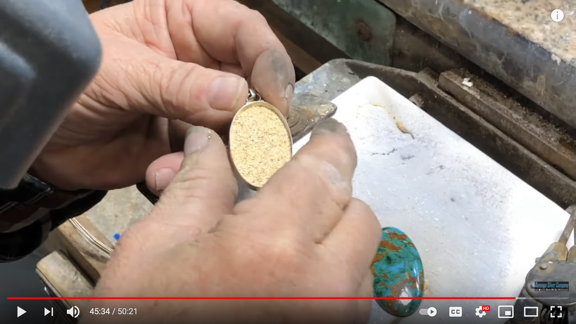
(By the way, here’s the shop video he’s referring to. It gives you some idea of my investment in equipment.)
I have redacted some identifying information because it’s not my purpose to identify and/or shame this person. It doesn’t really matter who it is, does it? I’ll just point out here that, like me, his primary career was not in any way related to art or jewelry making. This is something pretty new for him.
I looked at his website. It was very pretty. It had a lot of pictures of tumbled stones and a lot of the usual nonsense about spirituality and vibrations and the meanings of rocks. It did not seem to actually sell anything.
I re-read his message. He is basically a rock tumbler — he polishes rough stones by putting them in a barrel with different grits and letting the barrel run for weeks on end. Anyone can tumble rocks — hell, Amazon sells a kit that’ll get a 10-year-old kid started in no time for just $59. The only thing that impressed me about his equipment was that he was set up to tumble a lot of rocks.
(Maybe I should mention here that you can buy tumbled rocks by the handful or little bagful from a lot of gift shops out west for $5. Here’s 2 pounds of the stuff with a book about rocks for $20.)
I don’t use tumbled rocks in my work. The only stones I use are cabochons, which require different equipment and a lot more time and effort to make. Cabochons have flat backs and domed fronts. They’re often in regular shapes, like ovals and teardrops, but can be more randomly shaped, depending on the skills and artistic ideas of the lapidary who makes them.
I thought for a while about how I would answer this guy’s message. I even toyed with the idea of hooking him up with someone who did the kind of wire wrap work I started with. But in the end I decided to give him what he seemed to be asking for: advice.
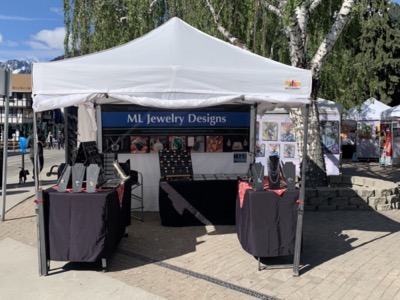
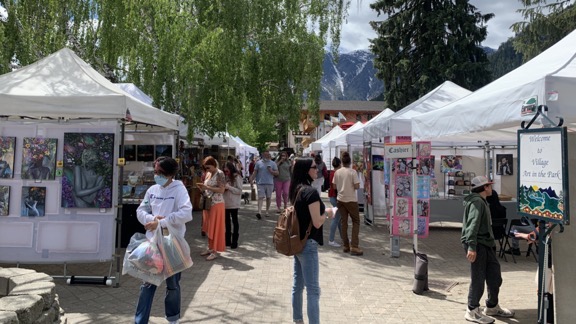
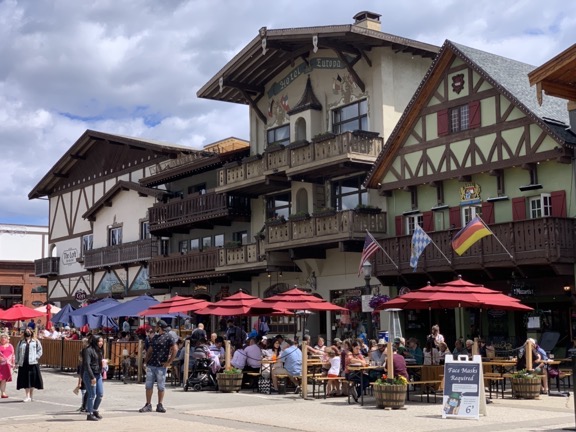
I’m sorry it took me so long to respond. I was busy this weekend selling my work at Art in the Park in Leavenworth.
I don’t think I can help you. I don’t use tumbled stones in my work at all. I use cabochons, which are best for the kind of stone setting I do.
As for an opinion: if you hired someone to make jewelry for you, the money you pay that person would have to be added to the cost of the jewelry, along with the materials used to make the jewelry.
You have to consider how much you could sell the jewelry for. Have you visited shops selling the kind of jewelry you want to make? Have you seen the prices on that jewelry? Can you discern whether it’s actually selling at those prices?
As you may have already surmised, having a “professional website” does not mean you’ll be able to sell a lot of product. Everyone has a website these days. You’d do better attending art or craft shows or setting up wholesale or consignment accounts. All that costs money, too. And, after spending a total of 30 hours in Leavenworth this weekend, with six hours of commuting and the cost of the booth fee, my tent, and display equipment to factor in, I can assure you that shows take a lot of time, energy, and money to sell at. Wholesale accounts expect to pay 50% of retail; consignment these days wants 35% to 40% of the selling price. Selling costs are real and need to be figured into any calculation.
Is the selling price minus cost of sales and cost of creation worthwhile for you?
These are the things you need to think objectively about. I hope this has been helpful to you.
Apparently, I misunderstood what he wanted. He didn’t want “a second opinion,” which I read as advice. He replied within 24 hours:
Thank you for your response. The business part I understand, the mechanics of jewelry making is my present interest.
Like yourself, I also do shows. I’ll be at the [redacted] Farmers Market this [redacted]. I do it because it’s a great chance to interact with the community, and I am test-marketing new products, some of which I purchase from Amazon, and resell.
I do have a rock saw, a sander and dop station, and can make cabochons myself.
However to speed things up, I’m in the process of determining whether I want a Cab King or a 6-inch Covington combo unit. I realize the lead times on these are significant but I am not deterred.
So, with that said, would consider teaching me how to make jewelry?
Regards,
[redacted]
Whoa. There was a lot to unpack there.
I bristled big time when I read, “like yourself, I do shows.” (And it wasn’t the grammar that got me.) He has no fucking idea what “doing shows” is all about if he’s limited to a 4-hour local farmer’s market. Has he carted a tent, leg weights, tables, table coverings, displays, etc. all over the southwest, spending hours to set up and tear down booths at venues in three (so far) different states? Has he dealt with trying to sell inside a tent in the cold or heat or rain? Having to go to the bathroom when there’s no one around to watch your merchandise while you wait in line at a port-a-potty? Has he even dealt with the jurying process, paying a fee just to see if his work is good enough to get into a show?
Okay, fine. But then there’s the farmers’ market itself. I’d been talking to a customer about that particular farmers’ market over the weekend. The customer suggested it to me. I tried to kindly explain why I wasn’t interested, focusing on the fact that setting up my booth for a 4-hour event was just not practical. The real reason was the fact that most farmers’ markets are not juried — that means there’s no assurance that I’d be showing my work with other people selling real art. You might think that’s a good thing, but when you’re trying to sell silver and gemstone pendants for $59 each and sterling silver earrings for $39 a pair, it really isn’t good to be among people selling junk jewelry for a lot less money.
And then there was his admission that he buys stuff on Amazon and sells it at the farmers’ market. Holy shit. That is a mortal sin in the world of art shows. I guess it’s okay if you just want to turn a few bucks, but if you want to be and represent yourself as an artist? My opinion of him dropped a few levels when I read that.
And I became very glad I didn’t waste my time at that farmers’ market.
As for buying a Cab King (which I own) or Covington Combo Unit and thinking you can make great cabochons cost effectively right out of the gate, I can tell you from experience that it just isn’t going to happen. When I make my own cabochons — which I occasionally do — I spend roughly an hour or more of time on every single one of them. I have come to realize that my time is worth a lot more than I could get for it by making cabochons, so I’ve decided to simply buy most of the cabochons I use. My collection is quite extensive at this point, with over 800 stones from all over the world, and I have no trouble selling them for considerably more than their cost on the rare instances when someone wants to buy one. My art is in the jewelry I make — not the raw materials I make it with.
Anyway, I was able to answer his request with a much shorter email. After all, it seemed that he wanted me to teach him how to make jewelry. Sure, I could do that:
Yes, I have a Craig’s List ad that offers that service.
https://wenatchee.craigslist.org/art/d/malaga-learn-to-make-fine-jewelry/7383971485.html
I can basically teach how to make almost anything that I make.
Maria
The link would take him to my ad about teaching jewelry making for $50/hour with a 2-hour minimum. If he wanted me to teach him how to make jewelry, he, like almost everyone else I’d taught over the past few years, would have to open his wallet and pay me for my time, knowledge, and equipment.
That was three days ago. I’m still waiting for his response.
Isn’t It Worth Something?
This is the same crap I’ve been dealing with for years in all of my freelance work: writing books and articles, flying helicopters, editing video, making jewelry. I have skills and equipment — sometimes very costly equipment — do you know what costs to buy and maintain a helicopter? — and someone expects me to share these things for free.
These are the tools I use to make a living. Any job I do requires my skills and equipment and the most valuable thing I have to offer: my time. Why the hell should I be expected to give this stuff away? To a stranger, no less?
In hindsight, I’m sorry I spent so much time answering his original email message. I gave him information based on my experience and I used my time to share it with him. What the hell is wrong with me? Why didn’t I realize from the get-go that he was just another person trying to squeeze something of value out of me, likely for free?
Anyway, I don’t expect to hear from him again, unless he’s going to try to trade me training time for some of his rocks.
I bet you can guess how that suggestion would go with me.
