Planting Trees

I make plans to add some serious foliage to my property.

I bought 10 acres of view property in Malaga, WA at the end of July, 2013 — the day after my divorce decree was issued. Although financial uncertainty delayed the start of construction of my new home, I finally got the builders out here in May, 2014, and building commenced. Although the shell of the building is done and all of my possessions are tucked safely indoors, the living space still has a way to go. While I wait for that to be done, I’ve gotten back to work on developing the land around my new home: cleaning up my vegetable garden, planting bulbs, sewing wildflower seeds, etc.

My lot is beautiful. It sits on the north side of the road — the side facing the Wenatchee Valley. On clear days — which is most of the time here on the dry side of Washington — the view goes on forever and ever. I see the Columbia River, countless orchards, the cities of Wenatchee and East Wenatchee, the valley walls, and snow-covered mountains nearly year-round. This time of year, the fall color is amazing as individual trees and full orchards change into reds, yellows, and oranges. I built my home to take advantage of these views, with a total of 21 windows, most of which look out to the north, northwest, and northeast where the best views are.

Autumn View
I shot this photo on Monday morning from my Lookout Point bench, after the sunlight had filled the valley. The snow is back on the mountains I can see to the west. Click this image to see a larger version where more detail is visible.

The best thing about this view: it’ll never be blocked. The land drops down sharply near my property line into a deep ravine owned by the county as a wildlife corridor. Beyond it, where the land climbs a bit again, is a very large orchard owned by a local fruit grower. I picked this lot because of this situation — one thing I learned in the past (the hard way) was that if land in front of your view can be bought/changed by someone else, it will be. Even if the PUD did sell that low-lying land to a developer (or something worse), whatever’s down there will never obstruct my view.

The view on the other side of the road isn’t too shabby, either. Basalt cliffs, hundreds of feet tall, filled with bighorn sheep that sometimes wander down to graze on the bunchgrass that dominates the hills below them. The cliffs illuminate with a golden light at sunrise or sunset, especially during the summer months. Really breathtaking sometimes.

Cliff View
This shot gives you a good idea what’s behind my home, on the other side of the road. (Before I completed the RV garage space and driveway apron, my helicopter was parked outside.)

But although there are trees up in the cliffs and trees down in the valley, there aren’t many trees on the properties on my side of the road. My 10 acres doesn’t have a single tree over 10 feet tall. Instead, it’s mostly gently rolling hills with bunch grass and sage brush.

That’s good, to a certain extent. The views wouldn’t be perfect if there were trees in the way. But I would like some trees for shade, privacy from the road, and autumn color. Trees that are drought tolerant once established, trees that grow naturally in the area and will do well here without a lot of watering or maintenance.

Enter the annual Cascadia Conservation District Native Plant Sale. This program makes native plants available at affordable prices to homeowners in the area. It includes tall trees such as ponderosa pines, quaking aspen, rocky mountain Maple, and blue elderberry, as well as shorter shrubs such as red osier dogwood, serviceberry, mock orange, and woods rose. The brochure clearly indicates how large each plant will get, when it flowers, and whether it has edible fruit and/or attracts wildlife. This makes it easy to decide which plants to buy.

Actually, it doesn’t. I want to buy some of everything.

I plan on planting in a few areas. First, alongside the road behind my building. My building is set down in a sort of bowl below the road with no trees or bushes to block it from the road. It’s sort of a fishbowl effect with minimum privacy. Fortunately, my building faces away from the road so I don’t have to worry at all about privacy when I’m inside. But I’d like to get some when I’m outdoors, working in the garden, etc. And a row of bushy trees will not only give me that privacy, but cut down on the dust kicked up by the occasional passing car. (I should mention that there are only three driveways past mine on the road, so it isn’t as if there’s any real “traffic” up here.)
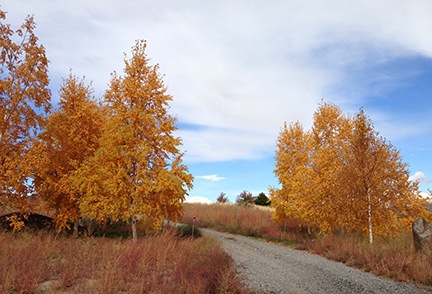
Quaking Aspen
Some of my neighbor’s aspen trees.

What to put up there? I was thinking of a mix of willow (which I’ve already got rooting from a friend in the area), quaking aspen, and red osier dogwood. (A neighbor already offered me some of their aspens — I need to go over and dig them up; after all the rain we’ve been having lately, it shouldn’t be too difficult.) This will give me the privacy/dust screen I want while providing early forage for my bees and vibrant fall colors later in the year. Although all of these do best with some irrigation, I’ve already got irrigation lines on that side of the driveway so it won’t be much of a chore to run another line up to the roadside. All of these varieties grow quickly and self-propagate.

I wasn’t going to plant anything beyond my driveway, but recent events have convinced me to extend that row of trees past the driveway, possibly all the way to the fence line that marks the end of my property. Unlike my neighbors on the other side of the road, my property stretches east along the road. Their lots stretch south up into the cliffs — in fact, they each own not only the cliff face behind their homes, but a bit of land near the top, which is impossible to reach by car or truck. (Not sure the value of that — unless you have a helicopter, of course.) My 10-acre lot actually stretches in front of three of their 20-acre lots.

Rather than have to see my neighbor’s rather unattractive roofline and bright, reflective chimney, I thought I’d plant some trees along the road to block my view. Some tall trees like ponderosa pines would fit in with the vegetation on the cliff side of the road and give me the screen I want. Maybe some blue elderberry and serviceberry so I can harvest some edible fruit at season’s end. I have irrigation set up on that side of my driveway, too, and can run the line quite far — I have excellent water pressure here — so getting all of these plants started and thriving should be pretty easy to do.

Since I plan to move my bee yard out toward the east end of my property next spring, trees out there will give the bees a nice screen from the wind and possibly a bit of shade. I’ll plant all kinds of flowering bushes around the bee yard so there’s foraging opportunities for them nearby. Maybe some snowberry, woods rose, and mock orange?

Not sure what I’ll plant on the view side of my home yet. I think I might wait until spring 2016, when I’m really settled in, to develop in that direction. Next year, I’ll be expanding my garden beyond the small area near my shed to include various locations in the immediate vicinity of my building. After all, if I’m going to plant around the building, why not plant things I can eat?

Beyond that, I suspect I’ll keep things close to the ground — that’s one direction that I don’t want a screen of tall trees. A wildflower field, kept vibrant through irrigation if necessary, might be just what I need. I’ve already got the seeds started.

Upcycling

Turning trash into useful items.

Over the past year or so, I’ve really embraced the idea of upcycling to make useful things around my home.

According to Wikipedia, coined in 1994, the term upcycling means

the process of converting waste materials or useless products into new materials or products of better quality or for better environmental value.

Why Upcycle?

I like the idea of upcycling for several reasons:

  • Upcycling really appeals to my scavenger instincts. For most of my life, I’ve wanted to gather discarded items that I think have some use. Hell, back in my college days, I furnished my dorm room with perfectly good items discarded by departing students, including an area rug, lamp, and table with chairs. You know what they say: One man’s trash is another man’s treasure.
  • Upcycling enables me to have more for less. With my recently limited budget, I have to make do with less money. While that often means doing without, it could also mean building my own solutions.
  • Upcycling reduces waste in landfills and recycling centers. Seriously, don’t we put enough crap in landfills and the ocean? Upcycling is better than recycling because it makes something useful without it first going through a waste stream. That means no transportation costs, no sorting costs, no remanufacturing costs, etc.

First Projects

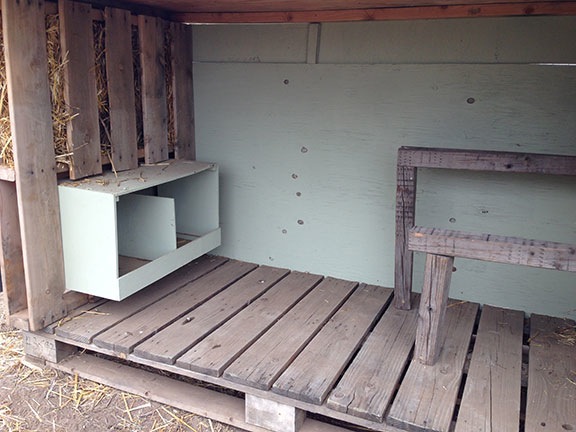
Coop Construction
A look at my chicken coop under construction.

Pallet Garden
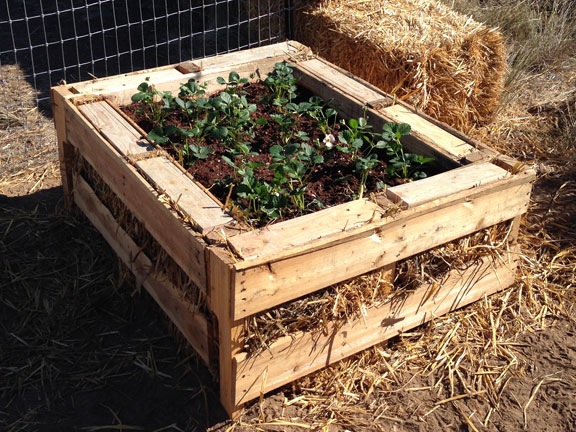
My first pallet planter makes an excellent strawberry patch.

I blogged about my first upcycling project before I even knew the word upcycling existed. In “Chickens Again, Part II: The Coop,” I wrote about the chicken coop I made, in part, from wooden pallets I’d scavenged. Two days later, I wrote “The Pallet Planter,” which showed off one of eventually three raised garden beds I’d built with more scavenged pallets.

Why Now?

All this is pretty new for me. In my old, half-dead life in Arizona, I wasn’t motivated to do much of anything — there just didn’t seem to be a point. And even if I did want to make or build something, I didn’t have tools or a useable workspace.

But here in Washington, things are different. I feel like I have a purpose in life, a reason to get up in the morning and make things happen. I also have a lot of free time on my hands that’s not filled with the need to try (and mostly fail) to make someone else happy.

I began acquiring decent power tools about a year ago — through purchases and hand-me-downs from friends — and have most of what I need to get projects done. And I have plenty of space; with my RV garage still mostly empty and my shop laid out to give me the best access to tools and workspace, I can tackle almost any sized project.

More Projects

As I work on my home to do all the wiring and plumbing — more on that in other blog posts — I take time out to get creative with “waste” materials.

Rolling Workbench
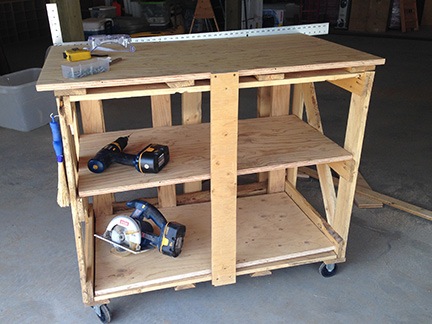
My first rolling workbench is a masterpiece of usefulness, built with a discarded crate and scrap lumber.

My favorite project to date is turning crates into rolling workbenches. There’s a business I pass when I go into town that gets engines and other parts on pallets and in crates. They discard the pallets and crates on a corner of their property near the road, under a sign that says “Free Wood.” If I’m driving by in my truck and there’s something worth taking, I pull over and load it up. (I actually keep work gloves in the truck just for this purpose.)

Small Rolling Workbench
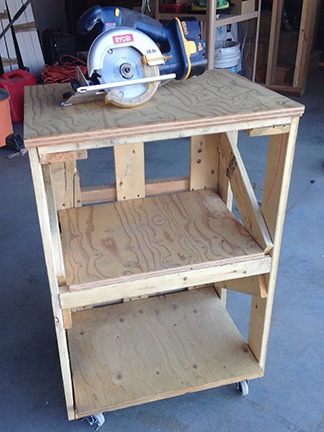
I built this smaller rolling worktable yesterday. The only cost was the wheels, which I bought for about $10.

I picked up two large crates a few months back and turned one of them into a stand for my garden beehive. The other just sat in the dirt for a while, occasionally used as a work surface for cutting wood. When my building shell was finished, however, I got a brainstorm. Why not lay it on one side, add plywood shelves, and put wheels on the bottom? I had all the scrap wood and even the wheels that I needed. The resulting mobile workbench is perfect for woodworking projects and storing my power tools in a handy place. I even made a smaller version just yesterday.

Woodshed
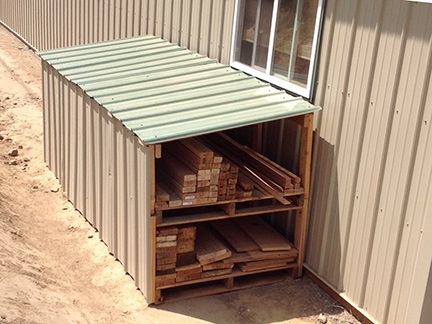
Yes, I did mark the length of each piece on the end and sort them by size. That makes it extremely quick and easy to find just the piece I need.

Because I’m such a scavenger and because I told the builder to leave behind any scrap wood, I needed a place to store the useable pieces. That meant a sort of woodshed. I built one out of pallets (again), scrap lumber, and leftover metal from my building. The result is a 4 x 10 sort of lean-to with shelves that keeps the lumber out of the rain and snow. And yes, I filled it almost immediately — it’s extremely handy to be able to quickly find exactly the piece of lumber I need for other projects. Best of all, it matches my building so it isn’t an eyesore from the road (which it faces).

I’m also working on glass projects, although I don’t have any photos yet. I start with discarded wine bottles which, because of the sheer number of local wineries, I can get in any number I need. I’ll be melting down glass rings in a kiln for use in wind chimes. And I’ve also been cutting the bottles in half and finishing off the cut edges to make drinking glasses and vases. This is time-consuming, tedious work that I’m not exactly excited about doing. But the results are impressive. I expect to make an entire set of drinking glasses for my new home out of wine bottles. I’d also like to melt small glass pieces in a kiln to make jewelry; we’ll see where I go with that.

Creativity Can Be Rewarding

I can’t tell you how proud I am of these silly little projects. Seeing waste turned into something truly useful that makes my life better or easier is extremely rewarding. Knowing that I’m the one who thought up the design and executed it makes it even better.

What have you upcycled lately? Use the comments to brag about it!

Repurposing Old Bee Hive Boxes

Reuse, recycle.

A few months back, my beekeeping friend James told me he’d was able to get a bunch of used deep hive boxes for about $5 each. Knowing I used deep boxes — he uses only mediums — he offered them to me. I asked about the condition and he admitted that they were pretty beat up but could probably be usable with just a cleaning and fresh coat of paint. They were heavy-duty commercial boxes — the kind the migratory beekeepers use. I told him I’d take 10.

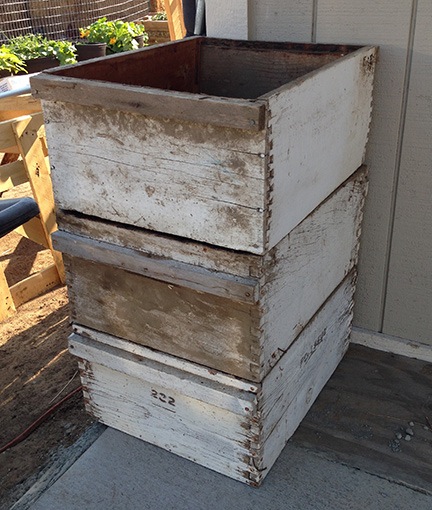
Beat Up Hive Boxes
These hive boxes are a little more beat up than I was expecting them to be.

I picked them up a while later. Although structurally sound, they were very beat up. James showed me one that he’d painted and it didn’t look half bad. Since the price was right and I had plenty of paint, I took them.

I spent one morning scraping the paint off four of them with a wire brush and then repainting them. They did look much better. But when I slipped some frames into one of them, I realized that they weren’t consistently sized; the frames fit too loosely and would require careful placement to prevent them from falling into the box.

Behive
This is my garden hive, so-called because I placed it near my garden. It was built with two of the used boxes and it’s pretty clear that they simply don’t fit the way they need to.

But it wasn’t until I placed the first box of frames onto a hive bottom — for a swarm capture I needed to permanently house — that I realized the problem couldn’t be solved with just a coat of paint. The top and bottom edges of the boxes were rough. This caused gaps between the bottom and the box and between stacked boxes. The gaps were large enough for light and air to pass through. That meant the bees would be busy filling all those gaps with propolis, thus gluing them together.

I used the four I’d painted and found the same problem with all of them. Although I didn’t want to invest more money in beekeeping equipment than I had to, it was clear that these boxes would not be suitable for long-term use. They’d need to be replaced.

I placed an order for five new boxes from Mann Lake, figuring that I’d begin swapping them out on my next inspections.

But what to do with the unneeded boxes?

The answer was in my garden, which was growing wild in the planters I’d bought and made: more movable planters.

Understand that bee hive boxes do not have tops or bottoms. All they have are sides. While I could simply place a box on the ground, fill it with soil, and plant something in it, that wouldn’t make it movable. It also wouldn’t keep the moles (or voles or whatever I have making holes on my property) from digging in from underneath to kill whatever was growing in the box.

So I did the same thing I did for my large pallet planters — I lined the bottom with wire mesh. I had a large piece I’d been using on the door for my chicken yard that I clipped off, cut to size, and lay inside of each of the three boxes I painted for my trial run. I used a staple gun to fasten the wire to the sides of the boxes. Then I placed the first box in position, put a layer of stray on the bottom, right over the wire, and topped it off with some potting soil. I planted corn in the box, covered the soil with some more straw (to discourage digging by birds), watered it, and left it.

The corn wasn’t supposed to germinate for 8-10 days, but within 6 days, it was pushing its way up between the pieces of straw.

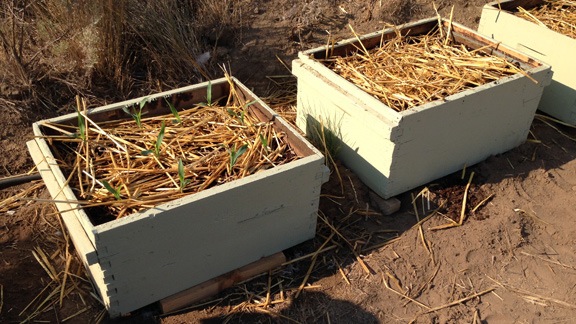
Beehive Planters
A row of the beehive planters. You can see the corn poking up through the straw in the closest box.

I lined up the other two boxes on the ground beside the first. I planted corn in one and onions in the other. When the heat breaks, I’ll prep the remaining three boxes, although I may not plant anything in them until next year.

What I like most about these movable planters is that they’re making it possible for me to have a garden this year, before I’m ready to commit to a location for the garden. And while the bottoms might not be the most sturdy, they do make it possible for plant roots to reach through, into the soil below.

I just hope I didn’t plant the corn too late for a good harvest.