Upcycling

Turning trash into useful items.

Over the past year or so, I’ve really embraced the idea of upcycling to make useful things around my home.

According to Wikipedia, coined in 1994, the term upcycling means

the process of converting waste materials or useless products into new materials or products of better quality or for better environmental value.

Why Upcycle?

I like the idea of upcycling for several reasons:

  • Upcycling really appeals to my scavenger instincts. For most of my life, I’ve wanted to gather discarded items that I think have some use. Hell, back in my college days, I furnished my dorm room with perfectly good items discarded by departing students, including an area rug, lamp, and table with chairs. You know what they say: One man’s trash is another man’s treasure.
  • Upcycling enables me to have more for less. With my recently limited budget, I have to make do with less money. While that often means doing without, it could also mean building my own solutions.
  • Upcycling reduces waste in landfills and recycling centers. Seriously, don’t we put enough crap in landfills and the ocean? Upcycling is better than recycling because it makes something useful without it first going through a waste stream. That means no transportation costs, no sorting costs, no remanufacturing costs, etc.

First Projects

Coop Construction
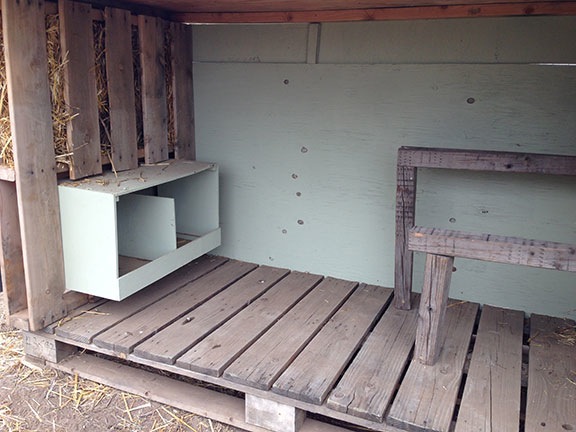
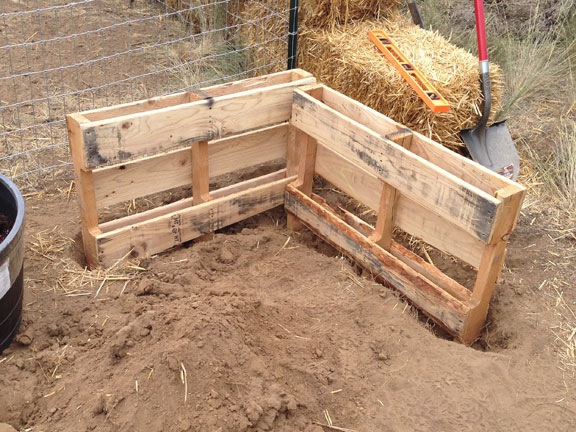
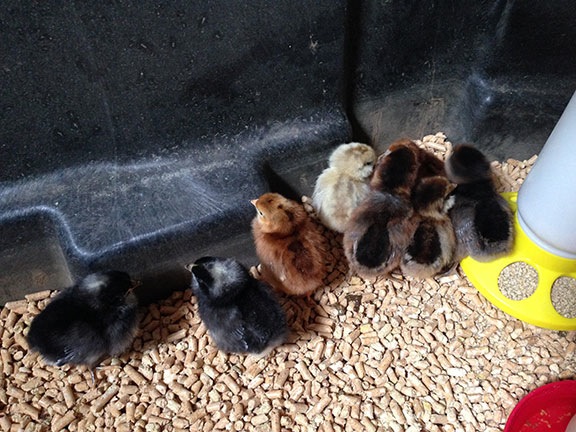
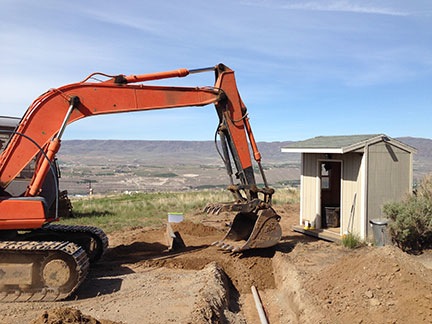
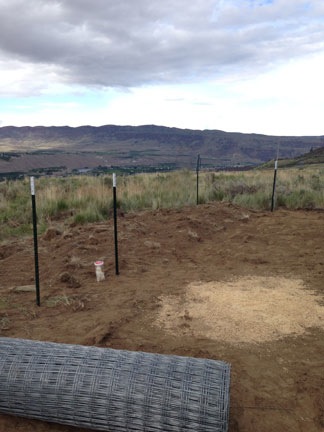
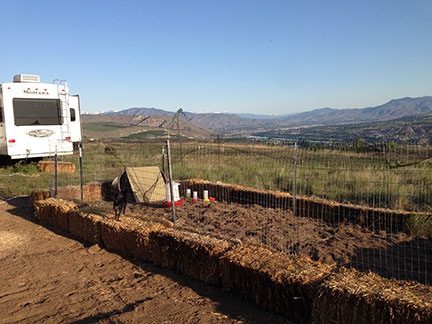
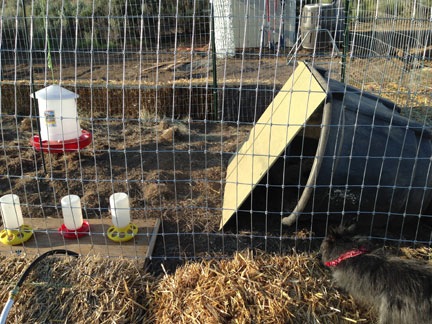
A look at my chicken coop under construction.

Pallet Garden
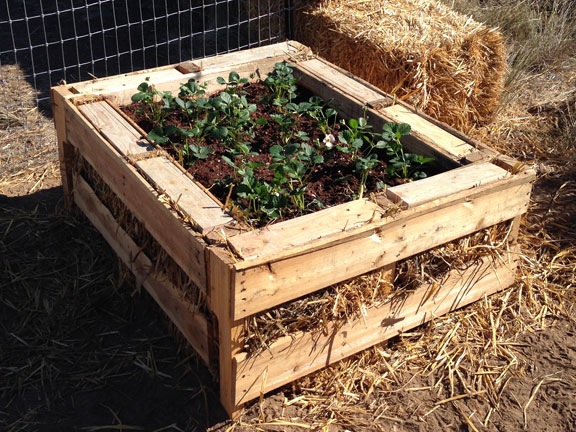
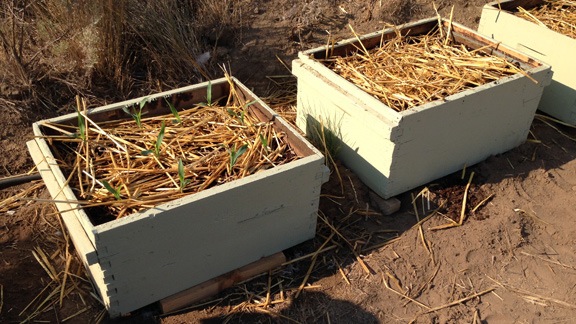
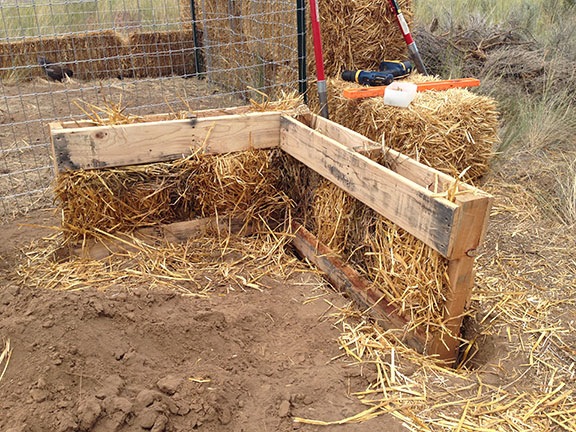
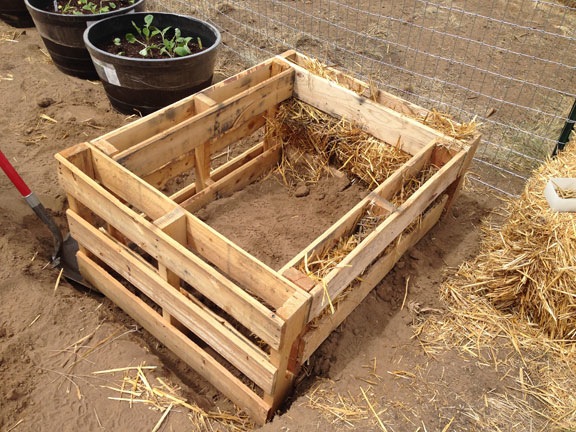
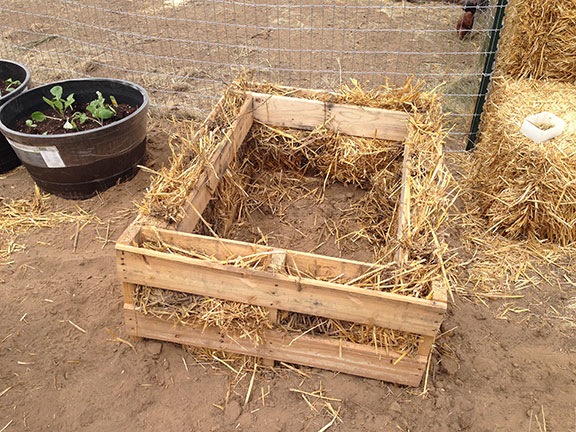
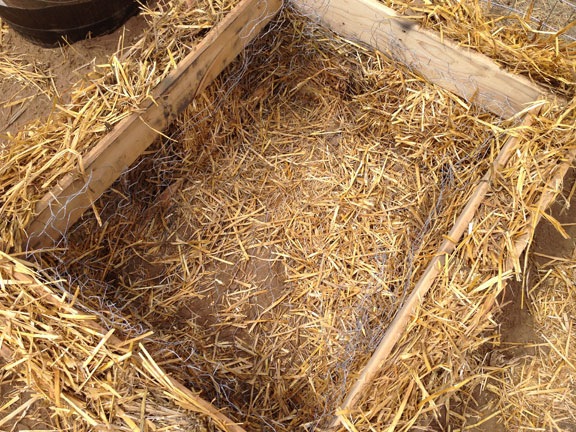
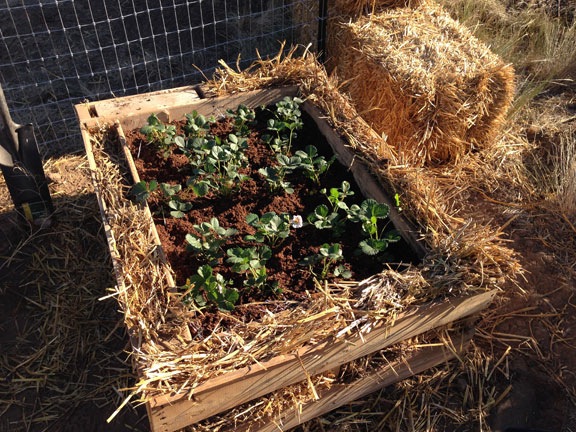
My first pallet planter makes an excellent strawberry patch.

I blogged about my first upcycling project before I even knew the word upcycling existed. In “Chickens Again, Part II: The Coop,” I wrote about the chicken coop I made, in part, from wooden pallets I’d scavenged. Two days later, I wrote “The Pallet Planter,” which showed off one of eventually three raised garden beds I’d built with more scavenged pallets.

Why Now?

All this is pretty new for me. In my old, half-dead life in Arizona, I wasn’t motivated to do much of anything — there just didn’t seem to be a point. And even if I did want to make or build something, I didn’t have tools or a useable workspace.

But here in Washington, things are different. I feel like I have a purpose in life, a reason to get up in the morning and make things happen. I also have a lot of free time on my hands that’s not filled with the need to try (and mostly fail) to make someone else happy.

I began acquiring decent power tools about a year ago — through purchases and hand-me-downs from friends — and have most of what I need to get projects done. And I have plenty of space; with my RV garage still mostly empty and my shop laid out to give me the best access to tools and workspace, I can tackle almost any sized project.

More Projects

As I work on my home to do all the wiring and plumbing — more on that in other blog posts — I take time out to get creative with “waste” materials.

Rolling Workbench
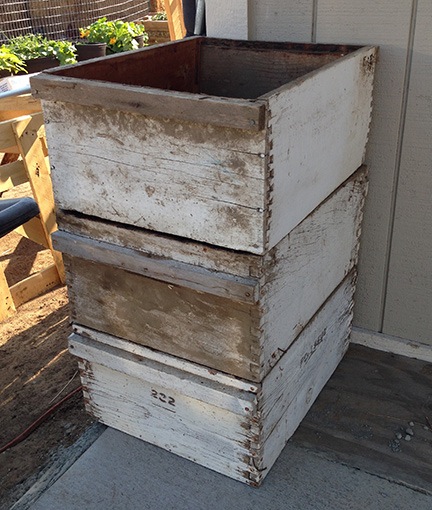
My first rolling workbench is a masterpiece of usefulness, built with a discarded crate and scrap lumber.

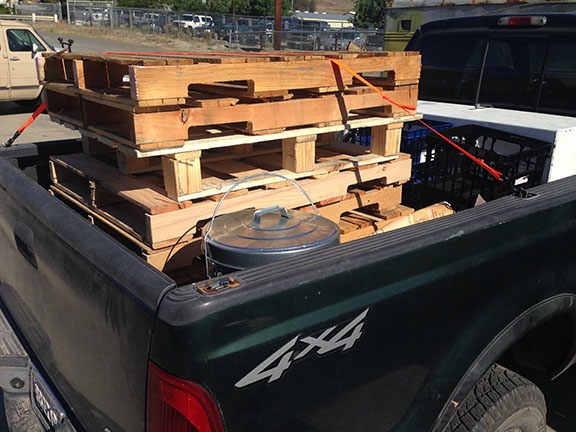
My favorite project to date is turning crates into rolling workbenches. There’s a business I pass when I go into town that gets engines and other parts on pallets and in crates. They discard the pallets and crates on a corner of their property near the road, under a sign that says “Free Wood.” If I’m driving by in my truck and there’s something worth taking, I pull over and load it up. (I actually keep work gloves in the truck just for this purpose.)

Small Rolling Workbench
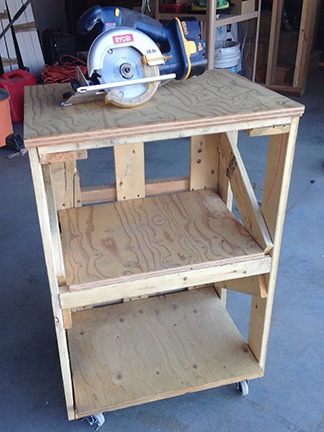
I built this smaller rolling worktable yesterday. The only cost was the wheels, which I bought for about $10.

I picked up two large crates a few months back and turned one of them into a stand for my garden beehive. The other just sat in the dirt for a while, occasionally used as a work surface for cutting wood. When my building shell was finished, however, I got a brainstorm. Why not lay it on one side, add plywood shelves, and put wheels on the bottom? I had all the scrap wood and even the wheels that I needed. The resulting mobile workbench is perfect for woodworking projects and storing my power tools in a handy place. I even made a smaller version just yesterday.

Woodshed
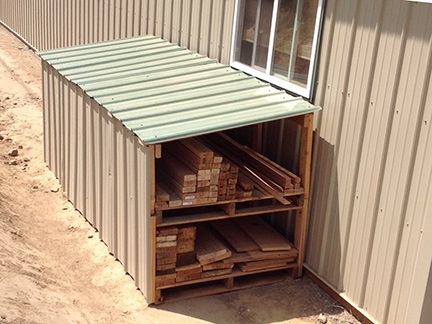
Yes, I did mark the length of each piece on the end and sort them by size. That makes it extremely quick and easy to find just the piece I need.

Because I’m such a scavenger and because I told the builder to leave behind any scrap wood, I needed a place to store the useable pieces. That meant a sort of woodshed. I built one out of pallets (again), scrap lumber, and leftover metal from my building. The result is a 4 x 10 sort of lean-to with shelves that keeps the lumber out of the rain and snow. And yes, I filled it almost immediately — it’s extremely handy to be able to quickly find exactly the piece of lumber I need for other projects. Best of all, it matches my building so it isn’t an eyesore from the road (which it faces).

I’m also working on glass projects, although I don’t have any photos yet. I start with discarded wine bottles which, because of the sheer number of local wineries, I can get in any number I need. I’ll be melting down glass rings in a kiln for use in wind chimes. And I’ve also been cutting the bottles in half and finishing off the cut edges to make drinking glasses and vases. This is time-consuming, tedious work that I’m not exactly excited about doing. But the results are impressive. I expect to make an entire set of drinking glasses for my new home out of wine bottles. I’d also like to melt small glass pieces in a kiln to make jewelry; we’ll see where I go with that.

Creativity Can Be Rewarding

I can’t tell you how proud I am of these silly little projects. Seeing waste turned into something truly useful that makes my life better or easier is extremely rewarding. Knowing that I’m the one who thought up the design and executed it makes it even better.

What have you upcycled lately? Use the comments to brag about it!

Repurposing Old Bee Hive Boxes

Reuse, recycle.

A few months back, my beekeeping friend James told me he’d was able to get a bunch of used deep hive boxes for about $5 each. Knowing I used deep boxes — he uses only mediums — he offered them to me. I asked about the condition and he admitted that they were pretty beat up but could probably be usable with just a cleaning and fresh coat of paint. They were heavy-duty commercial boxes — the kind the migratory beekeepers use. I told him I’d take 10.

Beat Up Hive Boxes
These hive boxes are a little more beat up than I was expecting them to be.

I picked them up a while later. Although structurally sound, they were very beat up. James showed me one that he’d painted and it didn’t look half bad. Since the price was right and I had plenty of paint, I took them.

I spent one morning scraping the paint off four of them with a wire brush and then repainting them. They did look much better. But when I slipped some frames into one of them, I realized that they weren’t consistently sized; the frames fit too loosely and would require careful placement to prevent them from falling into the box.

Behive
This is my garden hive, so-called because I placed it near my garden. It was built with two of the used boxes and it’s pretty clear that they simply don’t fit the way they need to.

But it wasn’t until I placed the first box of frames onto a hive bottom — for a swarm capture I needed to permanently house — that I realized the problem couldn’t be solved with just a coat of paint. The top and bottom edges of the boxes were rough. This caused gaps between the bottom and the box and between stacked boxes. The gaps were large enough for light and air to pass through. That meant the bees would be busy filling all those gaps with propolis, thus gluing them together.

I used the four I’d painted and found the same problem with all of them. Although I didn’t want to invest more money in beekeeping equipment than I had to, it was clear that these boxes would not be suitable for long-term use. They’d need to be replaced.

I placed an order for five new boxes from Mann Lake, figuring that I’d begin swapping them out on my next inspections.

But what to do with the unneeded boxes?

The answer was in my garden, which was growing wild in the planters I’d bought and made: more movable planters.

Understand that bee hive boxes do not have tops or bottoms. All they have are sides. While I could simply place a box on the ground, fill it with soil, and plant something in it, that wouldn’t make it movable. It also wouldn’t keep the moles (or voles or whatever I have making holes on my property) from digging in from underneath to kill whatever was growing in the box.

So I did the same thing I did for my large pallet planters — I lined the bottom with wire mesh. I had a large piece I’d been using on the door for my chicken yard that I clipped off, cut to size, and lay inside of each of the three boxes I painted for my trial run. I used a staple gun to fasten the wire to the sides of the boxes. Then I placed the first box in position, put a layer of stray on the bottom, right over the wire, and topped it off with some potting soil. I planted corn in the box, covered the soil with some more straw (to discourage digging by birds), watered it, and left it.

The corn wasn’t supposed to germinate for 8-10 days, but within 6 days, it was pushing its way up between the pieces of straw.

Beehive Planters
A row of the beehive planters. You can see the corn poking up through the straw in the closest box.

I lined up the other two boxes on the ground beside the first. I planted corn in one and onions in the other. When the heat breaks, I’ll prep the remaining three boxes, although I may not plant anything in them until next year.

What I like most about these movable planters is that they’re making it possible for me to have a garden this year, before I’m ready to commit to a location for the garden. And while the bottoms might not be the most sturdy, they do make it possible for plant roots to reach through, into the soil below.

I just hope I didn’t plant the corn too late for a good harvest.

The Pallet Planter

Reusing is better than recycling.

One of the things I wanted at my new home was a nice, neat garden. And there’s nothing that keeps a garden neater than raised beds for the plants.

But what to make them out of? A friend offered me railroad ties stacked up in his backyard, but they’re ugly and dirty and I was worried about tar or other nasty stuff they could have been treated with.

And then I thought of pallets.

I’ve got this thing about pallets. There’s something about a nice, clean, well-designed pallet that just makes me very happy. Come to think of it, it gives me almost the same feeling I get from unused paper. Is it the wood?

As I wrote the other day, my chicken coop was made, in part, with three pallets. My beehives are kept off the ground on pallets. And, in the past, I’ve made a “porch” for my RV with pallets and a deck for my poor man’s hot tub with pallets. To me, pallets are the ultimate free building material and I’m always on the lookout for good ones.

I hit the jackpot yesterday morning when I attended a “surplus sale” at the local school. Not only did I score two really nice media carts that’ll be perfect for my shop ($15 each), but I also bought a 4×10 foot magnetic white board in mint condition ($20) and a Sony boom box with AM/FM/CD/dual cassette ($5). And stacked outside were about 2 dozen of the nicest pallets I’d ever seen. I picked 7 of those and took them home for free.

Pallets in a Truck
I have a truck for a reason: I haul stuff.

Figuring out how to use them to create raised garden beds was a bit of a challenge until I took the time to see how they were configured. Then it was just a matter of cutting them in half and standing the pieces up in a square, partially buried in my garden. These photos and captions pretty much tell the story.

Pallet Garden
I started by digging a trench just wide enough to stand up the pallet halves. I used a level to keep them relatively level on sloped ground.

Pallet Garden
I needed something to prevent the dirt from coming out through between the slats. Because I have no shortage of straw, it was the logical choice. I really packed it in.

Pallet Garden
Because the dirt at the base (inside and out) would do most of the work holding the pallet halves together, I only needed four screws — one in each corner — at the top.

Pallet Garden
I filled in the straw all around.

Pallet Garden
Then I lined the inside with chicken wire to “discourage” moles (or voles or gophers or whatever the hell keeps digging on my property) from coming up through the bottom.

Pallet Garden
I filled the inside with the dirt from the trenches, some leftover compost, some leftover topsoil, and a big bag of Miracle Gro potting soil. before planting 18 strawberry plants.

Pallet Garden
For a finishing touch, I cut some scrap 2×4 lengths and set them into the groove at the top of the planter, hiding most of that messy straw.

Someone mentioned rabbits — they’d have to be pretty tall to reach these planters. And they’d have to get past my faithful garden watchdog, Penny. I’m more worried about birds. I’ll be making a chicken wire cover to keep the birds out before the plants begin to show fruit.

I’m very happy with the way this turned out. It took about 2 hours to build. The hardest part was digging the trench — which was actually quite easy because there are few rocks in my garden. The most costly part was filling the planter with dirt; I probably put about $15 worth of store-bought materials in there.

I’ll be building more of these. My goal is to eventually have three rows of six of them in my garden area.

What do you think?

A New Sign

With a tiny garden.

Here's My Sign
My first stab at a house sign.

Way back in August 2013, I blogged about my first week as a single landowner. In that blog post, I showed off a picture of a temporary sign I’d made to mark my driveway for contractors and visitors.

I was proud of that silly, ugly sign — it was a mark of achievement. It was evidence that I was on the road to a new life. A better life without a sad old man holding me back. Maria, rebooted, version 3.0.

Old Sign
By May 2014, my once-proud sign was looking very sad.

Time went on. I put a little ring of rocks around the sign and added a solar-powered light for nighttime. In the autumn, I planted bulbs.

Then winter came. I moved away for about five months, first on a local house-sitting “job” and then on a frost contract in California. When I returned, the ground was dry and the few bulbs that had emerged were struggling. The sign looked forlorn and sad.

The sign wasn’t meant to be permanent. I was hoping that a friend of mine in Arizona who works with metal would make me a new sign, but the death of her husband and the aftermath kept her busy with other things. I’d need to find another solution.

I should mention that I had a neat sign back in Arizona. It was made out of sandstone with symbols and numbers carved into it. I’d bought it from an artist at a show in Cave Creek (I think) and it was custom made. (Wish I had a photo of it to share!) I was hoping to get something like that, but I simply couldn’t find anything.

Then, last week when I was in California again for work, I happened upon an art tile shop. They made house numbers and frames. I chose a style with a black frame, picked out my numbers, and had them assembled. I bought it home and mounted it on a pair of stakes I painted black to match and then I pulled the other sign — with some difficulty! — and replaced it with the new one.

Yesterday, I went to Fred Meyer for groceries and stopped at their excellent garden shop. I bought a bunch of flowering plants that should bloom all summer. I loosened up the soil, removed rocks, added compost and top soil. Then I planted the flowers around the sign. I covered the soil with a dressing of straw (which I have no shortage of), watered it good, and took this photo.

A New Sign
Freshly planted: my new sign and some flowering plants.

Not bad, eh?

Of course, the big challenge will be to keep it watered…wish me luck!

Chickens Again, Part I

Getting started with a new batch of chickens.

Penny with Chicks
Penny suspected trouble when I got into the truck with this little box.

A few weeks ago — just a few days after returning from my 2-month California trip, in fact — I bought 8 chicks. I set them up in my shed, in the stock tank I’d bought last year for my poor man’s hot tub.

Chicks in my Shed
My little chickies, huddled together in their nursery.

I’d had chickens before, in Arizona. They’re a lot of fun and you really can’t beat fresh eggs. Because I knew I’d have chickens again, when I moved to Washington, I took along most of my chicken-rearing equipment: feeders, waterers, and heat lamp. That saved me a bunch of money when it came time to get these started. And the stock tank in the shed really beats the cardboard boxes I used to use in my garage to get the chicks started.

The Chicken Yard

Of course, they couldn’t stay in the shed. Eventually, they’d need a chicken coop and a fenced-in yard. Like Wickenburg, this area has coyotes and I’d have to protect the chickens from them. It also has large hawks, eagles — including Bald Eagles — and owls, so a net across the top would be vital. I wanted the chicken yard to be large enough to accommodate all the chickens and, with the real possibility of free-range egg sales, even more chickens in the future. And although I only wanted to build it once, I didn’t want it to be permanent. (I’ve come to realize that I don’t want anything in my life to be permanent because nothing really is. But that’s a philosophical discussion best saved for another blog post.)

I explored many options. “Hog panels” looked good, but the only ones available in the area were very large and very costly. Someone suggested a dog kennel and even sent me to Costco in search of one that seemed like a good deal. But they were out of stock and I was running out of time. I needed the chickens out of the shed before I headed south for a few days on personal business.

Gardening with a Backhoe
Jeff cleared a space for my shed and garden and left a pile of bunchgrass and weeds in the area just north of the garden patch.

Covering Conduit
After he moved my shed and dug a trench, I ran conduit for my temporary electric and water lines to keep them off the driveway and he covered it back up.

Meanwhile, Jeff, the earth-moving guy, was preparing the pad for my future home. He had a honking huge backhoe and an i-beam that he used to scrape the ground. I wanted a garden and I wanted my shed moved to the other side of the driveway. (Originally, I figured I’d sell the shed when my building was done, but I realized it would make a great place to store garden tools so I decided to keep it.) I realized that Jeff could give me a good head start on my garden prep with that i-beam and I set him to work on a small area near where I wanted the shed. He dug out the few sagebrush there and scraped the ground clear of bunchgrass, leaving it piled up in an area north of the garden. He even dragged my shed to its new position — it was built on skids — and got it level for me. And dug a trench so I could run power and water for my RV and shed under the driveway so the cords and hose would not be run over by construction vehicles this summer.

When he left, I looked at my future garden location and the spread-out, uprooted bunchgrass beside it. The chickens wouldn’t mind all that grass. And it would be nice to have them next to the garden so I could let them in to eat bugs. Without even intending to, Jeff had chosen the spot for my chicken yard.

I wound up buying 150 feet of 5-foot tall “horse fence” at the nearby Coastal Farm and Ranch store. I wanted 6-foot fencing so I’d have plenty of room to walk around under the net, but this was on sale for a good price and it’s not as if I’ll be hanging out in there with the chickens. I also bought a few 6-foot T-posts. I already had a T-post driver and a bunch more T-posts that a friend had given me.

But I began realizing that I’d have a problem when I got the roll of fence home. It was too heavy for me to lift. I couldn’t even push it out of the truck bed. Clearly, I’d need help.

Assembling the Fence

Help came in the form of my friend, Mike. He’d come up from California with his helicopter towed behind his motorhome. After dropping off the helicopter at the airport, he rolled down my driveway and greeted me with a big hug.

Fence Under Construction
Some of the T-posts in the ground around the future chicken yard; the roll of fencing was very heavy.

After getting a tour of the place — building pad, “lookout point,” apiary, chicks in shed — we talked about the things I needed to do. I mentioned the chicken yard and the fence, never even thinking about asking him for help. That’s when he offered to help me.

I’m not an idiot. When someone offers to help me with a difficult task, I say yes! We got to work right then and there.

The work went surprisingly well. Within about 2 hours, we had completely fenced in a 9 x 25 foot area beside my future garden, leaving only a 4-foot wide doorway for a gate. Although it wasn’t perfect, it was a lot better than I expected it to look.

Chicken Yard
The nearly finished chicken yard.

Finishing Up. Almost.

The next day, I bought some bird netting at Coastal. Although it was supposedly 14 x 45 feet in size, the 14 foot width could not span the 9 foot width of the chicken yard. (What was that all about?) But with a little creative cutting and attaching, I was able to fit three pieces across to protect the chickens from aerial predators.

The next morning was warm and sunny with hardly any wind. I decided to try out the chickens in their new yard — I really needed to get them settled in before I went on my trip. I dragged the stock tank out of the shed and into the chicken yard. I closed the makeshift gate I’d made behind me. And then I tilted the stock tank so it was laying on its side, thus freeing the chicks.

They were not happy. And Penny, of course, went nuts. She couldn’t get into the chicken yard and she wanted a piece of those chickens. The chickens ran around and Penny ran around the yard. And that’s when the chickens started squeezing through the fence.

What followed was a comedy routine that involved me and Penny chasing 3-week old chicks. Penny was good at catching them and, for some reason, she didn’t kill them. I managed to get them all back in the stock tank. After putting food and water in there, I went back into the RV, hot, sweaty, and dusty.

The chicks would not be much bigger before I headed out on my trip. That meant that if I wanted them in the yard, I’d have to put something around the bottom edge of the fence to prevent them from squeezing through. What? I had some chicken wire, but I’d bought 4-foot width and that was overkill. It looked as if I’d have to head back to Coastal for some more chicken wire.

Reuse, Recycle

I was back out in the yard, contemplating the situation, when my eyes fell upon the 22 bales of straw I had in two piles in my yard. I’d bought the straw the previous autumn to stack around the base of the RV to winterize it. When I moved the RV out for my California trip in February, I’d stacked the straw neatly to get it out of the way.

If I laid the straw around the base of the chicken yard, right up against the fence, would that prevent the chickens from getting out? It certainly seemed as if it would.

8 WD
Although I bought this little flatbed trailer — a Craig’s List deal — primarily to move my bees around in the future, its size and low bed make it perfect for moving my ATV and straw bales.

So I got to work. I’d brought my ATV home, along with the little cargo trailer I’d bought years ago for yard work up at our vacation property in northern Arizona. The cargo trailer’s tires had been replaced and it was all ready for use. But last week I’d also bought a very small flatbed trailer that was larger than the ATV’s yard trailer. With a ball on the front of my ATV for towing the helicopter, I could tow the little flatbed trailer. It would be perfect for moving all that straw.

A formerly wise man used to say that any job is easy if you have the right tools. How true. I had the straw moved and positioned in less than an hour.

I was thrilled. My solution solved more than just the chicken escape problem. It also temporarily solved the problem of what I was going to do with all that straw.

A while later, I tried again to let the chickens out into the yard. This time, they didn’t escape.

Chicken Yard
The chicken yard this morning. I haven’t done a headcount, but I’m pretty sure all eight of my little girls are in there.

Temporary Coop
The temporary chicken coop is nothing more than a stock tank on its side with a piece of scrap plywood as a lean-to wall.

I set up an automatic waterer that I think might be a bit too big for them. Then I set up their chick feeders and waterer. I left the stock tank on its side against the side of the fence as a makeshift shelter for them; later, I leaned a piece of scrap plywood against it to enclose most of it. My list of things to do includes building a chicken coop, but I’m not sure I’ll get to that before my trip. The chicks are still small and should be okay in the stock tank, at least for a few more weeks.

The sun has just risen as I’m tying this. Seeing movement out the window, I took a closer look. The chicks are out in their little yard, scratching around in the early morning light. They’re exploring their big automatic waterer and, with luck, will soon be using their hanging feeder, too.

It looks like I’m on the road to chicken success. More later, after I’ve built their coop.