I tuck my bees in for the winter.
I started my beekeeping hobby in June 2013 and have been blogging about it periodically. If you’re interested in reading the other posts in this series, follow the
Adventures in Beekeeping tag. Keep in mind that the most recent posts always appear first on this blog.
I moved to my new place in Malaga about six weeks ago and fetched my bees soon afterward. During the month they’ve been living in their new home, they’ve pretty much settled in. Although there aren’t any food sources right now — we’re well into the autumn season — they get out and about on warm days, which we had plenty of until very recently. I’d been supplementing their honey stores with sugar water in outside feeders that I filled every two days. Now those feeders were starting to freeze and leak. With temperatures dipping into the low 30s at night, it was time to prep my hives for the winter.
Because of my beekeeping goals, it’s vital for me to ensure that all of my hives survive the winter. With an average winter hive loss in this area of about 50%, statistically I stood to lose one or two of my three hives. I wanted to beat the odds and keep all three. That was my challenge.
Bees in Winter
Although bees don’t hibernate in winter, they do slow down their activities to a near hibernation state. They bunch together for warmth in the middle of the hive. The queen stops laying eggs — or lays very few –because the workers, who don’t really do any work outside the hive in winter, live a lot longer. The drones are generally kicked out; they serve no purpose at all in the winter and can eat precious food stores.
The food, by the way, is the honey and pollen they’ve been storing all summer. Beekeepers “steal” this honey, although a smart beekeeper will leave enough behind for the bees to eat during the winter. I harvested honey very early in the season with hopes that my bees would make enough to take them through the winter. For various reasons — hive strength, availability of food, etc. — I don’t think they made enough. That means I’ll have to feed them. More on that in a moment.
The bees will go out on warmish days, mostly to stretch their wings (so to speak) and poop. But because there’s nothing flowering, there’s no work to do and they don’t stay outside long.
Mite Control
Mite infestations weaken bees, making it more difficult for them to survive the winter. My friend Don is convinced that he lost his bees last year because of mites. I’m not going to make the same mistake.
I blogged about mites back in August; you can read more about varroa mites in that post.
This year, I used three techniques to control mites:
- Drone frames – These are special frames with cell sizes that encourage the hive to produce drone eggs. Since mites prefer drone larvae, you can simply remove a full drone frame and freeze it to destroy the mites and the drones. This works, as I detailed here. It’s a great spring/summer solution because it requires no chemicals so you don’t have to worry about contaminating any honey that might be destined for human consumption.
- Screened bottom boards – When mites move around the hive and when bees clean themselves, mites fall to the bottom of the hive. If there’s a flat bottom board, the mites can climb back up into the hive or hitch a ride on a bee entering the hive. But if there’s a screen bottom, the mites fall through while the bees can come and go by walking on the screen. This is a great year-round solution — no chemicals and no extra effort on the beekeeper’s part (although you could add a sticky board if you were interested in capturing and counting mites). I’d installed screened bottom boards on all three of my hives when I moved them in early October.
- Apiguard – Recommended by another beekeeping friend of mine, Apiguard is a thymol based miticide that’s used after honey season but before it gets cold; it requires temperatures of at least 60°F to work. I treated all three of my hives when I moved them in early October.
I should mention here that when I checked my hives for mites in late August, I learned that my original hive and the split from that hive had serious mite issues while the captured swarm had hardly any mites at all. In addition, that swarm capture hive is the strongest of the three. Interesting, no?
Some Notes about Feeders

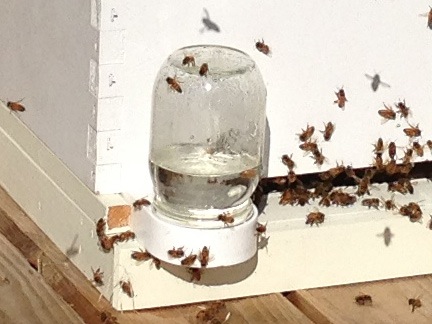
Here’s an entrance feeder on one of my hives.
I’d been using entrance feeders on all my hives since mid summer, although I didn’t always keep them full. When I moved them to my home in Malaga, I was able to tend to the feeders regularly and make sure they were never empty.
Entrance feeders utilize a jar with a perforated cap that sits on a plastic tray. One end of the tray slides into the corner of a hive entrance; bees can enter beneath the jar lid and feed through the perforations. I like entrance feeders because I can always see how much feed is left. They’re also easy enough to refill — just pull off the jar, brush off any bees on the lid, open the lid, fill it up, close the lid, and replace the jar on the plastic tray. I don’t even have to suit up to get the job done.
Entrance feeders were not practical for the winter. I’d discovered that with temperature fluctuations — low 30s at night vs. 70+ in direct sun during the day — the feeders would leak. In addition, once the temperatures dropped below freezing, the contents would freeze. Not only that, but I planned to put entrance reducers in the hive and I could not do so with an entrance feeder blocking part of the entrance.
Two more alternatives include frame feeders and top feeders.
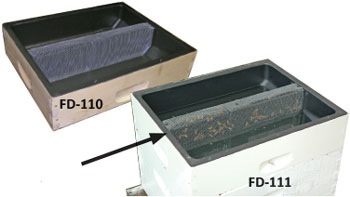
A frame feeder is shaped like a standard hive frame and is designed to slide into the place of one or two frames. Bees enter through the top where there are holes with “ladders” the bees can use to access the contents of the frame. Frame feeders can typically hold one to two gallons of feed. As a new beekeeper, I bought a frame feeder like the one shown here, thinking it would be the best solution for my hives when it came time to feed them.
I subsequently rethought that idea. The trouble with a frame feeder is that you have to open the hive and expose the bees to cold air to refill it. It’s also difficult to see how full it is. And because I initially thought I’d be spending the winter away this year, I realized it simply wouldn’t hold enough feed to keep the bees fed all winter long.
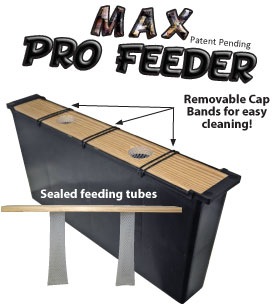
As my collection of hives expanded from one to three and I began seriously thinking about my winter strategy, I invested in two top feeders. A top feeder sits inside a hive box at the top of the hive, just under the inner cover. Bees enter from the bottom, through holes between two center wells. A screen enables them to crawl down to the level of the feed. Although a top feeder works with a shallow hive body, it can also work with a medium or deep hive body; I already had plenty of medium bodies.
There are three main benefits to top feeders. First, they sit on top of the hive so you don’t need to expose the bees to cold air when refilling them. Second, they hold a lot of feed — four gallons. There was a pretty good chance I could fill them each once and not have to worry about them for the entire winter. And that brings up the third benefit: it’s very easy to check the level of remaining feed because the feed is clearly visible in the wells. Oh, and how’s this for a fourth benefit: You can fill just one well with liquid feed and use the other well to provide pollen patties or some other supplement. A little bend in the screen on one side will give the bees access.
So as I got ready to prep my hives for the winter, I had three feeders for my three hives.
Prepping the Hives
On Thursday, the weather was warm enough to open the hives and prep them for the winter. I began with my weakest hive (a late summer split) and worked up to my strongest hive (a swam capture).
Before I could do any of that, however, I needed to open up the back of my bee shelter. I’d built it using good quality wood screws so I could easily disassemble and reassemble it when I needed to. Since the bees were coming and going out the front, I figured I’d access the hives from the back. (This is something my beekeeping friend Jim taught me early on.) So I used my handy battery drill to remove the six screws holding the back on and laid the plywood panel aside.
Then I suited up. I debated lighting my smoker and then decided against it. First of all, there weren’t that many bees flying around. Second, when you smoke bees, their instinct is to go into the hive and gorge themselves on honey. Although they’d eventually put that honey back — don’t ask me how; I just know that they somehow do — I didn’t think it was a good idea to encourage them to eat when they had a limited amount of available food. Besides, the suit would protect me and I really didn’t mind dealing with angry bees when I was suited up.
I got all the equipment I needed and laid it out nearby. Then, hive tool in hand, I got to work.
Split Hive
This hive has only one deep box with nine frames in it. I learned during the hive move in October that it had very little honey stored. If any colony was going to die over the winter, it would be this one. My goal was to make sure they had as much food as possible. To that end, I’d retrieved a full frame of capped honey that I’d pulled out of another hive that summer when I extracted honey. It was the seventh frame and I simply didn’t have time to extract it when I did the others. (The extractor holds three frames at a time.) I figured that I’d pull out an empty frame and replace it with this full one.
That turned out to be pretty easy to do. I found three empty frames — out of nine total frames! — in the hive. These poor bees would definitely starve if I didn’t feed them. I pulled out one empty frame on the left side of the hive box and slid the full frame into its place. Then I pulled out the two empty frames on the right side of the hive box and slid a frame feeder into their place. I had prepared a quart of sugar water and I poured that in, too. It wasn’t enough for the winter, but it was enough to get the bees started.
Before closing the hive back up, I removed the Apiguard tray, which was almost empty, and repositioned the remaining grease patty. I had at least six more of those patties in the freezer; I’d add another one when I topped off the feeder on the next nice day.
Original Hive
My original hive came from a nuc I bought back in June. It was an extremely healthy nuc that took to its new hive very quickly and produced 2-1/2 gallons of honey in a month. I consider myself very lucky to get my start with such a great colony of bees.
After extracting the honey in July and splitting off half the brood frames to a new hive, however, the health of the hive seemed to suffer. Honey production dipped and although I’d hoped the bees would produce enough honey for winter, it soon became clear that they would not. I think mites were part of that problem; when I did a mite count in August, it clearly showed a serious infestation. I can only hope my October treatment helped resolve that issue.
This hive had two boxes: a deep brood box on the bottom and a medium honey super on top. There was drawn-out comb in most of the 10 frames in the honey super, but there was no honey. I removed the entire box. Beneath that was a spacer that I no longer needed; I removed that, too. In the deep hive box, all the frames seemed full with either honey or brood cells. I didn’t want to pull any out to check more closely; there was no reason to expose the bees to the cold air more than necessary.
I removed the Apiguard tray and adjusted the remaining grease patty. Then I pulled the frames out of the medium hive box and positioned the empty box on top of the deep box. I laid in one of my top feeders and fiddled with the screen to ensure that the bees would have access to both wells. Then I took a break to make about 3 quarts of sugar water back in my RV. I brought it back to the hives, poured it into one of the wells, and closed up the hive. I’ll top off the levels on the next warm day.
Swarm Hive
At the end of June, I captured my first swarm. This became my second hive but it is now the strongest of the three. As mentioned earlier, it has very few mites.
The setup of this hive is almost identical to my original hive: two boxes with a spacer between them. I followed the same process to winterize them. There were two differences, though.
First, the honey super’s frames were nearly all built out with comb and there was some honey in several frames. None of the frames, however, had been capped. I suspect the bees were eating this honey. There was not enough honey in the frames to leave them in.
Second, when I pulled the frames out of the honey super, bees were clinging to the bottoms of several frames. I suspect this is because this hive has a much larger population that the other hive, which had no bees in the upper box at all. I used my brush to brush them down into the deep bottom box.
After removing the medium frames, spacer, and Apiguard and adjusting the grease patty, I laid the top feeder in place. Then another break to make another 3 quarts of sugar water. (I was now out of sugar; I’ll need at least another 20 pounds to top off all the feeders.) I poured the feed into one well of the feeder and closed up the hive.
Reducing Entrances
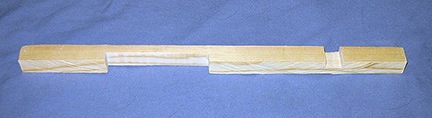
Each of my hive bottoms came with an entrance reducer. This is a piece of notched wood designed to fit into the entrance of a hive. You rotate it to allow a tiny opening or a larger opening.
At the bee chat I attended the other night, I got into a discussion with another beekeeper about how to set the entrance reducer. His concern was dead bees blocking the entrance to the hive, so he planned to use the smallest setting and rotate it so that the hole was slightly elevated. This would (theoretically) prevent dead bees from blocking the entrance. I thought long and hard about this strategy. I was counting on my bees to keep the hive clean by dragging out their dead. (This is what bees normally do.) Setting the entrance reducer the way he described would make it very difficult for the bees to do this.
After some internal debate, I decided to set my entrance reducers with the wider entrance in the normal position. Not only would this make it easier for the bees to drag out their dead, but it would make it possible for me to reach in with a tool and scrape dead bees out for them. The drawback: a bigger opening that could let in more cool air.
The decision made, I implemented it. First, I removed the entrance feeders. Then, using my hive tool as a lever when necessary, I slid the entrance reducers into place. Because two of my hive bottoms had non-standard width entrances, I had to use a saw to shorten two of my entrance reducers. Not a big deal.
Finishing Up
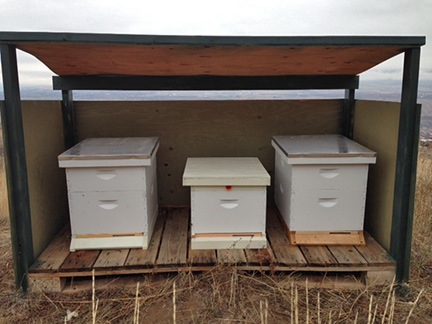
My three hives, almost ready for winter.
Finished with most of the winter prep work, I closed up the back of the hive shelter again, replacing some of the (too) long screws with shorter ones that would be easier to work with in the future. Then I gathered together all of the frames I’d removed from the hives — a total of 19 medium frames and 3 deep frames! — and packed them up in my truck. Later in the day, I’d drive them out to my hangar for winter storage with the rest of my beehive components.
I also made a list of things to do to finish up winterization:
- Top off feeders. There was no reason why I shouldn’t fill them up to the brim on the next warm day to minimize the number of times I needed to open the hives. For now, they had enough food to keep them for at least a few weeks.
- Wedge tops open. One of the issues other area beekeepers have had is with condensation in the winter causing mold to form inside hives. This can be remedied by inserting a stick under the hive’s top cover to allow a small amount of ventilation.
- Consider burlap blanket for weak hive. One of my beekeeping friends, who lives in the mountains where the conditions are considerably harsher in the winter time, used a medium box filled with burlap on top of each hive for additional insulation. I didn’t think I needed that since my hives had a roof over them and two of them had top feeders which would form an additional barrier to cold air. My weak hive, however, didn’t have this top barrier. I had everything I needed except the burlap. I needed to think about this and get my hands on some burlap.
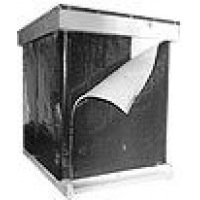
Cover hives with “colony quilt” blanket. I’d ordered the insulating covers from B & B Honey Farm earlier in the week but they hadn’t arrived yet. I liked the idea of the cover because I knew the dark color, when exposed to the sun, would help warm the hives. The insulating quality would help keep the warm when the sun wasn’t on them. I can’t comment on these beyond that yet; will blog about them once I’ve had a chance to check them out.
- Place insulation under screen bottom boards. Right now, two of my three hives have nothing beneath the screen bottom boards except the palette on which the hives sit. I need to slide in some foam insulation to prevent drafts from coming up from below.
With luck, I’ll be able to finish up all these tasks this week. Only then will I feel as if I’ve done everything in my power to keep my bees alive for the winter.

 I first made Julia’s cranberry recipe for Thanksgiving dinner in 1996. This was an amazing meal served in my New Jersey home. Our Salvation Army-acquired dining table, expanded to its full length with the help of a homemade leaf fully five feet wide, made it possible for all 15 of us to sit together. Amazing timing with the help of a standard sized oven and the microwave I still own made it possible to serve the entire meal at the same time, fresh and hot. If there is such a thing as miracles, this was one of them. I’ll never be able to top that feat again.
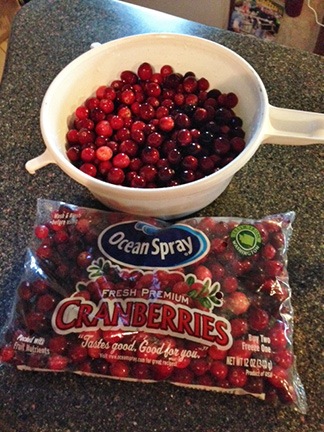

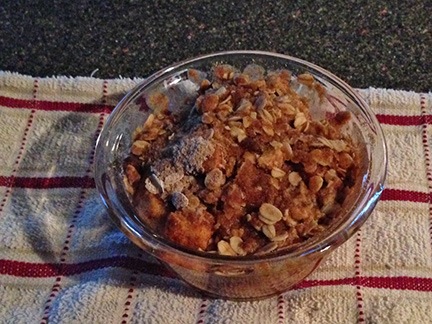 Sprinkle the topping over the apples.