Two Jewelry Classes

I take the camper to Tacoma to learn more about making jewelry.

Note: I actually wrote this and much of the post after it about my new cargo trailer back in early October while I was still traveling. I can’t tell you how many blog posts I start writing and don’t finish. This one’s done. I’ll try to get the other one done this week, too.

Last September, I took a 3-day intensive beginner metalworking class at the Tacoma Metal Arts Center in Tacoma, WA. It was an amazing experience that really transformed the way I think of making jewelry. I learned a bunch of metal working skills and how to use new (to me) tools that would take me to the next level in my work: cutting, soldering, texturing, shaping, and polishing sheet metal using jeweler’s saws, shears, torches, flex shafts and attachments, dapping blocks and punches, rolling mills, texture plates, and burnishing tools. I left class with the basic tools I’d need to practice what I’d learned.

Getting Serious about Jewelry Making

Over the winter, I decided to get serious about making jewelry. I paid a contractor friend to frame in a 12 x 24 foot space in my absurdly large garage so we could make an insulated shop for me. That would give me a climate controlled space to work on jewelry projects. While I was in Arizona over the winter, I shopped for the tools and equipment I’d need to set up a full-blown annealing/soldering station and jeweler’s workbench. When I returned from Arizona, I ran the wiring in the new shop and my friend returned to put in the insulation and drywall while I fastened T1-11 paneling to the two outside walls facing into the garage. Then I painted the inside of the room and added some trim around the windows. I installed the two glass-paned doors last week with another friend. The room is large and bright from its two windows and four track light setups, with an 8-foot ceiling and 288 square feet of loft space above it that I’ll likely never use.
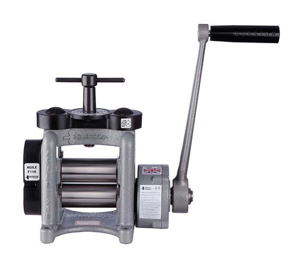

Durston Rolling Mill
Swanstrom Disc Cutter
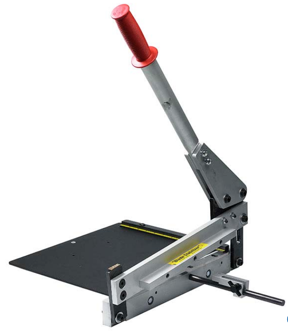
Bench Shear
Some shop tools purchased from Rio Grande earlier this year: a Durston Agile 110 Rolling Mill, a Swanstrom Round Disc Cutter, and a Precision 12″ Bench Shear. (Catalog photos not to scale; the disc cutter is actually quite small.)

With the help of the folks at Rio Grande — my primary supplier of metals — I purchased a few rather costly quality tools: a Durston rolling mill, a Swanstrom disc cutter, and a PepeTools ring bender. I also acquired a set of dapping blocks/punches and a metal shear almost as good as a true guillotine style cutter. I moved my jeweler’s bench into my new space, putting it right beneath one window where I’d get plenty of natural light. I built a solid workbench for the corner where I bolted down the rolling mill. Then I moved in the rolling storage cabinets I’d been collecting for years, set up one as my soldering station, another as my rock storage and jewelry photography studio, and a third as storage for the display and packaging equipment I’d accumulated. Half the room is set up as a jewelry studio while the other half is my regular workshop with the big workbench I built several years ago, my tool chest, and the rolling cart I’d converted into a storage and charging area for my power tools. My table saw, miter saw, tile saw, and Cabking cab making machine remain in the garage, on the other side of the wall. (The room is big, but not that big.)

Now, in addition to the sterling silver and/or copper framed gemstone cabochon pendants I’ve been making for a while, I also make textured and etched silver and copper earrings, soldered silver and copper stack rings, hammered bangle bracelets, silver plated “spoon rings,” and novelty keychains. This gives me a full range of products to offer customers when I show and sell my jewelry. I make these items in my shop and make my cabochon pendants when I go to shows.

This summer, however, I realized that I was ready for more.

Classes at the Tacoma Metal Arts Center

The Tacoma Metal Arts Center (TMAC) offers a variety of jewelry classes. Although I wanted to take the three-day course again with a different instructor to polish my skills and learn things from a different person, the dates and times it was offered did not work with cherry season, which requires me to be at home every day for three months — roughly June through August. There were a few one-day classes in September and October that looked interesting, but I wasn’t interested in coming to Tacoma for just one day. And then I saw the two one-day classes offered on the weekend of October 12 and 13: Molten Magic and Possibilities of Precious Metal Clay.

Molten Magic’s description was as follows:

Ruth [the instructor] will show you how to cut a shape from copper sheet for your project, then you will cover it with texture through the molten magic of melted silver! The result is a wonderfully rich surface texture of ridges and waves. Then, you will learn how to apply an iridescent patina with a torch by flame painting the surface.

Possibilities of Precious Metal Clay was described as:

PMC (aka Precious Metal Clay). Create fine silver jewelry from a clay: this material works like earthen clay so it can be shaped and formed, textured and refined and then fired. The result is precious metal in pure silver. Once it is finished into silver you can polish it or apply a patina for that vintage look.

These two seemed perfect for me. I was interested in taking my sheet metal work to the next level and fusing silver and copper sounded very interesting. As for PMC, I had actually bought some of the stuff and a bunch of tools to work with it but because of its cost, I was hesitant to get started. This would give me the information I needed to try it with confidence — or realize that it wasn’t really for me.

I signed up and planned to spend the weekend, camping out in their back parking lot in my truck camper as I had done the year before. Not only would I save on overnight lodging, but I could bring Penny the Tiny Dog along.

Molten Magic

Although I’d been hoping to get to Tacoma the evening before Saturday’s class, a big project at home kept me busy until 4 PM. By the time I prepped the camper, it was 6 PM and sunset was less than 30 minutes away. I try hard not to drive in unfamiliar places at night, so I didn’t depart until 5:30 AM the next day. Of course, I still had to drive in the dark over Blewett Pass, which I seldom drive. It wasn’t light until I got to Snowqualmie Pass.

Mushrooms
To give you an idea of the variety of food items Metropolitan Market offers, he’s a shot of some of the mushrooms they had for sale that day.

Traffic was light and I got there early. So I kept driving and stopped at Metropolitan Market, a supermarket that is so posh it makes Whole Foods look like a Smart and Final. I parked in the lot, got out to visit the restroom and buy some snacks, and then took Penny for a walk down the adjoining residential street. Then it was back to the TMAC, where I drove into the alley behind the place and backed the truck into the narrow parking area, trying (and failing) to use up only half the width of the space. The back gate was locked (as I knew it would be), so I got Penny set up in the camper with food and water, locked it up, and walked around front to the main entrance.

I was the first student to arrive. I met the instructor and chatted with her for a while. She must have thought I was a nut, talking to her as if I’d known her for years. I do that. The second of four students arrived before the 10 AM start time. The third arrived loudly 20 minutes late, after class had already begun. The fourth never arrived.

The instructor, Ruth, did not have a very structured teaching style. It was all very casual. There would be no specific project. Instead, she told us about the techniques we’d be using, handed out sheets of copper and scraps of sterling silver, and encouraged us to practice on the copper scraps in a bin near the rolling mill. Then she took us back to the polishing and soldering stations and demonstrated how to clean off the metal with wheels on three bench grinders there and then use heat from a torch to oxidize the copper enough to get different colors and patterns. She showed us how to melt silver onto the copper, including how to somewhat control how the silver melted by using heat to guide it across the copper.

Then she let us go to it.

There were three soldering stations and three of us so it worked out well that the fourth person hadn’t shown up. We each played with the sample copper for a while. One of the scrap sheets I’d taken had been run through the rolling mill and had a pattern on it. I managed to get shades of orange and pink on it. Later, I’d turn it into a pair of twisted metal earrings suitable for sale. (Yes, I can make jewelry out of scrap metal.) My silver melting wasn’t quite as interesting. I couldn’t come up with a suitable shape, so I’d traced a plastic spoon. No matter how I looked at it, it looked like a spoon. And I didn’t like the way I melted the silver on it.

Meanwhile, my two companions were working on nice projects. I felt uninspired. And disappointed. You see, I had already played with “fire painting” copper so it wasn’t new to me. The only thing I’d learned was that you could polish off the color to start over — I normally used “pickle,” which is an acid that removes oxidization — and that it was possible to melt sterling silver with the same little butane torch I used to solder and anneal.

Ruth spent a few minutes showing us how we could create a chain for a pendant using sterling silver wire and jump rings that she provided. I liked the chain on the sample piece she’d brought along, but it had been created with 14 gauge wire and she’d give us thinner 16 gauge wire. I played around with it for a while but didn’t like what I was doing.
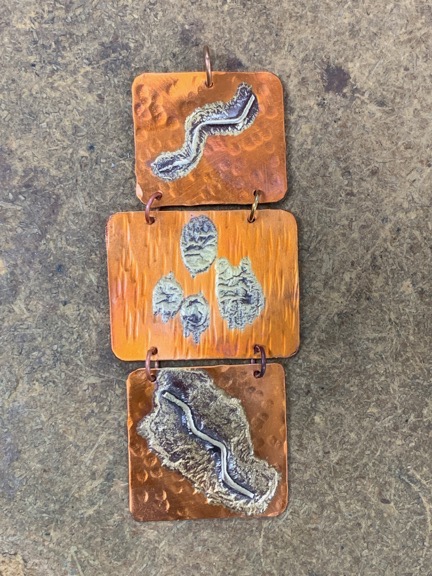
File Painted Pendant
Here’s the pendant I made in class. I finished it with a leather necklace and added a pair of matching earrings. They sold as a set on the first day I displayed them in my booth.

Then I got an idea for a pendant that would consist of three textured copper panels, each of which had silver wire melted on it. I’d join them together with jump rings. So I cut some of the copper sheet and went at it with two different hammers. Then I took some of the wire she’d given us to make a chain and made a zigzag pattern with it. I made tiny dots with more wire. I melted the wire to the copper without allowing the zigzags to get completely molten so they were fused onto the copper without losing their shape. I polished off the oxidation and then used the torch to apply just a tiny bit of color. I liked the result. I fetched some copper jump rings from my camper, colored them a bit with the torch, and put the whole thing together. Funky, but I liked it.

By this time, the day was pretty much over. Amy, the owner, came in to do some paperwork and she took photos of what we’d made. I felt that I made a respectable showing; everyone seemed to like the pendant and earrings. My companions had created more things than I had, but I didn’t mind. I had some ideas and that’s all I needed.

More at Metropolitan Market

After class, I went back to the camper — I’d checked on Penny at lunchtime — and put Penny on her leash. We walked the mile or so to Metropolitan Market. I parked Penny at the outside dog parking area where an Australian Shepherd was waiting for her human. I bought some things for dinner from their extensive prepared food area, remarking to the person behind the counter that if I lived nearby I’d be 300 pounds and flat broke.

Penny and I shared a gelato — I scooped some of mine out into the lid of the container for her — and walked back. Then we climbed into the truck and drove to a local U-Haul place that filled propane tanks. One of my tanks was completely empty and the other was only 1/4 full. I did not want to run out of gas overnight. That done, we returned to our parking spot and I backed all the way in so my back door was only a few feet from the back gate.

I heated my dinner in the camper’s oven — I wasn’t plugged into power and hadn’t brought along a generator so the microwave was useless — and worked on some earrings while I waited for it to finish heating. After dinner and another quick walk with Penny, I stretched out on my bed to read.

I slept well. During the night, I was treated to a rainstorm. The only thing I love more than hearing rain on my camper’s roof is hearing it on the metal roof of my home.

The Iliad and The Odyssey

I was up at 5:30 the next morning. I lounged in bed for a while, like I do at home, and then got up, threw on a pair of sweatpants, and made my coffee. I did a little web surfing at the table while I had my coffee. Before I knew it, it was 7:30. I made breakfast and ate it as Penny came down off the bed to let me know she was ready to go out.

I put the leash on her and we walked down the alley. There was a Bartell’s pharmacy about two blocks away and it looked like the kind of place that might have a refrigerator case. I really felt like having some orange juice. They had every sugar or alcohol drink in that case except real orange juice.

We crossed the road to a coffee shop. They didn’t have orange juice either. But they had a nice staff that let me bring Penny in so I bought a latte and caught up on Twitter at a table near the window while Penny ate a dog biscuit and a nearby dog watched her.

At one point, a young guy came over and complemented me on how well behaved my dog was. That got us into a conversation about dogs in public and how the owners really needed to keep them under control. I pointed to the other dog. “That’s a well-behaved dog,” I said.


This is the edition recommended by my friend.

I noticed that he was reading The Iliad and asked him if he was reading it for a class or if he was just reading it. He told me that he’d always wanted to read the classics and figured he’d start with the first one. (At that point, I found myself wishing he was about 20 to 30 years older and single — I felt the same way about reading the classics but needed a bit more motivation to actually do it.) I had recently explored reading a specific translation of The Odyssey that a friend had recommended. I told him about it and looked up the translator’s name for him. He said that was next on his list and he’d look for that version. I think he really will.

Possibilities of Precious Metal Clay

By that time, it was 9:45 and I was running the risk of being late for class. So Penny and I hurried back. I put her in the camper and went into class. I arrived at about the same time as one of the previous day’s students, Ellen. Two other students joined us. Again, there was a no-show.

This instructor, Meredith, had a more structured approach — but not much more. She spent some time talking about PMC — what it is, how it works, etc. She sent around examples of her own work — some of it with problems she pointed out as examples of what can go wrong. She handed out 9 gram packets of PMC3, bunches of 10 standard playing cards (which are used to gauge thickness for rolling), tiny pieces of plastic needlepoint grid (for a simple texture, a small sheet of foam (for creating our own textures), and long pins with masking tape flags on the end (for cutting clay). She seemed a bit disorganized; she’d forgotten to bring along work surfaces for us. Instead, we’d be rolling out the clay on the same teflon surfaces we’d use to dry it on. All the other tools were laid out in piles on unused benches and workspaces.

And then she let us go to it, again, without a specific project.

I guess wanting a specific thing to make is something that affected me more than my companions. I suspect that it’s because I’m pretty new to art — so new that I usually don’t provide a straight answer when people ask me how long I’ve been making jewelry.

Although I’m a visual person when it comes to learning, I’m not visually creative. (My creativity has always come with words; I have always been a writer.) Show me how to make something specific using a set group of techniques or skills and I’ll make it. Then, as I make it over and over, the creativity comes out. You can see that in my silver framed jewelry. Dorothy taught me how to make a pendant in her style using her materials and tools. The more pendants I make, the more my materials, tools, and final products differ from hers. I look at a stone and I think about how I could make an interesting pendant from it. The idea clicks and I make something creative and new. But when it all comes down to it, I’m just doing the same thing over and over, with minor twists that make something new.

Although Ruth had provided a project idea — the sample pendant she’d made for the course description — I hadn’t been interested in duplicating that. And Meredith did provide many examples of what we could do with PMC, but there were too many. I guess I was expecting her to walk us through the process of creating some of these things rather than giving us an overview of how to make them and then answering questions to help us complete our own personal products.

My problem was that I lacked ideas.

I made two textured pieces that could be earrings or charms. It took only minutes to do, even with the custom texture I created in the foam I’d been provided. I was interested in creating a bead and had picked out a small piece of cork clay to form a bead around. I had a few false starts — you have to surround the cork with clay before applying a texture (duh). My mistake was choosing such a small piece of cork; it meant that I was working with a very tiny object. But the damn clay is so expensive that I can’t imagine using it to make anything large. And we’d only been provided with 9 grams of the stuff so I was afraid to use too much right from the start.

Around lunchtime, Meredith set out a timeline for the rest of the class. All of the pieces had to be fired for about 45 minutes in a kiln. It took 30 minutes to ramp up the kiln to 1470°F. After that, we’d have to brush, tumble, and burnish our pieces, which would take at least another 15-30 minutes. With the class ending at 4 PM, that meant we’d need to get everything in the kiln by 2:30 at the latest.

I decided to use the rest of my clay to make a rectangular pendant with shapes adhered to it. This would enable me to practice “gluing” pieces together. What I made was ugly, but it did let me practice techniques. I worked and fine-tuned my pieces until 2:15 and laid them all out on the heating pad with the others to dry.

Compared to everyone else’s work, mine was pitiful. I didn’t even take a photo of them.

Meredith loaded the main kiln, which she’d brought along with her, and, while the kiln was coming up to temperature, talked to us a little about kilns. She’d brought along a smaller kiln designed for enameling that also worked with PNC and wound up firing that up for a few more pieces. Then we waited, asking questions and looking at more examples.

Finally, it was done. Meredith opened the kiln shortly after it was finished firing, opening and closing the door at short intervals to cool it slowly. She pulled out and quenched our pieces in a bowl of water. As I expected, they were all covered with a white film. She had us brush them off with a brass brush that put scratches in my pieces. I was pleased to see that none of them had any problems, although none of them had gotten any nicer.

Then she prepped the tumbler and dropped all of our pieces in. We cleaned up our workspaces while we waited. The owner, Amy, had come in and we shopped. TMAC is an excellent source of jewelry making tools and equipment at reasonable prices. I bought a small hand drill and two silver hallmarking stamps (.925 and .999FS).

Out of the tumbler, my pieces still had a lot of white residue on them. Meredith told us to burnish them with steel. I found a suitable tool and went to work on one of the pieces. The silver shine popped out. So now it was ugly and shiny.

Of course, I’m half joking here. Although my work wasn’t anything to be proud of, I had learned quite a bit about working with PMC and am no longer afraid to play with the 30 grams I bought earlier this year. I’m hoping to get my tiny desktop kiln running again; it’s the perfect size for this kind of work.

I just need some ideas.

After Class

Although I’d originally planned to spend the night in Tacoma, it was early enough to get a start for my next destination: Yakima. I needed to pick up a cargo trailer that I’d be converting into a mobile jewelry studio.

But I think you’ve read enough here. I’ll cover that in another blog post.
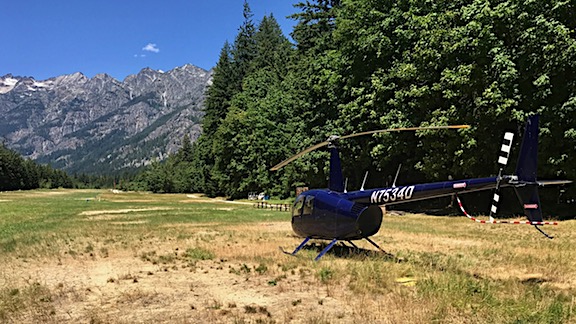
Helicopter Flight: Central Washington Geology Tour, Part 2

A cockpit POV video from the FlyingMAir YouTube Channel.

COME FLY WITH ME as I take Central Washington University geology professor and star of “Nick on the Rocks” Nick Zentner on a helicopter tour of the area between Mission Ridge in Wenatchee and Malaga, which is just down the river, with a focus on geology. Nick talks about the geology of the area and explains how the land under our local airport and my home were formed. I show him some landslides he’s never seen and give him a unique view of Saddle Rock. This is part 2 of a two-part series, cut short when one of the cameras died in flight.

Some videos referenced in this video:

Points of Interest Discussed:

About Me and the Helicopter

  • I have been flying for about 20 years. My nearly 4,000 hours of flight time is in Robinson R44, Robinson R22, and Bell 206L (Long Ranger) helicopters.
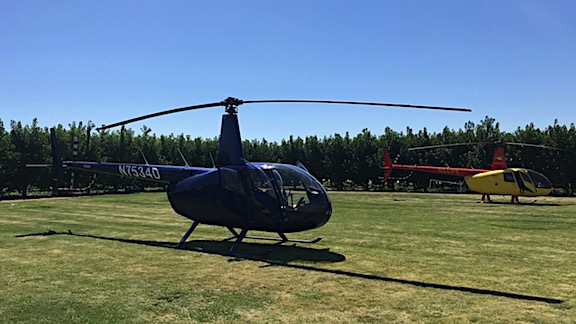
  • The helicopter is a 2005 Robinson R44 Raven II — the same one that appears in the photo at the beginning of the video. You can learn more about them here: https://robinsonheli.com/r44-specifications/ I own this helicopter. It is the third helicopter I’ve owned since 2000.
  • My helicopter has ADS-B Out and is picked up by radar facilities. You can see my track for recent flights on Flightradar24: https://www.flightradar24.com/data/aircraft/n7534D This is a great site for tracking any almost any flight, including the airlines.

About Nick Zentner

  • Nick has an MS in Geology and has been teaching at Central Washington University since 1992.
  • In 2015, Nick received the prestigious James Shea Award, a national award recognizing exceptional delivery of Earth Science to the general public.
  • You can learn more about Nick on his website: http://www.nickzentner.com/

  • You can watch Nick on the Rocks episodes here:
  • https://www.youtube.com/playlist?list=PL18y1vgsGPLbl3wrSZwUyvkAiUJHZTS5Y

About the Video

  • The video was recorded with a pair of GoPro Hero 7 cameras (https://amzn.to/2Lxyzwl), one of which is connected to the helicopter’s intercom system with an NFlightCam audio cable (https://amzn.to/31syLTm). Both cameras record audio, but I dialed down the helicopter sound to about 25% of normal volume so it wouldn’t be annoying.
  • The video was edited on a Macintosh using Screenflow software. Learn more about it here: https://www.telestream.net/screenflow/overview.htm
  • The intro music is by Bob Levitus, famed “Dr. Mac.” You can find him here: http://www.boblevitus.com/

I try to drop cockpit POV videos every Sunday morning and “extras” with more info about owning and operating a helicopter midweek. (Some channel members get early access to some of these videos.) I also host occasional livestreams with Q&A chats. Subscribe so you don’t miss anything new! And tell your friends. The more subscribers I have, the more motivated I am to keep producing videos like this one.

Any Amazon links on my channel are affiliate links (https://amzn.to/32PLHTD). If you click one of them and buy something, Amazon sends me a few pennies. Enough pennies make a dollar. Enough dollars buy new equipment. It doesn’t cost you anything so I hope you’ll shop with one of those links. Thanks.

Still reading? Thanks! Maybe you’ll consider buying something from my Etsy store to help support this channel? Start here: https://www.etsy.com/shop/FlyingMAir

Or better yet, to support this channel on an ongoing basis, consider becoming a member. This link will get you started: https://www.youtube.com/channel/UCLGD_GbGsS6YKK_Ekx0QMqQ/join

Helicopter Flight: Central Washington Geology Tour, Part 1

A cockpit POV video from the FlyingMAir YouTube Channel.

COME FLY WITH ME as I take Central Washington University geology professor and star of “Nick on the Rocks” Nick Zentner on a helicopter tour of the area between his home in Ellensburg, WA and the Mission Ridge area of Wenatchee with a focus on geology. We’re just getting to know each other in this video but there’s plenty of scenery and geology to talk about. Nick talks about the geology of Naneum Canyon, which we fly along the edge of, and some basalt formations he’s never seen. He also points out the Malaga Slide, which I knew absolutely nothing about. This is part 1 of a multi-part series; I’m trying to keep them short and sweet.

By the way, my reference early in the video to Nick being a “big boy” is due to the fact that he’s 6’6″ tall (!) and weighs over 250 pounds. He barely fits in the passenger seat; his head is up in the overhead window there! I really felt the heavier weight on his side of the helicopter when I picked it up into a hover and that made me laugh.

Some videos referenced in this video:

Points of Interest Discussed:

About Me and the Helicopter

  • I have been flying for about 20 years. My nearly 4,000 hours of flight time is in Robinson R44, Robinson R22, and Bell 206L (Long Ranger) helicopters.
  • The helicopter is a 2005 Robinson R44 Raven II — the same one that appears in the photo at the beginning of the video. You can learn more about them here: https://robinsonheli.com/r44-specifications/ I own this helicopter. It is the third helicopter I’ve owned since 2000.
  • My helicopter has ADS-B Out and is picked up by radar facilities. You can see my track for recent flights on Flightradar24: https://www.flightradar24.com/data/aircraft/n7534D This is a great site for tracking any almost any flight, including the airlines.

About Nick Zentner

About the Video

I try to drop cockpit POV videos every Sunday morning and “extras” with more info about owning and operating a helicopter midweek. (Some channel members get early access to some of these videos.) I also host occasional livestreams with Q&A chats. Subscribe so you don’t miss anything new! And tell your friends. The more subscribers I have, the more motivated I am to keep producing videos like this one.

Any Amazon links on my channel are affiliate links (https://amzn.to/32PLHTD). If you click one of them and buy something, Amazon sends me a few pennies. Enough pennies make a dollar. Enough dollars buy new equipment. It doesn’t cost you anything so I hope you’ll shop with one of those links. Thanks.

Still reading? Thanks! Maybe you’ll consider buying a t-shirt, hat, sticker, or other item from my Etsy store to help support this channel? Start here: https://www.etsy.com/shop/FlyingMAir

Or better yet, to support this channel on an ongoing basis, consider becoming a member. This link will get you started: https://www.youtube.com/channel/UCLGD_GbGsS6YKK_Ekx0QMqQ/join

Autorotation is Controlled Flight

Clearing up something that might not be apparent to non-pilots.

Yesterday, I got the following tweet in my notifications from someone who had never tweeted at me before:

This was mind boggling to me. I replied:

His response came later in the day:

He was referring to one of my YouTube videos, R44 Helicopter Autorotation Practice. That video records my practice session with CFI Trevor Hale at Wenatchee Pangborn Memorial Airport early one July 2019 morning. What I’d hoped to accomplish with the video is to take some of the mystery out of autorotations for non-pilots and to take some of the fear of practicing and dealing with engine failures for helicopter pilots. The video shows the two of us sitting in the cockpit while I simulate one engine failure after another by cutting the throttle and disengaging the drive system from the rotor system. The only thing keeping the blades spinning is me doing what I’ve been trained and tested to do for the past 20 years: full (or almost full) down collective to reduce drag and pitch to maintain optimum airspeed and rotor RPM while flying to a suitable landing spot.

What I guess a lot of people still don’t get is that when a pilot performs an autorotation, she has full control of the helicopter and is flying the helicopter. The pilot does not become a passenger, as she would if she lost control. She can move the helicopter in any direction except up, steering it as necessary to make the spot.

Now let’s say a helicopter has a ballistic parachute system at the top of the rotor mast as this person on Twitter suggests. Can someone explain to me why a pilot might deploy this parachute, thus giving up control of the aircraft, in the event of an engine failure when autorotation makes it possible to stay in control all the way to the ground? I’m not seeing it.

Some of you might know that Cirrus airplanes have this a ballistic parachute system built in. It’s not designed for engine failures, however. It’s designed for situations when the pilot cannot control the plane to a safe landing. All pilots, regardless of what they fly, are trained to deal with engine failures during various stages of flight. If there’s nothing physically wrong with the aircraft’s flight controls or surfaces, there’s really no reason to rely on a parachute to get you to the ground safely. Start the appropriate emergency procedure and fly the aircraft to the ground.

And let’s be honest now: how often do engines fail? Bored one afternoon? Go to the NTSB’s web site and read a bunch of accident reports for airplanes and helicopters. It’s all there. How many of them were caused by engine failures? How many of them were caused by mechanical issues at all? And how many were caused by pilot error?

It isn’t engine failures that pilots should be fearing. It’s their own stupidity. (And yes, I’m a poster child for that.)

So I posted my response, challenging him to explain what I was apparently missing:

I hope I educated him and any others who don’t quite understand what happens if a helicopter engine quits and the pilot does what she’s trained to do.

Why Flying Experience Matters

Experience helps pilots make good decisions.

I’m often amazed by pilots who seem outraged that they can’t find a decent flying job until they’ve logged 500, 1,000, or even more pilot-in-command (PIC) flight time. Too many of these people seem to think that they’re qualified to fly for hire as soon as they get their commercial rating and a few hundred hours of flight time.

How Pilots Gain Experience

Some new pilots don’t seem to understand that the best way to build time quickly is as a flight instructor (CFI) and they stubbornly try to enter the job market without sufficient experience.

I can name more than a few of these people who have been floundering around, taking odd jobs that give them a few hours of stick time here and there with little or no pay. Some even pay to work for the privilege of working for a helicopter owner. One good pilot I met managed to lock in a flying gig with decent flight time — I can’t use the word “job” because he never got paid at all — and added a few hundred hours to his logbook. Then the company’s owner disappeared, leaving the leased helicopter sitting on an airport ramp for its owner to repossess and the pilot locked out of the hangar he’d been living in because he couldn’t afford an apartment.

More than a few of these low-time pilots make their way to Washington in the summertime, with unrealistic dreams of logging hundreds of hours of flight time drying cherries. I’ve had guys offer to fly for me for free just to get the flight time. Really. (News flash: this ain’t Seattle. It’s usually dry here and the likelihood of flying even a dozen hours is slim. Don’t believe me? Ask the four pilots over the past two years who came up to fly for me who didn’t turn a blade in over four weeks.)

I didn’t come up through the ranks of a flight school to build my time, either, and it took nearly five years to get my first 1,000 hours. But it was different for me — I never intended to make flying a career. My second career put me in an excellent financial situation, one that included the ability to buy a helicopter and fly it around for fun. I put nearly 1,000 hours on my first helicopter, an R22, before selling it and buying the R44 I took delivery of in 2005. By that time, my goal was to simply earn enough with the helicopter to pay for the helicopter — a goal I achieved in 2007 when I started doing aerial survey work. That changed, and, by around 2012 (or thereabouts; I’d have to check my tax returns for an exact date), I was earning more as a pilot than as a writer and my flying career was in full swing. By then, I had more than 3,000 hours in helicopters, none of which was flying under the supervision of a flight school.

But is building time as a flight instructor the best way to get experience? I’ll always argue that it isn’t — as I did in a 2009 blog post titled “Real Pilot Experience.” In that post, I discussed the value of my experience at 2,100 hours vs. the experience of several newly minted 300-hour CFIs that I’d flown with. My experience was built flying real-life missions that required planning, decision making, and aviating while theirs was in a flight school environment, mostly with a slightly more experienced CFI sitting beside them. I thought it odd at the time — and I still do — that they were more qualified to teach people how to fly than I was.

Still, how else can a new pilot get the experience they so sorely need to be good, safe pilots on for-hire missions?

At Stehekin
I took Mr Bleu, Penny, and a friend up to Stehekin on Sunday for a nice day trip. In this shot, I’m parked next to the grass runway.

Landings and Wind

The other day, I blogged about the stress I felt at facing my 15th Part 135 check ride. In that post, I wrote a little about the decision making process on one particular maneuver. Here’s what I said:

On my check ride, I was asked to land in a confined space on a hillside. It was a relatively big area — I’ve certainly landed in a lot tighter spaces — and there were no real obstacles, although there were some open range cattle, fencing, and a water tank nearby.

I misjudged the wind. I thought it was light and inconsequential and set up my approach to give me a the best angle of approach. As I came near the landing spot, however, I saw trees blowing and felt the wind buffeting me. Left pedal kept things under control without getting too sloppy.

Still, I decided to go around and approach from a different angle. As I told the examiner as I started going around, “If the helicopter is light, performance is not an issue, and the wind isn’t too strong, I could make this work. But making a bad approach work is probably not a good idea on a check ride.” He agreed.

And that’s the difference between flying as a pilot and flying as a CFI. A pilot flies depending on her skills, the conditions, and her intimate knowledge of the aircraft. A CFI flies depending on the best scenario learned in training. We all know it’s best to land with a headwind and that’s what the CFI will always try to do. But an experienced pilot also knows that you don’t have to fly into the wind if other conditionals make a safe operation possible. In this instance, there wasn’t that much wind and we were light. I knew I could land safely with that right quartering tailwind; I’d done similar landings before. But I also knew that the FAA was more interested in a textbook approach. My going around showed good decision-making skills and the second attempt was a lot smoother with a lot less dancing on the pedals.

A Story about CFIs and Headwinds

About 10 years ago, I had to fly from Arizona to Washington State for cherry season — a 10+ hour flight. In those days, there were plenty of low-time CFIs who wanted to build time in R44 helicopters so they could meet the requirements of SFAR-73 for flight training. I think they needed a total of 25 hours. I’d let these guys, who already had their R44 endorsement, lease my helicopter with me as a passenger to bring me and the helicopter up to Washington State. They’d get cheap flight time and I’d get the helicopter moved at no cost. Win-win.

This particular flight has a lot of stories to tell, but I’ll focus on one: landing at Redding, CA. The airport is towered. We arrived late in the afternoon, light on fuel, from the south. The ATIS said the wind was about 4 knots from the south. The tower told us to land on Runway 34 — in other words, straight in with a slight tailwind. The pilot at the controls — a 300-hour CFI — acknowledged the instruction.

As we got closer to the airport, it came into view. The pilot was flying to the west of it. I assumed he didn’t see it — after all, when you fly at 500 feet AGL it’s not easy to see airports. I pointed it out to him.

“I was going to go around to the west in a downwind and turn midfield and land to the south,” he told me. For you non-pilots, that meant he was going to go around to the left and then land on the same runway but in the opposite direction.

I was floored and took a moment to figure out how to gently explain the problem with that. “Well, the tower told you to land straight in on Runway 34. So you have two options. You can either call the tower and request a landing on Runway 16 or you can land on Runway 34 as instructed.”

(Is it me, or am I correct in thinking that I shouldn’t be instructing a CFI?)

He took a moment to think about it, then changed course and landed straight in on Runway 34. Of course, he came in hot and did a quick stop so he wouldn’t overshoot the parking area. The quick stop was unexpected but well executed and he was so proud of it that he sought my approval when he touched down in our parking spot moments later.

I’m afraid I didn’t deliver. Instead, I said the first thing that came into my mind based on my experience-based knowledge of flight conditions and possibilities: “If you do that at the Grand Canyon on a 90° day with a full load of passengers, you’ll have one hell of a hard landing.” (I can be such a bitch.) Most sea level pilots are completely clueless about flying at high density altitude and I can tell stories about that, too.

In my defense for misjudging the wind, during my high reconnaissance of the landing zone, there were no wind indicators — flags, bodies of water, large trees, blowing dust, smoke, etc. — for me to get an idea of the wind. The trees down near the landing zone weren’t big — maybe 10 feet tall? — and I didn’t see any movement from above. The location we’d departed from less than five miles away had a light wind out of the west. I came in from the north, assuming the wind would be about the same. It was, but it was also a bit stiffer. A better low reconnaissance would have helped me see this, but in the grand scheme of things, it really didn’t matter.

And that’s my point. Whether the wind over my right shoulder was 4 knots or 10 knots didn’t matter. (And yes, 20 or 30 knots would have mattered and I definitely would have noted on such winds.) The helicopter, with half tanks of fuel and just two average sized people on board, was light. It was still cool out and we were operating at about 1500 feet MSL, so density altitude wasn’t an issue. The helicopter’s performance was good. I was making a relatively slow, shallow approach, so airspeed and descent rate would not have put me into a settling with power situation and the minor tailwind would not have caused me to overshoot my intended touch down spot. As I came in on my approach and felt the wind, I could easily keep the helicopter under control with the pedals. I knew from experience — over 2,000 hours flying R44s in all kinds of conditions — that I could make a safe landing.

The only reason I went around was because I was on a check ride. The FAA isn’t interested in seeing pilots who can make a bad approach work. They’re interested in pilots who can made good decisions, even if those decisions mean breaking off an approach to go around and do it differently. So going around is exactly what the examiner wanted to see. He wanted to know that I could recognize a bad approach and act accordingly.

And I need to make one thing very clear: I’ve done go arounds on bad approaches before, without an FAA examiner sitting in the seat beside me. I recall one in particular at Sedona Airport, elevation 4830, years ago. There were three of us on board with luggage and half tanks of fuel, so we were pretty heavy. It wasn’t hot, but it was windy. I made my approach to the helipad following the path I always followed — I flew in there a few times a month. But in this case, it was a little too squirrelly for me and I was dancing on the pedals a lot more than I like to dance. I broke off about 50 feet from the ground and went around. My second approach was more into the wind and a lot smoother. Could I have made the initial approach work? Maybe. But why risk it?

That’s what experience teaches you. It teaches you what works and what might not work and what definitely won’t work. It teaches you how to fix little mistakes before they become big mistakes. Or fatal mistakes.

Does it teach you everything? Apparently not, as my February incident proves. But at least that won’t happen again. I learned my lesson.

Don’t Fly Like a CFI

Before you go ape and blast me for the above heading, let me explain.

A CFI is taught to fly “by the book.” If you’re a CFI you know exactly what I mean. Or you should.

Let’s take an example: taking off. Common instructions tell you to follow these steps:

  1. Bring the helicopter into a 3 to 5 foot hover.
  2. Pitch forward with the cyclic to start moving forward.
  3. Add pedal as necessary to stay in trim.
  4. Push through ETL and pitch for 45 knots, staying within 10 feet of the ground.
  5. At 45 knots pitch for 60 knots to climb out.
  6. When at desired altitude, pitch for cruise speed.

Did I leave anything out? This is from memory and I never taught anyone to fly.

This is basically how low-time CFIs always take off (unless they’re in a confined space or have an obstacle) because (1) it’s how they were taught and (2) it’s how they teach their students. Do takeoffs like this for 1,000 hours and it’s pretty much engrained in you.

But is that how all helicopter pilots take off all of the time? Of course not. The situation you’re in determines how you take off.

Need to get away from the ground quickly because of the potential for dust or damaging downwash along your flight path? (I was once with a low-time CFI when he did a textbook takeoff right past an ultralight sitting idle next to his flight path. He’s lucky the owner grabbed it as we went by.) While a maximum performance takeoff (with its inherent risks) might not be needed, there is some middle ground — and yes, it might require some flight in the scary part of the height velocity diagram.

And landing. I cannot tell you how many times a low-time CFI flying with me entered a traffic pattern at an airport in the middle of nowhere, did a one-mile final approach to land on the runway numbers, and then hover-taxied on the taxiway a half mile to the midfield self-serve fuel pump. What’s that all about? If you’re flying a freaking helicopter, you don’t need a freaking runway. Landing to get fuel? Land at the pumps.

(Want a story about that? I was passenger on a flight my friend Jim did to Prescott Airport (PRC) in his Hughes 500c. We were headed for the restaurant, which was adjacent to a parking area. The tower there put him on a wide downwind for one of the runways on the other side of the airport. Jim barked into the microphone: “Negative! Helicopter One-Two-Three-Alpha-Bravo is a helicopter! We want direct to the restaurant! When the controller recovered from the shock of getting this demand after working with flight school pilots all day every day, he gave Jim exactly what he wanted. Did I mention that Jim was a retired Eastern Airlines pilot?)

About high density altitude experience

Landing or departing at high density altitude is no laughing matter, especially if your ship is heavy and your experience is limited. That’s one of the lessons learned from this doomed flight in Easton, WA about 11 years ago. That’s what I was thinking of when I departed with three passengers at near max gross weight from an off-airport landing zone on a hot day this July.

I’m not exaggerating when I say that I struggled to gain altitude without puling pitch past the redline on my manifold pressure gauge. There was hardly any wind, which didn’t help matters at all, and the air temperature was about 90°F. When you consider our landing zone elevation of about 800 feet, that put our DA at about 3200 feet. Fortunately, the area around us was clear of obstacles and we inched up into the sky.

Once on our way, everything was fine. But I knew I had two problems ahead of me: making a safe landing in a confined space landing zone at 1400 feet and then departing from that confined space when it was likely to be up to 10°F hotter. That put us at about 4500 feet DA. We would not burn enough fuel on the 20-minute flight to make a significant difference in weight.

The landing didn’t worry me that much. I have a lot of high DA experience and it really paid off. I came in smoothly and landed to a hover, then quickly but surprisingly gently put it on the ground. My passengers climbed out and went about their business. While I idled there, I looked around me at the shop buildings, wires, and mature apple trees, and decided that there was no way I’d depart from there with all of them on board. I didn’t need performance data to tell me that it wouldn’t be safe. That 2007 Easton crash was up front in my mind.

So I called my client and told her that I’d pick up the group at an airport about 5 miles away. It was only a minor inconvenience for them; they were attending a meeting at the orchard and the orchardist had a truck he could take them to the airport in. I departed the orchard landing zone and waited for them at the airport.

My OAT gauge read 103°F when they met me for departure. I loaded them up, pointed the helicopter into the wind, and did one of those textbook takeoffs over the ground and across the runway of the deserted farm country airport, pitching for a 60 knot climb before I reached the fence line. We climbed out smoothly and safely, which is what any pilot should aim for.

And here’s my argument for why experience matters: According to the accident report, the Easton accident pilot had “a total time in helicopters of 2,122 hours, 1,492 hours of instruction given in helicopters, 160 hours in the last 90 days, 24 hours in make and model…” While 2,122 hours of helicopter experience is considerable, she had just 24 hours of experience in the make and model of the crashed helicopter (an R44). She was based in Seattle and had done the vast majority of her flying at sea level. The calculated density altitude at the crash site was 6,841 and the helicopter was only 33 pounds below max gross weight. The probable cause was listed as “The pilot’s improper planning/decision in attempting a downwind takeoff under high density altitude conditions that resulted in a loss of control and impact with terrain.  Contributing to the accident were the helicopter’s gross weight in excess of the maximum hover out of ground effect limit, a high density altitude, and the gusty tailwind.” I have to think that her limited experience with the helicopter and high DA conditions, combined with an understandable desire to please the client, contributed to bad decision making and execution of departure maneuvers.

Only experience can help protect you from a similar fate in a similar situation.

But what I’m trying to say here when I tell pilots not to fly like flight instructors goes beyond modifying standard procedures to fit a situation. It’s this: You will never become a better, more experienced pilot if you don’t push the edges of what’s comfortable to you.

Now I’m not saying you should go out and fly like a lunatic, pushing your skills and aircraft to their limits. That’s a good way to get yourself and possibly others on the ground hurt or killed. I’m saying that you should push gently to expand your comfort level and learn valuable lessons along the way.

Has your flight school forbidden flights when the winds exceed 15 knots? Fly when the wind is 20 knots. Then, when that’s comfortable, bump it up to flying at 25 knots. (Obviously, you should consult your pilot operating handbook to see if there are any limitations.) Don’t be like I was when I went to work at the Grand Canyon. After being taught to avoid flying in high wind situations, I was suddenly required to fly when the wind speeds were up to 50 knots. I learned to deal with high wind a little faster there than I probably should have.

Does your flight school limit flights to a handful of airports? Fly somewhere else. (Yes, get permission if necessary. Duh.) One of the best ways to get real-life flying experience is to fly to different places. It works your flight planning, navigation, and communication skills. It challenges you to think about your approach and landing rather than to do the same thing you’ve been doing for weeks or months.

If you’re a sea level pilot — I’m talking about someone who has learned to fly and usually flies mostly at or near sea level — do yourself a huge favor and fly to a destination above sea level. Someplace high enough where you can really feel the difference in the aircraft’s performance. Then take it to another destination even higher. Do you really want to get your first high density altitude experience when you get a job flying tours at the Grand Canyon, elevation 6600 feet? (And yes, I’ve done running takeoffs from Grand Canyon Airport twice: once in my R22 and once in my R44. They teach us that stuff for a reason.)

Do long cross-country flights. Solo. That’ll really test your flight planning and navigation skills — especially when unforecasted weather or other conditions force you to choose an alternate destination airport or land off-airport to wait out a storm.

I guess what I’m trying to advise is to do the things CFIs don’t generally do when they’re working as CFIs. But don’t go nuts. Build your skills and confidence levels slowly.

And shame on flight schools that don’t give their CFIs or commercial students the opportunity to do these things.

Mr Bleu and a Friend
Here’s Mr Bleu with a friend from Lake Chelan. We occasionally work together to take more than 3 passengers on charter flights. Here, we’ve landed in a soccer field beside a cherry orchard.

Passionate for a Reason

I feel very passionate about real life vs. CFI flying and even more so after my own accident.

I’m not a complete idiot. I realize that my accident was caused by two things:

  • Distraction in the cockpit. I was flying VFR and I should have had my eyes outside the cockpit. Instead, I allowed myself to get distracted and failed to maintain awareness of my flight path.
  • Lack of experience with night flight. Seriously! What was I thinking? I’ve got 3,700 hours of flight time, but less than 100 hours of that is at night. How could I possibly have allowed myself to get as complacent as I obviously was about the additional challenges of flying in the dark?

I’m lucky to be alive and I know it. And although I’m seriously embarrassed about the mistakes I made that led to my crash, I’m not too embarrassed to use my learning experience to teach others.

Throughout this blog, you’ll find lots of lectures about safety, many of which touch upon NTSB-analyzed accident reports. When reading between the lines, so many of them can be traced back to insufficient pilot experience with the situation or aircraft.

Don’t be one of those pilots. Push yourself gently to expand your skills and knowledge with real-life scenarios you can only get from non-CFI style flying. And never stop learning to be a better pilot.