I try some meat substitutes and come away unimpressed.
I first heard of the Impossible Burger on NPR, which I listen to quite regularly. It was mentioned in a piece on one show and then, a few days later, on another. The folks talking about it seemed quite impressed claiming that they’d finally nailed a plant-based burger.
Of course, I wanted to try one. I like trying new foods. So I did some research and learned that the local Red Robin burger joint sold them. As much as I dislike Red Robin — I’m not a fan of chain restaurants and I’d had a very unsatisfactory experience at the local one — I went to give it a try.
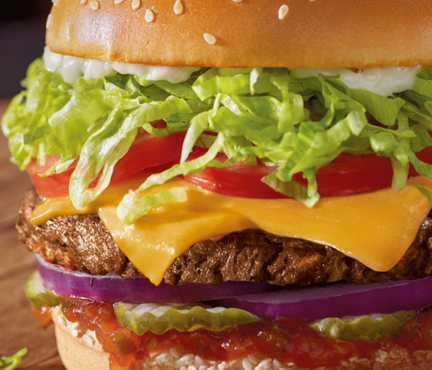
From the Red Robin website: the Impossible Burger.
They had different versions on the menu. I ordered some sort of cheeseburger. When it arrived I realized that I’d forgotten to tell them not to fill the bun with sauces and lettuce and tomato and whatever else they stuffed in there. It was a mess. I ate it. It was tasty, but I can’t say I tasted anything resembling beef.
I tried again a few weeks later. This time I told them I wanted it plain: the burger and the cheese on the bun. Nothing else. Now I could actually taste what I’d come to taste. And I was not impressed. If people thought this tasted like beef, I had to wonder what kind of beef they were eating.
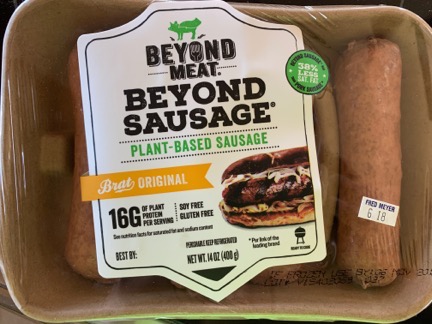
Beyond Sausage packaging.
Fast forward a few weeks. I was in my local Fred Meyer supermarket shopping the meat department and I saw Beyond Meat burgers. Beyond Meat is an Impossible Foods competitor. On a whim — remember, I like to try new foods — I bought a pack of two burgers. A while later, while chatting with the butcher there, he mentioned that the sausage was really good. I figured, why not? I bought them, too.
I got home and took a closer look at the package. I was interested in calorie count. And that’s when I got my first shock: 190 calories for one sausage.

The nutrition facts and cooking instructions for Beyond Sausage. One sausage gives you 25% and 21% of your daily requirements of fat and sodium, respectively.
How could that be? It was made from vegetables. A closer look at the ingredients explained all. The first four ingredients, in order, were water, pea protein, coconut oil, and sunflower oil. Oil. I’d bought a mixture of peas, water, and oil. And this was supposed to replace sausage?
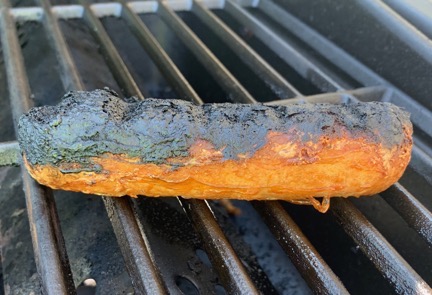
I guess when one of your primary ingredients is oil, you’ll burn pretty quickly.
I heated up my propane grill, lowered the flame, and closed the lid. I hadn’t looked at the cooking instructions yet. I figured I’d cook it like I cooked a sausage. I went back outside a few minutes later to turn them. The grill temperature gauge said 350°F and smoke was billowing out. I lifted the lid in time to see the sausage on fire. I pulled it aside with a fork. Shit. Definitely not edible.
One down, three to go.
I decided to look at the cooking instructions. It said to heat the grill to 500°F (!), brush the sausage with oil (!), and grill 6 minutes per side. If I’d followed those instructions, I likely would have set my neighborhood on fire.
I lowered the flame and tried again. It cooked more slowly. Too slowly. I raised it. Now it was cooking too fast. I found myself standing by the grill, watching it cook so I wouldn’t destroy another one.

Penny can tell the difference between food and nonfood.
Meanwhile, I cut off an unburned piece of the first one and offered it to Penny. She sniffed it and looked up at me as if to say, “Am I supposed to eat this?” I wound up throwing it away.
When the one on the grill was done, I put it on a plate beside the salad I’d prepared for my “healthy” meal. I wanted to pretend it was normal food.
I tasted it. The flavor was good — it tasted like some version of a sausage. It’s amazing what seasonings can do.
But the texture was all wrong. It was spongy with a uniform texture not like any real meat. It was a lot like the frozen chicken meatballs I keep in the freezer for a last minute pot luck contribution — bake them with homemade honey barbecue sauce and they’re tasty. But spongy. Even real meat, when processed enough with additives, ceased to be realistic. These sausages never had a chance.
So no, I wasn’t impressed. I won’t buy them again.
Oddly, I did have two left and was determined to eat them. So one afternoon, for lunch, I cut one up into small pieces and threw it in a frying pan with some chopped onions and broccoli. When it was mostly cooked up, I dropped an egg on top, covered the pan, and let the egg cook until the white was set and white. This is a typical meal for me — I have chickens, after all, and no shortage of eggs — although I usually use bacon, real sausage, or ham as the meat protein. To my surprise, it was actually quite tasty. The sponginess wasn’t that noticeable in such small pieces.
But no, I’m not sold enough to buy it again.
The way I see it is this: there is no flavor, nutrition, or financial benefit to buying Beyond Meat sausage (and likely burgers, although I admit I haven’t tried them yet). They don’t taste any better than real meat alternatives. They’re not, by any stretch of the imagination, a healthy food. And they’re not cheap. I’m not sure why anyone other than a strict vegetarian or vegan would buy these.

 Now I know what you’re saying.