Making Greek Yogurt

It’s easy and it just makes sense.

I eat a lot of yogurt. I like yogurt for breakfast — especially with granola — and yogurt for snacks. I eat salad dressing with yogurt in it, enjoy frozen yogurt, and sometimes even eat flavored yogurt for dessert.

I buy plain, non-fat, Greek yogurt. Greek yogurt is basically the same as regular yogurt but with a lot of the excess whey removed. You know what whey is if you’ve bought yogurt or cottage cheese or ricotta in a large container and used only some of it: it’s the liquid that accumulates at the top after you’ve scooped some out.

Greek yogurt is more properly known as strained yogurt and is also called yogurt cheese or labneh. You can read more about it on Wikipedia.

Not All Greek Yogurt is Created Equally

Creamy, delicious Greek yogurt has become wildly popular. Unfortunately, that’s causing a serious environmental problem: an overabundance of whey, the by-product that must be discarded. As this excellent article about the problem in Salon mentions, there’s 2-3 ounces of whey for every ounce of Greek yogurt produced. This video explains the problem and potential solutions:


A quick video explains the problems with mass-produced Greek yogurt and some possible solutions.

The article also suggests that you can help the environment by making your own Greek yogurt (instead of buying it) and using the whey that’s produced in your own kitchen and garden.

What some Greek yogurt makers are doing to circumvent the problem is “faking” Greek yogurt by adding artificial thickeners. The article, “Greek Yogurt: What’s Real & What’s Not,” lists the actual ingredients of many popular plain Greek yogurts. You might be surprised to learn that your favorite creamy yogurt is made that way by the addition of thickeners like corn starch and gelatin. This is covered in articles like “Greek Yogurt Wars: The High-Tech Shortcuts vs. The Purists” on The Kitchn and “High-Tech Shortcut To Greek Yogurt Leaves Purists Fuming” on NPR’s The Salt.

Real yogurt should have just two ingredients: milk and active yogurt cultures such as S. Thermophilus, L. Bulgaricus, L. Acidophilus, Bifidus and L. Casei.

I don’t know about you, but when I buy yogurt, I’m not interested in buying corn starch and gelatin. Take-away lesson: Read the ingredients list and make sure you’re paying for what you really want.

Or make your own.

The Recipe

My wasband wasn’t a big yogurt eater, but he told me, time and time again (as we often do in long-term relationships) that his Armenian grandfather used to make his own yogurt. I was kind of impressed, mostly because I thought it was difficult to do. That’s until I stumbled onto a recipe posted by my friend Tammy on her blog. I tried it and had immediate success. Since then, I make about half the yogurt I eat.

Tammy’s recipe can be found here. It’s got lots of photos with the step-by-step instructions. I find myself searching for the recipe time and time again; for some reason I can’t remember the important temperatures. So I’ve decided to put the short version here, mostly for my own reference. I recommend you stop by Tammy’s site and read it there before you try it. And then leave her a comment telling her about your results. I think she’d like that. (Most bloggers do like comments.)

Tools:

I don’t usually include a Tools section in my recipes, but there are four that you must have (beyond what you might expect in a recipe):

  • Thermometer. I use an instant read meat thermometer. It needs to go up to at least 200°F. Temperature is extremely important in this recipe, so don’t try it if you can’t take an accurate temperature reading.
  • Whisk. I have a plastic whisk, but that’s because I use non-stick cookware. A regular metal wire whisk should be fine.
  • 2 1-quart mason jars with tight-fitting lids. Even if you don’t can your own foods, you really should have a few of these around your kitchen.
  • A small cooler taller than the jars. Make sure it has a tight-fitting lid.

Ingredients:

  • 1/2 gallon non-fat milk. I used to make this by the quart, but when I started “Greeking” it (see below), the yield was lower so I started making 2 quarts at a time.
  • 1/4 cup real plain yogurt with active yogurt cultures. Did you know that not all yogurt is just yogurt? I discuss that above, in case you skipped it to get to the recipe. I recommend the following Greek yogurts: Chobani, Dannon Oikos, Trader Joe’s, Athenos, and Stonyfield. If not using Greek yogurt as a starter, check the ingredients list to make sure the only ingredients are milk and yogurt cultures. This quantity, by the way, is more than Tammy uses. Let it get to room temperature.

Instructions:

  1. Heat the milk to 190°F, stirring occasionally. I do this in a microwave. I have a huge glass measuring cup that holds 1/2 gallon. I put it in the microwave and heat it on high. In my current microwave, it takes 20 minutes to get to 190°F. I know this by repeated temperature readings as I heated it. (My old microwave in Arizona had a temperature probe, which was probably its best feature — and definitely the reason I packed it when I moved. I’d put the probe in the milk, tell the microwave I wanted the milk at 190°F, and it would simply stop zapping when the temperature reached 190°. I’m looking forward to installing it in my new kitchen — despite the fact that it’ll be nearly 30 years old by then.) Of course, you can always do this in a pot on the stove.
  2. Remove the milk from the heat source and allow to cool to about 120°F. I do this by letting it just sit on the stovetop.
  3. In a small bowl, mix about 1/4 cup milk with the 1/4 cup yogurt. This smooths out any lumps and makes it easier to blend with the rest of the milk in the next step.
  4. Whisk in yogurt/milk mixture in to the rest of the milk. Mike sure it’s blended well, but try to minimize bubbles.
  5. Pour the milk mixture into the mason jars. Fill them to the very top. Then close them up tight.
  6. Place the mason jars into the cooler and fill the cooler with the hottest tap water you can get out of your sink. My water heater delivers 130°F water in my kitchen, which is just a tiny bit too hot for my hands — but otherwise perfect, in my opinion. Fill to the very top of the jars, almost so they’re floating in it.
  7. Cover the cooler tightly and set aside for 6-8 hours. When I made this in Arizona in the spring and autumn, I used to set it outside on the patio in the shade. In the winter, it stayed inside. The idea is for the water (and milk) to cool slowly.
  8. Remove the jars from the cooler and discard the water.

At this point, the jars should contain yogurt. You can pop them in the fridge to enjoy at your leisure or “Greek” it.

“Greeking” the Yogurt

My only gripe with Tammy’s recipe — or at least the way it usually came out for me — was that the yogurt tended to be very runny. I don’t like runny yogurt.

I started making yogurt right around the time I discovered Greek yogurt. I actually stopped making yogurt because I preferred Greek yogurt and didn’t know how it was made.

Then I did some research and discovered that all I needed was one more step: strain out the extra whey.

Greek Yogurt Maker
You can get this nice Greek yogurt maker for about $22 on Amazon.com.

While you could do this with cheesecloth in a strainer and make a big mess on your countertop or in your fridge, I went online to Amazon.com and bought a gadget: a Euro Cuisine Greek Yogurt Maker.

To “Greek” your homemade yogurt, add these steps to the recipe above.

  1. Refrigerate the yogurt. I suggest overnight to really chill it down and give it as much substance as it can get on its own. Just put the jars in the fridge.
  2. Empty the yogurt into a strainer lined with cheesecloth or a nifty Greek yogurt maker like the one I bought. If using a strainer, you’ll want a bowl beneath it to catch the whey.
  3. Straining Yogurt
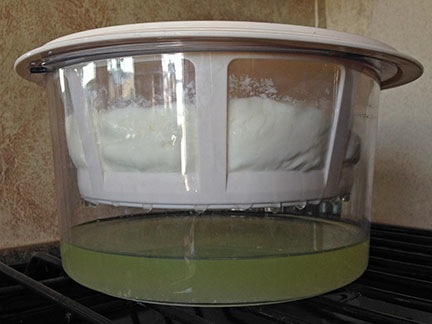
    This yogurt has been straining in my refrigerator for about 90 minutes. The yellow liquid is whey.

    Let strain for 2-4 hours, preferably in the refrigerator. The amount of time you allow it to strain will determine how thick the yogurt is. I have, in the past, forgotten about it and let it go overnight. The resulting yogurt was too thick, almost like cheese.

  4. Remove the yogurt from the strainer and place it into a container you can seal. I use (ironically) old yogurt containers.
  5. Give the yogurt a good stirring. This will smooth out any lumps and make it creamier.
  6. Store in the refrigerator. Obviously.

The removal of the whey should cut the total quantity of yogurt in half.

If you’re wondering what to do with the whey, this page has some excellent suggestions. I give it to my chickens and blend it with water for my tomato plants. I also, on occasion, make it into ricotta. As you might imagine, its very high in calcium but supposedly tastes very bad on its own. I’ve been too cowardly to try it.

Cost Considerations

One of the most mind-blowing things about making my own Greek yogurt is the cost savings. Yesterday, I spent $1.69 on half a gallon of skim milk. I already had yogurt for the starter and can use the yogurt I made for the next starter, so there’s no additional cost. This half gallon of milk will yield about a quart of Greek yogurt.

The last time I bought Greek yogurt, it cost $5.89 for a quart. So I’m saving more than $4 every time I make it instead of buy it. With two quarts a week — my average consumption — that’s $416/year saved.

And you know what Ben Franklin said about saving pennies…

Flavoring Yogurt

I have two things to add here.

First, a while back when I posted on Facebook about making yogurt and included a photo, one of my friends commented to ask, “When do you add the flavor?” Well, there’s no reason to add flavor because yogurt already has flavor. It’s yogurt flavor.

However, if you like to add flavor, you can always mix in some honey or a spoonful of your favorite jam or preserve. I like apricot, which I keep around mostly for a condiment on grilled pork.

And that brings up my second point, also from Facebook. A friend posted an image of a bowl of yogurt with fresh strawberries on top of it. Her caption: “This is how you flavor yogurt.”

Yes, fresh fruit is the best way to do it. Don’t add sugar; add more natural ingredients. It’s more healthy for you and it really is quite tasty.

What do you think?

Do you make your own yogurt? Do you think it’s worth the time?

Share your tips, thoughts, and recipes (or links to recipes) in the comments for this post.

View to a [Chicken] Kill

Not quite as gross as I expected it to be.

One of the things about living in farm country is that there are a lot of farmers around. I’m not just talking about the folks who grow corn or soybeans or even the cherry trees that originally brought me here in 2008. I’m also talking about people who raise cows and chickens for milk and eggs and meat.

I ran into an acquaintance at the local Coastal Farm and Ranch store about a month ago. I was looking for a chicken fencing; he was buying a ton of feed for meat chickens. We chatted about our chickens, ending up with an offer to buy some freshly slaughtered birds the next time they killed. I ran into him and his spouse again a week later and placed my order for two birds — which is about all I can fit in my RV’s tiny freezer. I asked if I could come watch them slaughter the chickens and was told I could. I wasn’t sure how I felt about it, but I suspected it would be, at the least, very interesting to see.

I was invited to their next slaughter, but had to turn down the invitation because of a scheduling conflict. (I spent that day in Woodinville, wine tasting with a hard cider maker friend. I really need to blog about that excellent day.) But they slaughtered again on Saturday morning and I made it my business to attend.

First came a tour of the facilities. The birds live in a relatively spacious pen beneath a deck. All my non-farming friends talk about “free range” — this is about as free as these birds want to be. They basically do four things: eat, poop, sit, and sleep. They are not interested at all in wandering around, pecking at the ground and doing bird things.

This could be because of selected breeding. Meat chickens are bred to grow quickly. The birds in the pen were 6 to 8 weeks old and ready to slaughter. They were huge — far bigger than my 7 week old laying chickens — and downright lazy. They just sat around in the shade and seemed perfectly happy about it. Melanie, who’d invited me that day, said that if they don’t slaughter them now, they’d likely die of heart attacks within the next few days. She’d already lost two of them that week. These chickens are not bred for longevity.

We talked about “free range” and she confirmed what someone else had told me: if given access to a large open area, these chickens would do the same thing they were doing right then: nothing. It would be a waste of space. They’d tried it and had seen for themselves.

I can actually confirm a bit of this. My 7 laying chickens have a 9 x 25 enclosure and they spend most of their time either in their coop or in the shade of some straw bales stacked up outside their yard.

Melanie gave me a quick rundown of the process. Rather than just narrate, why not look at the photos I took and read the captions?

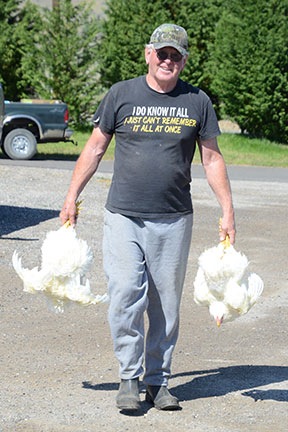
Carrying the Chickens  Carrying the Chickens
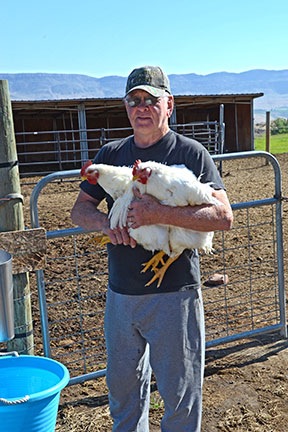
Al was in charge of fetching the chickens from the pen. He took one or two at a time. He said he talked softly to them as he caught and carried them, telling him that he was sorry but that they were going to taste good. And before anyone freaks out about him carrying them by their feet, that’s actually how it’s supposed to be done to calm them down.

Chicken in Cone Chicken in Cone
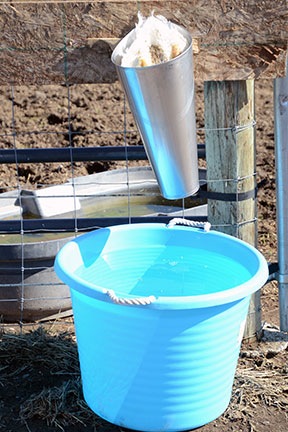
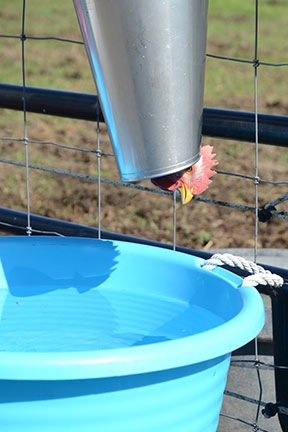
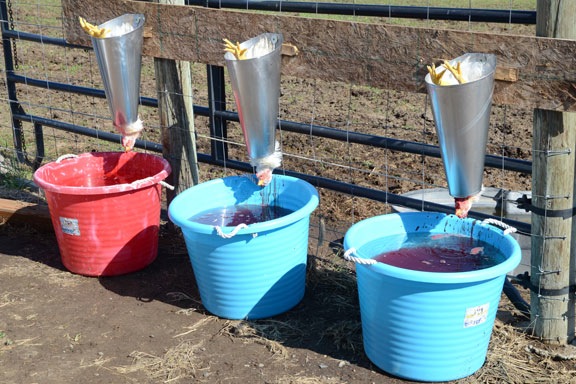
Al placed each chicken head down in what’s commonly known as a killing cone suspended over a large basin of water. After a few minutes, the chicken relaxes enough to let its head through the bottom of the cone.

Slit throat
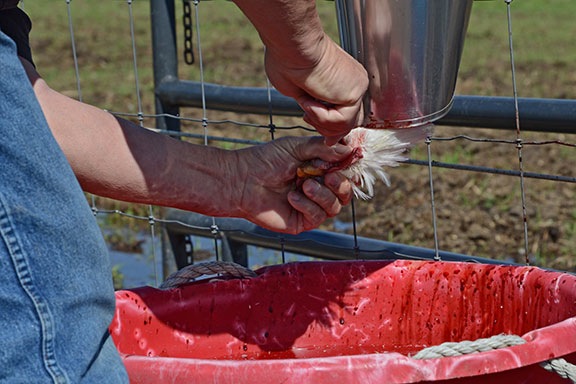
Next, Dennis stepped up with a very sharp knift, grabbed the chicken’s head, and slit its throat.

Draining Blood
The blood drained from the chickens into the bins of water. Although the chickens died very quickly — this is supposedly the most humane way to do this — they often had muscle spasms that made them jerk around inside the cones. That was probably the worst part of this whole thing — seeing those dead chickens move as the blood drained from them.

Dipping Chickens  Dipping Chickens
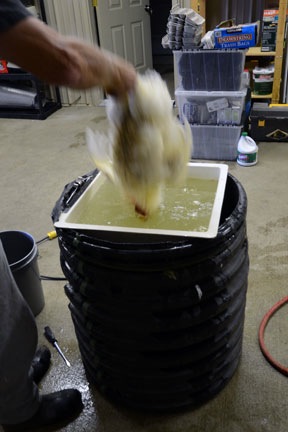
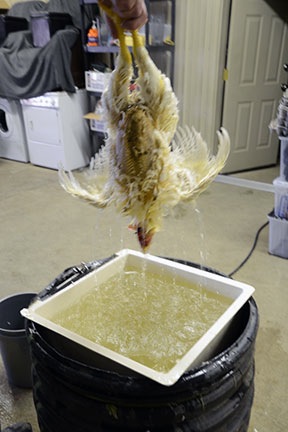
When the chickens stopped moving and the blood had sufficiently drained, Al took them, one at a time, to a vat of very hot water to loosen the bird’s feathers. The water had to be an exact temperature: too hot and the skin would split when the feathers were plucked; too cool and the feathers wouldn’t come off. He dunked each bird 3 times, swirling it around in the water before taking it back outside.

Off with their heads!
Back at the butchering table, Dennis used his sharp knife to cut off the chicken’s head.

Into the plucker  Plucking Chickens
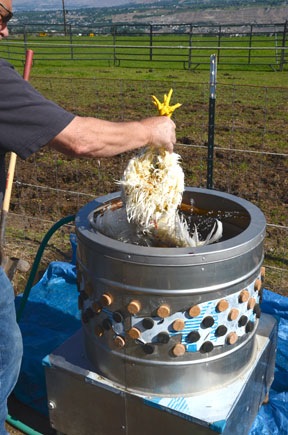
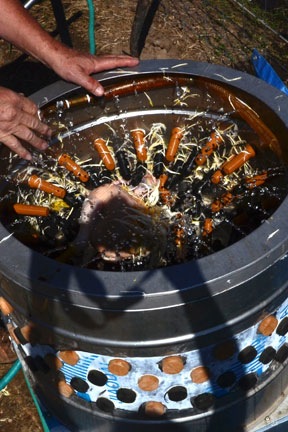
Then Dennis dropped the bird into the chicken plucker and turned it on. This machine has a bunch of rubber-covered fingers that pull the feathers off the bird as it bounces around inside. The process takes less than 10 seconds and splashes quite a bit, so I couldn’t get a decent photo of it.

Ready to Butcher
The chickens emerge with only a few feathers left, all ready to be butchered.

Ready to be butchered
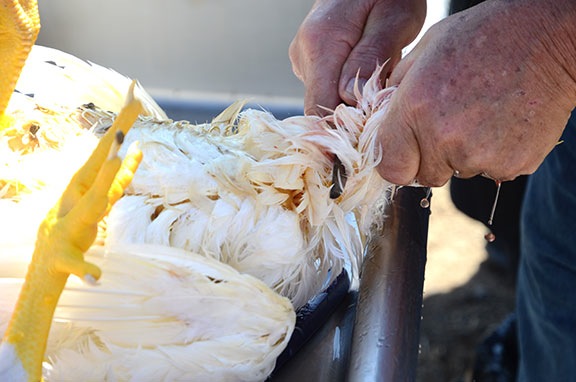
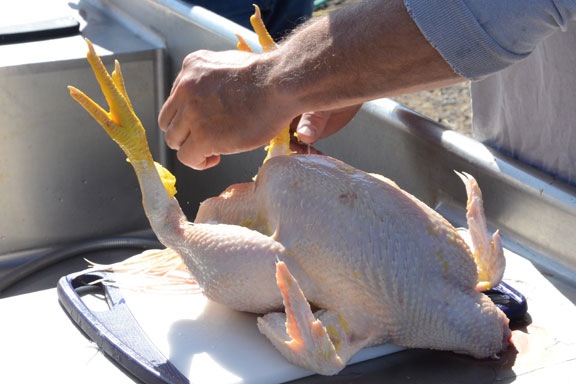
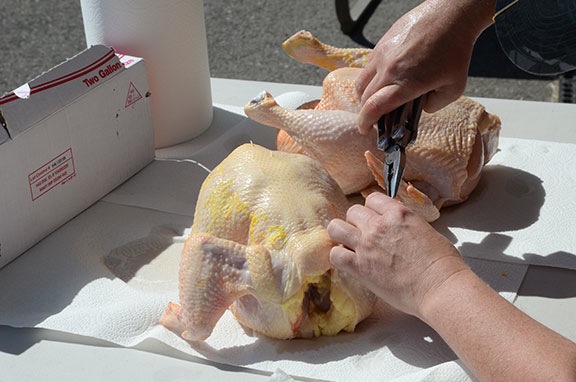
Jill and her husband did the butchering, using sharp knifes and cutting boards on a stainless steel restaurant sink. The feet are cut off first.

Getting out the Guts
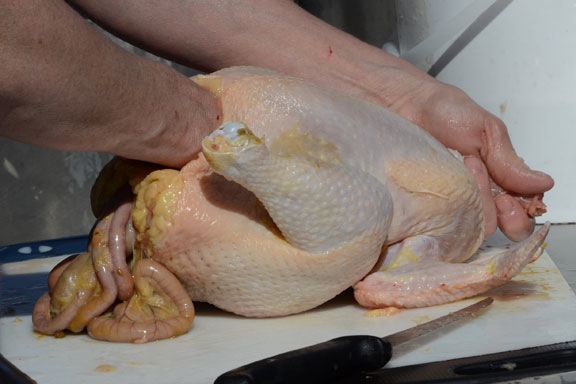
Next, they open up the chicken’s bottom end, reach inside, and scoop out the innards. (This part is pretty gross.)

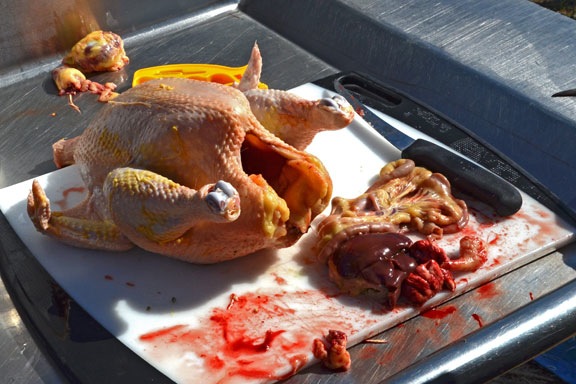
Chicken Guts
They saved the hearts and gizzards — for the dogs, I think — but threw away the rest of the guts, including some really excellent livers that my mother-in-law would have killed for. (People outside of the NYC area don’t seem interested in chicken livers.)

Washing Chickens
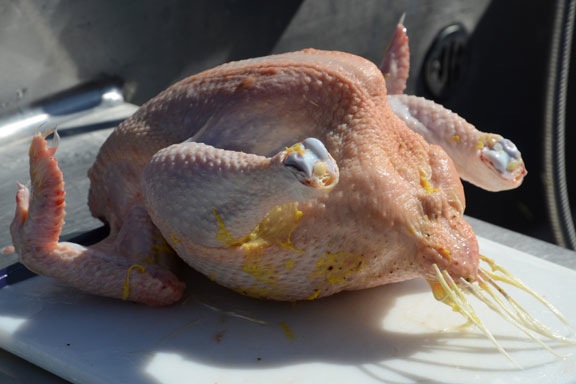
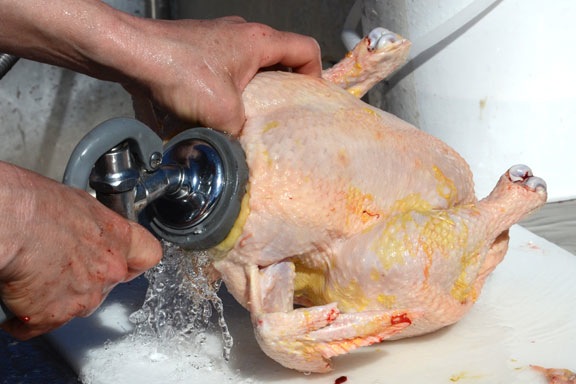
There was lots of washing with fresh, cold water. Afterwards, the chicken was put into a large plastic container filled with ice water. It stayed there for about 15 minutes before being transferred to another plastic bin of ice water.

Packaging
Melanie’s job was to pull off any remaining feathers and exterior fat, pat the chickens dry, and then vacuum seal it. From there, it went right into a freezer.

We started work at about 9:30 AM and, when I left at about noon, 25 birds had been slaughtered. Melanie was almost done packaging them. It was a lot of work.

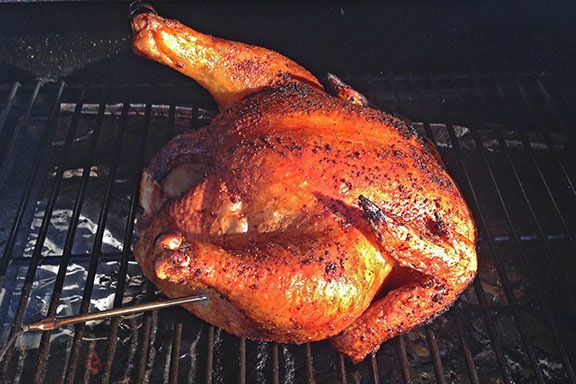
I got to take home one fresh bird and one frozen one from the last slaughter. I cooked up the fresh one on my Traeger grill and it was good — although I have to admit that it wasn’t quite as good as I expected.

Grilled Chicken
Looks yummy, no?

It tasted like chicken.

Would I do this again? I can’t see any reason to. And although I might buy chickens from Melanie and company in the future — mostly to support local farmers — I don’t think I’d stop buying store-bought chickens.

Chickens Again, Part II: The Coop

The challenge was building with scrap wood I already had.

About six weeks ago, I bought eight baby chicks. I was raising them in a stock tank in my shed. You can read more about them and the chicken yard I built for them with a friend here.

The chicken yard was working well. The large feeder and automatic waterer got them through my six day absence when I went to California on a business trip in mid-May. They’d accepted the tipped over stock tank with plywood lean-to as a shelter. But I wasn’t fooling myself. They’d need a real coop — someplace they could roost at night that also had nest boxes for laying eggs.

Buying a coop was out of the question. A coop big enough for them would cost hundreds of dollars that I simply wasn’t willing to spend on chickens when I was facing monster construction bills for my new home. Besides, I had all kinds of scrap lumber and pallets lying around. Couldn’t I come up with a design that utilized them?

I spent a lot of time thinking about it. Probably a lot more time than I needed to. Finally, I just gathered up one long pallet, two matching shorter ones, and all the plywood I’d used to build my bee shelter the previous autumn. I borrowed a pair of saw horses from the builders and, on Memorial Day Weekend, I went to work.

Coop Construction
I used my ATV to drag the 36×76-inch floor pallet from the bee area to the chicken yard. The damn thing is heavy.

Coop Construction
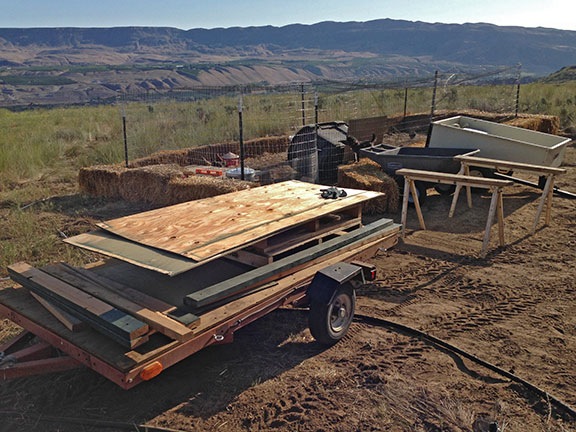
I used my Craig’s List Special flat bed trailer to move all the other pallets and wood into my work area. It also made an excellent work surface. (I’m really looking forward to having a real shop.)

Coop construction
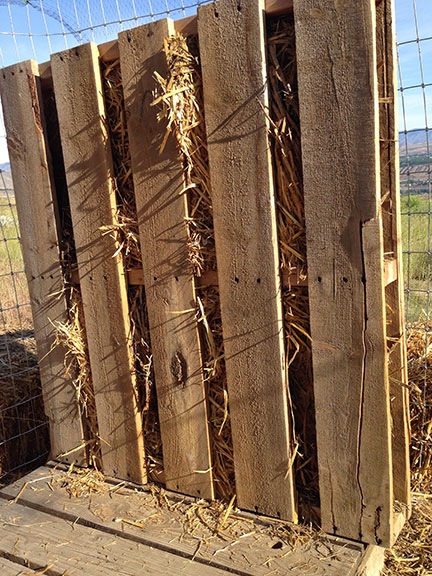
I stuffed the wall with straw, facing the side with more wood planks in toward the chickens. The outside would get a plywood skin.

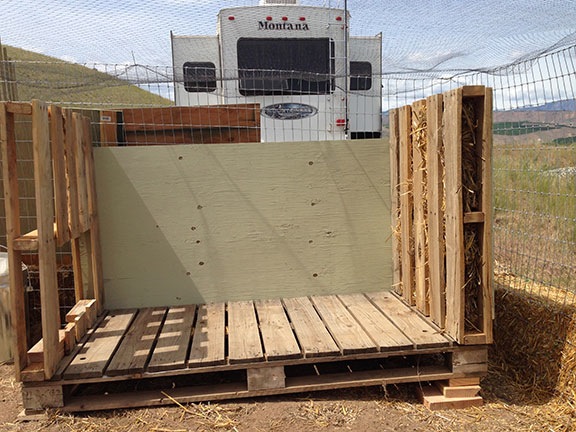
The design is simple: the big pallet at the bottom for a floor and the two smaller pallets on the sides as walls. I stuffed the walls with straw — which I have absolutely no shortage of — for insulation; this was something I’d seen on the web. Then I used plywood sheets and 2x4s to make the back and roof and to cover the outside of the walls.

Coop Construction
Leveling the coop floor took quite a few blocks. I painted the plywood sections before putting them in place. The paint, by the way, was a high quality, no primer needed exterior paint I bought for just $10/gallon because it was a coloring mistake.

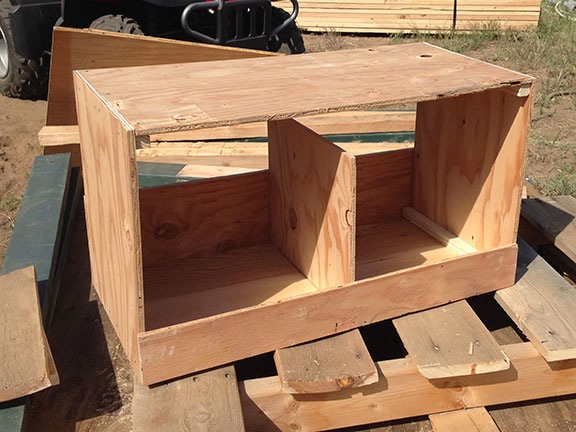
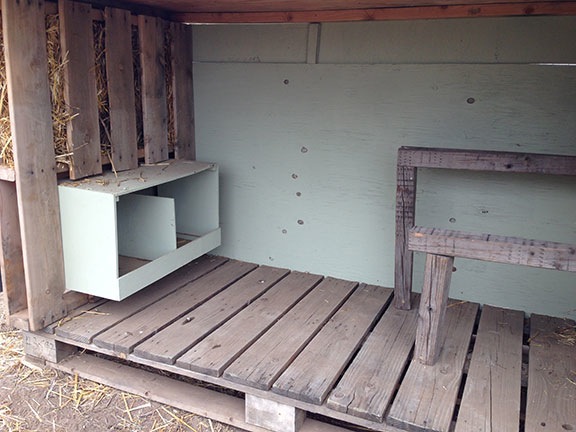
The tricky part was the nests, which I wanted to set into one of the walls with a hinged back for collecting the eggs. I’d never built anything so complex before and I had to give it extra thought to do it without screwing up. They came out remarkably good.

Coop Construction
The nests were a challenge — at least at first. They came out good. I painted them before installation in the side wall.

I got to use my new circular saw for the job. I’d never used a circular saw before so I was learning by doing. My first few cuts were satisfactory, but not much better. But by the end of the day, I was making rip cuts in 1x 2s to make the 1x1s I needed for the next boxes.

While I worked, one of my chickens died. She’d been acting kind of sluggish all day long and had even let me pet her. Later on, I found her keeled over in the temporary shelter. I buried her on the far east end of my property.

I ran out of steam around 7 PM, right after putting the roof on. It had been a long, hot day. I’d get back to it in the morning.

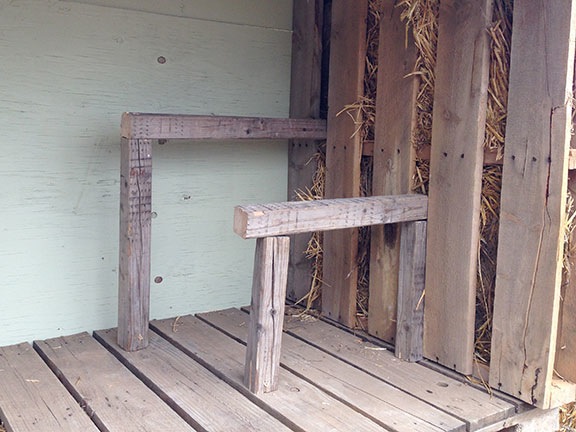
The next day, I designed and built two perches out of one of the dozen or so 2×2 posts a friend had given me. Originally, I was going to make two tall ones but I started wondering if the young chickens would be able to jump that high. So I wound up with a tall one and a short one.

Coop Construction
The two perches should provide enough space for seven full-grown chickens.

Coop Construction
The nest boxes fit snugly into the side wall. The outer wall is hinged to provide access to the eggs from the outside.

I had just enough plywood left to put two outer panels on the front of the coop. This would provide shade in the morning and shelter from the wind on the rare instances when it blew from the east.

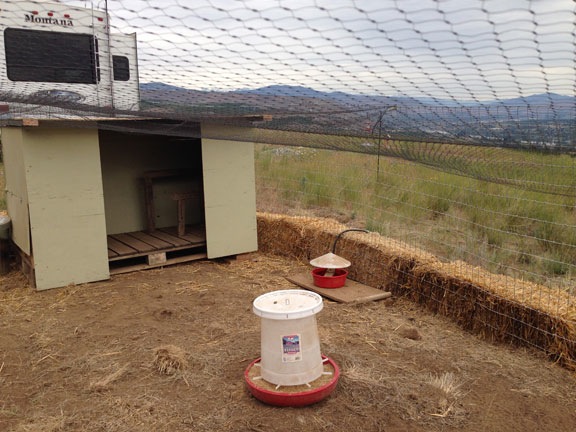
Chicken Coop
The finished chicken coop.

Although the coop is pretty much finished, I do have one more thing to do: I want to put roof shingles on the top piece of plywood. I bought the shingles and the nails; I just need to get around to it — hopefully, before the next heavy rain.

This was an ambitious project for me, requiring me to make use of a limited amount of lumber and tools that were brand new to me. I can’t tell you how rewarding it is for me to dream up a plan for a project like this and then complete it by myself. Every time I reach beyond what I think are my limitations and succeed, I prove that I’m capable of doing everything I need to do.

Too many women rely on men for even the most basic things. I’m very proud that I’m not one of them.

Chickens Again, Part I

Getting started with a new batch of chickens.

Penny with Chicks
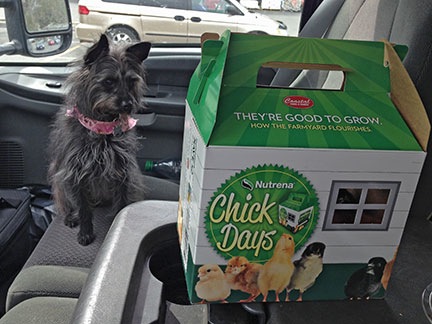
Penny suspected trouble when I got into the truck with this little box.

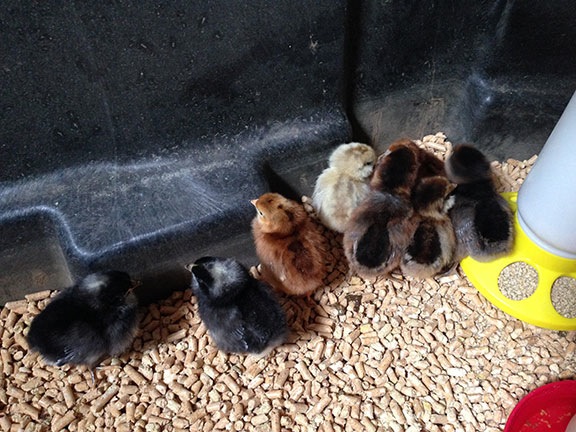
A few weeks ago — just a few days after returning from my 2-month California trip, in fact — I bought 8 chicks. I set them up in my shed, in the stock tank I’d bought last year for my poor man’s hot tub.

Chicks in my Shed
My little chickies, huddled together in their nursery.

I’d had chickens before, in Arizona. They’re a lot of fun and you really can’t beat fresh eggs. Because I knew I’d have chickens again, when I moved to Washington, I took along most of my chicken-rearing equipment: feeders, waterers, and heat lamp. That saved me a bunch of money when it came time to get these started. And the stock tank in the shed really beats the cardboard boxes I used to use in my garage to get the chicks started.

The Chicken Yard

Of course, they couldn’t stay in the shed. Eventually, they’d need a chicken coop and a fenced-in yard. Like Wickenburg, this area has coyotes and I’d have to protect the chickens from them. It also has large hawks, eagles — including Bald Eagles — and owls, so a net across the top would be vital. I wanted the chicken yard to be large enough to accommodate all the chickens and, with the real possibility of free-range egg sales, even more chickens in the future. And although I only wanted to build it once, I didn’t want it to be permanent. (I’ve come to realize that I don’t want anything in my life to be permanent because nothing really is. But that’s a philosophical discussion best saved for another blog post.)

I explored many options. “Hog panels” looked good, but the only ones available in the area were very large and very costly. Someone suggested a dog kennel and even sent me to Costco in search of one that seemed like a good deal. But they were out of stock and I was running out of time. I needed the chickens out of the shed before I headed south for a few days on personal business.

Gardening with a Backhoe
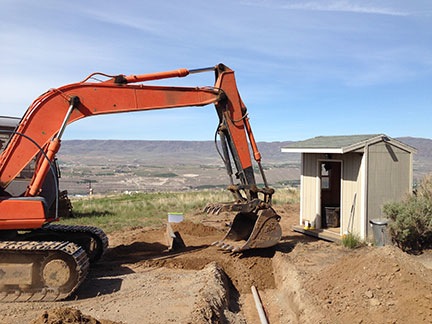
Jeff cleared a space for my shed and garden and left a pile of bunchgrass and weeds in the area just north of the garden patch.

Covering Conduit
After he moved my shed and dug a trench, I ran conduit for my temporary electric and water lines to keep them off the driveway and he covered it back up.

Meanwhile, Jeff, the earth-moving guy, was preparing the pad for my future home. He had a honking huge backhoe and an i-beam that he used to scrape the ground. I wanted a garden and I wanted my shed moved to the other side of the driveway. (Originally, I figured I’d sell the shed when my building was done, but I realized it would make a great place to store garden tools so I decided to keep it.) I realized that Jeff could give me a good head start on my garden prep with that i-beam and I set him to work on a small area near where I wanted the shed. He dug out the few sagebrush there and scraped the ground clear of bunchgrass, leaving it piled up in an area north of the garden. He even dragged my shed to its new position — it was built on skids — and got it level for me. And dug a trench so I could run power and water for my RV and shed under the driveway so the cords and hose would not be run over by construction vehicles this summer.

When he left, I looked at my future garden location and the spread-out, uprooted bunchgrass beside it. The chickens wouldn’t mind all that grass. And it would be nice to have them next to the garden so I could let them in to eat bugs. Without even intending to, Jeff had chosen the spot for my chicken yard.

I wound up buying 150 feet of 5-foot tall “horse fence” at the nearby Coastal Farm and Ranch store. I wanted 6-foot fencing so I’d have plenty of room to walk around under the net, but this was on sale for a good price and it’s not as if I’ll be hanging out in there with the chickens. I also bought a few 6-foot T-posts. I already had a T-post driver and a bunch more T-posts that a friend had given me.

But I began realizing that I’d have a problem when I got the roll of fence home. It was too heavy for me to lift. I couldn’t even push it out of the truck bed. Clearly, I’d need help.

Assembling the Fence

Help came in the form of my friend, Mike. He’d come up from California with his helicopter towed behind his motorhome. After dropping off the helicopter at the airport, he rolled down my driveway and greeted me with a big hug.

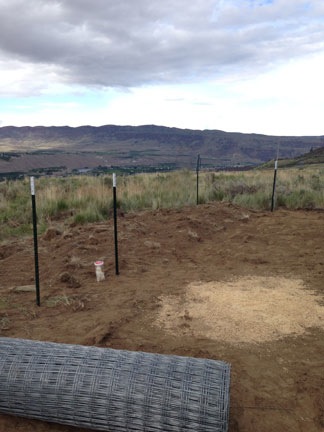
Fence Under Construction
Some of the T-posts in the ground around the future chicken yard; the roll of fencing was very heavy.

After getting a tour of the place — building pad, “lookout point,” apiary, chicks in shed — we talked about the things I needed to do. I mentioned the chicken yard and the fence, never even thinking about asking him for help. That’s when he offered to help me.

I’m not an idiot. When someone offers to help me with a difficult task, I say yes! We got to work right then and there.

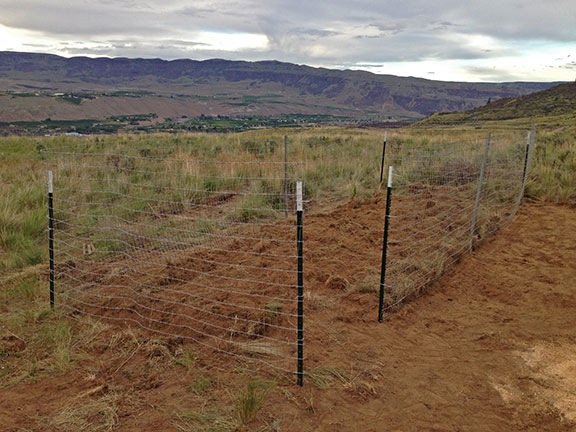
The work went surprisingly well. Within about 2 hours, we had completely fenced in a 9 x 25 foot area beside my future garden, leaving only a 4-foot wide doorway for a gate. Although it wasn’t perfect, it was a lot better than I expected it to look.

Chicken Yard
The nearly finished chicken yard.

Finishing Up. Almost.
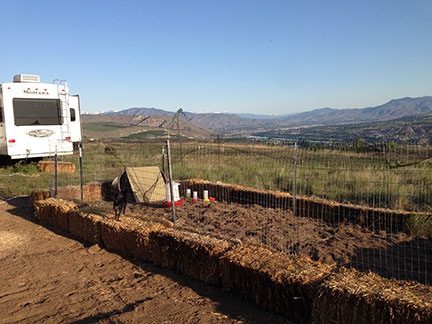
The next day, I bought some bird netting at Coastal. Although it was supposedly 14 x 45 feet in size, the 14 foot width could not span the 9 foot width of the chicken yard. (What was that all about?) But with a little creative cutting and attaching, I was able to fit three pieces across to protect the chickens from aerial predators.

The next morning was warm and sunny with hardly any wind. I decided to try out the chickens in their new yard — I really needed to get them settled in before I went on my trip. I dragged the stock tank out of the shed and into the chicken yard. I closed the makeshift gate I’d made behind me. And then I tilted the stock tank so it was laying on its side, thus freeing the chicks.

They were not happy. And Penny, of course, went nuts. She couldn’t get into the chicken yard and she wanted a piece of those chickens. The chickens ran around and Penny ran around the yard. And that’s when the chickens started squeezing through the fence.

What followed was a comedy routine that involved me and Penny chasing 3-week old chicks. Penny was good at catching them and, for some reason, she didn’t kill them. I managed to get them all back in the stock tank. After putting food and water in there, I went back into the RV, hot, sweaty, and dusty.

The chicks would not be much bigger before I headed out on my trip. That meant that if I wanted them in the yard, I’d have to put something around the bottom edge of the fence to prevent them from squeezing through. What? I had some chicken wire, but I’d bought 4-foot width and that was overkill. It looked as if I’d have to head back to Coastal for some more chicken wire.

Reuse, Recycle

I was back out in the yard, contemplating the situation, when my eyes fell upon the 22 bales of straw I had in two piles in my yard. I’d bought the straw the previous autumn to stack around the base of the RV to winterize it. When I moved the RV out for my California trip in February, I’d stacked the straw neatly to get it out of the way.

If I laid the straw around the base of the chicken yard, right up against the fence, would that prevent the chickens from getting out? It certainly seemed as if it would.

8 WD
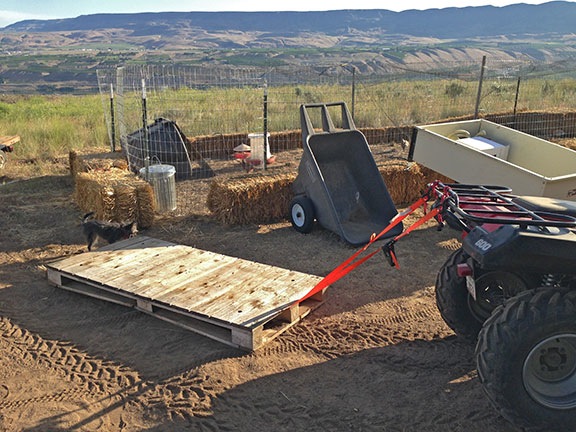
Although I bought this little flatbed trailer — a Craig’s List deal — primarily to move my bees around in the future, its size and low bed make it perfect for moving my ATV and straw bales.

So I got to work. I’d brought my ATV home, along with the little cargo trailer I’d bought years ago for yard work up at our vacation property in northern Arizona. The cargo trailer’s tires had been replaced and it was all ready for use. But last week I’d also bought a very small flatbed trailer that was larger than the ATV’s yard trailer. With a ball on the front of my ATV for towing the helicopter, I could tow the little flatbed trailer. It would be perfect for moving all that straw.

A formerly wise man used to say that any job is easy if you have the right tools. How true. I had the straw moved and positioned in less than an hour.

I was thrilled. My solution solved more than just the chicken escape problem. It also temporarily solved the problem of what I was going to do with all that straw.

A while later, I tried again to let the chickens out into the yard. This time, they didn’t escape.

Chicken Yard
The chicken yard this morning. I haven’t done a headcount, but I’m pretty sure all eight of my little girls are in there.

Temporary Coop
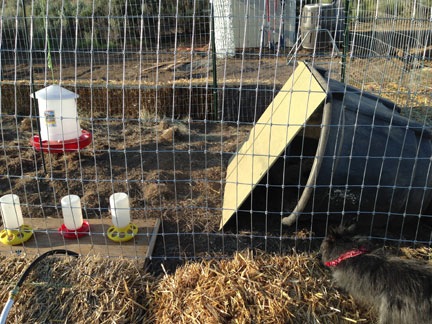
The temporary chicken coop is nothing more than a stock tank on its side with a piece of scrap plywood as a lean-to wall.

I set up an automatic waterer that I think might be a bit too big for them. Then I set up their chick feeders and waterer. I left the stock tank on its side against the side of the fence as a makeshift shelter for them; later, I leaned a piece of scrap plywood against it to enclose most of it. My list of things to do includes building a chicken coop, but I’m not sure I’ll get to that before my trip. The chicks are still small and should be okay in the stock tank, at least for a few more weeks.

The sun has just risen as I’m tying this. Seeing movement out the window, I took a closer look. The chicks are out in their little yard, scratching around in the early morning light. They’re exploring their big automatic waterer and, with luck, will soon be using their hanging feeder, too.

It looks like I’m on the road to chicken success. More later, after I’ve built their coop.

Araucana Rooster Seeks New Coop

Kicked out for pestering the hens.

Araucana RoosterMr. Rooster (that’s the name I give all my roosters) has been kicked out of the chicken coop. One of two roosters in my flock, the girls prefer his rival, the other Mr. Rooster. They’re particularly upset by exiled Mr. Rooster chasing them out of their nests while they’re trying to lay eggs. (It’s quite obvious he isn’t “getting enough.” Wink-wink, nod-nod, say no more.)

Mr. Rooster is an Araucana, an Easter Egg chicken. He’s about 16 months old. Araucanas lay colored eggs. In my flock, they’re mostly green, but one of the hens lays brown eggs. Mr. Rooster, of course, does not lay eggs. But if he’s in with your hens, you can bet those eggs will be fertilized daily.

We kicked him out of the coop so he’d stop bothering the girls. It was my hope that a coyote would have him for dinner one night, but it’s been two weeks and he’s still hanging around outside the coop. We give him food and water and he’s gotten quite friendly. But he’s not getting back in with the girls.

So I’m hoping someone who either needs a rooster to complete a flock or a chicken to have for dinner will come claim him and take him off my hands. You bring the box with the air holes in it and I’ll catch him and get him in the box. Do what you like with him, but if it involves axes or Mexicans, I don’t want to know about it.

Seriously interested? Use the Contact link. And no, I won’t ship or deliver him. You’ll have to come to Wickenburg to pick him up.

But hurry. He can only hide from the coyotes for so long.

June 21, 2015 Update: Because someone actually emailed me today to ask whether the rooster I wrote about eight years ago was still available, let me make it clear: it’s not.