Back over the border to the U.S.
– Day 1: The Road to Mazama
– Day 2: Mazama to Colonial Creek
– Day 3: Colonial Creek to Baker Lake
– Day 4: Baker Lake to Mount Baker
– Day 5: Mount Baker to Chilliwack Lake
– Day 6: Chilliwack Lake to Hozomeen
– Day 7: Hozomeen to Copper Creek
– Day 8: Winetasting My Way Home
It was just getting light when I woke up. The forest canopy over my campsite was too dense for me to get an idea of the weather, but it wasn’t raining.
I made coffee and settled down at the table to finish up the two previous day’s blog posts. I needed to add the photos. That’s the most time-consuming part because it requires me to choose the photos I want to illustrate what I’ve written open them in an image editing app, crop them, and then save them as JPEGs. Then I have to import them into just the right place in my blog post and write captions. (I’ve got a blogging app I’ve been using for years — it’s called ecto and is no longer supported by its author — and I’ve got it all tricked out with macros that make blogging quick and easy for me. When ecto stops working, I don’t know what I’ll do. I’ve tried other tools that just don’t seem to do the job I need them to.)
I finished up that Trader Joe’s almond danish, too. Had to do it. Didn’t want it getting stale.
Chilliwack Lake Hike
I was done by the time the sun started shining on the trees around me. Time for a walk. I still hadn’t really seen the lake. According to the map I had, the trail I could pick up out behind my campsite would take me right to it. So I finished getting dressed, put Penny on her leash, and set off with my camera.
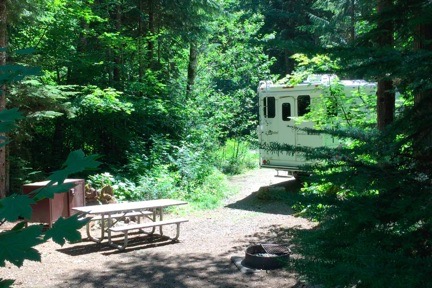
The trail was wide and carpeted with evergreen needles. The trees formed a canopy over us. Each campsite had a small trail running from it to the larger trail, but when we’d passed the last campsite, that stopped. We headed deeper and deeper into the woods, without any sound from the campground.
I met up with a woman walking two border collie mix dogs. We stopped to chat while Penny and the dogs did their dog greeting things.
Further along the trail, we met up with a woman who seemed absolutely terrified of Penny to the point that she walked off the trail as we approached. I kept Penny’s leash short until we’d passed. That was weird. Penny barely noticed her.
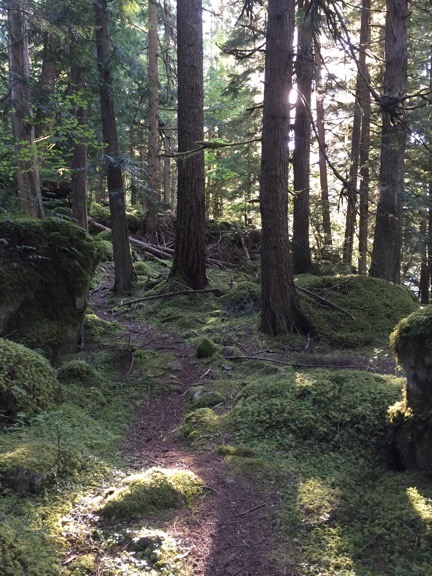
One of many narrow trails that wound through the woods near Chilliwack Lake.
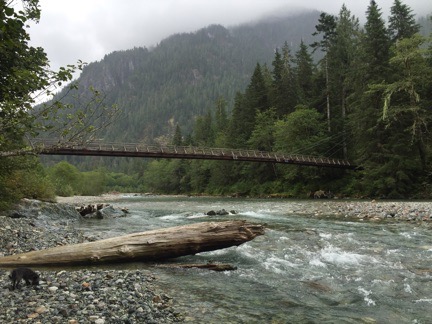
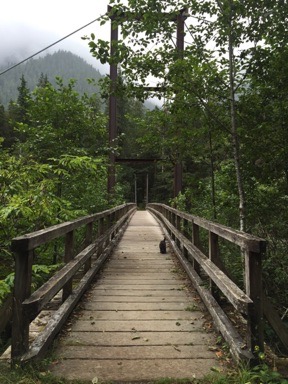
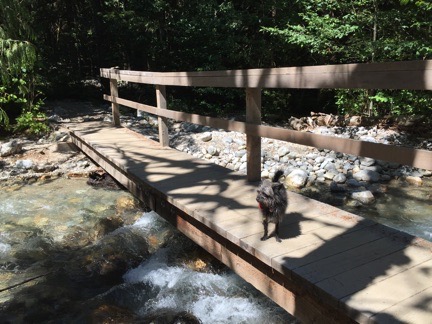
The trail took me down to the a footbridge where the Chilliwack Lake dumps into the Chilliwack River. The water rushed by as Penny and I crossed the bridge. The trail continued up to Radium Lake, which I was not interested in visiting, so we doubled back across the bridge and found another trail that paralleled the northern shoreline of the lake, taking us back toward the campground and boat launch. Soon we were among tents and RVs, not far from the site I’d almost stayed in the previous day.
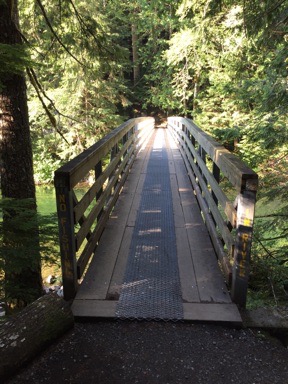
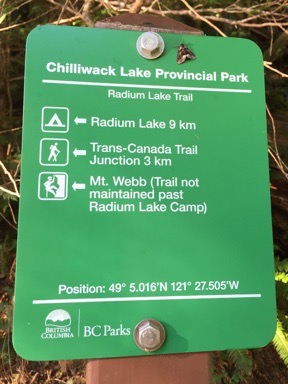
Left: The bridge across the Chilliwack River at the outlet of the lake was rustic but sturdy. Right: A typical trail sign in a Brtitish Columbia park is full of useful information about distances, trail conditions, and even exact location.
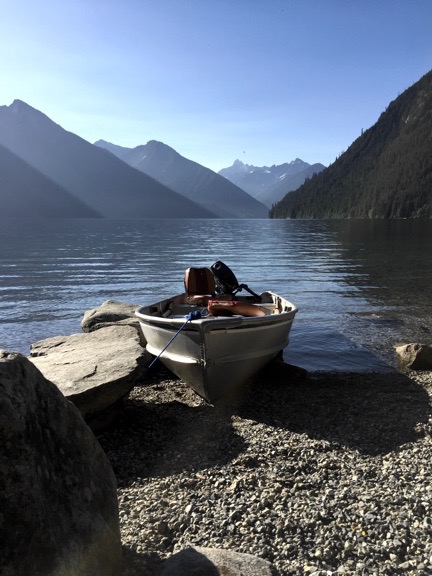
Early morning at Chilliwack Lake.
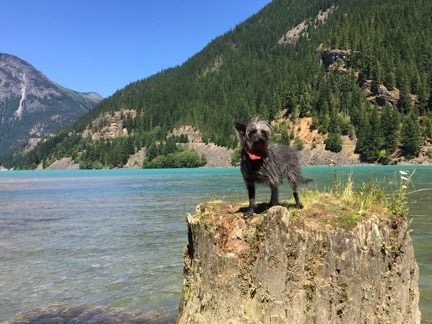
I found another trail down to the beach and followed that. Boats were tied up along the shoreline there, waiting for another day of fishing or water sports. The lake’s water was clean and clear; the mountains around the lake were majestic, robed in thick green forests. It looked just like you’d expect a Pacific Northwest lake to look. Picture postcard stuff. Was I starting to get numb to all the magnificent scenery around me?
We walked back up to the campground and headed back to our site. I chose one of the other trails that cut through the woods in the approximate direction I wanted to go. I realized that the whole park was criss-crossed with a network of unmarked trails. Once you were 50 feet or so down a trail, you were in woods so dense that you couldn’t see any signs of campgrounds or people. It was kind of pleasant, but I expect it would unnerve people without a good sense of direction or situational awareness.
Chores before Departure
Back at the campsite, I did the dishes and packed up. On the way out of the campground, I made one stop: at the dump station. I didn’t need to dump my tanks — I’d done that two days before on the way to Mount Baker. But I did want to top off the water tank. My fresh water system seemed to be having a pressure issue and the pump would go on when I wasn’t using the water. I suspected it was because the water level was low. One way to test that theory was to top off the water level and see if the problem persisted.
There was a man with a motorhome filling his water tank when I arrived. He was a little older than me and wore a knit cap and small-lensed sunglasses. We chatted for a while — hell, I’ll chat with nearly anyone. We talked about our rigs and their pros and cons and traveling to Arizona and all kinds of things. The water spigot did not fill very quickly so we had at least 15 minutes to talk. I realized that I’d have to either pull out a hose to reach my fresh water fill port or turn my truck around. So when he was done and we said our goodbyes, I followed him out, turned around, and pulled in going the wrong way. As my tank filled, I told the folks behind me (or in front of me, I guess) what I was up to so they didn’t have to wonder. It seemed to take forever for my tank to fill; I guess it was emptier than I thought.
I toyed with the idea of taking the road all the way down to the south end of the lake, but decided against it. Instead, I headed out the way I’d come in. Without a cell signal, I wasn’t sure about how to get to my next destination, but I figured I’d pick up the highway — and a cell signal — in Chilliwack. (Note to self: Get paper maps of all destinations prior to trip departure.)
On the Road Again
I paid closer attention to the road that I’d taken down to the lake the day before. I realized that my blog description wasn’t quite as clear as it could have been. I saw that it was mostly straight through a heavily forested area. It was the kind of area where they clear cut trees in big areas but leave the trees close to the road intact, to hide the cutting. But you can easily see the bright patches through the trees along the road, making it clear that there are no trees 50 or 100 feet in. You can also tell the area is heavily forested by simply looking up a the hillsides where there have been clearcuts in the past. I’ve seen this all over the northwest, particularly in Oregon and Washington. When you’re in a helicopter, these areas are hard to miss.
The road came close to Chilliwack River in several places. In one area not far from the city of Chilliwack there are rapids where kayakers practice. I’d noticed it on my way in and decided to stop. I got out of the truck with my camera, leaving Penny behind. And who do you think I ran into right near the river bank? The same guy I’d chatted with at the campground dump station.
We must have talked for another 30 of 45 minutes. Travel, politics, relationships, trucks. He told me how worried Canadians are about our elections. About how a Donald Trump presidency would make us the laughing stock of the world. I told him that Canada is going to need a wall if he gets elected.
I managed to get some photos of kayakers coming through the rapids as we chatted. Unfortunately, they’re all on my Nikon so I can’t add any to this blog post until I get home.
Although I think we could have talked all day, I reminded him that I was facing a two-hour drive to my next destination and was hoping to get a hike in there before dinner. So we went our separate ways and I got back on the road.
There was traffic in Chilliwack. I debated stopping and using my cell phone connection to publish the two blog posts I’d finished but decided to wait until I got to Hope, where my next exit was. By this time, my Internet connection was working fine in the car and Google was providing driving instructions. I got on the highway and headed east again.
I drove at the speed limit — after using my glasses to figure out what 110 kph was in mph (almost 70). The road was just curvy enough that I didn’t feel comfortable going any faster with the Turtleback on top. I’m starting to think that’s how they establish speed limits: put a camper on the back of a pickup and drive as fast as they can. When the load starts feeling a little unstable, that’s the speed limit.
There was nothing remarkable about the drive. There seldom is on a freeway. That’s why I tend to avoid freeway driving on a road trip. If I wanted to move quickly between two distant points, I’d fly. Driving is to be enjoyed, whenever possible. Back roads offer an insight into the way people in an area live. They give drivers a chance to see the world around them when they’re not doing 70 mph.
One thing I did notice, though: Canada has the same familiar brands we have in the U.S. The first thing I noticed after crossing the border was a Costco, followed immediately by Lowes. There are all the same fast food places, there are Starbucks everywhere. Banks and supermarkets had different names. Of course, I wasn’t on the freeway when I noted all this. Can’t notice much at 70 mph.
The Road to Hozomeen
Google alerted me to my exit up ahead, one of the first in Hope. From there, it had me turn south on a relatively narrow road with neglected pavement. I drove past a row of small, condemned houses alongside a creek and then a residential area. And then I was heading south toward another provincial park and the border. I’d gone at least 10 miles before I remembered my planned stop at Hope to publish those blog posts. Oh, well. It could wait another day.
The road was in sorry shape. This was not a surprise. All the reviews I’d read about Hozomeen mentioned the road. It was 38 miles from Hope to the campground and although I’m not sure what the speed limit was, I was able to keep my speed at about 30 to 40 miles per hour. The road was actually worse on the north end because it also led to handful of lakeside and riverside provincial parks that, according to the ranger I met later at Hozomeen, were pretty popular with the locals. At a certain point, the road gave up any pretense of being paved and continued with a hard-packed gravel surface that had potholes but very little washboarding.
Although I’d lost my cell phone signal not far from the beginning of the road, GoogleMaps still showed my route with an estimate how how much time/distance I had left. I realized after a while that it was counting down the minutes faster than real time — I suspect I was going faster than Google thought I would.
Cars, some pulling trailers or boats, passed me in the opposite direction. Maybe ten of them total. There was no one in front of me and no one behind me.
I reached the turn for Ross Lake Campground in Skagit Valley Provincial Park and turned in. This would be plan B for the night. The campground was remarkably similar to the one I’d spent the previous night in: wooded, decent sized sites with trees or brush for some privacy. The sites along the lake — I’d reached the north end of Ross Lake at this point — were either taken or reserved. But there were plenty of empty sites, many of which would meet my needs. So if Hozomeen didn’t pan out, this would work.
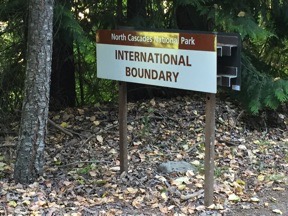
This is the US sign looking toward Canada. The Canadian sign is on the flip side. This sign post can’t be more than 3 feet tall.
I left the campground and continued south. There was a turn for a day use area on the lake. And then a nondescript sign that said International Boundary. I kept driving, slowly now, looking for the border station where I’d need to stop and show ID.
There wasn’t any.
Instead, the speed limit signs went from kph to mph. I was in the United States.
And this is what really makes me laugh. Politicians talk about putting up walls and fences to keep out illegal immigrants and terrorists. If they only had a glimpse of reality! This isn’t the first time I’d crossed an International border that wasn’t protected by anything more than a sign. The borders between the United States and its neighbors to the north and south are thousands of miles long. It is impossible to protect every inch of them. Anyone who tells you different is either lying or completely ignorant. Hell, I blogged about this way back in 2010 when John McCain was going on and on about a fence along the U.S./Mexico border. Same tune, same completely idiotic plan.
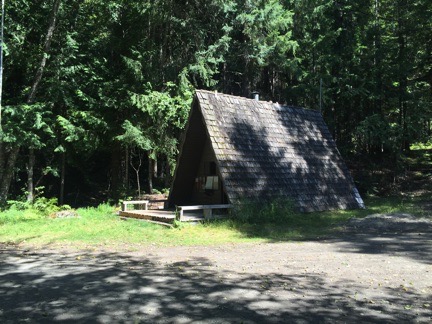
The ranger station at Hozomeen is a cute little a-frame that looks as if it’s been there for 50 years or more.
A little bit farther down the road was a cute little A-frame building that was clearly the ranger station. The flagpole was bare. The door was wide open. I parked and got out to see whether I had to check in or show ID or pay a fee. There was no one in the building, although it had clearly been set up for ranger business. The placed smelled old and musty, like my godfather Jackie’s basement antique shop. There were flyers — including one titled “Insects: Masters of Survival,” which I took, hoping I wouldn’t need to consult it — but no area maps. A sign outside was titled “How to Find a Ranger” and provided a list of places to look if you needed a ranger. Talk about loosey goosey.
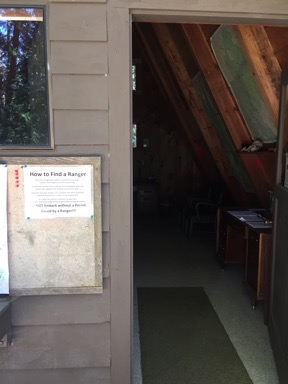
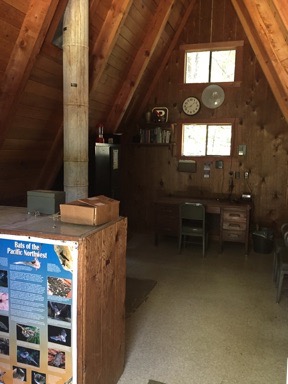
Left: The door to the ranger station stood wide open. Note sign titled “How to Find a Ranger.” Right: Inside the Hozomeen ranger station.
But let’s face it: we were in the middle of nowhere and the only road led north, back into Canada. It wasn’t as if this was a waypoint along a heavily trafficked route into Seattle. We were at the end of the road and beyond it were only bear-filled mountains. The only people coming to this place were people who wanted to be in this place — not somewhere beyond it. It wasn’t the kind of place you’d stumble into. The rangers likely realized that people who came here had done some sort of homework and likely wouldn’t need their help. Why sit in an office to greet the handful of people who might show up each day?
So I got back in the truck and continued down the road, trying to get a feel for the place and an idea of where I could camp for the night.
Three Sites at Hozomeen
Hozomeen lies at the far north end of Ross Lake, a 25-mile long, manmade lake along the Skagit River in the North Cascades. A mentioned above, it’s only accessible by car through Canada. It’s also the only place on the lake where where there are boat launches. So if you want to put a decent sized boat on the lake, you have to go to Canada to do it — even though less than 3 miles of the lake are within Canadian borders. There’s supposed to be good trout fishing in the lake, although limits are determined by whether you caught the fish in the U.S. or Canada.
Other than boating and fishing, there’s hiking. Hozomeen Campground was named for Hozomeen Mountain just to the east. A trail winds up from one of the camping areas to Hozomeen Lake. It was that trail that I was hoping to hike when I got here. But by the time I arrived in early afternoon, after being bumped around for an hour on the road from Hope, I wasn’t in the mood for a 7-mile round trip hike, the first mile or so of which was a steep climb. But I’m getting ahead of myself now.
A few hundred feet farther down the road was the first campground, Winnebago Flats. I’m thinking that’s more of a nickname than anything else. It was a mostly open area right on the water and was nearly full of RVers and tent campers baking in the sun. There were boats tied up at the docks and boat trailers parked here, there, and everywhere. Some kids and dogs, a generator running — definitely not the kind of quiet place I wanted to stay. I kept driving.
The road climbed a bit above the lake and entered the same dense woods I’d come to expect. Off to the right was the ranger housing — one of the places you might find a ranger — and beyond that, to the left, was a road marked Hozomeen Trailhead that climbed into the hillside. And beyond that, a campground loop. This one was just about deserted, with only three campers in 30+ sites. As I drove through, I liked what I saw. I picked a site on a hillside with views of the lake through the trees, backed my rig in, and got out to set up camp.
By “set up camp,” I really mean make lunch. I had the same thing I’d made the day before: grilled eggplant and goat brie on the bread I’d bought two days before. I finished up the brie but had no shortage of eggplant or bread. Penny sat in high alert while I made and ate my meal. I suspect she smelled the bears that were supposed to be in the area and was waiting for one to come bounding out of the woods.
After lunch, we followed the signs to the boat launch just down the road. I’d seen a ranger SUV head down there and figured I’d ask a few questions about the area. The road was longer than I expected and we reached the ranger boat dock first. That’s where the two rangers were. One was fiddling with the motor on a 20+ foot aluminum-hulled boat while the other sat on the dock waiting. Both wore uniforms and inflatable collar life jackets, like the ones I’d bought for overwater operations in my helicopter years ago.
I called out and the waiting ranger walked over. I asked him if there was a fee and whether I needed a backcountry permit. (No and no.) We talked about the bear situation (there was a resident bear), leaving fires unattended (a definite no-no), and leaving food out overnight (another no-no). He reminded me that Penny needed to be leashed at all times. We talked about the other campground and he mentioned that there were fewer bugs there because of the breezes — which is one reason it was so popular. The mosquitoes weren’t bad — yet — he assured me. (I’d already noticed them.) Then we talked about the condition of the road and the fact that bad weather in July had kept park attendance low, which kept the road from getting washboarded. We also talked about living and working in such a remote place and agreed that there were a lot worse places a ranger could be stationed.
By then, the other ranger had the engine running. I volunteered our services to help out on the boat if needed and we both laughed. Then we parted ways. As I headed back up the road, the boat roared out over the lake towards the opposite shore.
There’s a lot to be said about a career as a U.S. Park Ranger.
Back at the campsite, I took a nap. It seemed like something that had to be done.
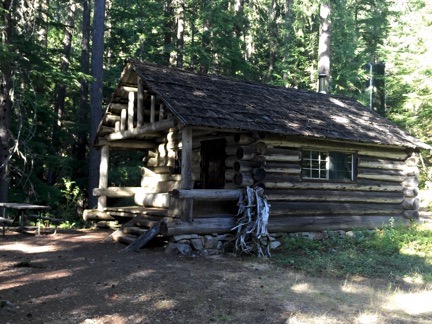
I read in one of the guide books that this was originally a customs cabin.
I woke up around four and felt that I really needed to do something. So Penny and I got into the truck and drove up to the Hozomeen Trailhead. It was a lot closer than I remembered it being — we could have walked. I parked by the old Customs Cabin there and got out to look around. The cabin was neat and clean inside, with two beds and a kitchen area. The padlock on the door wasn’t clasped shut, but I didn’t go in. I didn’t want to intrude on what might be someone’s living space. A creek roared by past the back of the cabin and there was a tall water tank nearby — likely the source of all the water in the park.
There were campsites nearby, too. One very close to the trailhead was large with what looked like a level place to park. There was a restroom nearby. No other campers. I peeked into the restroom and it was immaculately clean and odor-free — as if it were brand new.
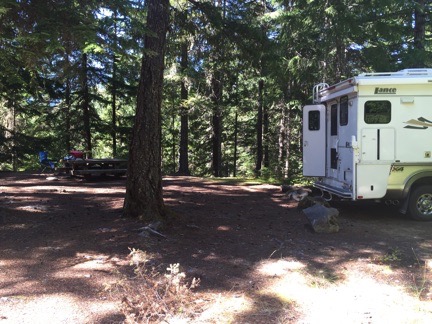
My second campsite for the day.
I got to thinking that this might be a better campsite. Clean restrooms, water right across the road, ranger housing just down the hill. I didn’t need any of these things, but they somehow figured into my calculations. Penny and I got back into the truck, drove it down to our first campsite, gathered together the few things I’d left out, and drove back to the new site on the hill. I backed in, maneuvering to get the Turtleback as level as possible, and parked. Then I unpacked those outdoor items and left them at the table.
I tried to sit for a while, but the mosquitoes were bugging me — literally, I guess. I put on some of the “all natural,” Deet-free bug repellant I’d bought in the Mazama Store a few days before. I didn’t have high hopes of it working — I’d read a review of bug repellants online recently and it rated the ones with Deet a lot higher than the others. But this one seemed to work. The mosquitoes stayed clear. And it didn’t smell bad, either.
There was a trail down to the road and feeling the need to take some kind of hike, I leashed up Penny and followed it. From there, we walked a short distance down the road before another trail led to the lake. That eventually put us right on the shore. It was after 5 PM at this point and still bright and sunny on the east shoreline. I quickly worked up a sweat and began wondering how that bug repellant would handle it.
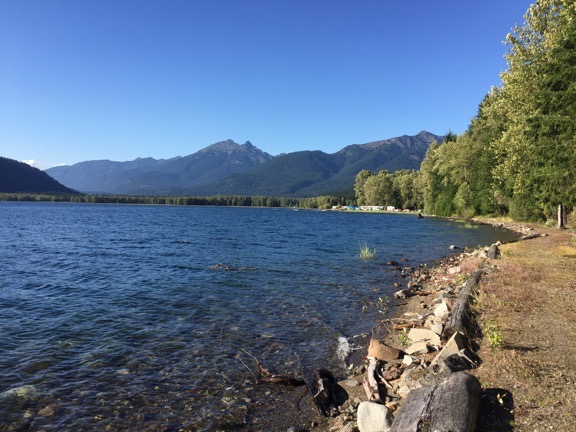
The trail through the woods eventually led to one right alongside the lake. You can see the campers at Winnebago Flats in the near distance.
The sunny campground was 3/4 of a mile from where I’d parked. As I walked through, I realized that the campers on the south end were the noisy groups while those on the north end were more laid back. I stopped and took photos from a few of the docks and chatted with a woman floating in an inner tube beside a boat with two barking dogs in it. (I’d left Penny on shore; she didn’t want to walk on the dock surface.) When I noticed the top of Hozomeen Peak to the east — which is impossible to see from the shore — she told me that in late afternoon as the sun was going down, it glowed.
That’s probably the seed that got me thinking about moving my campsite again. There was a campsite at the north end right beside a trailer parking spot. The lake would be right out my back door. It wasn’t a tough decision. When I told the folks two sites down that I was thinking of moving there, they offered to hold it for me while I fetched my rig. Thirty minutes later, I was backing into my third (and last) campsite for the day.
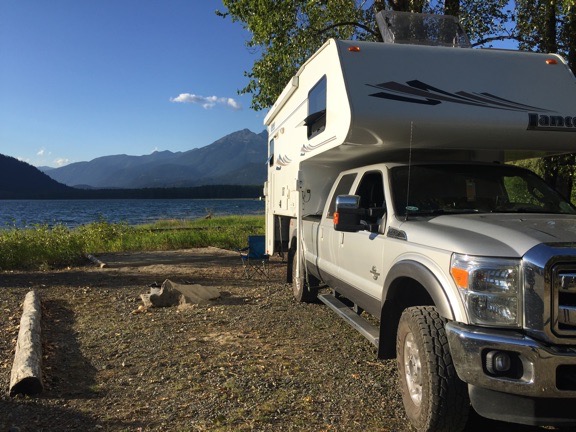
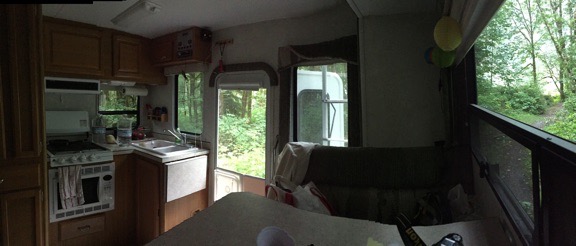
My third (and last) campsite for the day was small and not very private, but had nice views of the lake out the back windows.
Funny, but usually the problem is there not being enough good campsites to choose from. In this campground, there are too many.
Penny and I relaxed out behind the camper for a while. I sat in my new chair with my feet up on the picnic table bench. It was a quieter than I expected it to be. I’d made a good decision.
A ranger came by and invited me to attend a ranger program at the International Border Amphitheater at 8 PM. She wasn’t clear about how far away it was. I thought about walking over after dinner.
Later, I took out the grill again and cooked up a chicken thigh and some zucchini. We ate out at the picnic table, overlooking the lake. 8 PM came and went. My neighbors walked up to the presentation. I stayed at my site.
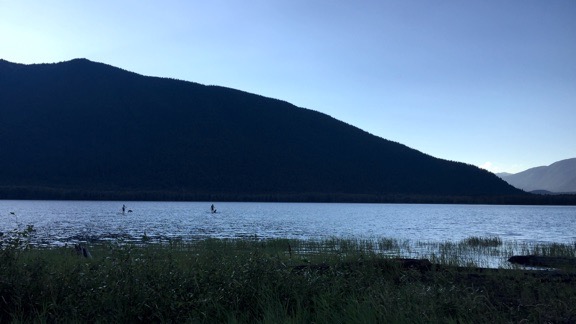
As I ate dinner, a pair of standup paddle boarders paddled down from Canada with their dogs. I shot this photo when they were on their way back after sunset.
When it got too chilly to sit outside, I went in and got to work on this blog post. I’m rather proud of the way I’ve been keeping up on this trip. It’s got me thinking that it is possible for me to get real writing work done when I travel.
My neighbors got home and started a campfire. But I was in bed asleep before they put it out.


