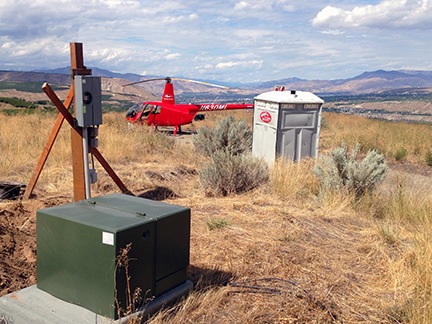
Construction: The Earth Work

Moving earth to make room for my new home.

On May 20, 2014, I began blogging about the construction of my new home in Malaga, WA. You can read all of these posts — and see the time-lapse movies that go with them — by clicking the new home construction tag.

Yesterday, they finally began construction on what will be my new home.

I blogged about the home here. It’s not a typical home by any means — I’m not the kind of person who really wants to live in a typical house. As an old ex-friend of mine would say, it’s a garage with a house attached. It’s a pole building, which is a type of construction popular here in farm country. Instead of framing from a foundation up, a pole building basically hangs the structure on a series of vertical beams or “poles” and puts a metal (usually) skin over it. They’re cost effective to build, especially for storage, and that’s primarily what this will be, with roughly 1200 square feet on the second floor for me to settle into.

I’d been working with the builder on plans for over a year. The plans themselves didn’t change much at all over that time. But I had a few delays, mostly related to the failure of my wasband to do the right thing. (Seriously: What the hell is wrong with that man?) This spring with money coming in from cherry drying contracts and the promise of a loan from a family member (if needed), I’m ready to move forward. It’s amazing what a person can save up for when she knows how to live within her means.

The earthwork for the project was mostly completed in late April, started almost right after I got home from my California contract. I see from looking at my blog archives that I didn’t blog about it — likely because I was busy with a writing project. I may as well do that now. I know I posted a lot of photos on Facebook. Here are a few of them for the folks wise enough to stay off that time-sucking social network.
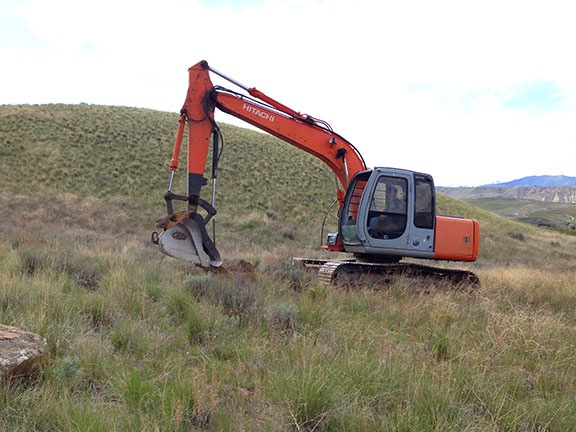
First Shovel
Jeff of Parkway Excavation scooped up the first shovelful of earth on April 24, 2014. I highly recommend Jeff. He knows his stuff, is honest, and is a really great guy to work with.
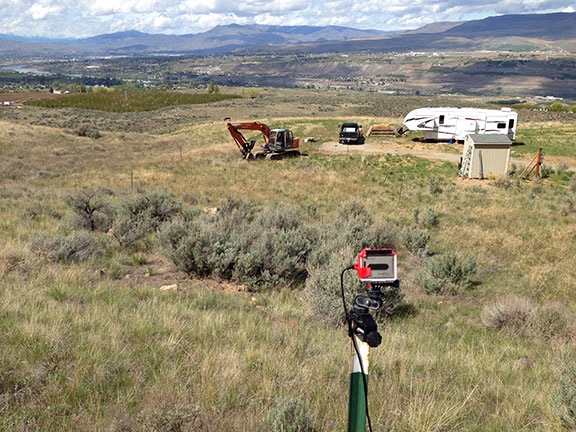
Time-Lapse Setup
I set up one of my old GoPros as a time-lapse camera far above the action. (Video below.)
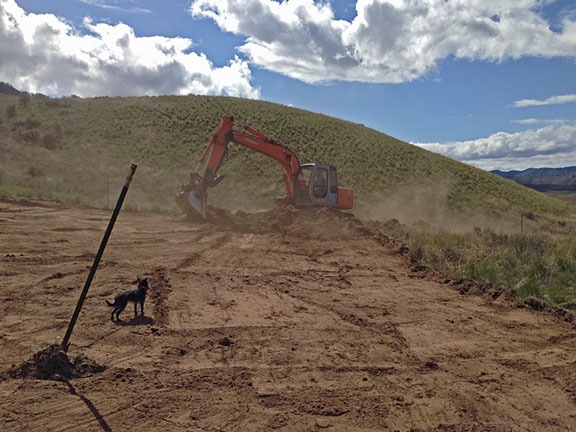
Penny Supervises
Penny was not afraid of the heavy equipment. She’s fearless! Of course, with all that dust, she got unbelievably dirty every day.

It took Jeff a few days to get the job done. It required him to clear out and level an area roughly 80 x 70 in size. The whole time he worked, I was sort of holding my breath, worried about him hitting rocks. I live on a sort of “shelf” at the base of some basalt cliffs. Over the past 11,000 years (since the Missoula Floods), pieces of those cliffs have tumbled down and embedded themselves in the earth. My neighbors across the road are much closer to all that broken rock and have lots of rock in their earth. But I was pleasantly surprised that I didn’t hit any at all when I dug the trench for my temporary power post in August 2013. Still, on the south side of the building site, Jeff had to dig down more than 5 feet. Would he hit rock? If he did, that would crank up the cost of his work and the cost of getting the poles for my building planted.

But I lucked out. He hit a few rocks on the south side, but nothing worth worrying about. I think even he was surprised at how nice my dirt was.
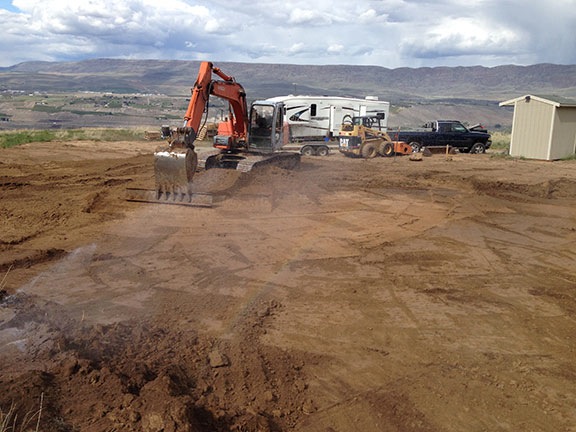
Dust Control
Dust was a real issue. I had a sprinkler going almost the entire time Jeff was working.
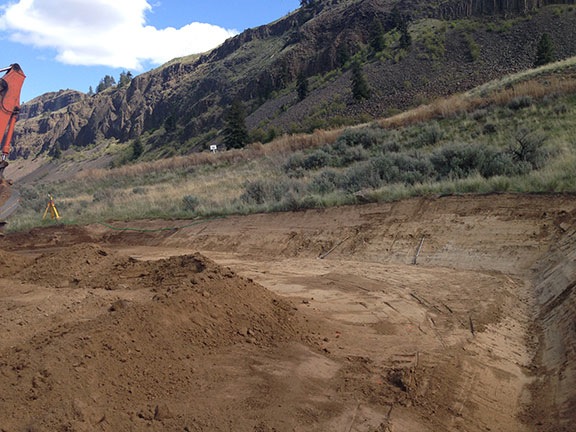
Digging In
To make a large, level pad, Jeff had to dig into the side of the hill. I also had him dig out a drainage ditch for water off the hillside and roof.

While I had Jeff there, I also had him move my shed, which I’d put in a dumb place. (I usually plan better, but I had lots of distractions when I took delivery of it in November. And I had him clear an area for my garden and chicken yard. And dig a trench across the driveway so I could run my RV power and water in a conduit underground, thus heading off any fears of damage to wires/hoses from construction vehicles. I worked my ass off that day and slept like the dead that night.
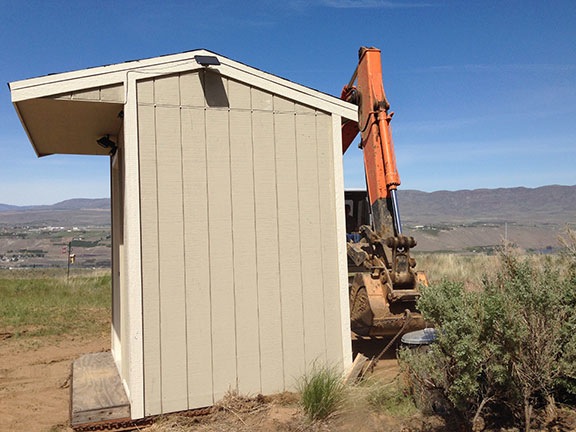
Dragging the Shed
Jeff used his backhoe and a chain to drag the shed into its new position on the other side of the driveway beside the garden. I’d planned to sell the shed when my building was done, but now I think I’ll keep it for garden tools.
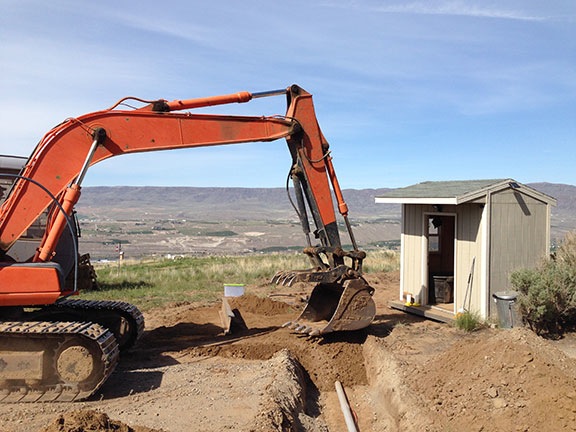
Trenching
Jeff dug the trench and I laid in conduit with a water line and 30 amp power line. Then Jeff covered it all back up.
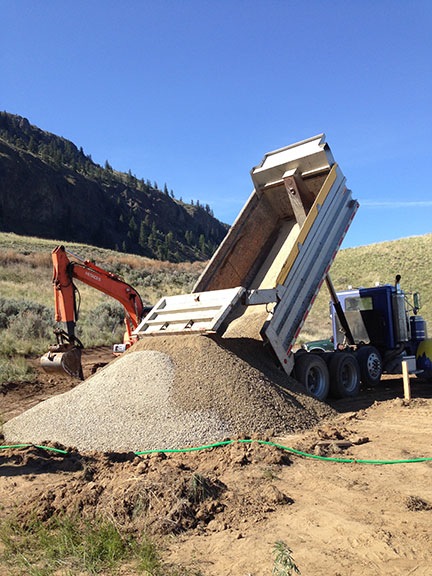
Gravel Delivery
Jeff delivers the second load of gravel.

The job required a lot of earth moving — actually taking dirt from the south side of the site to the north end. I’d need a driveway to access the four-car garage on the south side and the earth sloped away a bit there. Jeff fixed that right up. He then came through with a compacter and made a rock-hard surface in the ground.

Jeff finished off the job with three loads of gravel requested by the builder. He dumped them in two places on the cleared out pad. The builder had come by to check out his work earlier in the week and I think he was pleased with what he saw. I know I was.

When he was all finished, I had a huge, flat, level pad. A friend came by the next day and parked his motorhome on it for an overnight stay. The day after that, I landed my helicopter on it. Nice!
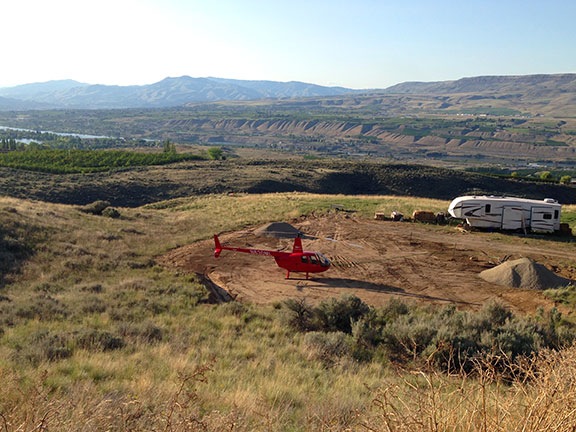
Makeshift Helipad
It fits!

Here’s the promised time-lapse:

Although the builders were supposed to start on April 30, there was a delay in the permits. They needed some sort of drainage plan. What that meant was I needed to pay someone $600 to satisfy the county. This is no real surprise. The delay didn’t really bother me. I had to go to California for a week anyway and wanted to be home when they started work. They got the permit while I was gone and showed up on time yesterday morning.

More on that in another blog post.

Shelf Constuction Time-Lapse

Shelves in my shed.

Way back in 2008, when I lived in Arizona, I bought a bunch of Ikea shelves to organize the garage. In February of that year, my wasband and I, supervised by our neighbor’s kids, built the shelves on one side of the garage. It took nearly the whole day to get that job done and when it was over, we were exhausted. The idea was to do the other side of the garage on a future weekend.

But like so many things I planned with my wasband, it never happened. The extra shelves sat languishing against one wall for more than five years. Finally, when I realized that I was going to be spending the entire winter of 2012/2013 in my house and had nothing better to do than pack, I packed up those loose shelves, leaving the built ones behind. The packed shelves were moved up to my storage space in Washington in September 2013 with the rest of my belongings.

Last week, I lucked upon an excellent deal for a 6 x 8 shed. I realized that I’d be able to store a lot more in the shed a lot more neatly with shelves. I measured those Ikea shelves and I measured the shed’s inside wall. Would you believe the shelves were just 1/4 inch narrower than the wall? They’d fit perfectly.

I built them today. Rather than use the relatively short vertical posts I already had, however, I bought some new 1 x 4s, 6 feet in length, so the shelves would be higher. So part of construction meant drilling new holes. I had all the tools I needed to make the job a snap — I’m really building quite a collection of power tools! And the difference in the shed is amazing; you can see for yourself in the time-lapse video I created.

The project took just over 2 hours from beginning to end. I’m very happy with the way it turned out!

I’ve Got the Power!

Literally.*

Last week, I blogged about cleaning my hand-me-down temporary power box in preparation for rewiring it and installing it on my 10-acre lot in Malaga, WA. At the end of that post, I mentioned that I hoped my friend and I could have it in place later that day.

Well, I got what I hoped for. When my friend rolled up just minutes after publishing that post to this blog, he was eager to get started on the job. By the end of the day, the pole was in place.

Rewiring

Power Box After
Here’s what we started with.

The first job was clearing out the old wires to replace them with new ones. Not everything had to go. We had to remove the wires on the left side of the box and replace them with a new set that I’d bought the previous week. On the right side, we had to connect wires to the 30 amp breaker and run those wires down to an RV outlet that had to be positioned farther down the pole.

I backed my pickup down to where the pole was and we lifted it into the back of my truck with the business end on the tailgate. Then I moved the truck forward into the shade of the house under construction — now nearly finished — where I’m currently living. I fetched all the pieces I’d bought at Home Depot and the electrical supply shop the week before and got out some tools.

I think my friend was pretty surprised when he realized that I knew how to use tools. Apparently, a lot of women don’t. When he pointed out which wires needed to be removed, I grabbed the right screwdriver and got to work on it. After all, I was supposed to do all the wiring myself — that was a requirement of my permit. (In Chelan County, either the homeowner hires a licensed electrician to do all the work or does it all herself. The rule didn’t say anything about coaching from a knowledgable friend.)

I had most of the tools needed to get the job done. There were only two I didn’t have — and got the next time I was out: a good wire stripper and a hacksaw. The wire stripper was needed for obvious reasons — each new wire’s end had to be stripped before it could be fastened into place. The hacksaw was to cut the plastic conduit that also needed to be replaced.

Step-by-step we worked our way through the box. I learned about how the box was organized and what each wire did. It was surprisingly simple. And safe — it wasn’t hooked up to any power yet.

Then we were finished. It had taken less than an hour.

Planting the Pole

We closed up the tailgate, climbed into the truck, and headed out. I think my friend was more excited about getting the pole set up than I was. Don’t get me wrong — I was eager to get it set up. But when you consider that he had plenty of other things to do that day, it was really nice — and so refreshing! — to be with someone who was so focused on helping me get a job done. (That’s part of what real friends are all about.)

At my property, my friend was pleasantly surprised at the trench and hole I’d dug. After seeing me limp around on a bad foot for three weeks, I don’t think he had very high expectations. I think he’d come with the idea that he’d have to do some digging, despite the fact that I’d assured him that I’d dug the trench to specs. He later told me that out of everything I’d done so far on this project, digging that trench was the most impressive. (I have to agree. I surprised myself.)

Because he’s a man, though, he had to pick up a shovel and extend the trench a little in front of the transformer box. I’m not sure if he did it because he thought we needed the extra length or if he was trying to see for himself how difficult it was to dig. If the later, he discovered that it was quite easy to dig. After all, a middle-aged woman with a gimpy foot had done it.

I backed the truck up as close to the post hole as I could and we wrestled the pole out of the truck and into the hole. It was a bit of a struggle, mostly because of the conduit hanging loose with a 90° angle at the bottom and 10 feet of wire hanging out. But we finally got it into place. We threw some rocks into the hole and followed that up with some dirt. We realized that the fastener we’d brought to connect the grounding wire to the grounding rod wasn’t big enough. I’d have to come back and make that connection another time.

Power Pole Installed
My friend took this silly photo of me with the power pole and box installed.

The last step was putting in the two required supporting poles each in a different direction. We used the same poles my friend had used for his setup. The heads on the screws he’d used stripped immediately, but I had some long nails in my toolbox to get the job done.

My friend voiced some concern about the grounding rod being inside the hole. He seemed to think it needed to be driven in from the surrounding grade to make it more sturdy. But it was sturdy. If I could have pulled it out, I would have — just to drive it in elsewhere. It would have to wait. I could aways get another rod if I needed to.

Finished, my friend took a picture of me by the pole. Then we put away the shovel and other tools and celebrated by going out for a late Thai lunch in town.

I called the Chelan County PUD and told them the power pole was ready for inspection. I knew it would be at least 24 hours before the inspector came out.

Fastening the Grounding Wire

Later that day, while doing laundry at a local laundromat, I stopped at a hardware store to pick up the piece I’d need to connect the grounding wire to the rod. But rather than take care of it that day, I went out to dinner with another friend. We spent the evening back at the Mobile Mansion where we chatted and drank wine and I helped him fix a problem he was having with his GPS. (Once a techie, always a techie.)

The next day, I had a charter flight down to Othello and Pasco. I had to pick up my passengers at 8 AM sharp. Before leaving, however, I put the grounding rod connector piece and a screwdriver in my bag.

Helicopter Parking
Heck, why make the drive when I was only a few minutes away by air?

At about 1 PM, when the flight was done and I’d dropped off my passengers, I flew over to the property and landed at the end of the driveway. I shut down and took the connector and screwdriver over to the power pole.

ConnectionI sure did drive that rod in close to the pole.
I ran the connector through the very long piece of copper wire and made the connection to the rod. My friend had told me I could bury the extra wire. Seemed like a shame to me, but I really didn’t care. All I wanted was to pass the inspection.

The Inspection

I was home for less than an hour when the phone rang. It was the inspector. He said he’d be out on the property by 3 PM.

Thinking that showing up in a helicopter would be a wee bit too cocky, I jumped into my Jeep and made the 30-minute drive from Wenatchee Heights to Malaga. I had to stop for gas, of course — why is it that my vehicles always need fuel when I’m in a hurry? But even though I arrived early, the inspector was already there, looking at my pole and the trench and the hole.

Penny and I hopped out of the Jeep and I extended my hand as I walked up to the inspector. “What do you think of my trench?” I asked proudly. “I dug it myself.”

We both laughed.

He did the inspection, pointing out the few minor things that were wrong with the setup. Because they were minor, however, he let the pole pass inspection. He put the official sticker on the box.

Another hurdle jumped.

I’ve Got the Power

That was on Tuesday. Part of the inspector’s job is to call the Chelan County PUD and arrange for them to hook up the power. I had no idea if I needed to be present, but I figured that they had my phone number and would call if they needed me.

The rest of the week rolled by. I got busy. (I always get busy.) I didn’t hear anything about the power pole.

On Saturday, I had a charter flight. I was taking a couple up to Tsillan Cellars in Chelan for dinner. I had to meet them at the airport at 4 PM. But it was a nice day and I felt like flying. So I fired up the helicopter and took it out for a spin in the Leavenworth area where some friends of mine were hiking in the mountains. One of them had texted me his general location with some landmarks. I thought it would be fun to try to spot them from the air. And I hooked up the GoPro to get some video while I was out. (More of that in another post.)

By 3 PM I was ready to head back to Wenatchee. I needed fuel and wanted to relax for a while before meeting my passengers. I figured I’d fly by my property to see whether I could tell if the power had been installed.

Meter on my Box
The meter on my power box confirmed that power was available at my lot.

I didn’t want to land there and shut down, but I did have to get close. I hovered near the transformer box. The wires I’d left loose were buried. As I flew away leaving a nasty cloud of dust (from the digging) behind me, I realized that I now had both water and power on the property.

I confirmed that the power worked just yesterday when I drove out to take a look. There was a meter on the box and it was running. I took a shovel and finished filling in the hole and ditch.

I was another step closer to my new home.

[*Note: Thanks to my old friend Steve for inspiring the title of this blog post.]

The Little Dig

Hard work, but not a difficult task.

This past week, I made a radical decision: I decided to install my own temporary power box at my future homesite.

Chelan County Electric GuideTemporary power is what’s commonly installed at a construction site to provide power to the builders for their tools. It consists of a 4×4 post with a circuit box, meter, and outlets. Chelan County is very specific about how the box should be installed. It’s all detailed in their 74-page book, Residential Electrical Services Connection and General Information,” which is available as a PDF from the Chelan County PUD website.
I’d spoken to two electricians about doing the work. One wanted $500, which included “renting” me the post for six months. He never did say what it would cost if I still needed it after that. The other promised to come look at the site but never showed. I called him to follow up and left a message. But by the time he called back, I’d already made my decision.

A friend of mine had a power post he no longer needed. All I needed to do was buy some more outlets and wire and some conduit and a grounding rod. He went with me to Home Depot and an electrical supply place. I spent $120 for the items I needed, along with a electrical how-to book.

The biggest challenge, he told me, would be to get the hole dug and drive in the copper grounding rod. The rod was about seven feet long. It had to be driven all the way into the ground. He said that driving in that damn rod would be the hardest part of all.

I went out to the property the next day. I wanted to scout out where I’d put the pole. I also wanted to measure the distance from the pole to where I planned to park my RV during construction. I was hoping to run 30 amp power to the RV. I needed 75 feet of cable. I think I had 50. I began rethinking the parking space.

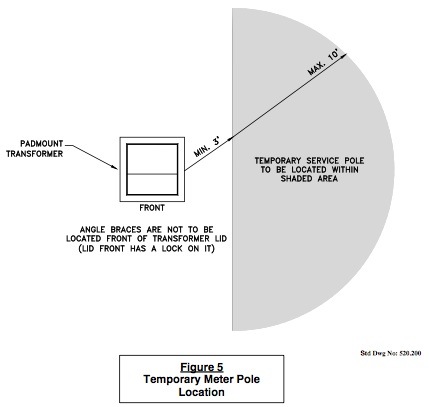
Pole PlacementYou see, the power pole has to be 3 to 10 feet from the transformer, which is already on the property. So I’m limited as to where I can put the pole. Fortunately, the transformer and pole location will be quite close to the building site. That’s good because the building must be within 100 feet of the transformer. So I’m all set for that.
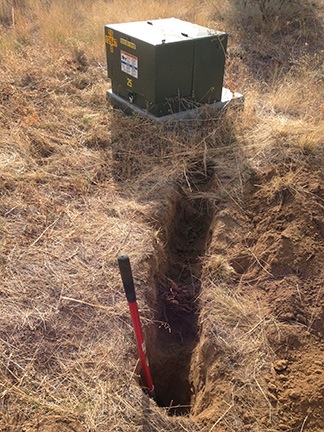
While I was there, I took a shovel and thrust it into the dirt, expecting to hit rocks. After all, I’d had a hell of a time driving the T-post for my name/address sign three weeks before. But the shovel went in smoothly. I dumped a shovelful of dirt to the side. Easy. The next one wouldn’t be that easy, though.

I dug again. It was.

I got out my tape measure and measured about 7 feet from the transformer, in a line almost abeam my city water spigot. And I dug.

I dug for a good 15 minutes, always expecting to hit rock. I didn’t encounter a single stone.

Start of my Hole
I got pretty far the first day, just looking for rocks I never found.

By that time, I had a good trench going but I was sweating hard. It was afternoon on a sunny day. I wasn’t dressed for digging. My foot, which I’d sprained more than two weeks before, ached. I’d have to come back earlier in the day, before it got warm out.

That day was yesterday. I showed up at 8 AM. After a little weed whacking to clear the area, I got to it.

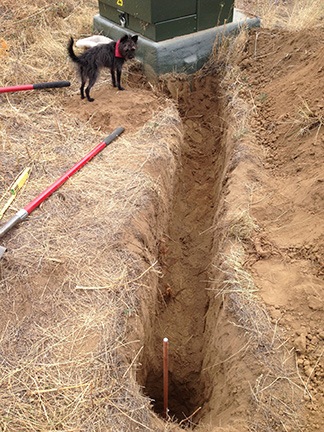
The trench needed to be 24 inches deep. The hole for the pole needed to be 36 inches deep. Unless you’ve actually dug a trench and hole that deep you have no idea how deep it really is. It’s deep.

But there were no rocks. The dirt came up easily, shovel after shovel. I had no trouble getting down to 20 inches on the trench and 30 on the hole. Then it started to get a little harder — the dirt was packed solid.

I drove down the street to where my friend Kathy lives. She’s an avid gardener. She was outside with her husband, talking about plans to add a new tasting room to their winery. I asked her if she had a “digging stick.” I described it as a long, pointed pole that was heavy. I had one back in Wickenburg but had left it behind. No problem. Kathy had one. And a post hole digger. We loaded both into my truck and I drove back.

I pounded with the digging stick to loosen up the soil. The post hole digger worked great to pull the dirt out of the trench and hole — after all, they weren’t much wider than my shovel — but was too heavy for me to work over and over. I went back to the shovel.

By 11 AM, after several breaks, I was done.

But there was one more thing: the copper rod.

I brought it over to the hole and lowered down onto one side. Then I got the post driver I’d bought to put in my name/address sign and put it over the rod. I rammed it down hard. The hit made a gawdawful clanging sound, but the rod must have gone in 6 inches.

I put on a pair of earplugs and got back to it. Soon I was kneeling beside the hole, banging away with the fence post driver. When the rod was about 4 inches out of the ground, I stopped. I could always finish it off later.

The Finished TrenchHere’s the finished trench and hole, approved by my tiny inspector.

I stopped and took a photo. When I put it on Facebook, my friends joked about using it to bury my wasband. We pretty much agreed that the ditch was so narrow he’d have to go in sideways. I told them I’d rather use it for its intended purpose since it was unlikely that I’d be able to cram his mommy in there with him.

On the way home, I stopped to chat with my next door neighbors whose home, the subject of my wasband’s investigation back in April, is nearly done. (I still giggle about that every time I drive by and see their RV parked there.) They were cleaning up after the builders — their way of saving some money. They’d loaded up their little flatbed trailer (another giggle) with scrap wood while their three sons played in the dirt. We exchanged phone numbers and talked about road maintenance.

Then I continued home, stopping just long enough to drop off the digging tools I’d borrowed.

Digging had been hard work, but it was surprisingly easy. As someone on Facebook mentioned, the lack of rocks was like some kind of good omen — it was meant to be. Still, you can bet I took plenty of ibuprofen last night.