The last one I’ll build here, anyway.
I just built my third (and final) chicken coop.
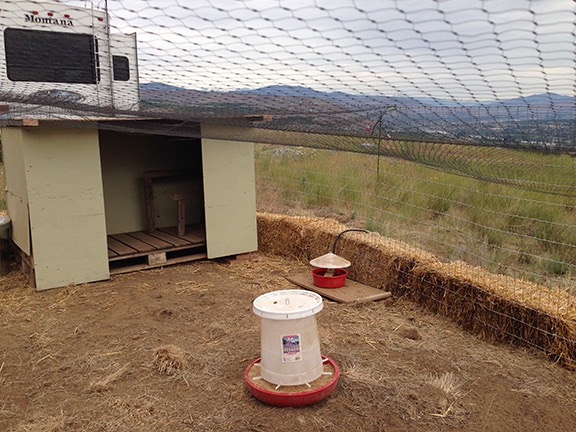
The first coop was really more of a chicken lean-to. It was mostly open on one side, had two nice nests and two very rickety perches. I made it mostly out of pallets and scrap wood — and it showed.

My original chicken coop and chicken yard. The coop lasted from mid 2014 through October 2015; the yard was rebuilt with better fencing early 2015. This photo was shot in early 2014, when I was still living in my “mobile mansion” fifth wheel.
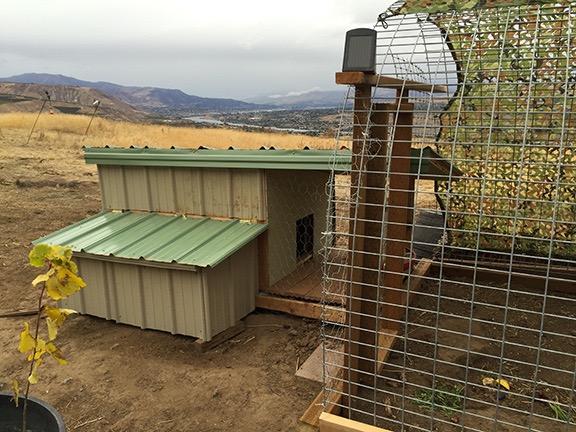
The second coop was way more ambitious. Also built with pallets as its base, it was designed to match the appearance of my home with an exterior finish using the same exact metal. It had three nests under a hinged lid and three sturdier perches. It was also insulated and had a covered porch so I could keep the chicken food out of the rain. It weighed a ton, though, and I had to drag it into place with my ATV. You can learn more about this project and my other efforts in this blog post from 2015.

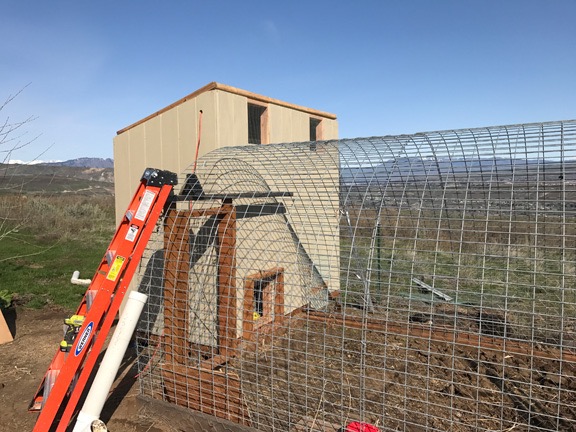
The second coop scored high on durability and insulation values, but low on practicality. I don’t think there was enough room inside for more than the 8 chickens I had at the time. This photo also shows part of my third chicken yard, a hoop affair made of 5×16 foot “hog wire” panels. I like the design and still use it.
What I wanted was a coop that was big enough to hold a lot of birds laying a lot of eggs. But I wanted one I could actually walk into, one that was easy to clean and had plenty of light and ventilation. Although I’d bought a small coop the year before, it was unsuitable for more than two or three adult birds. I wanted to raise chicks into laying hens and sell them when they started laying. To get started, I bought 18 chicks when I got home from my winter travel in March and set them up in a brooder in my garage. That gave me a time limit — I needed the new coop done before they outgrew the brooder.
I almost converted my existing shed into a coop. With a little interior modification, it would have done the job. But then I would have lost my garden storage area. And what about the controls for the irrigation? Did I really want my chickens crapping on it?
I looked into shed kits at Home Depot. They were not cheap and they were a lot of work to build. I could build a custom solution for a fraction of the price.
But no more pallets! I was going to build from scratch.
I sketched out a design. The footprint would be 4 x 8 feet. The roof would be 7 feet sloping down to 6 feet. I began disassembling the old coop. I think that was harder than assembling it. I managed to salvage the framed plywood roof and one of the trim panels. I wanted more overhang on the metal, so I scrapped what I had. I burned pretty much everything else, although I did have to throw away the Trex decking I’d used inside. (I did say it was heavy.)
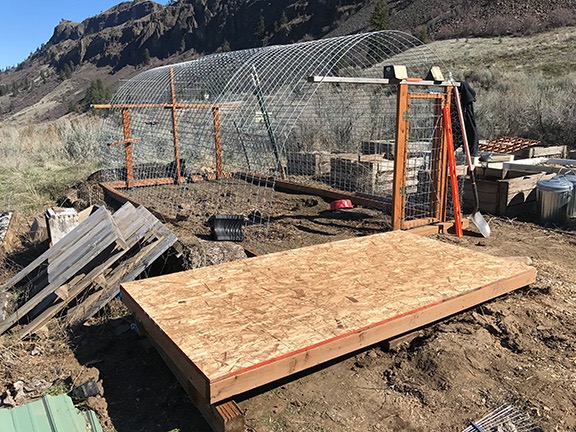
I started at the bottom, building the floor on 4x4s with 2×4 studs 16 inches on center. I used a heavy OBS sheet as the base and gave it two coats of oil based porch paint.

I started with a floor on 4x4s, leveled in place.
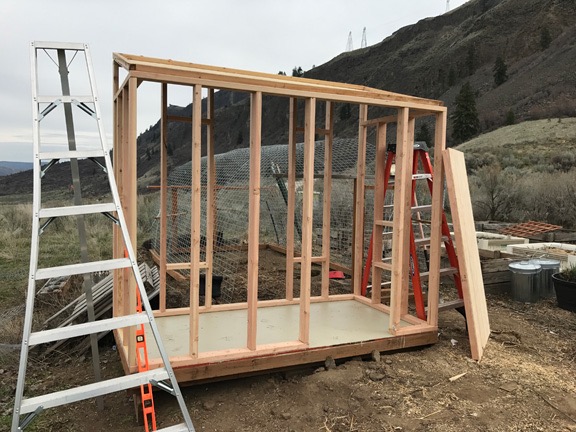
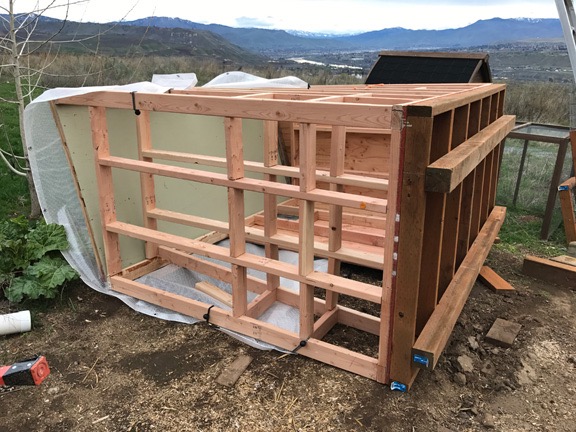
Next, I framed out the four walls. But instead of framing them on the floor, I built the frames on my concrete driveway apron. It was easier for me to work on level ground. I framed them with 2x4s 16 inches on center. Every time I finished a wall, I stood it up against a deck post. I knew that it would be impossible for me to carry the two long walls over to the coop and fasten them into place by myself, so I did as much as I could before prepping the building area with two ladders and a bunch of wood screws and my impact driver. Then I called my neighbor Elizabeth and made an appointment for her to come help me get the walls in place. I promised it would take less than an hour and it did. And not only did we get the walls in place, but we even lifted the roof into position and fastened that down.

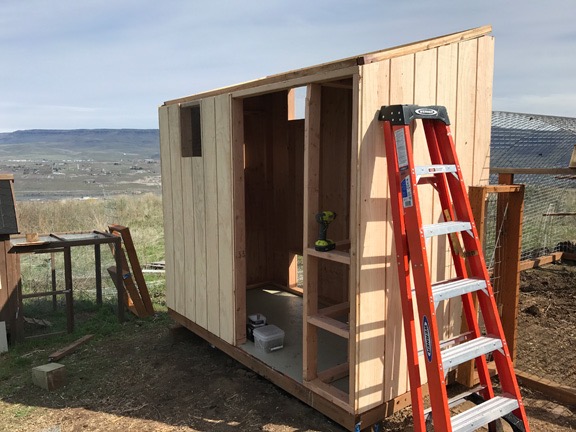
I shot this photo right after Elizabeth left. The ladders were still in place; the one on the left is an orchard ladder, which are pretty common here. The wood thing leaning against the building is the door, which I’d made while I was waiting to put the walls in place.
The coop design had a 32-inch wide door, three ventilation windows, and two chicken doors. I framed them as needed. The trick then was to cut the T1-11 wood — it’s like plywood paneling — so the openings would match up right. Measure twice, cut once. I think I must have told myself that a dozen times a day during construction. But it sunk in. I fitted the north side short wall and half the west side wall without any problems.
Weather came. We had an unusually rainy spring this year. I had some large tarps and fastened one over the coop’s roof and two wall panels. I hadn’t painted anything yet and I didn’t want the wood to get soaked or ruined. My camper, the Turtleback, was parked on the driveway near the coop, blocking it from view from my home. So I was very surprised to find the coop lying on its side when the weather cleared and I was ready to get back to work. Apparently, strong winds had come though and knocked it over as if it were a sail.

Oops. Did I mention that it gets windy here? The tarp acted as a sail on the top-heavy coop and it went right over.
Neighbors to the rescue. I had three of them meet me the next morning to right the coop. Damage was minimal. When they left, I got right to work.
I used 1/4 inch wire that I already had between the frame and the T1-11 for the windows. Later, I’d put sliding panels to close them off. I had two doors to the outside but planned on using only one for now; the other one was for expanding the chicken yard with another hoop enclosure. (It’s important to cover the chickens here to protect them from birds of prey.)
The original designed called for nests just inside the door that were accessible through hinged panels from the outside. I decided to do away with the outside access, mostly because I figured a single T1-11 panel would add to the structural integrity of the building. And after all, the building was big enough for me to walk into.

In this shot, only one wall and the door are left to install. The nests are just inside the door to the right.
Once the walls were in place and the door was hung, it was time to paint it all. I used the rest of that oil-based porch paint and even bought a second can. The paint guy had warned me that it would absorb into the wood and he wasn’t kidding. I’m going to need a second coat. But for now, the wood is sealed tough against the elements. A second coat before winter and it’ll be ready for any weather.

Here’s the coop right after painting it. By this point, the chicks were living inside. I drilled a hole in the wall and ran an extension cord so I could hang their heat lamp. I blocked off the exit to the chicken yard with a framed bit of fencing I already had. The two upper windows have 1/4 inch screen that doesn’t show in the photo.
I still had to finish the roof. I wanted so badly to get metal panels that match my home — after all, the walls of the coop match the walls of my home — but Home Depot had a limited selection of colors. So I chose the dark green. I dreaded cutting the metal — it’s no picnic, believe me — but it went a lot more smoothly than I expected it to. I had insulation leftover from the old coop and I put it into place. Then I painstakingly lifted the metal panels into place and screwed them down. Not perfect by any means, but functional.

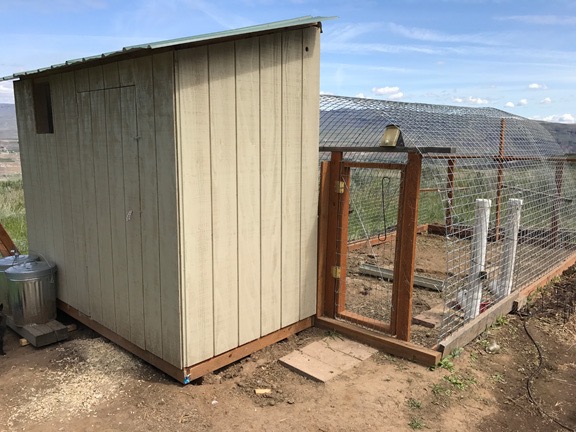
Here’s a photo of the outside of the coop and yard that I took just the other day. The door really blends in; I use a piece of rope as a “doorknob” and a hook to keep the door closed. The long white pipes are chicken feeders I made last year; they each hold about 10 pounds of chicken food.

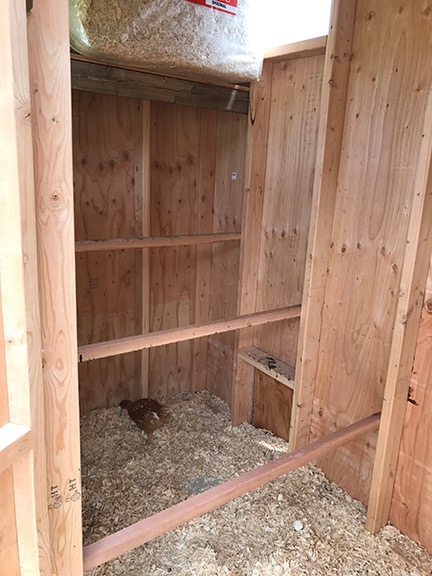
I used 2x2s with rounded edges for the perches. I also added a shelf on the north side, far above the highest perch, to store odds and ends like the pine shavings I use on the floor and in the nests.
By this time, the chickens were installed and able to come and go freely between the coop and their yard. I had put in some perches for them, but as they grew, I knew I could raise them and add more. So I did; they have a total of three perches now, each about 4 feet long. With 8 inches per bird, my 18 chickens (now 17 since one died) have plenty of space to roost. I could easily add 2-3 more if I had to since they’re spaced 16 inches apart.

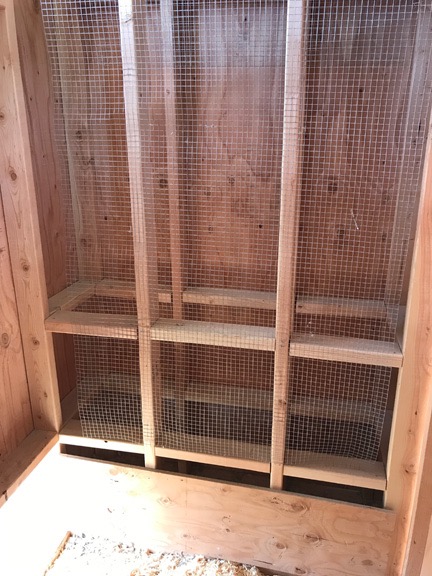
I had to block off the nest area with wood and wire mesh to keep the chickens out.
I still needed to do the nest boxes. The first thing I did was close off the nest area; the chicks were sleeping on the floor in there when they were still very young and I wanted to break them of that habit. They wouldn’t need the nests until they started laying, which probably won’t be until August.

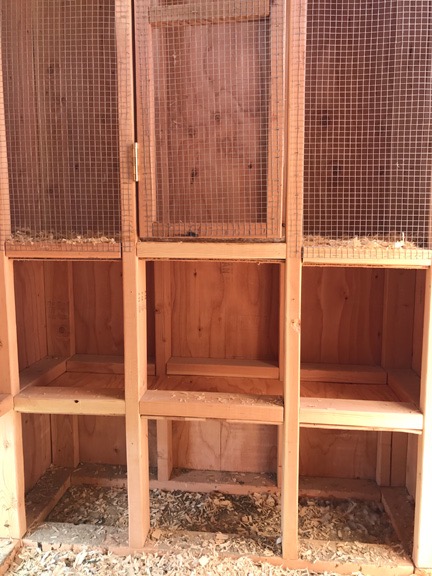
Here are the finished nests on the bottom with the bottom half of the brooding area on top.
Still, I wanted to get them done and create a brooding area above them. My design called for six nests — three on each level — so I had to build a floor for one level and then the brooding area level above it. This required me to take careful measurements of the 2×4 framing because I’d have to cut plywood around it. Then I’d have to lift it into place from below and screw it into the 2x4s I’d put in to hold them. It’s hard to describe and was hard to do, although my little jig saw did make the job easier than I expected. In the end, I had to cut each floor into two pieces to get them into the tight-fitting space.
Once that was done, I used a staple gun to securely fasten 1/4 inch screen to either side of the top brooding area. I framed a door with 2x2s and stapled more screen onto that. Then I put the door on hinges and added a hook to hold it closed. I’d be able to hang a heat lamp over the area if I needed to to keep chicks warm. I figure I can brood up to 6 chicks for up to a month in the space. Keeping them with the other chickens should allow them to get to know each other while they grow, hopefully preventing fights when they’re released into the flock.
When it was all done, I had to block off the nests again. The chickens really like snuggling up in corners when they’re indoors. I wouldn’t mind so much, but they crap where they hang out and it’s a pain in the butt to clean out the nests.
At this point, the chicken coop is mostly done. In July, I’ll pull the covers off the nests and put a fake egg — I usually use an egg-shaped rock — into one or two of the nests. With luck, they’ll get the idea and start laying in there when the time comes.
Although I’d originally wanted to add sliding panels over each of the windows, I think I’ll skip it. The ventilation is good. In the winter, I’ll fasten some heavy plastic over each window to prevent drafts. I’ll leave the door to the yard open for them.
Because this coop is not insulated — neither was the original one — I might buy a chicken coop heater for it. I already have a Thermo Cube that will turn power on when the temperature gets down to 35 and turn it off when it gets up to 45. Attaching that to the heater will run it only when needed during the winter. It’ll never get warm in there, but it’ll stay warm enough to prevent frostbite. You might think that’s nuts, but power is cheap here and from renewable energy (hydro and wind) so I have no qualms about using it to keep my chickens from freezing in the winter.
In the meantime, I’m just happy to have this project done. And even happier that I can’t find anything wrong with this design so I won’t have to build yet another one.
